Hello, beautiful day! It's a pleasure to greet you🌞. I hope you are all doing very well, dear and appreciated friends. I warmly welcome you to a new blog where I will be sharing with you the creative process of what we will do here step by step. Feel comfortable and thank you for being here reading this blog.✨😸
.jpg)
I wanted to share with you the happy process of how it is that for the first time I make this type of woven bracelets with Chinese thread of different colors that I got in a store near my house, these bracelets have never gone out of style but I feel that this time they have been more fashionable than normal, I have seen that girls who go to high school and those who go to college use them, they also sell them with different appliqués or animal flower charms among other details and very colorful, but above all I have seen them with these designs very style of the 2000s or 2010s, there are couples that each have their own bracelet with their initials, girls also use them with little stones in the shape of faces of different colors and they look very beautiful on the hand, I liked them a lot but I did not know how to weave them or make them, I saw something very difficult to do until little by little I learned with the help of the internet and I decided to take this knowledge of bracelets by practicing little by little.
I didn't know how to make these bracelets at all and as I told you I wanted one or two but after I learned if I had like several of different colors and stones, the weaving process is not as difficult as I thought, I know that if you have not tried to make them because of that fear of not knowing where or how to start, don't worry because here I am showing you how to do it because in the same way I am also learning to make them with you, so it's time to lose that fear and get to work, I feel these bracelets are a very good project to undertake, if you are one of those who already has a particular business or want to start an entrepreneur this can help you, of course I already have a business which is my sewing but in the same way I wanted to learn how to make these bracelets with the intention of selling in the future if someone sees it on my hand and asks where I bought it then I will easily tell them that I make them myself and then I can start selling them, I like them a lot but to start practicing I am going to make one for myself, please I invite you to stay and appreciate the process and step by step of this bracelet. I hope you like it a lot and can start practicing and making them.
.jpg)
Materiales:// Materials:
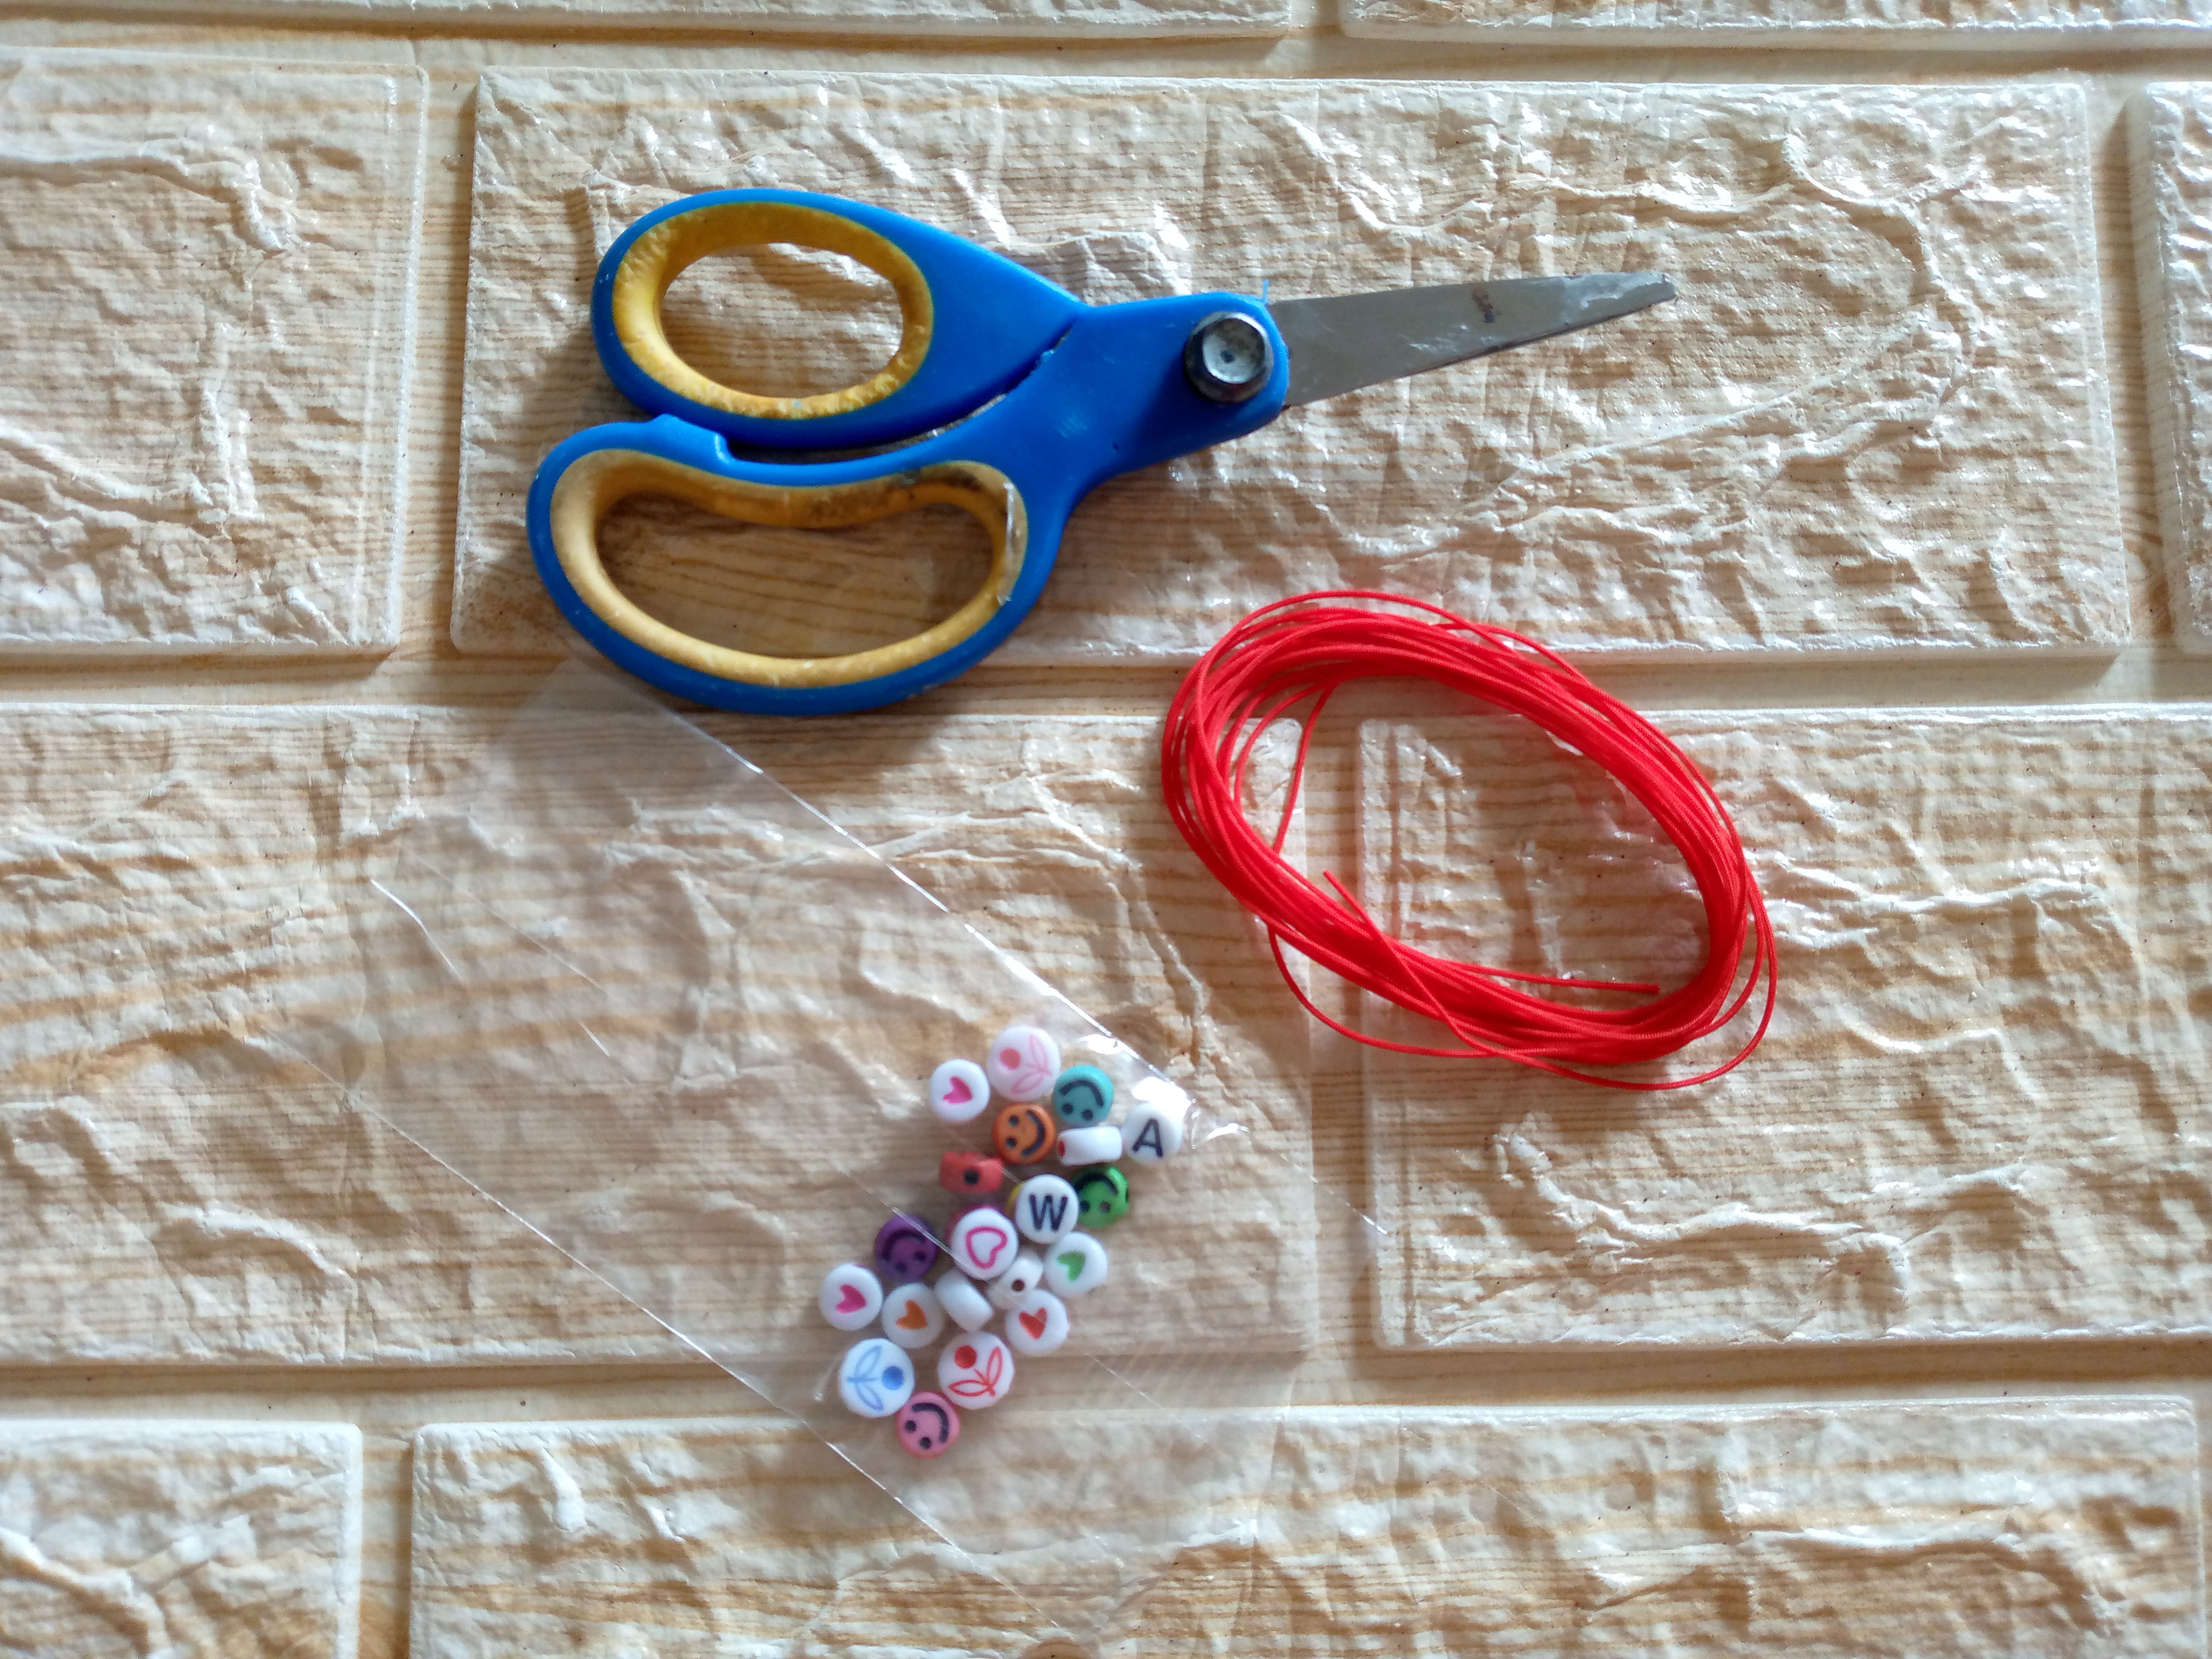
- Hilo chino del color de tu preferencia exactamente 150 cm de largo
- Tijera
- Piedritas para la decoración,estás también son del modelo y color que tú quieras recuerda que es un tutorial para práctica y aprendizaje
- Trozo de cinta adhesiva
- Regla
- Chinese thread of the color of your preference, exactly 150 cm long
- Scissors
- Small stones for decoration, these are also of the model and color you want, remember that this is a tutorial for practice and learning
- Piece of adhesive tape
- Ruler
.jpg)
Pasos a seguir://Steps to follow:
Paso 01
Step 01
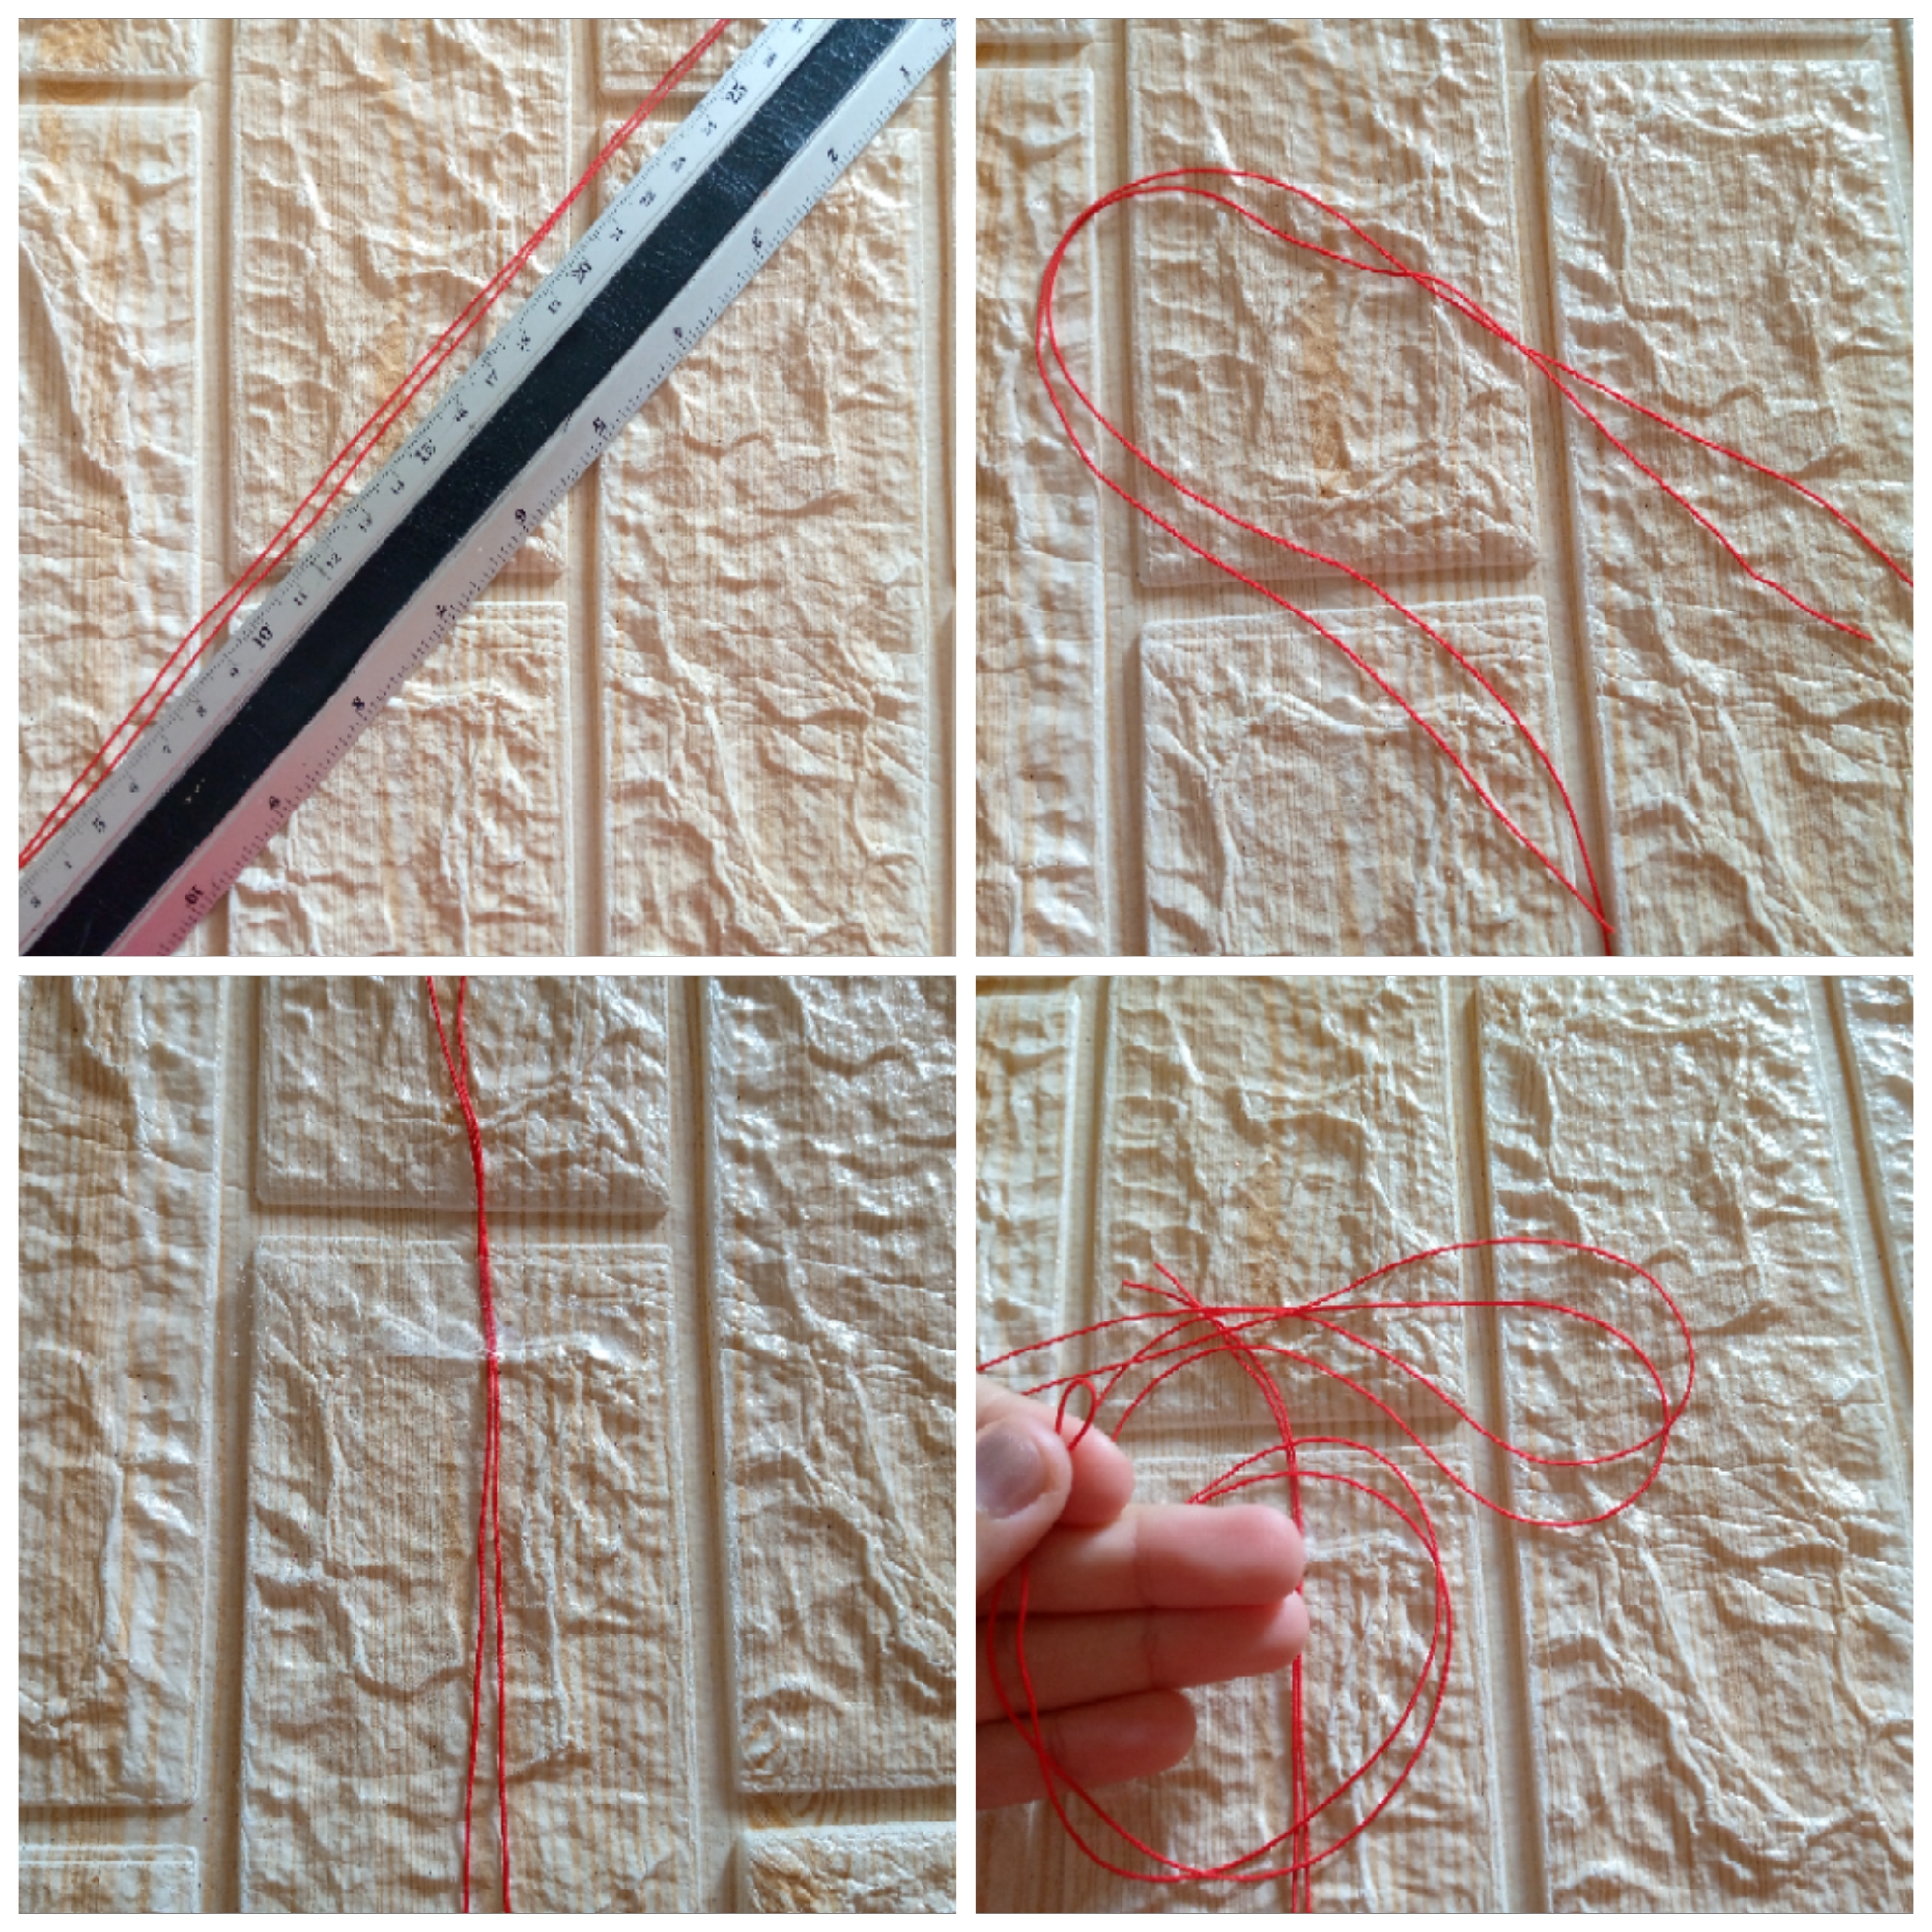
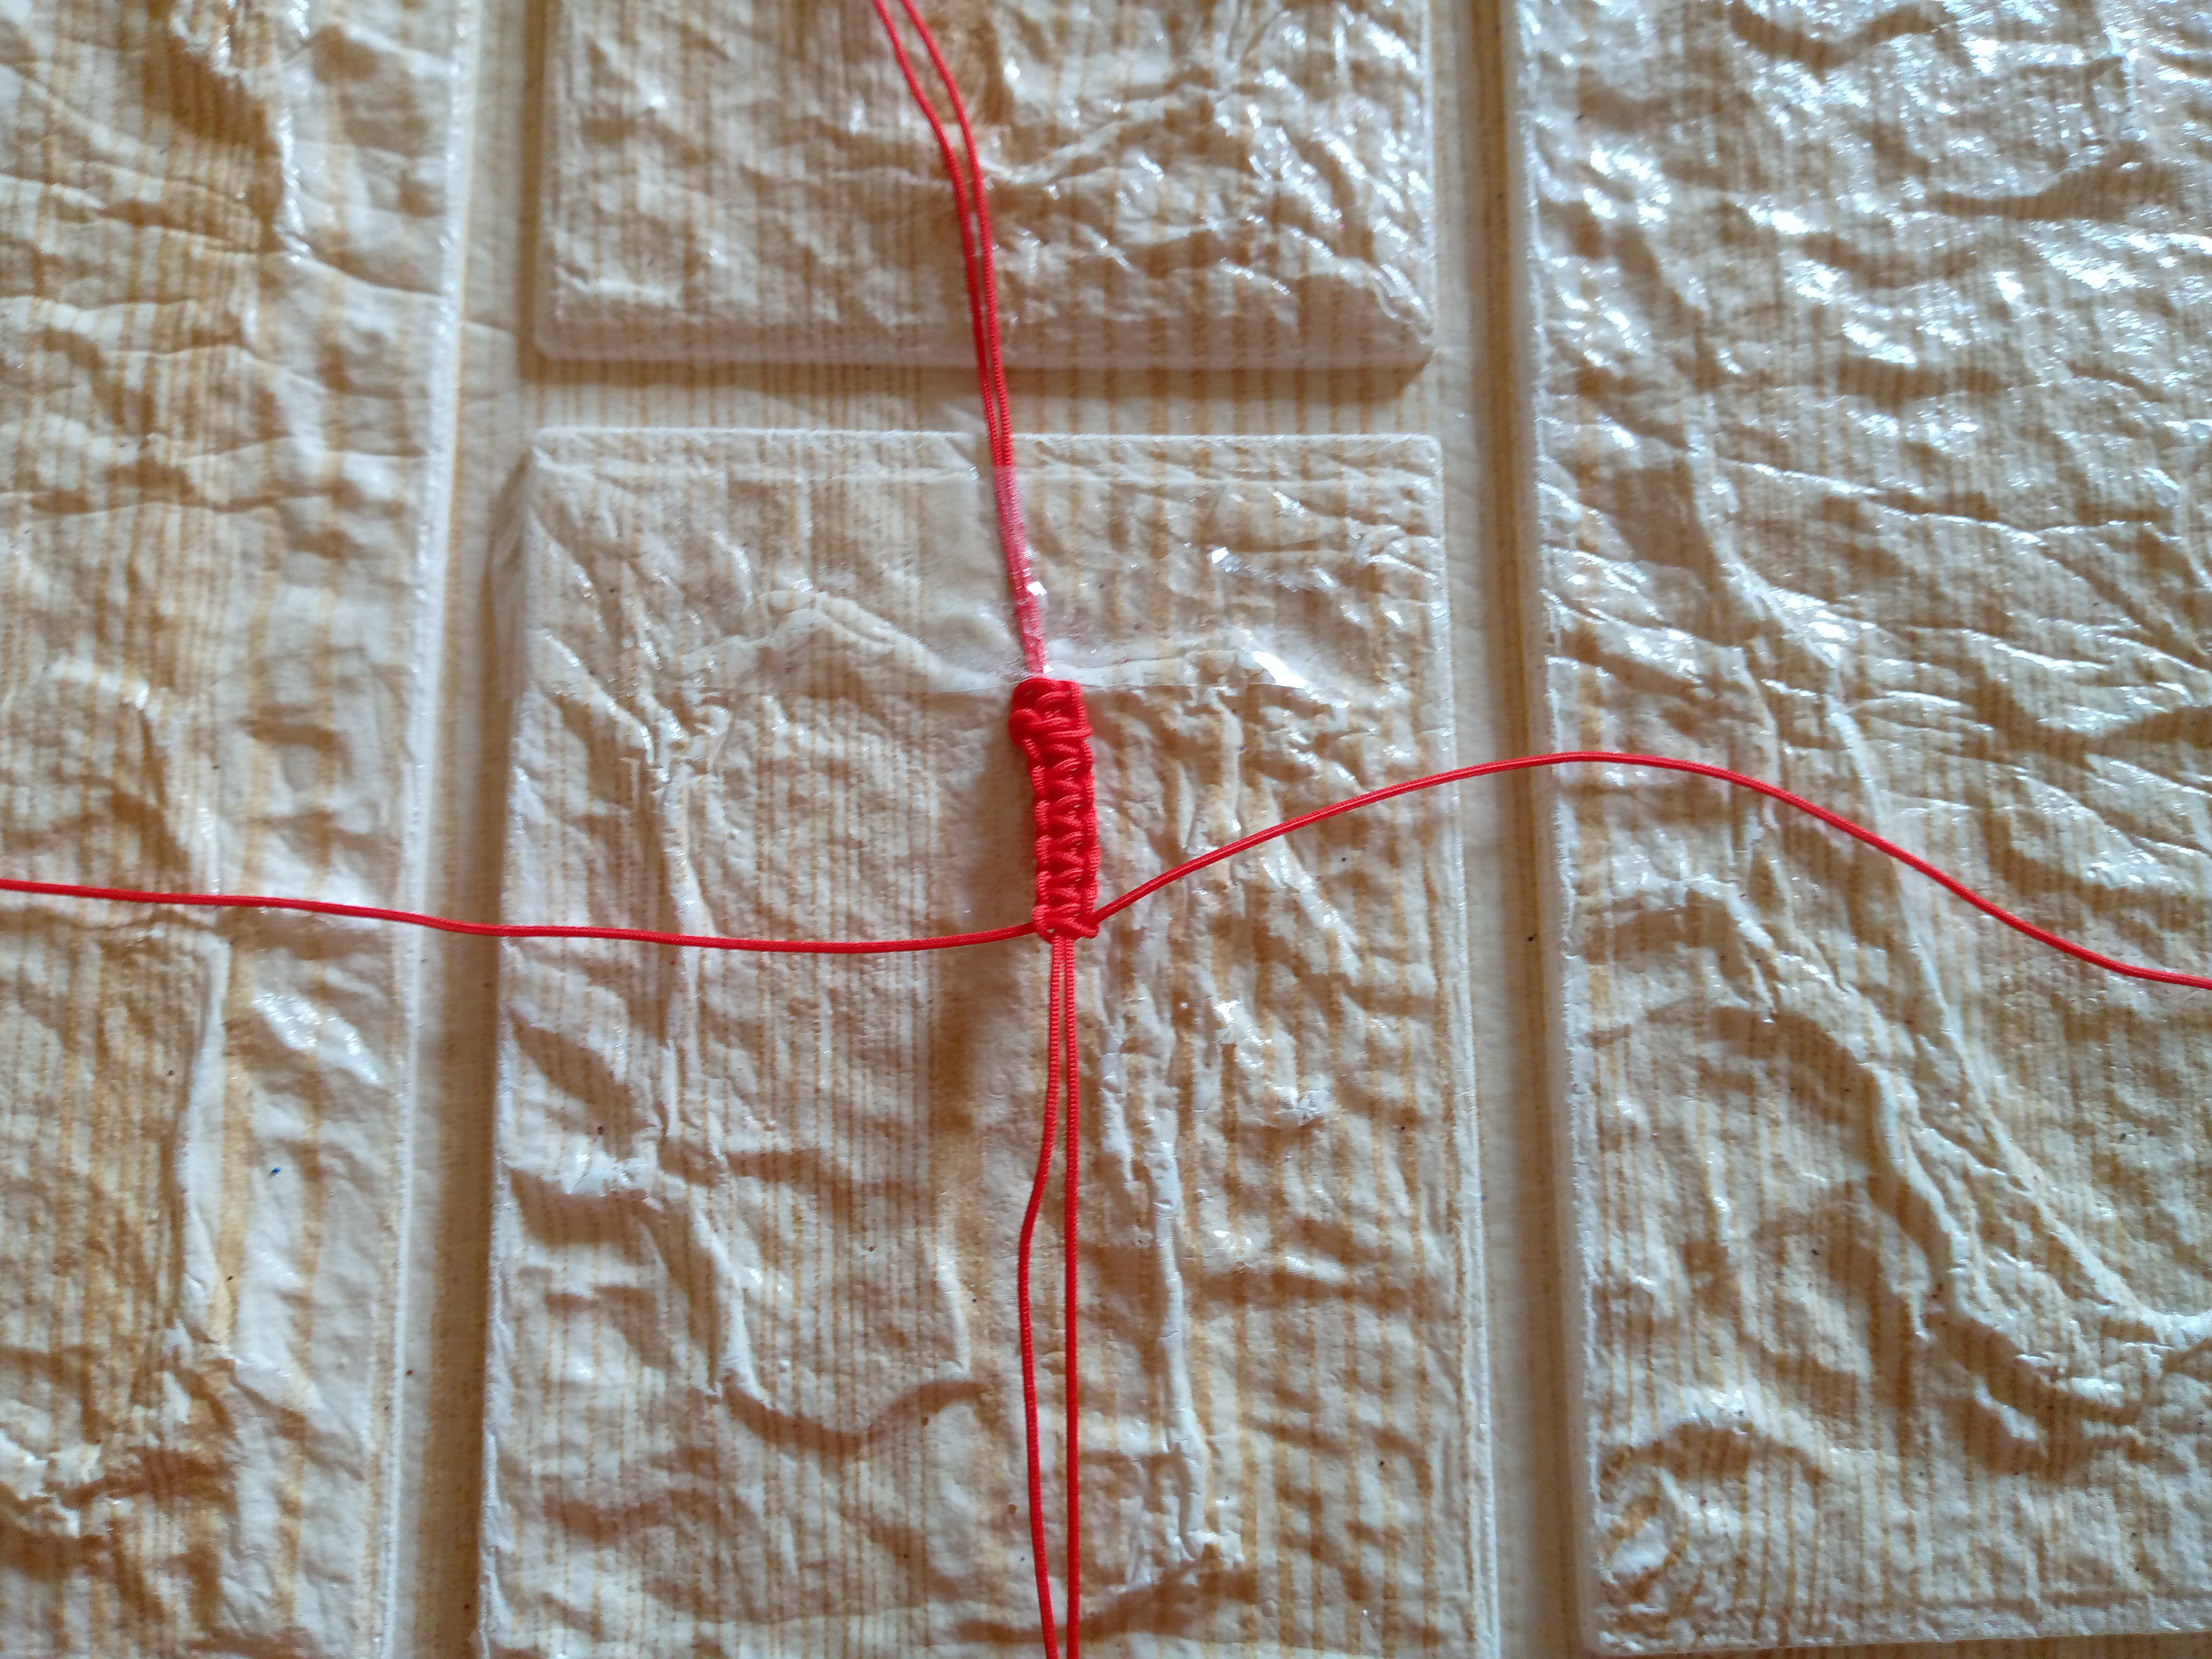
The first step we will do is place our double thread that we will use in the middle, we fold it and we will measure 30 cm long with our ruler and we will cut it, we will hold it on the surface where we are working with the tape so that it will be much easier for us to work with our hands, then we cut the 120 cm long thread that we will use to knit the stitches.
.jpg)
.jpg)
.jpg)
Paso 02
Step 02
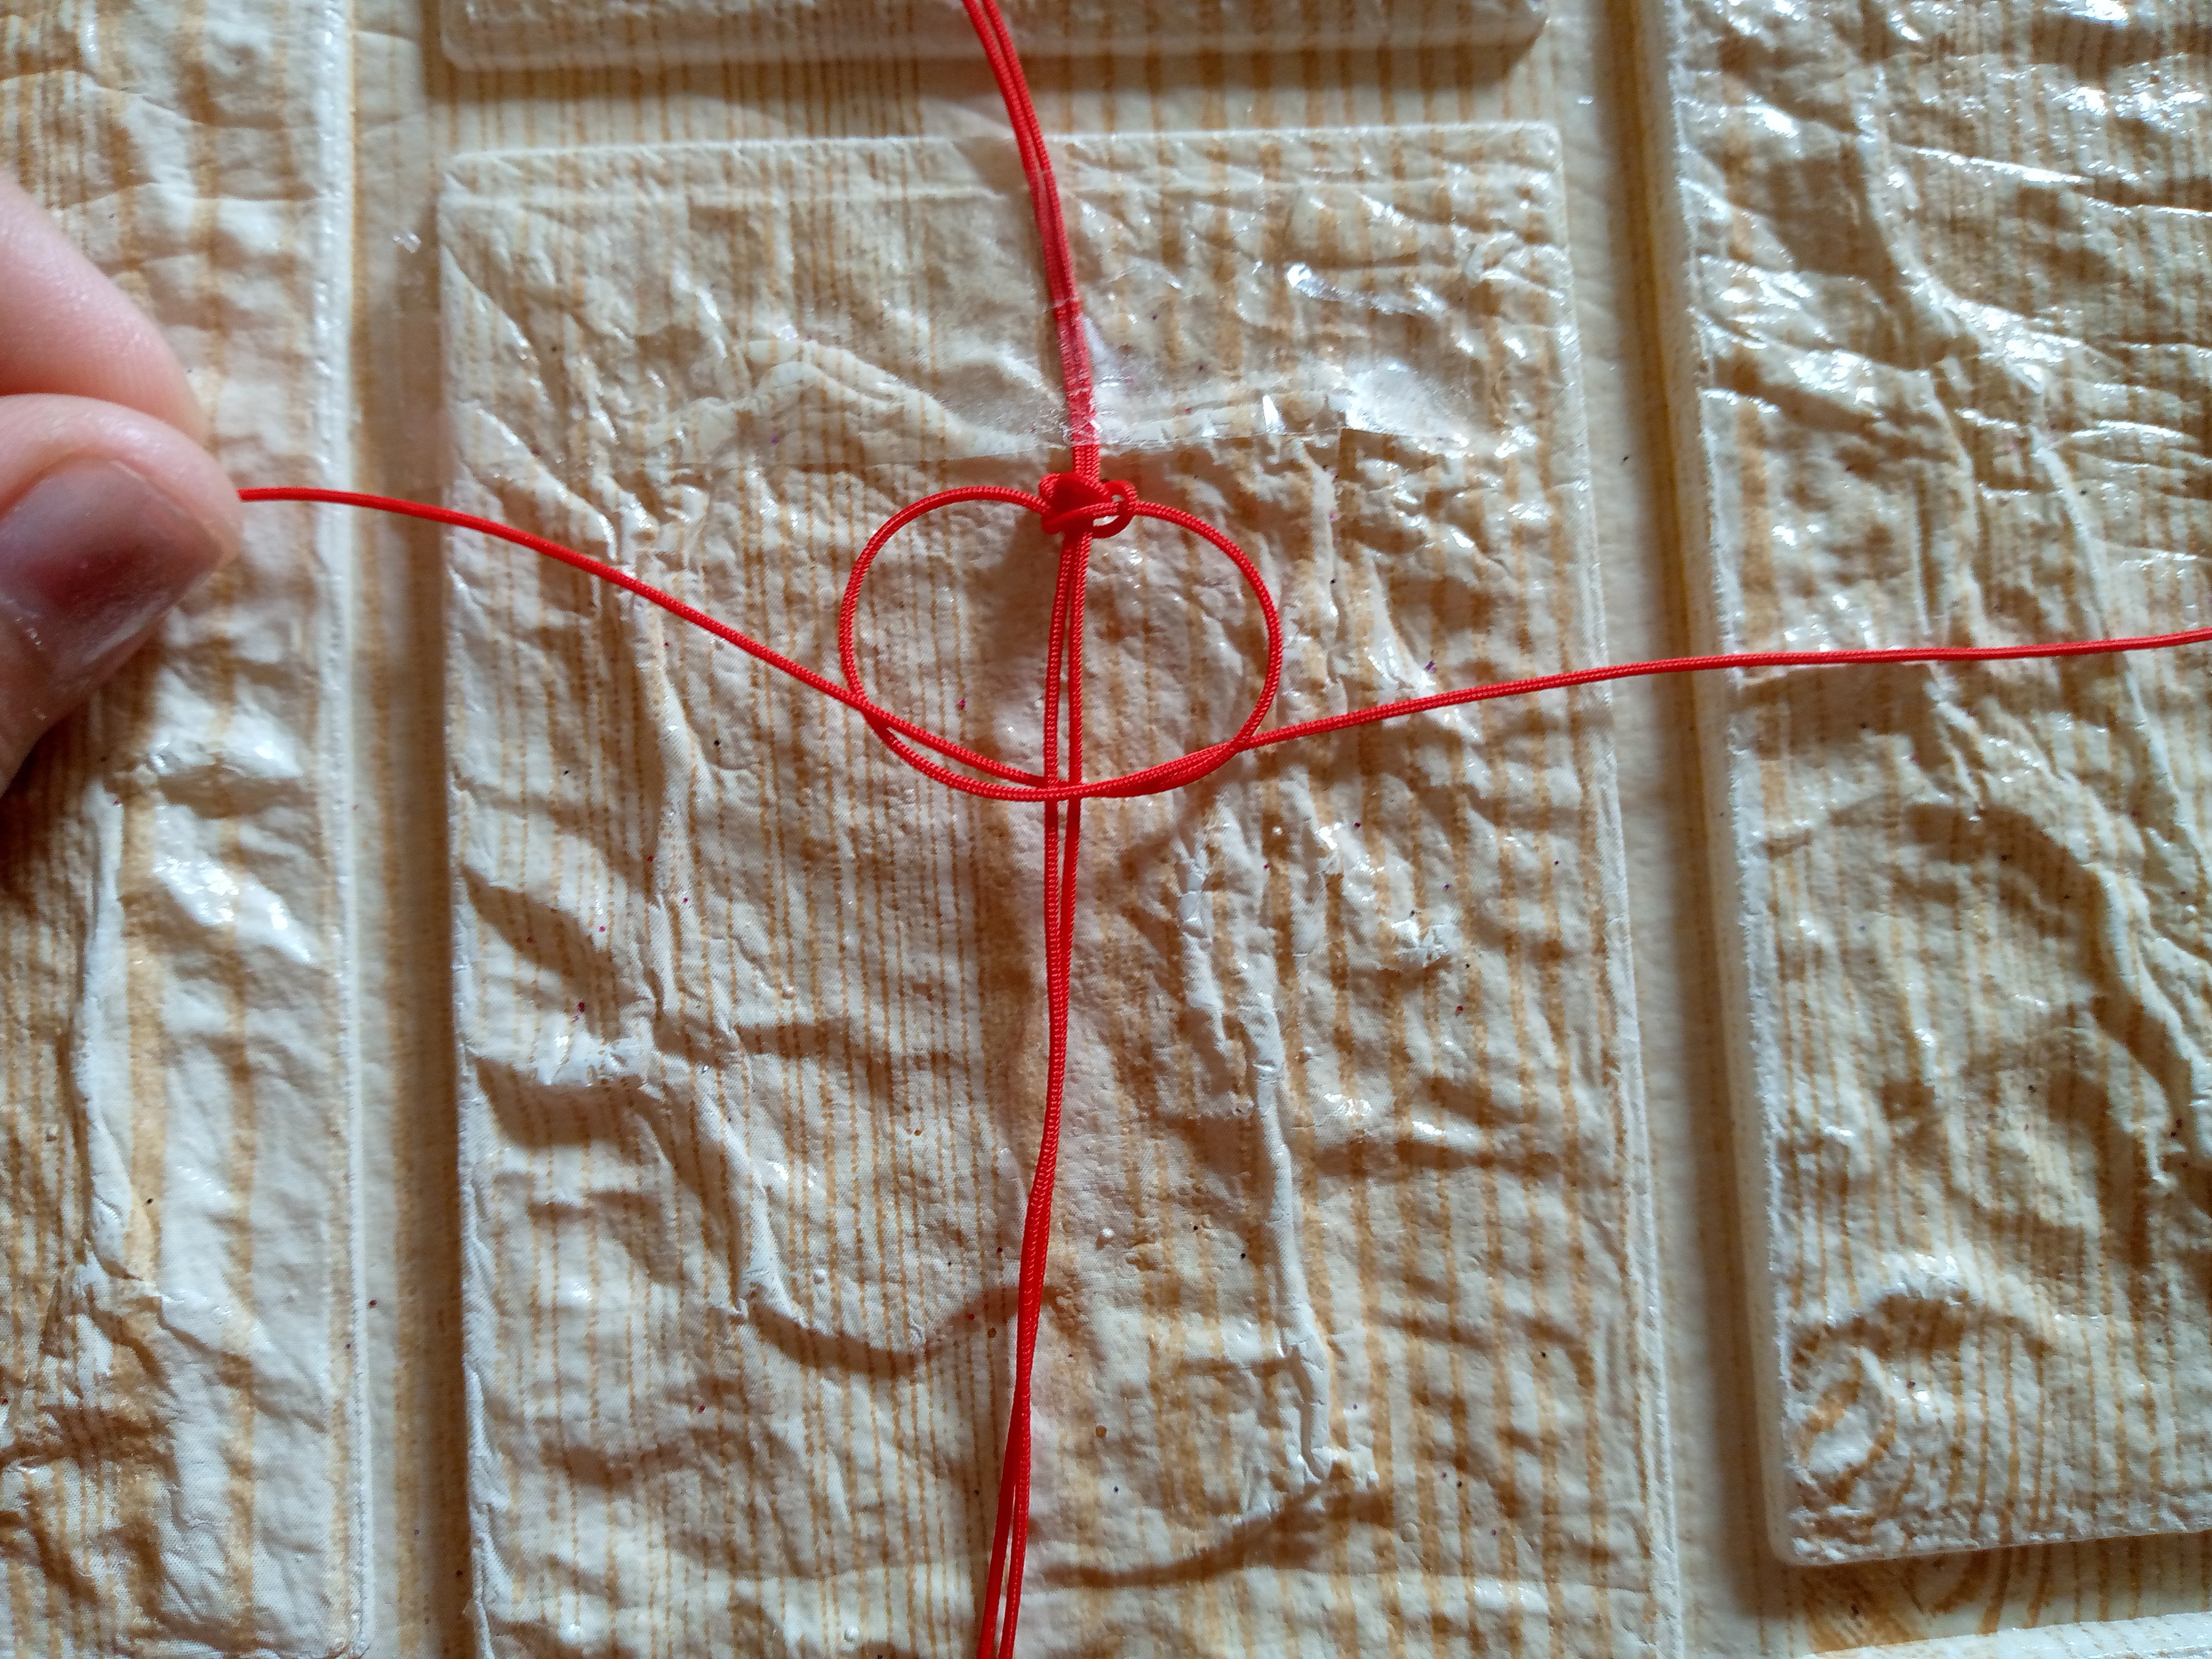
To start knitting the flat knot stitch is very easy, you are just going to pass the thread under the two strands that we hold with the adhesive and I will make the first stitch, the thread on the right, I place it like this in a circular shape placing it on top of the two strands of thread below, then the thread on the left I place it in a circular position as well and this time I am going to pass it to the right side under the three strands taking it up then I have the threads braided in one we pass it over the strand the right to the left and of course the left under the strands to the right and we pull both threads until we form that little knot, the first we start with the right and then we pass to the left and so we go with all the stitches, one right and one left.
Paso 03
Step 03
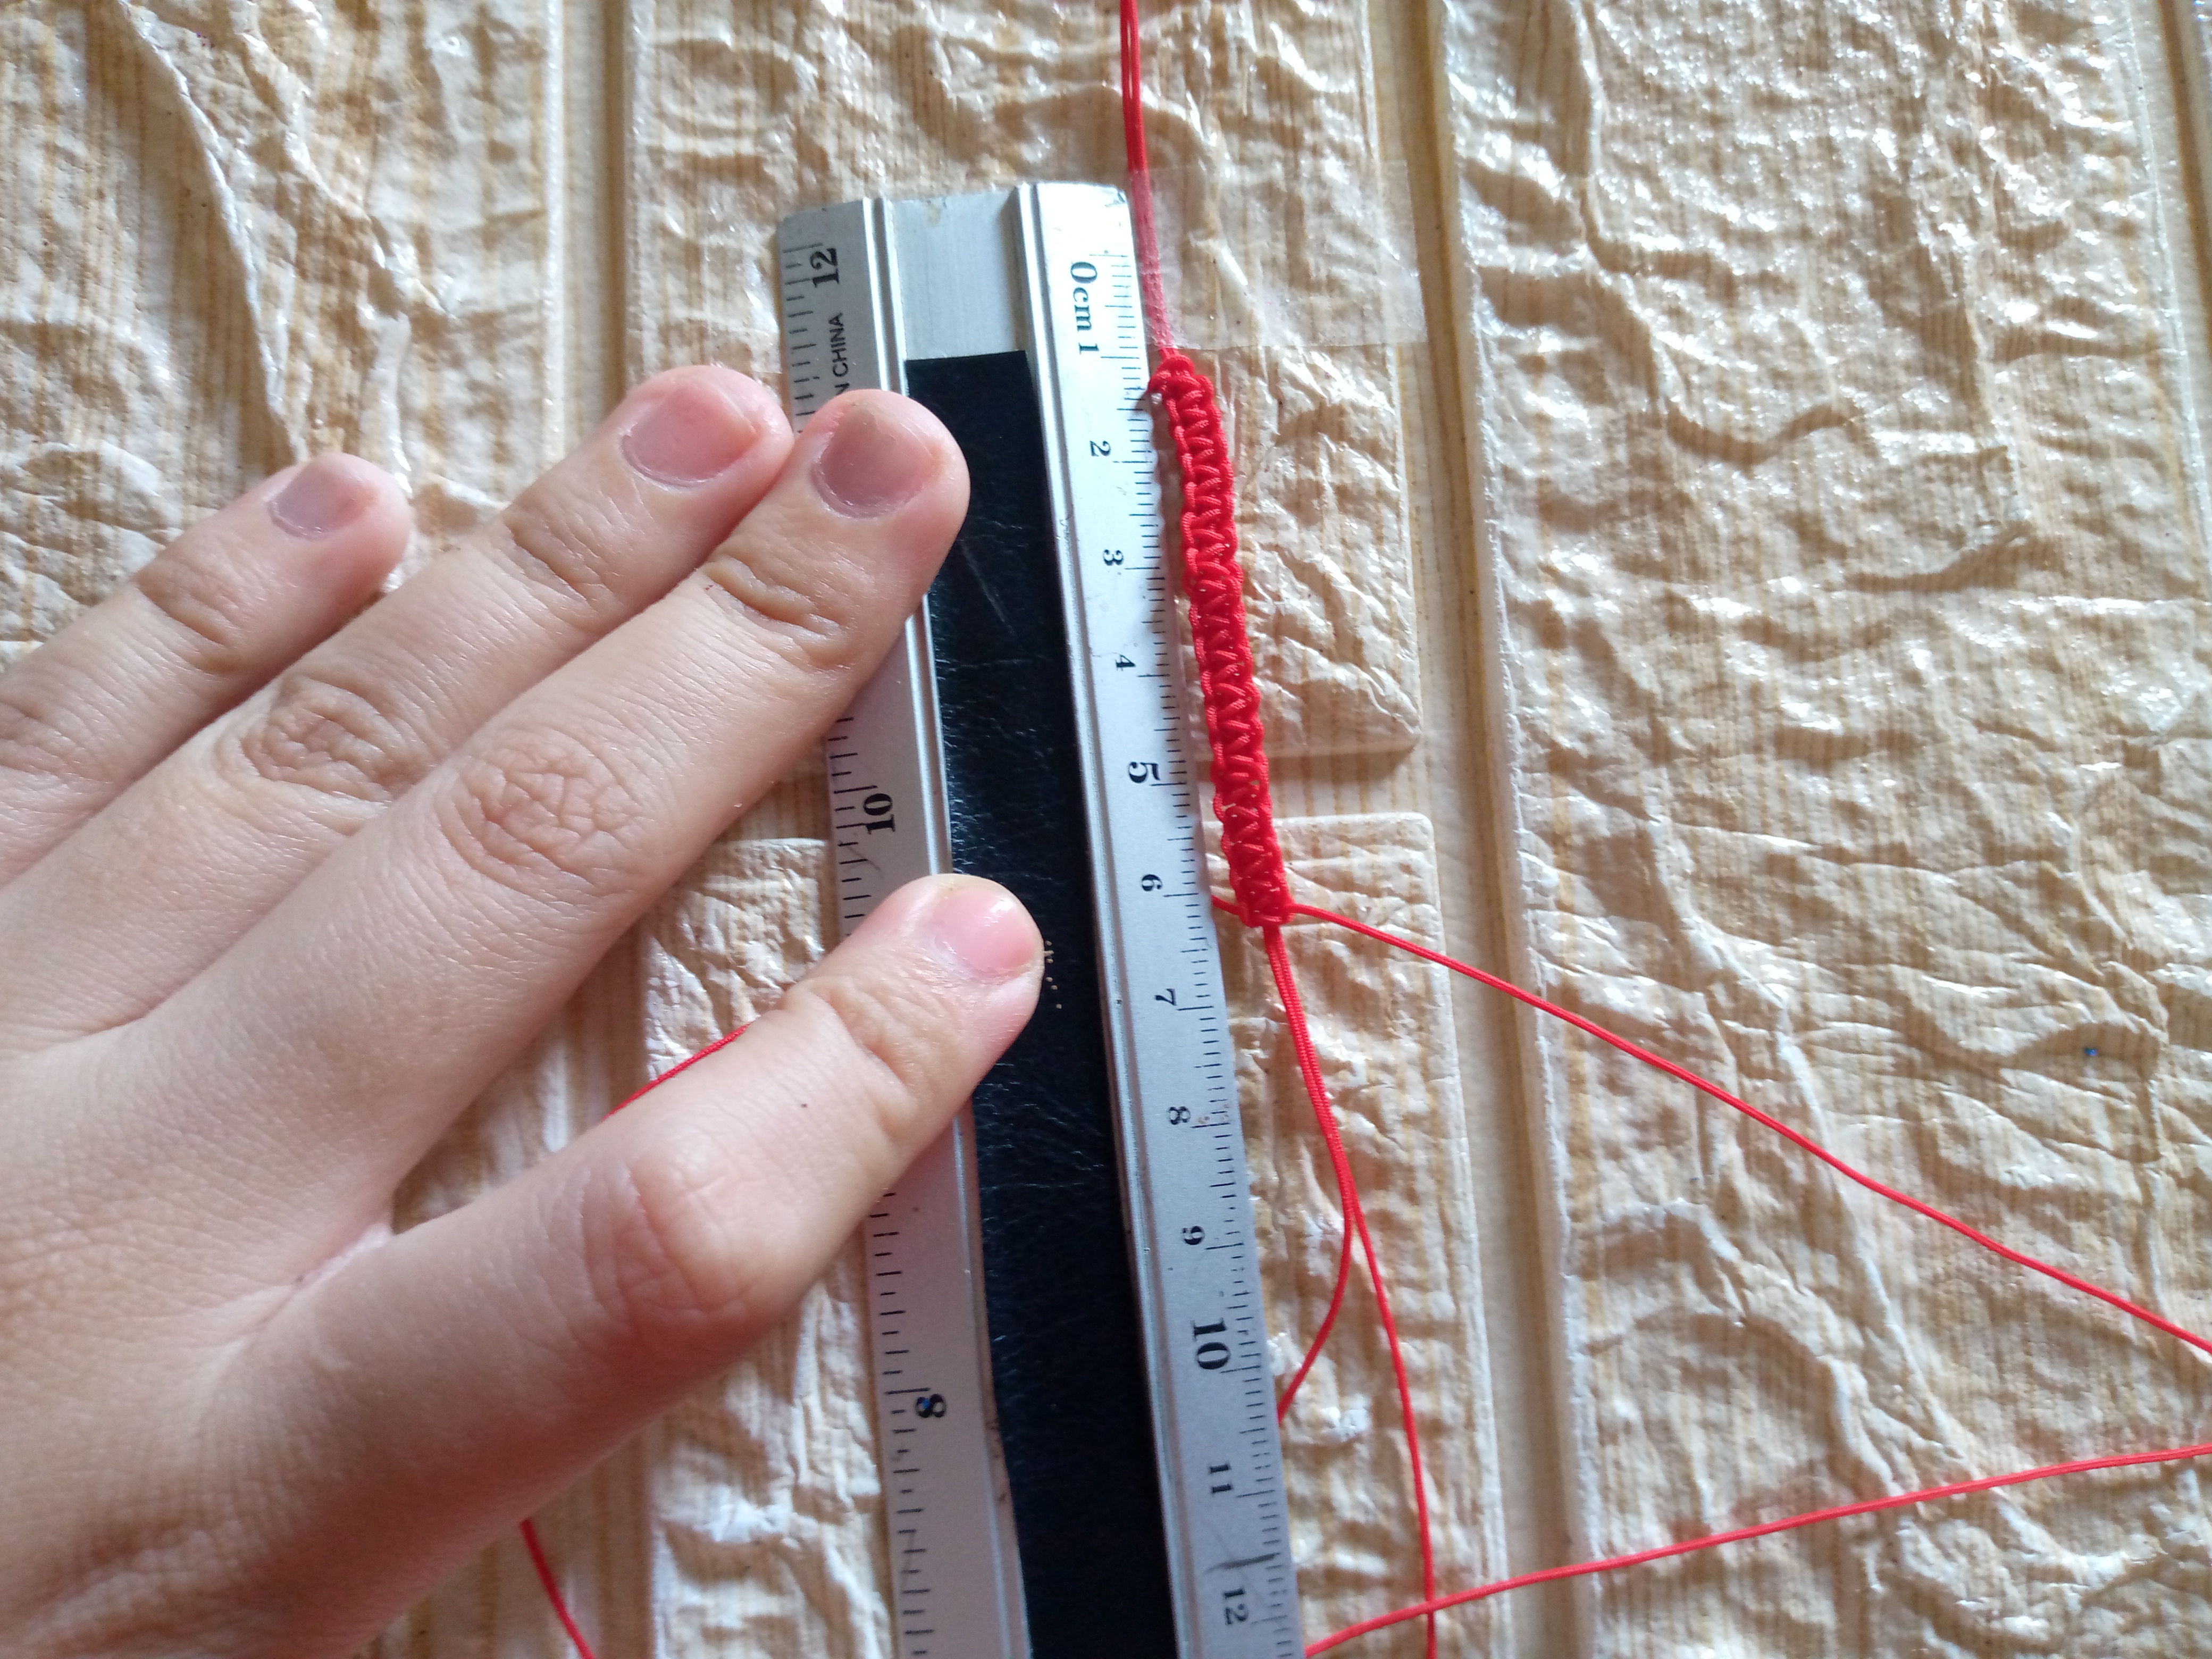
When we advance weaving enough knots it is time to mark with the ruler 6 cm
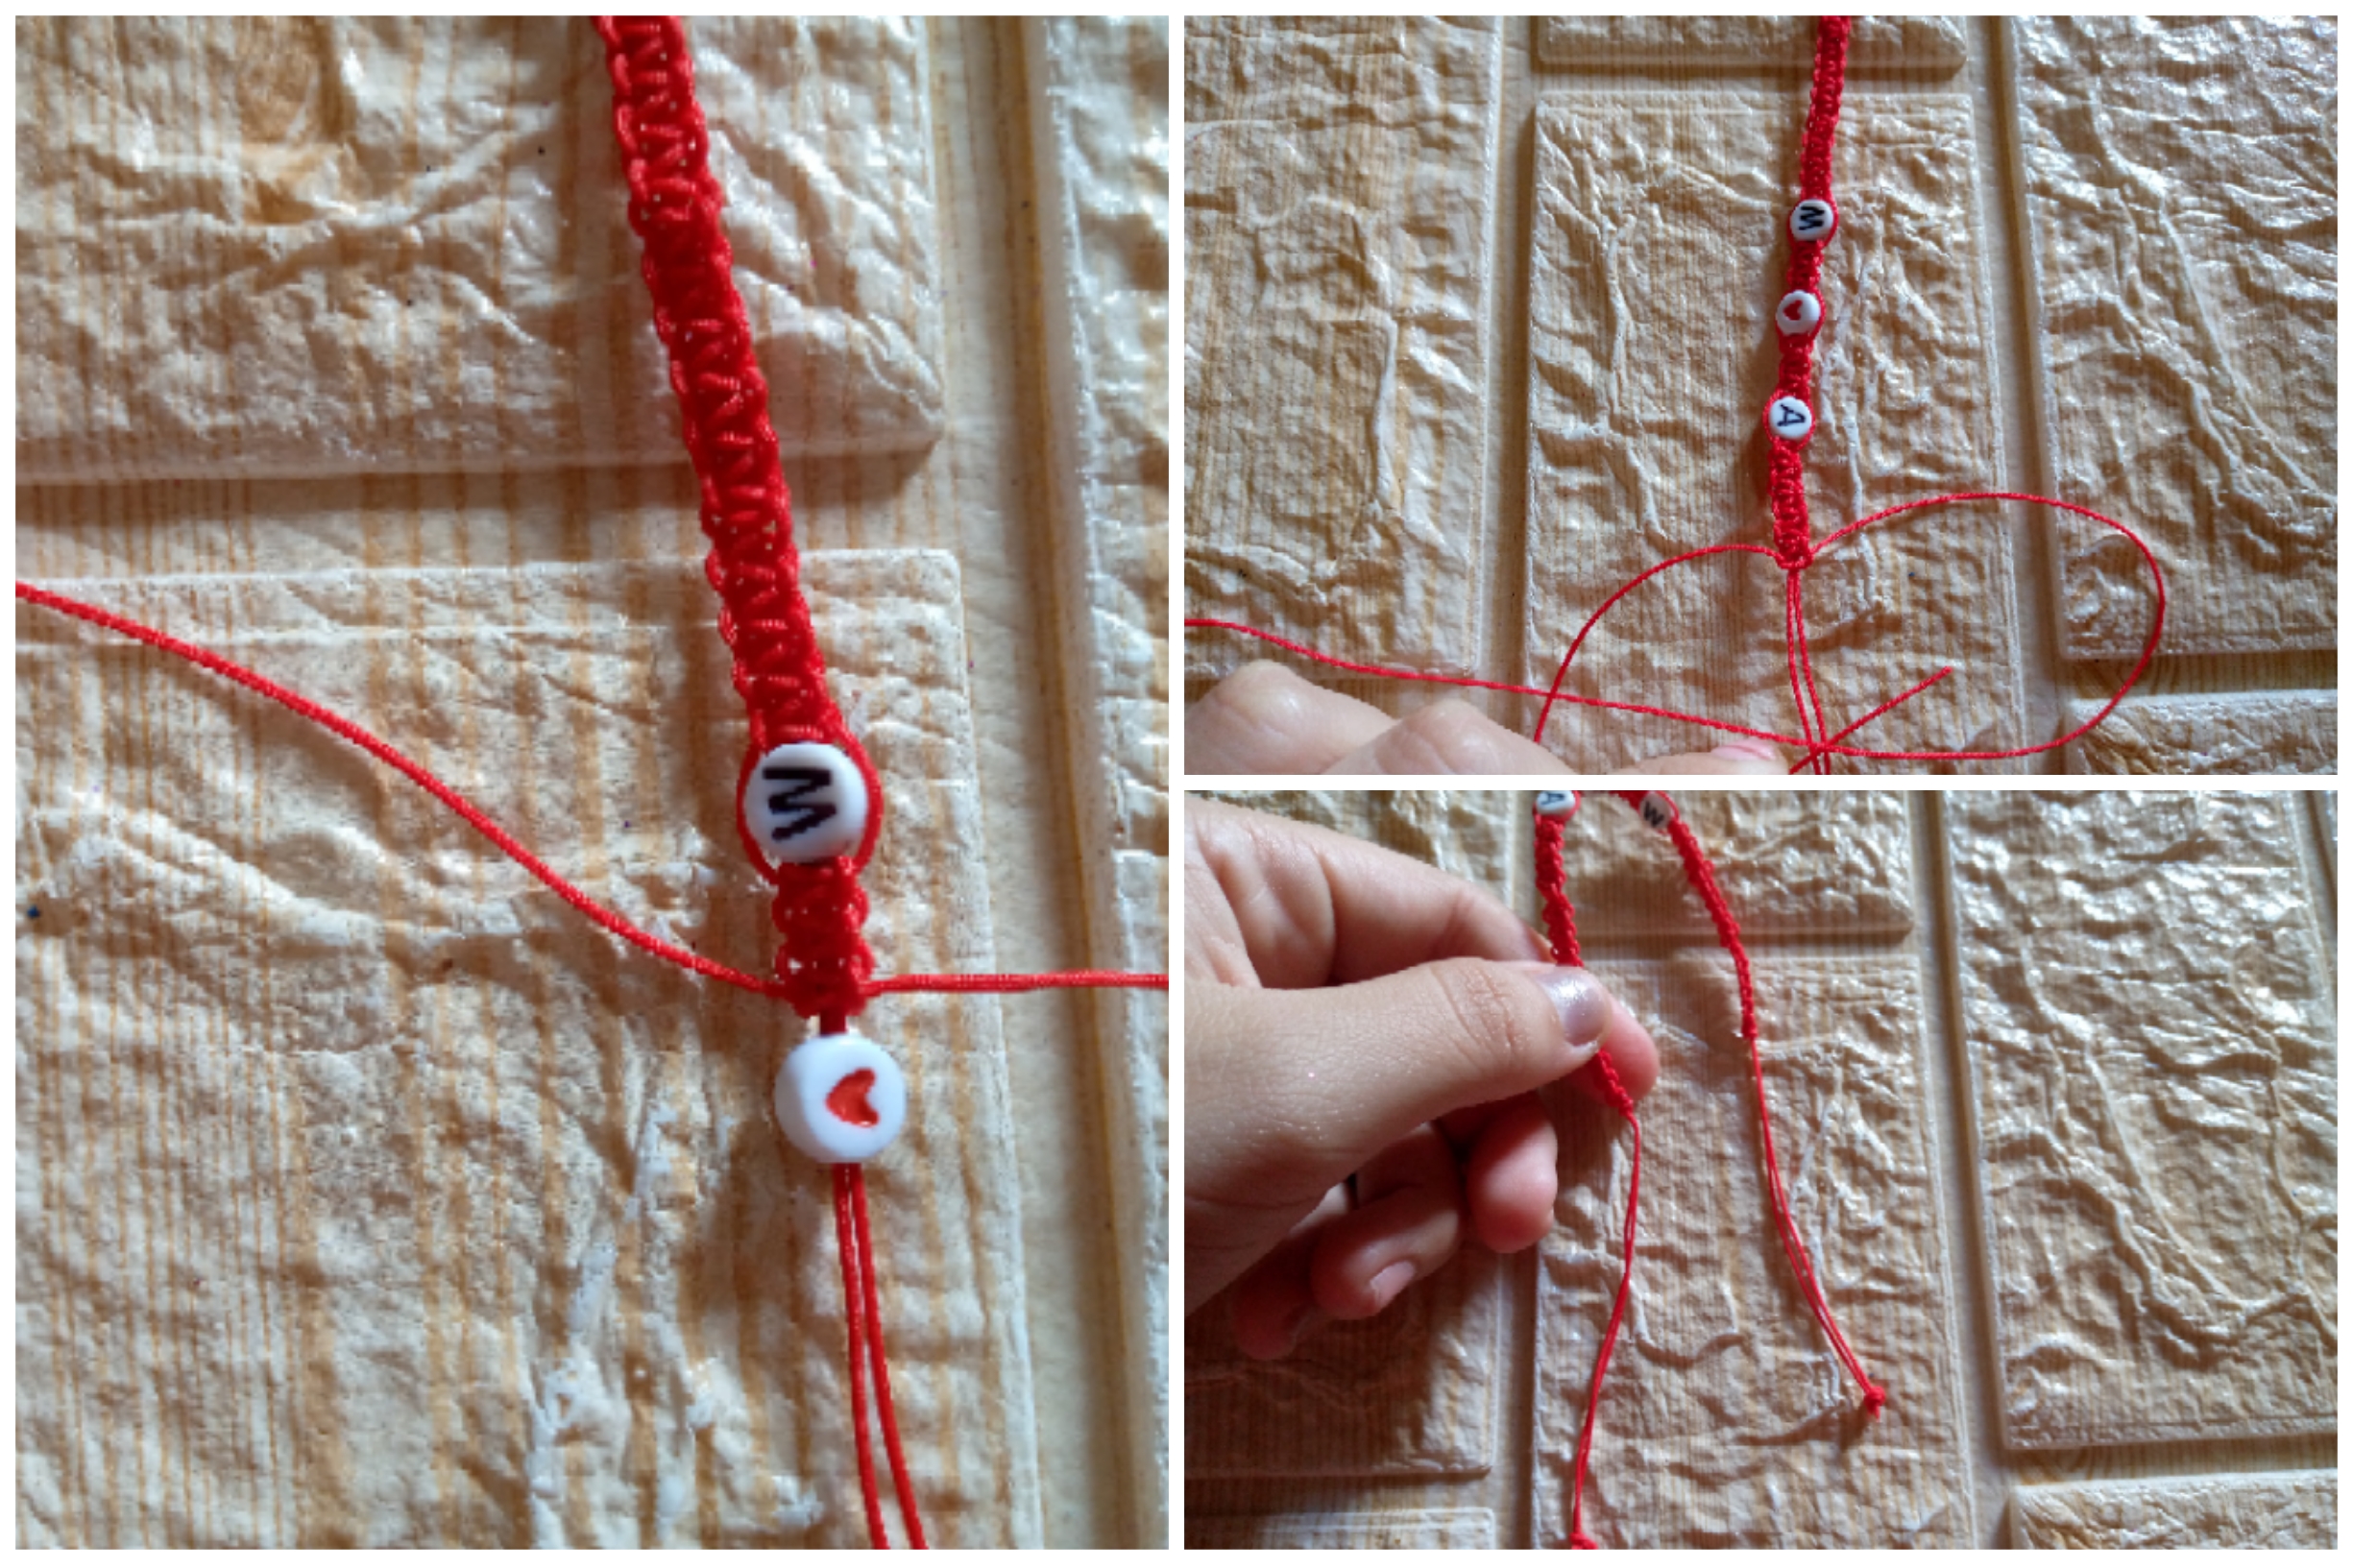
depending on the width of your hand you can place more or less, I placed 6 cm and there it was time to insert a small stone in the shape of an initial that I like a lot, then I continued weaving 5 more stitches and inserted the next stone like this I wove again to insert the last one and I finish weaving the sequence again of stitches until completing the 6 cm again of the other part of the bracelet. I cut it, close it with small knots on both sides and with a lighter I seal the tips, I cut the thread in the middle and I make two double knots at each tip.
Paso 04
Step 04
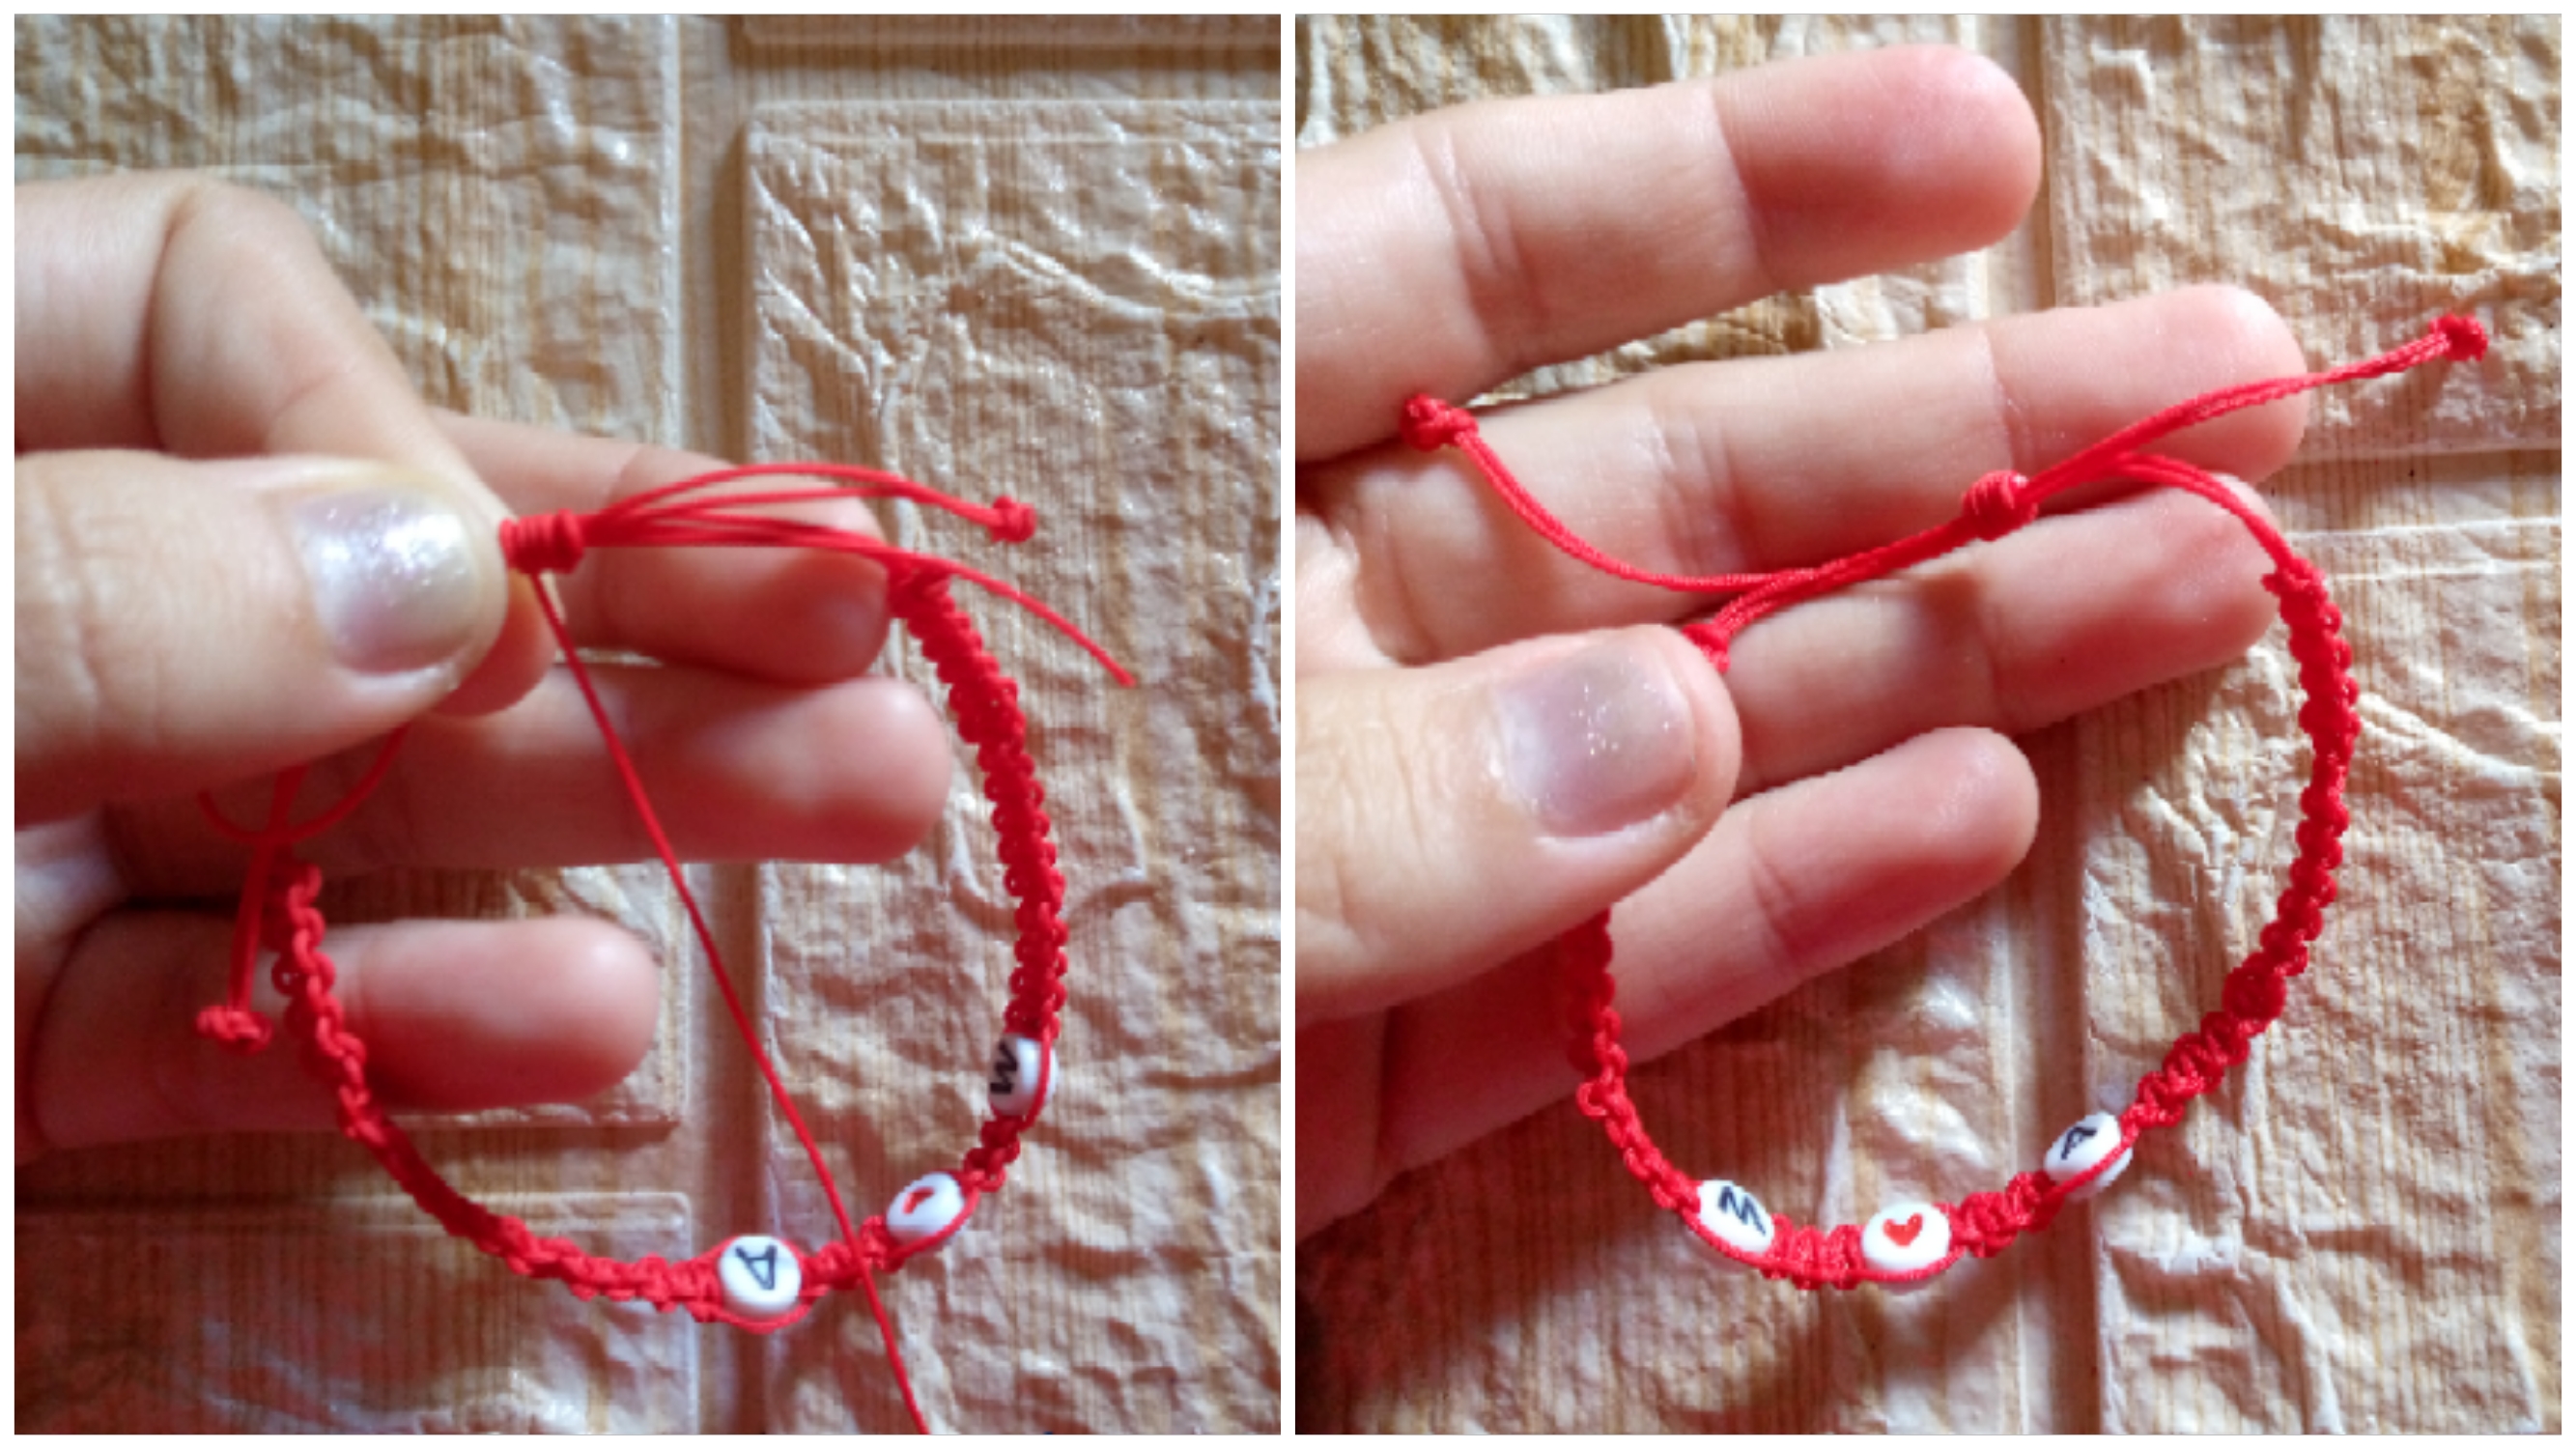
I finish my bracelet by making a small sliding knot to adjust the bracelet to the wrist with five turns and in the center of both threads placing them facing different sides to be able to adjust it, certain with a small knot and with the lighter I burn the excess so I have finished them.
.jpg)
Resultado:// Result:
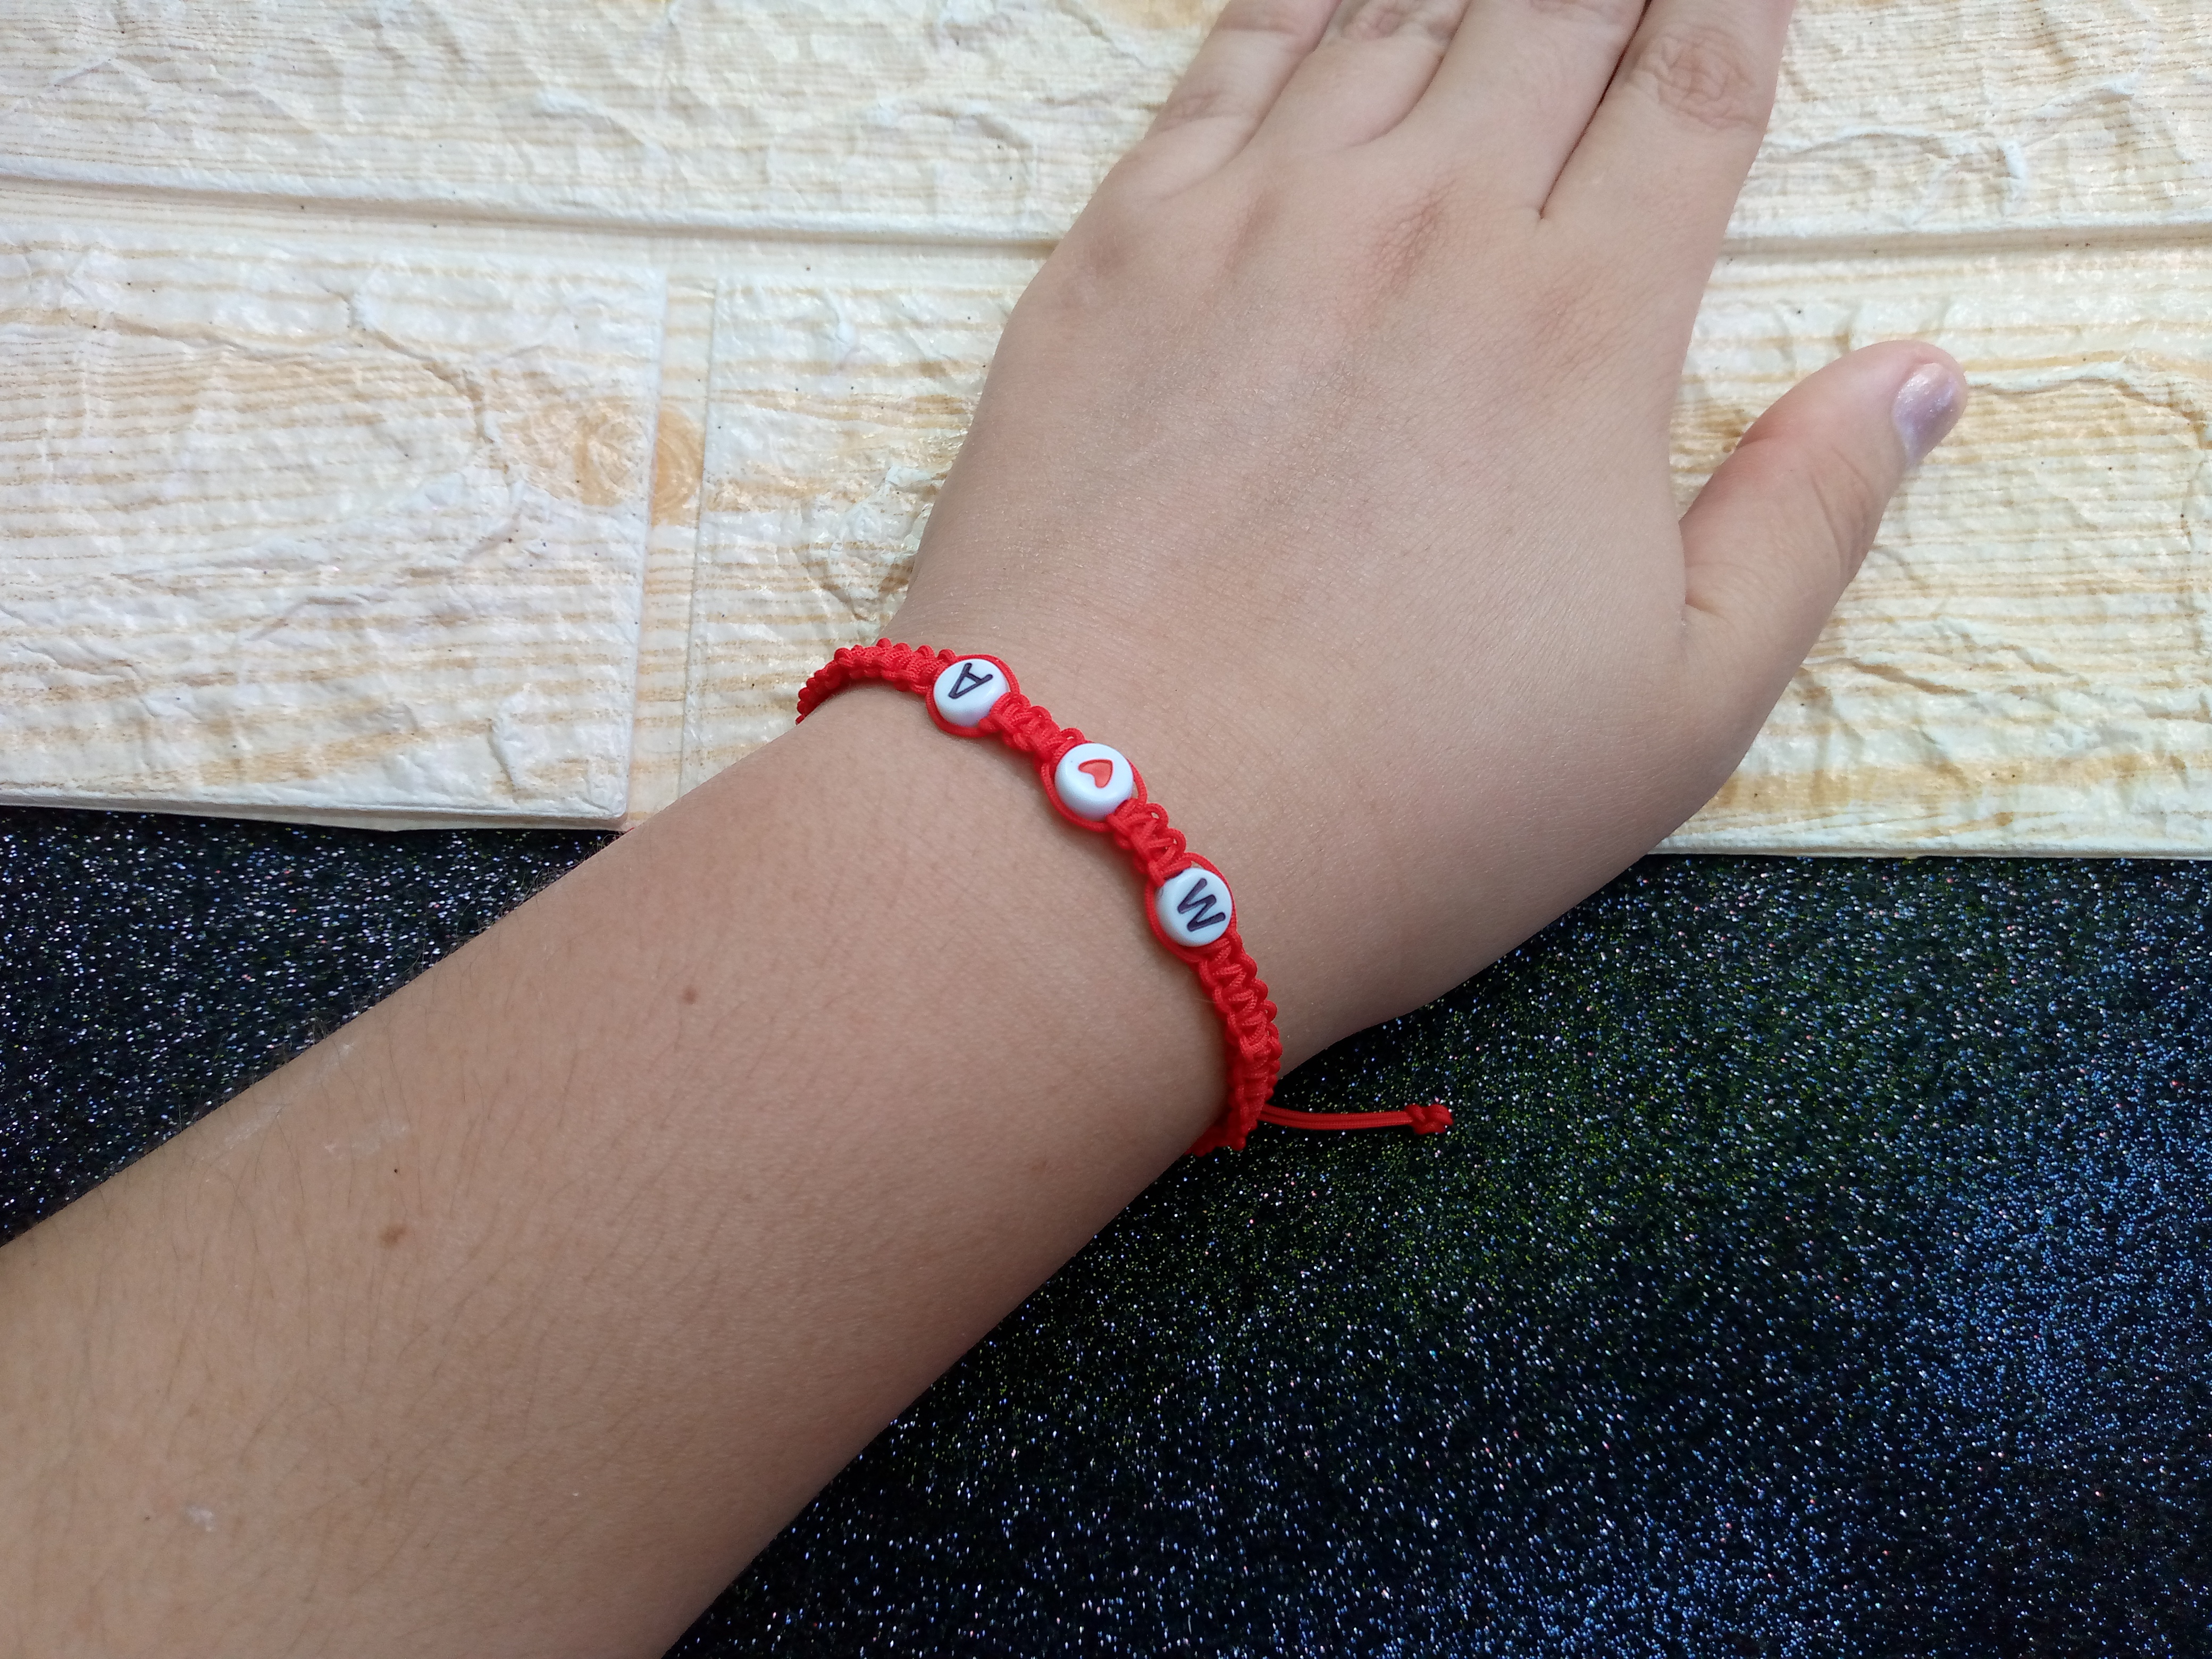

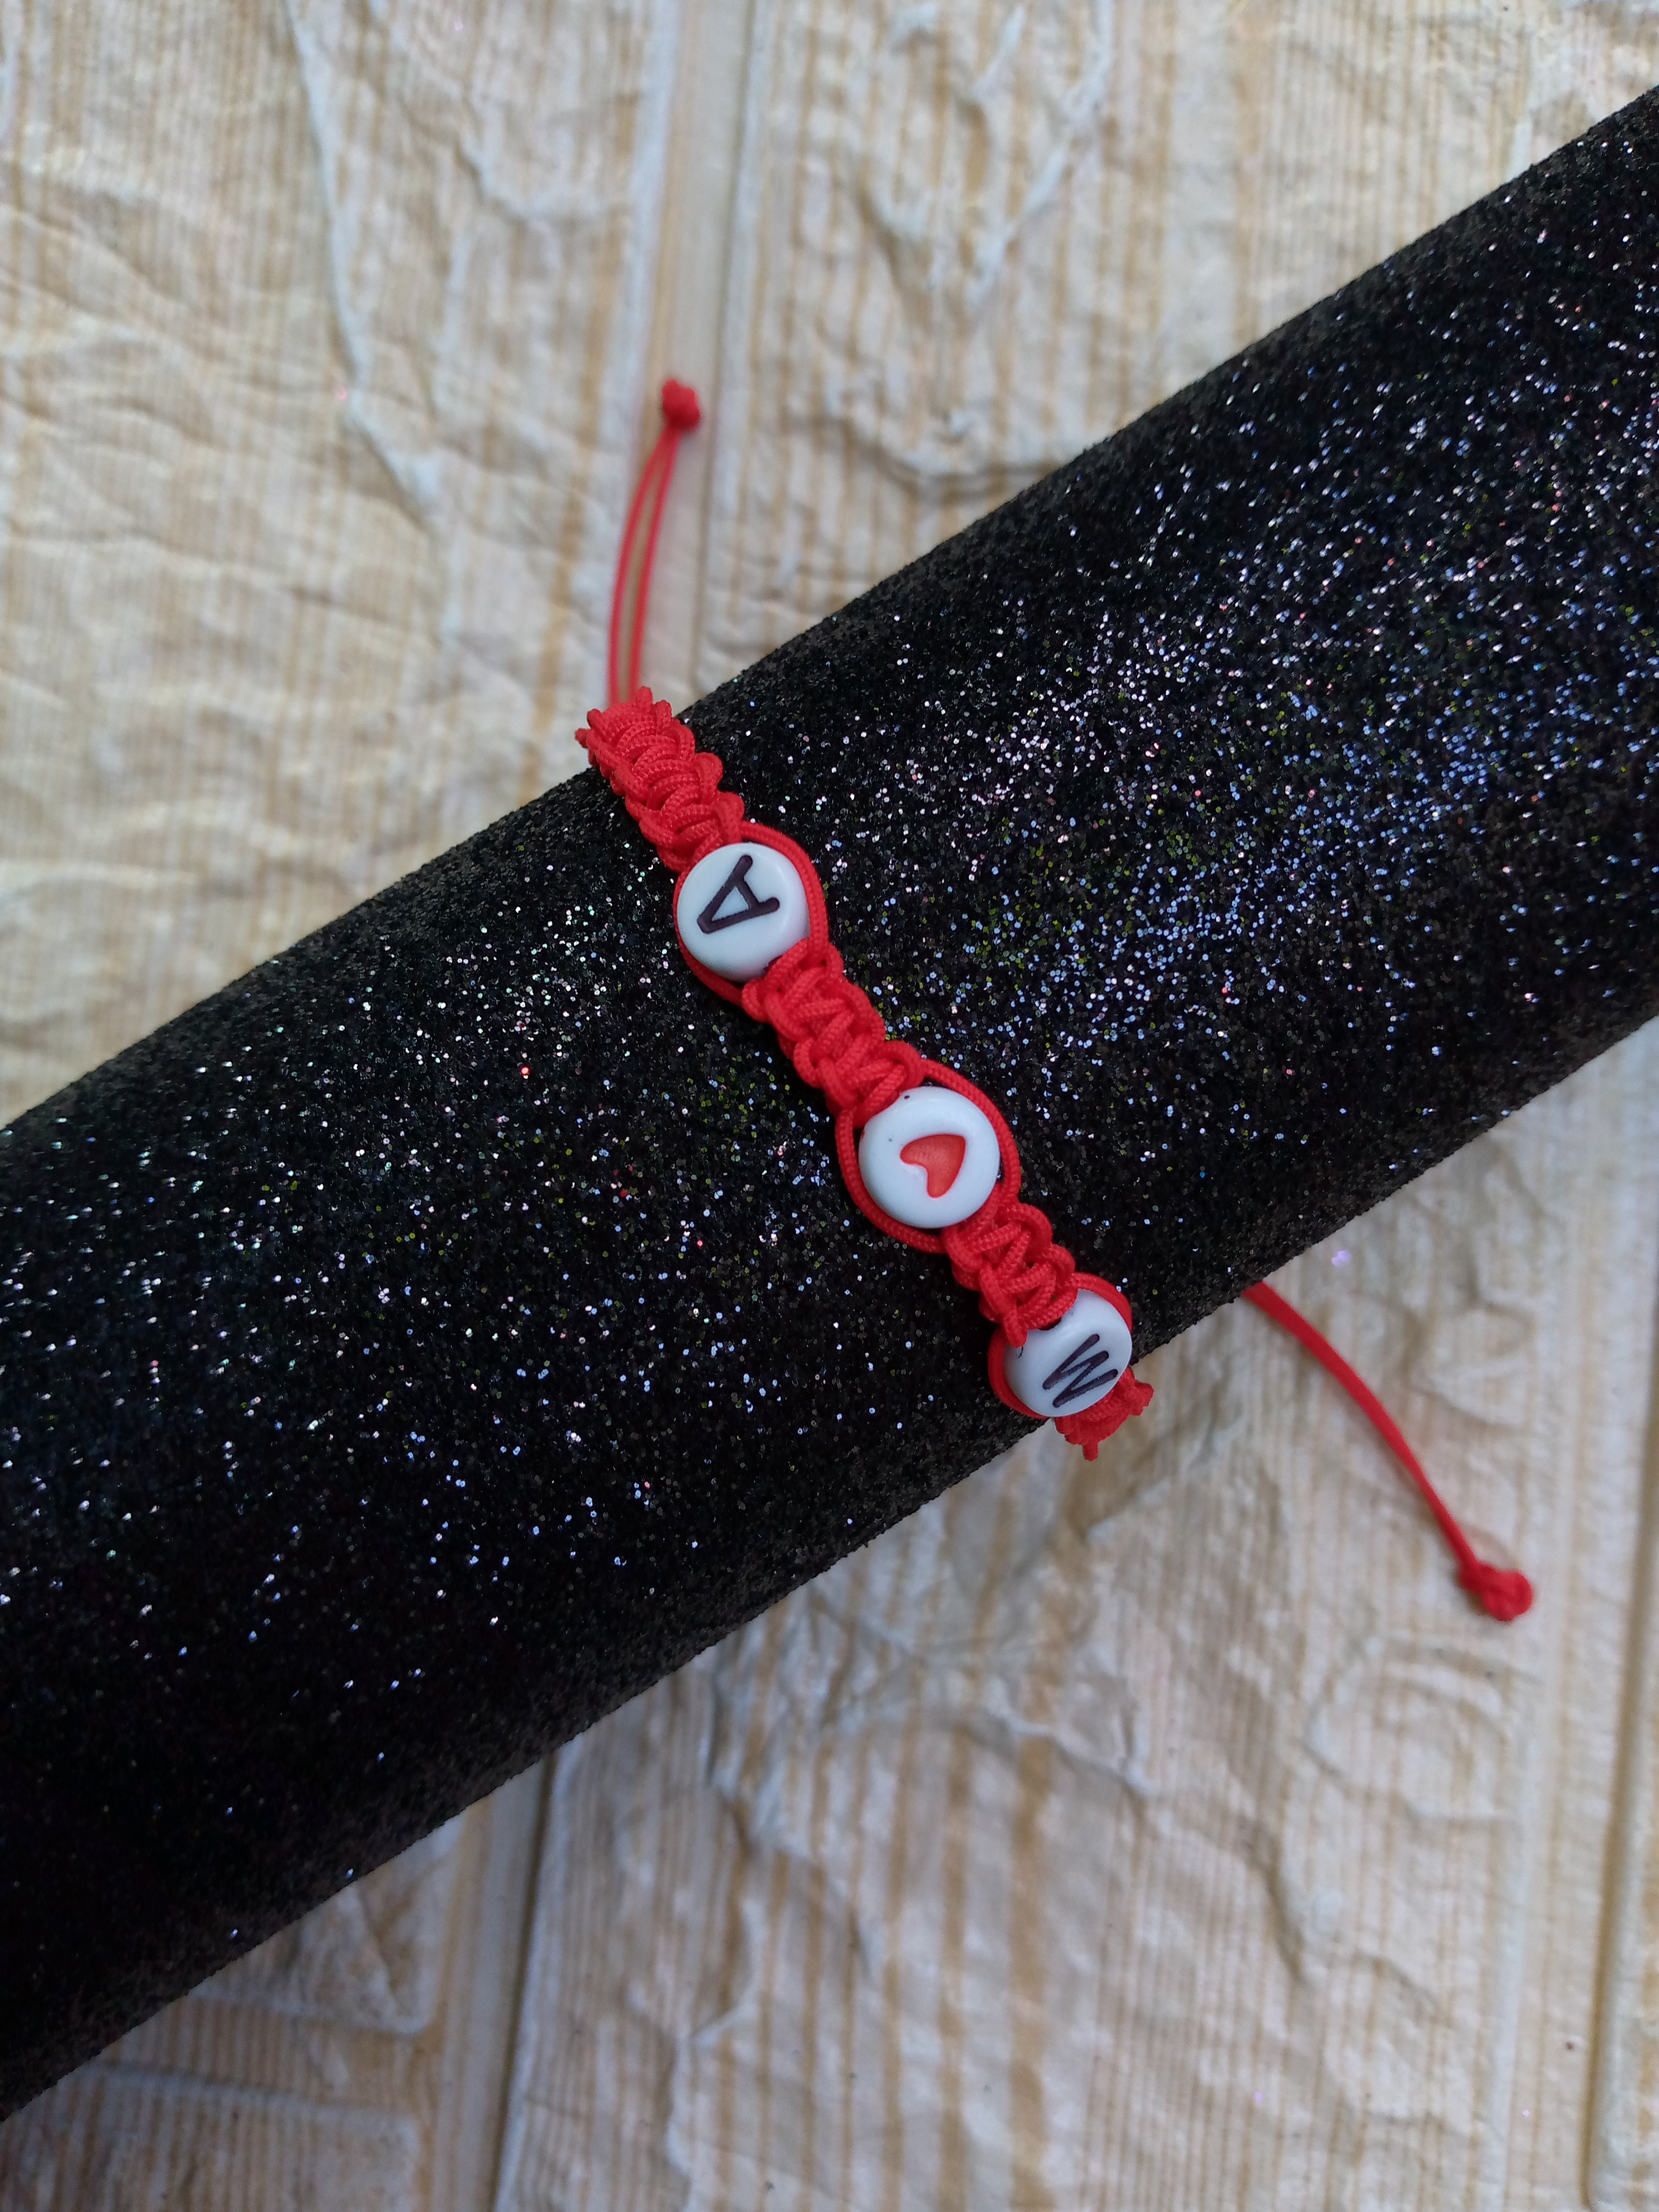
This is how this beautiful bracelet turns out, I tell you that talking to my mother I lost concentration and on one occasion I lost where I was going to continue the sequence of the next stitch and that is why it turned out a little crooked, and to avoid this you always have to carry the sequence like this one to the left and another to the right that is the sequence to knit and in order not to get lost or lose concentration it is better to do it in silence 🤭 and that nothing distracts us because we can lose the sequence like me but despite that it did not take away from how good this bracelet turned out for my first time making them, I hope you liked it too 😍🥰 see you in another next blog thanks for joining me in this process, I wish you a great afternoon friends.
.jpg)
Creating things with love 🌷❤️
🦋✨ All the images in this publication are my author ,📱taken with my TecnoSpark8C cell phone |📸Photos edited in PicsArt and Canva. Text translated in Google Translate.
Buena explicación...me encantan los accesorios de nudos. Gracias por compartir
!discovery 40
!PIZZA 🍕
Gracias que bueno saber que te ha gustado 😊🥺
This post was shared and voted inside the discord by the curators team of discovery-it
Join our Community and follow our Curation Trail
Discovery-it is also a Witness, vote for us here
Delegate to us for passive income. Check our 80% fee-back Program
$PIZZA slices delivered:
@chacald.dcymt(1/5) tipped @anne002
¡Enhorabuena!
✅ Has hecho un buen trabajo, por lo cual tu publicación ha sido valorada y ha recibido el apoyo de parte de CHESS BROTHERS ♔ 💪
♟ Te invitamos a usar nuestra etiqueta #chessbrothers y a que aprendas más sobre nosotros.
♟♟ También puedes contactarnos en nuestro servidor de Discord y promocionar allí tus publicaciones.
♟♟♟ Considera unirte a nuestro trail de curación para que trabajemos en equipo y recibas recompensas automáticamente.
♞♟ Echa un vistazo a nuestra cuenta @chessbrotherspro para que te informes sobre el proceso de curación llevado a diario por nuestro equipo.
🥇 Si quieres obtener ganancias con tu delegacion de HP y apoyar a nuestro proyecto, te invitamos a unirte al plan Master Investor. Aquí puedes aprender cómo hacerlo.
Cordialmente
El equipo de CHESS BROTHERS
Lovely bracelet
Thanks friend 🤗
WOW! It is so beautiful, elegant, and stylish. Love this bracelet. It looks great. You did a wonderful job! Keep it up!
Hello team, thank you very much, thank you always for encouraging me to continue with these beautiful works.