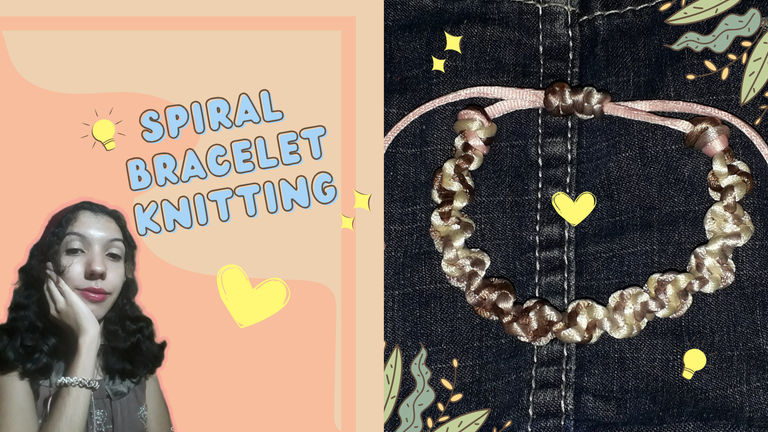

English

This time, I want to share with you the making of a macramé bracelet. I tell you, as a curious fact, that I learned to knit some bracelets when I was about 11 years old, because I saw some mousetail cords that my mom had, and OMG! I managed to knit one bracelet by myself.
After that, I was researching and learning, and I got to sell some bracelets. But I got bored with that and didn't buy any more cord, so I stopped making bracelets....
But recently, quite a few years later, I was bored and wanted to make a bracelet with some old cord I had there. So with some cord, intertwined with muscle memory, I want you to join me in this process of making a bracelet. Here we go!
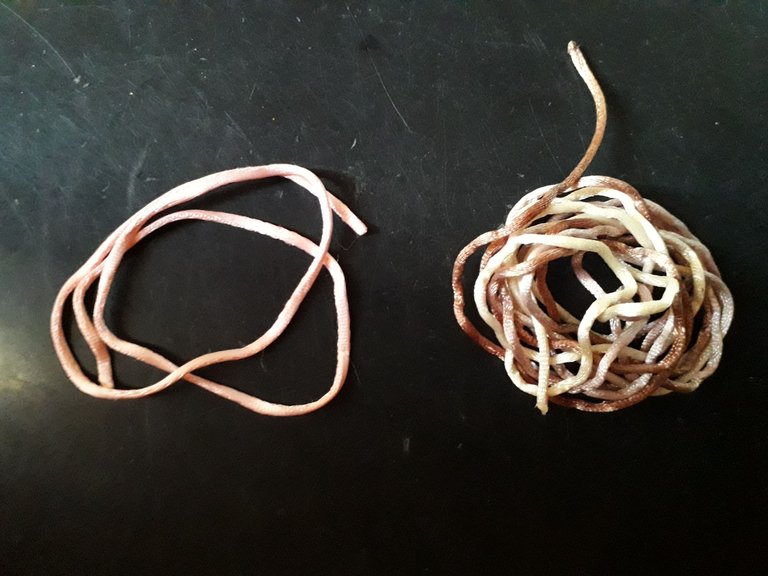

Materials

- 40 cm of mousetail cord, light pink color.
- 280 cm of mousetail cord, brown gradient.
- Clipboard.
I didn't know what to call the color of the cord I will use to weave the bracelet, because it is a multicolored cord, which changes from brownish to white simultaneously. I think it is a very nice cord that is perfect for this weaving, because it gives a harmonious variety of colors.
 |  |
|---|
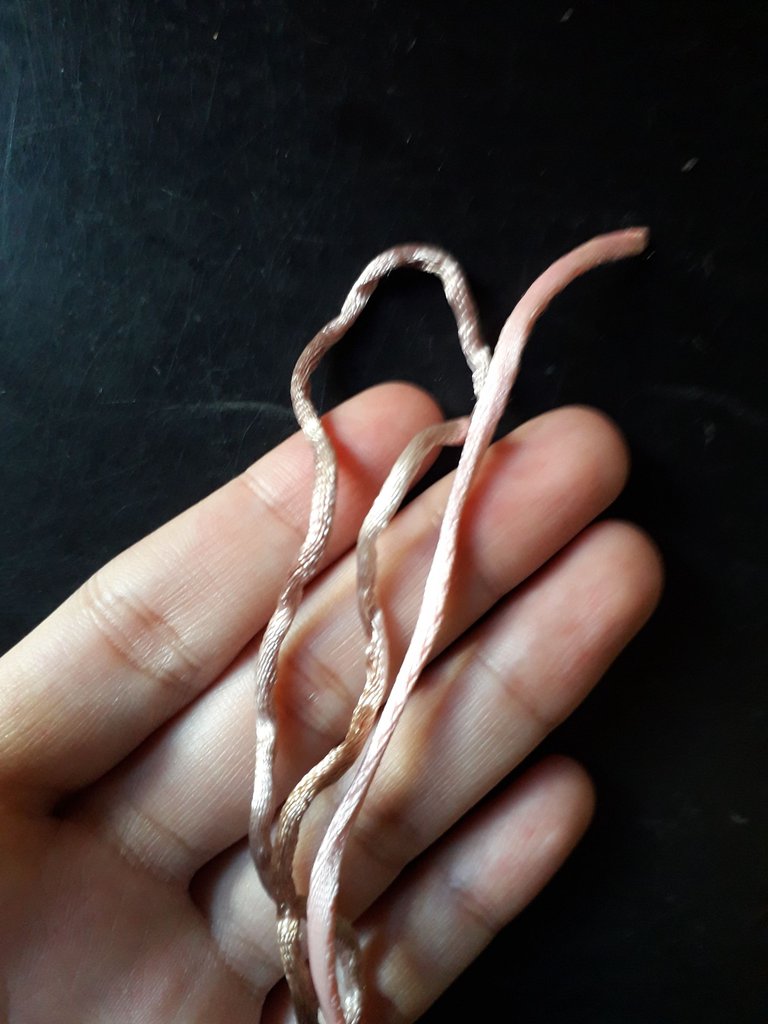
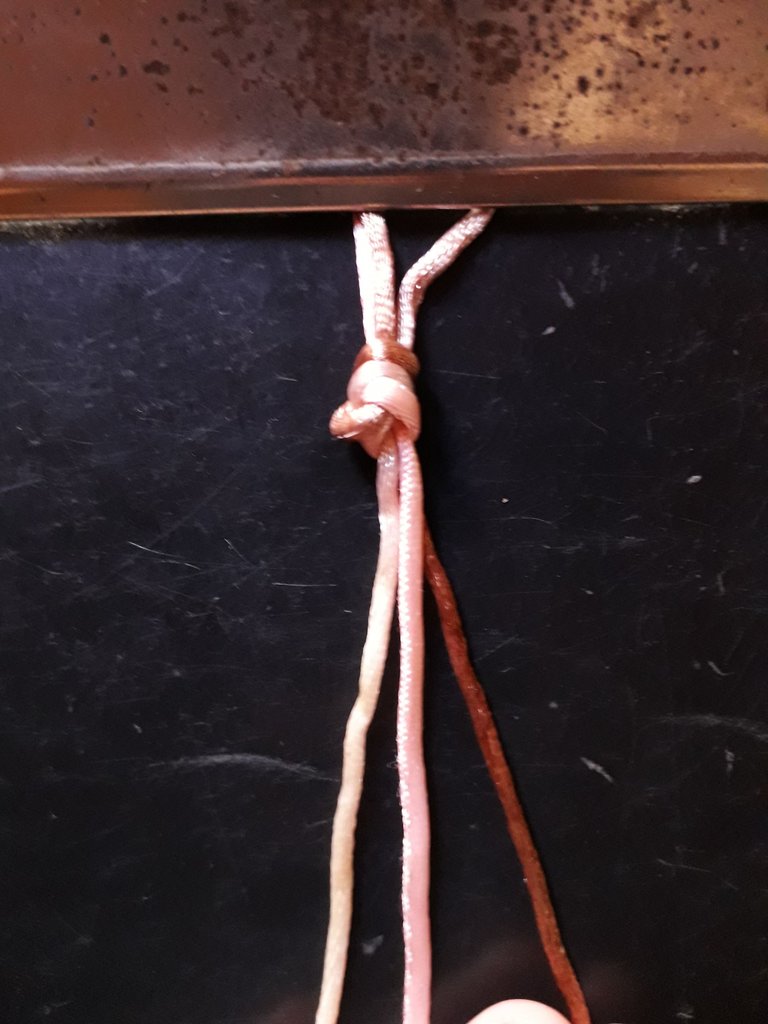
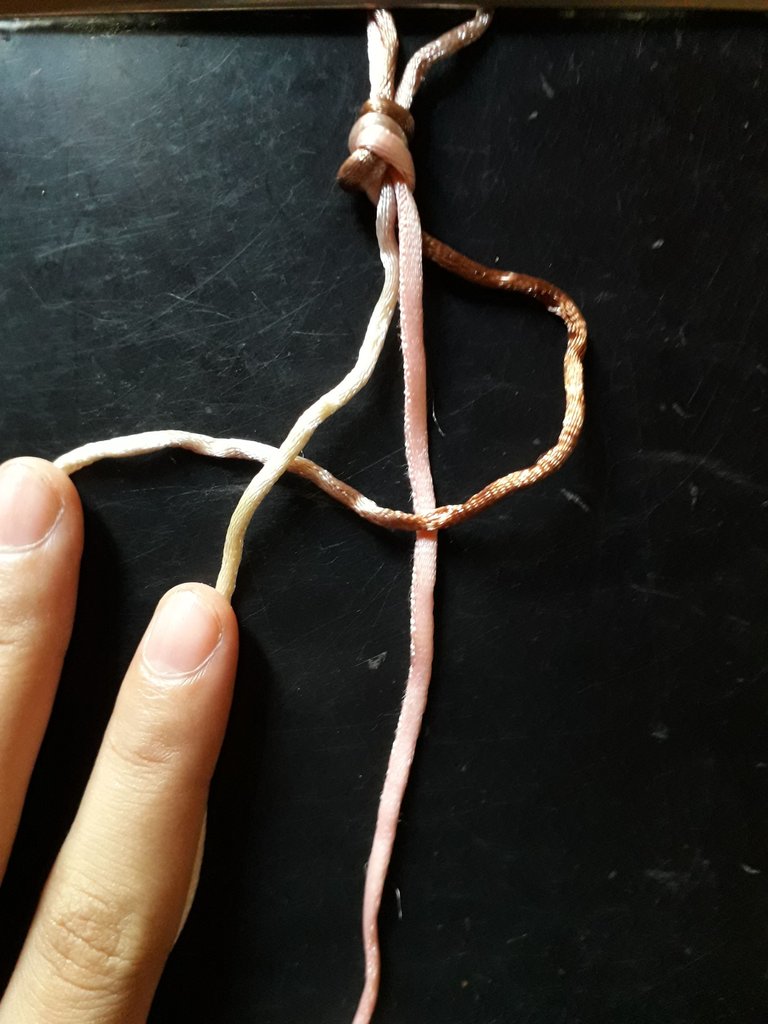
So, the first thing we're going to do is fold the longer cord in half, so that the ends are flush with each other. Then, we are going to take our pink cord and join them all together at the same level as seen in the first picture. The next thing to do is to make a simple knot, as shown in the second picture, which is just to turn the thread over and pull it through. We use the hook of the clipboard to step on the threads, and this way we can knit our bracelet without it moving; I think it is especially necessary in this knitting, because it is very easy to get it crooked.
Something that I found cute about the way the colors of the threads were in the knot, is that they look like Neapolitan ice cream. The pink one is strawberry, the white one is vanilla and the brown one is chocolate, hehe.
 |  |
|---|
For this weave (or knot), we will do the following:
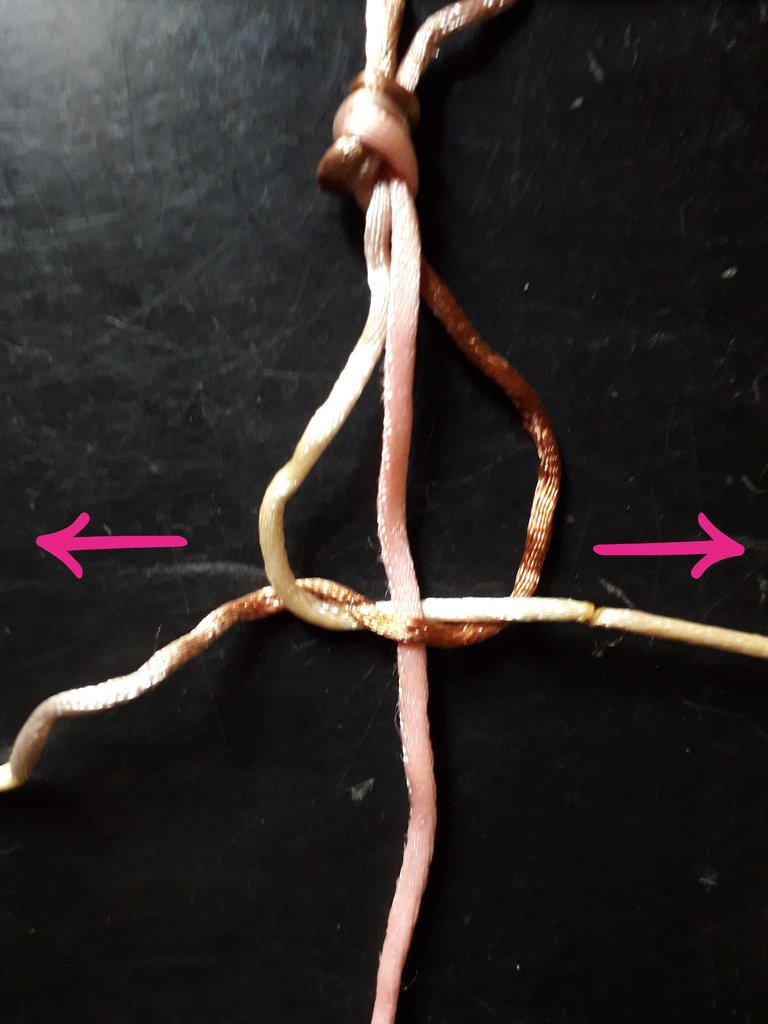
The thread on the right, will pass over the thread in the center. Then, the thread on the left will pass behind the thread in the center, and will come out between the thread on the right and the thread in the center, do you know what I mean?
Anyway, if I didn't explain it well, in the picture you can see what the threads do; I always imagine it as if the threads embrace the center thread, they intertwine with each other with the center thread in between.
Once both threads are intertwined, we are going to pull them in the direction of the arrows I drew in the photo. Pull them outwards, making sure that it is tight.
 |  |
|---|
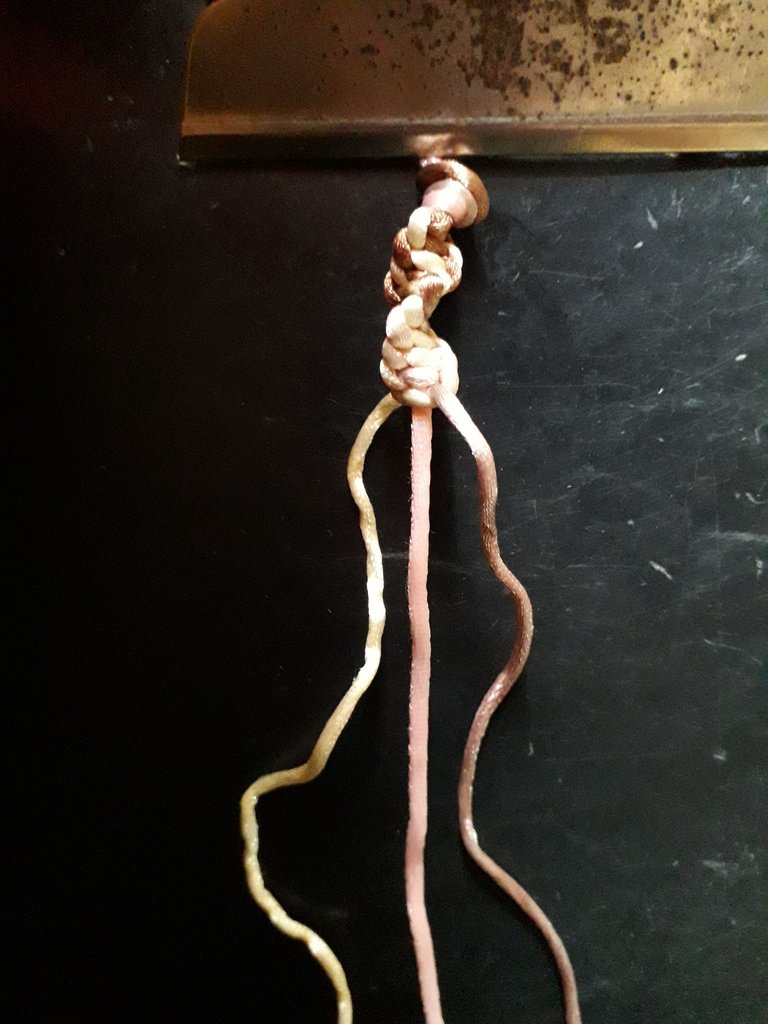
This is how the knitting looks like. It folds naturally, as if it were a curl, so it is important to do it leaning clipboard, so that the curl is not twisted.
Two fundamental details:
The first. You are going to make the same knot every time, that is to say, what I explained above. Throughout the knitting, the thread on the right will pass over the thread in the center. Then, the left-hand thread will pass behind the center thread, and come out between the right-hand thread and the center thread. If you do it right, you will notice that it will be making a swirl on its own.
The second one. You must tighten the weave well, not only when you pull it, but you must also roll it up so that it stays all together. I used to make them strong and tight because in the past my bracelets have come undone, or the weave has been twisted because it is not consistent.
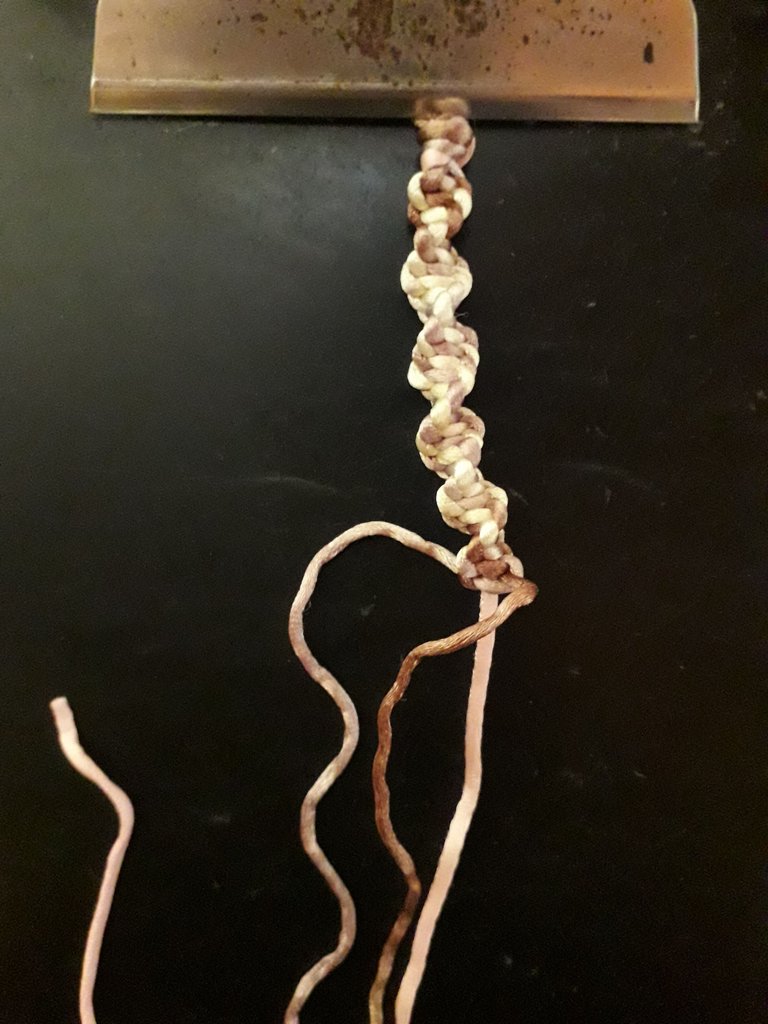 | 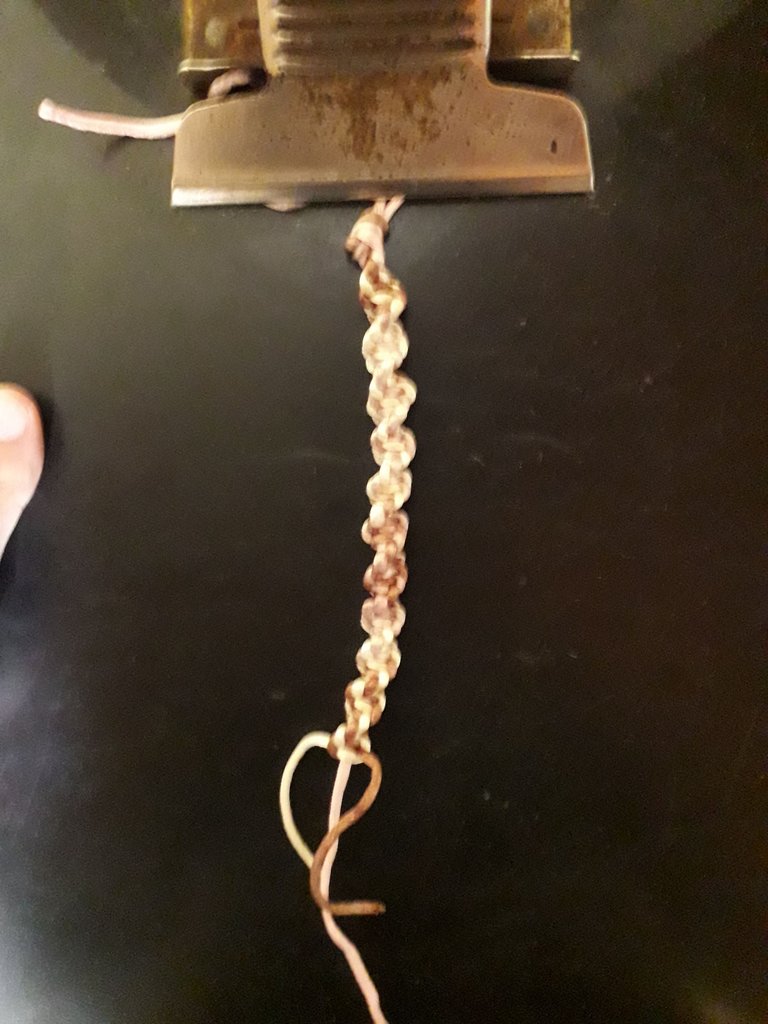 |
|---|
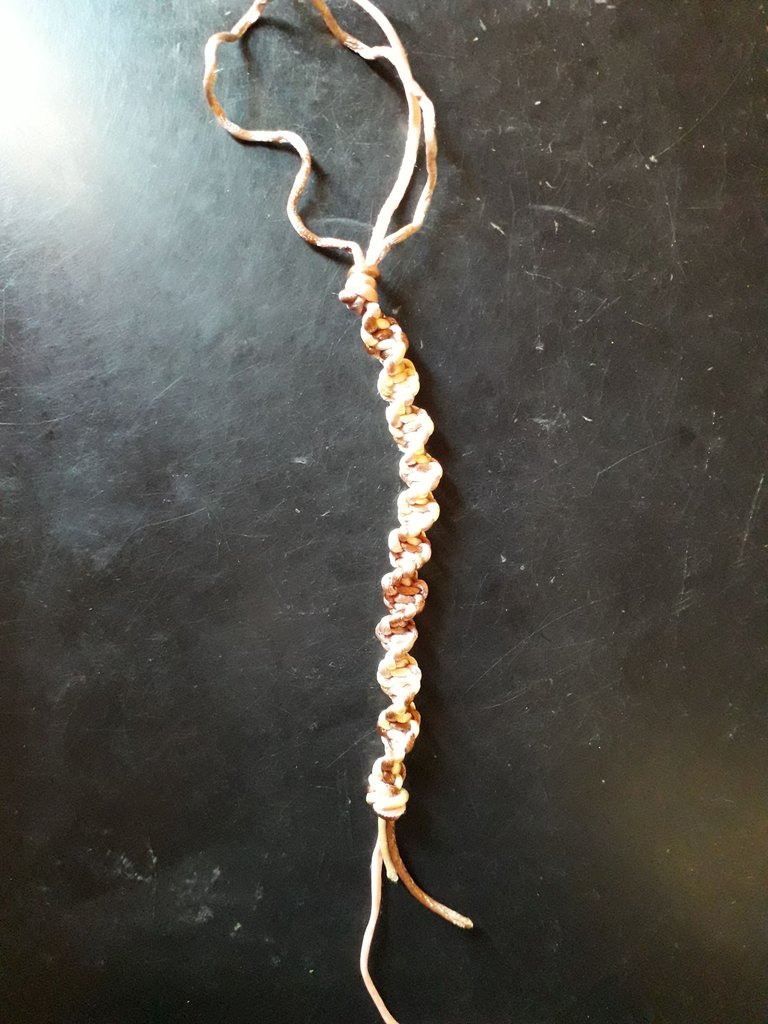
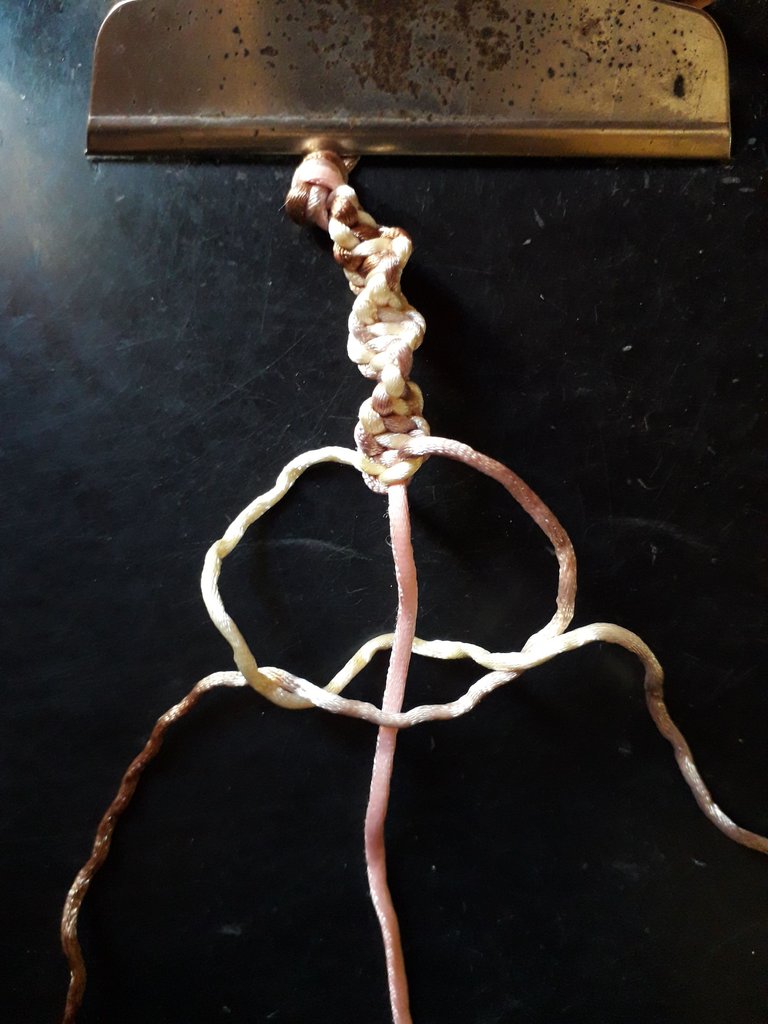
We continue knitting, you already know it, you are going to embrace the thread in the center with the ones on each side.
We knit, we knit, we knit…
One way I knew when to finish weaving, is because every now, and then I would stop and examine it. I would fold the bracelet in half, with the two ends flush, and when I saw that the end of the weave reached the knot at the beginning, I was done.
When I finished the weaving, I made a simple knot like the one I made at the beginning.
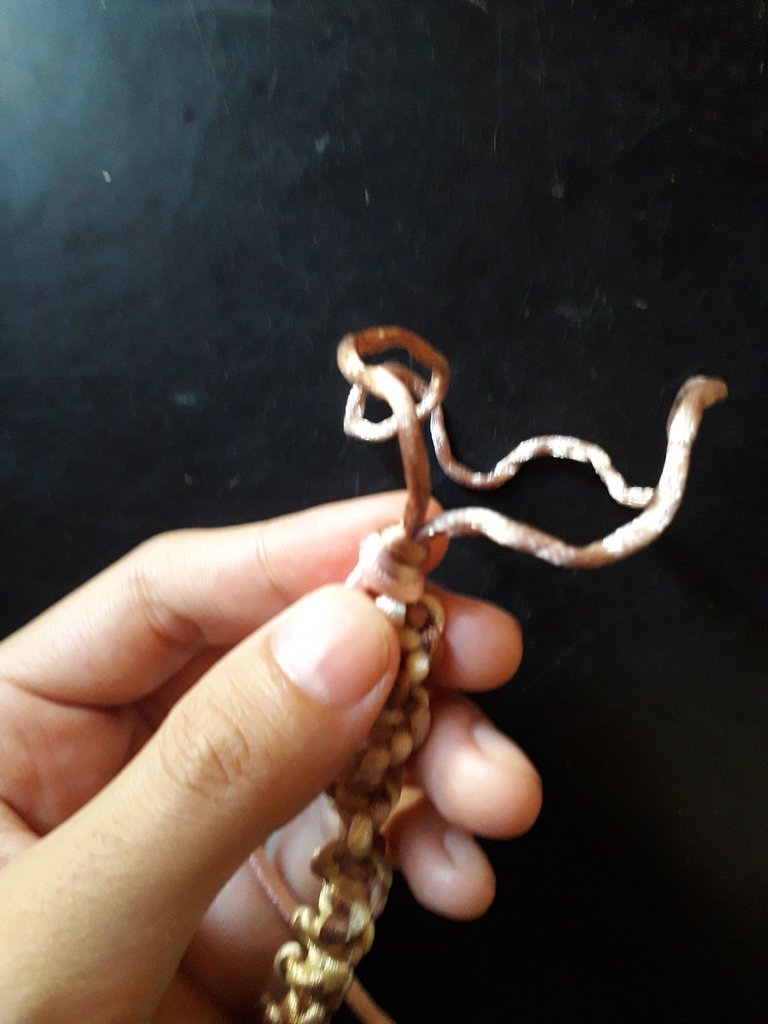
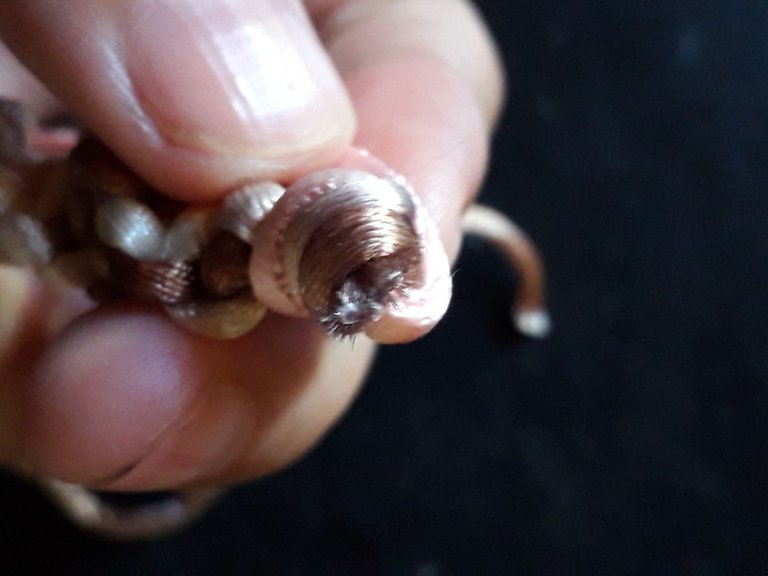
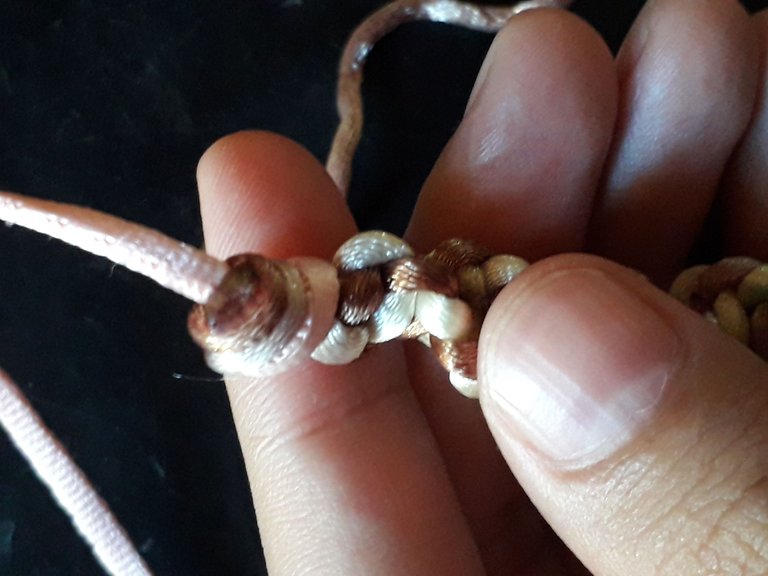
Now you see that we're left with this doubled thread here at the tip… What we're going to do is cut it all off, flush with the knot.
 |  |
|---|
Here I cut it, you can see that fuzzy end of frayed thread. I cut it flush because now I'm going to burn it to set it.
With a lighter, we're going to burn those little hairs carefully. I use the blue part of the flame because it doesn't scorch the thread (turning it black). When the trhead melts, with a finger dipped in water, I tap the melted thread, to appease it and set it; I don't know how many people do exactly the same thing, but be careful that they get burned, hehe. I like to flatten it well, even heating it twice, because it has happened to me that I buy bracelets and the knot comes undone, and I don't want that for mine, right?
 |  |
|---|
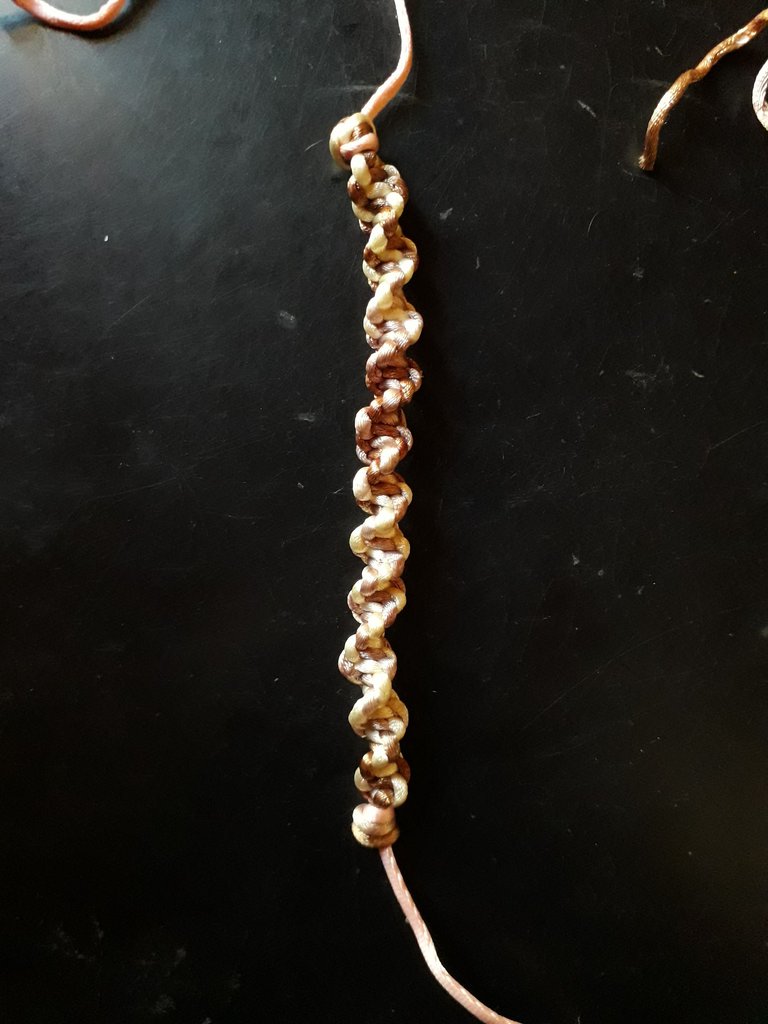
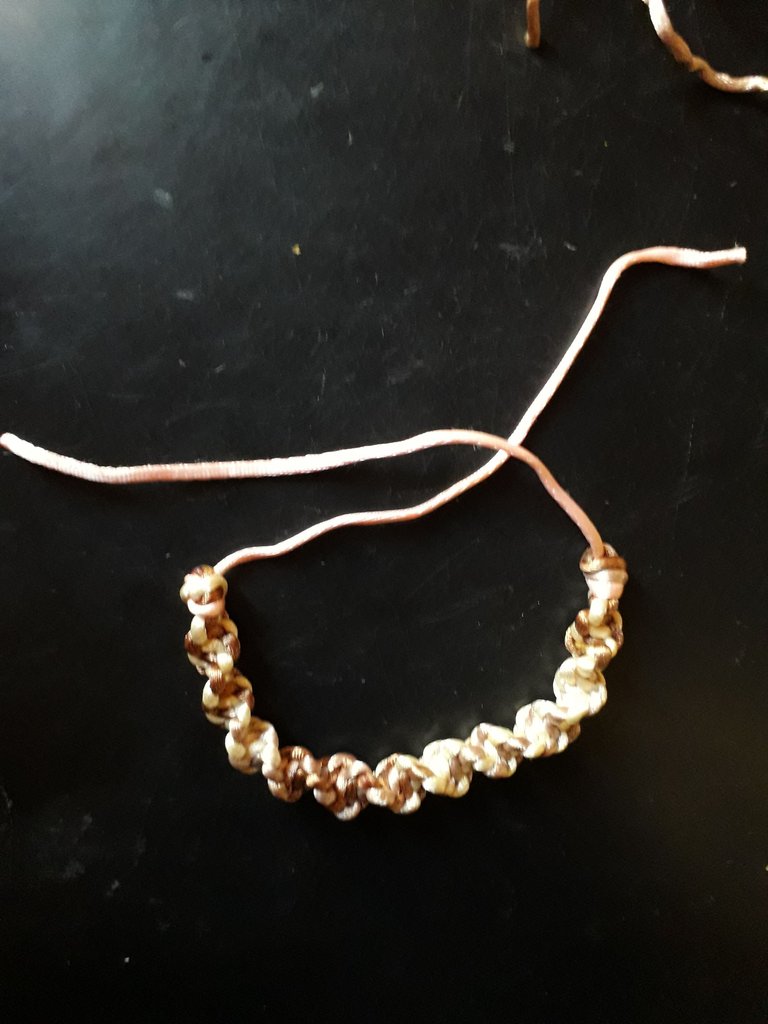
And my dears, after repeating this process with the other end of the bracelet, we have it almost ready, what a thrill.
Now comes the time to make the clasp. We are going to fold our bracelet as shown in the second picture, and we will take the thread that was left over when we cut the folded end, remember? We are not going to waste it here, no, no, no, no.
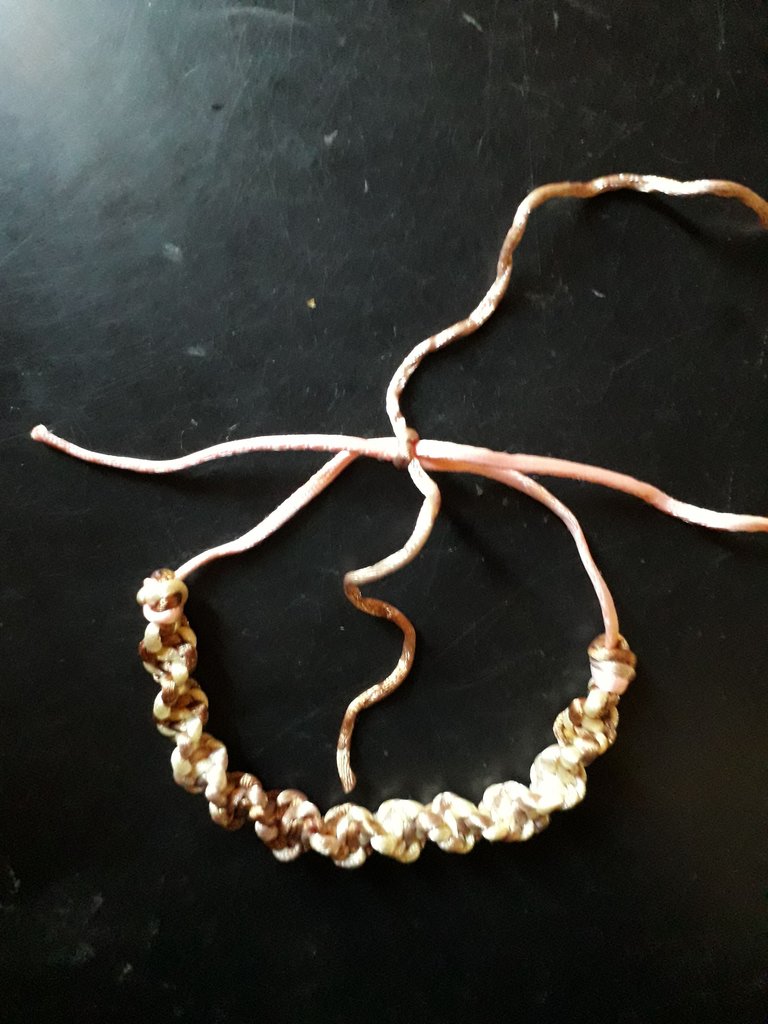 | 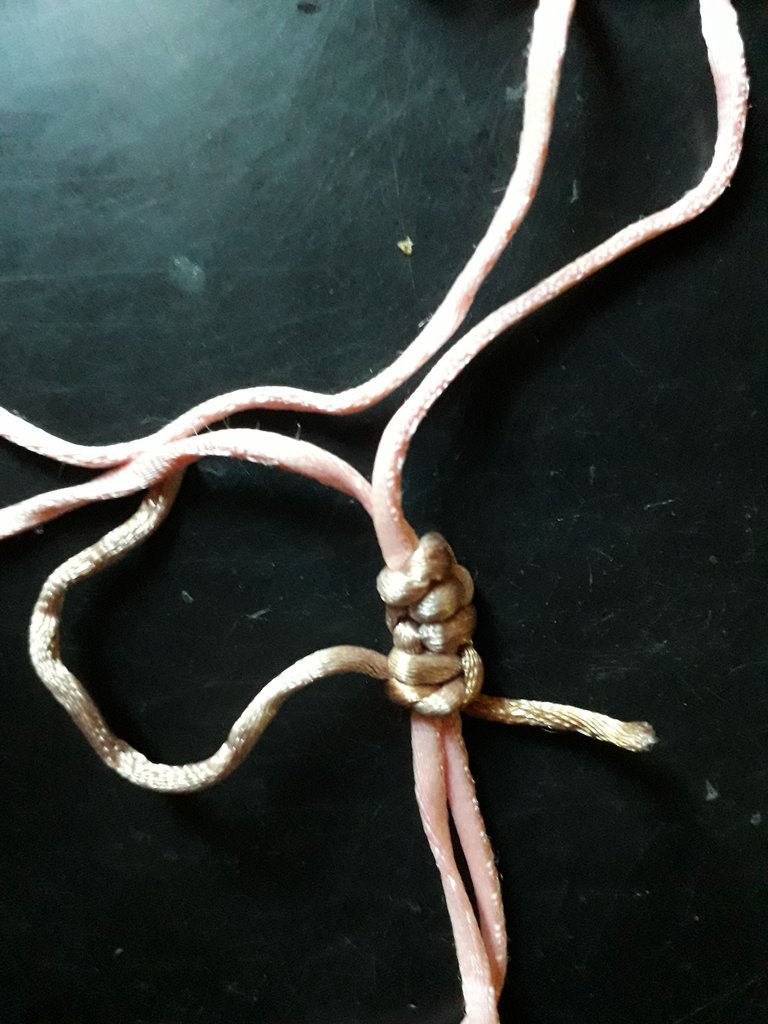 |
|---|
We are going to tie, as well as in the first picture, a little knot. And then I decided to make a knit… I'll explain the knitting.
It is quite similar to the one we used in this bracelet.
The thread on the right, will go over the thread in the center. Then, the left-hand thread will go behind the center thread, and come out between the right-hand thread and the center thread. Ok.
But after that, we now take the left-hand thread, pass it over the center thread. Then, the right-hand thread passes behind the center thread, and it will come out between the left-hand thread and the center thread.
Then, again. The right-hand thread will pass over the center thread. Then, the left-hand thread will pass behind the center thread, and come out between the right-hand thread and the center thread. And so on.
And so on…
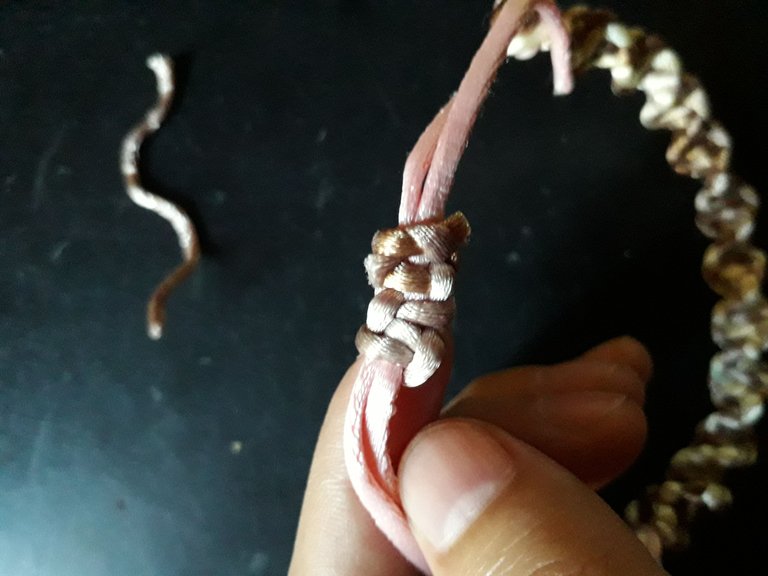 | 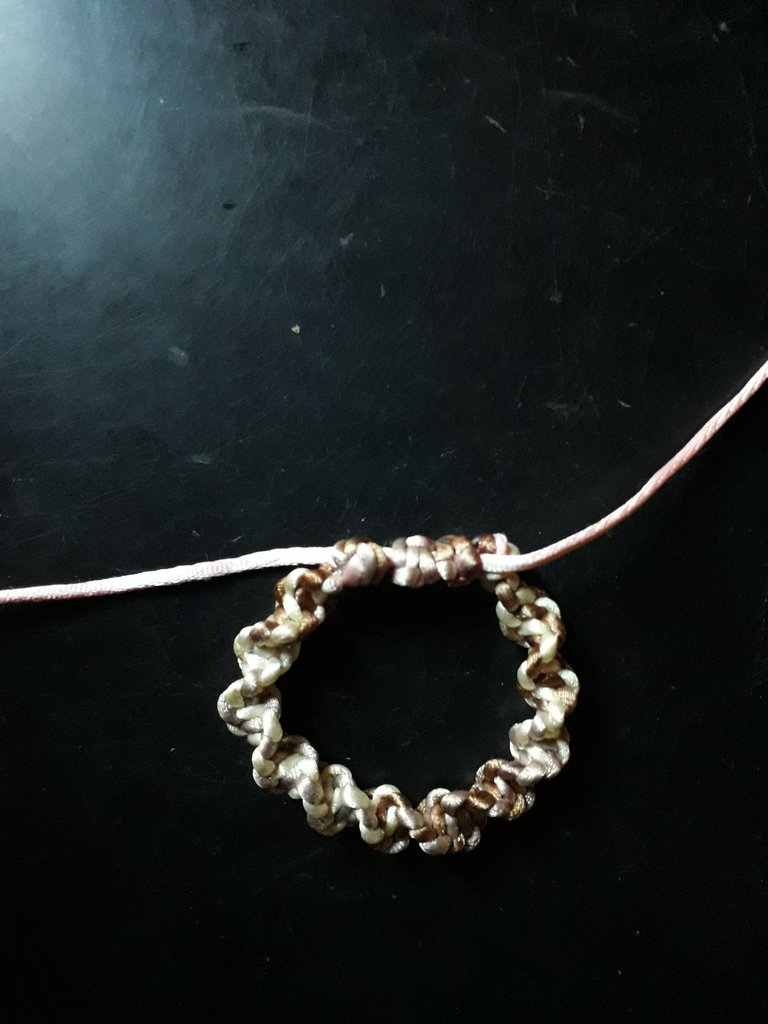 |
|---|
You don't have to knit that much either, three knots would be enough, it's just a fastener.
When we finish knitting, we cut off the leftover ends and heat them to flatten them and fix them, as I explained before.
 |  |
|---|
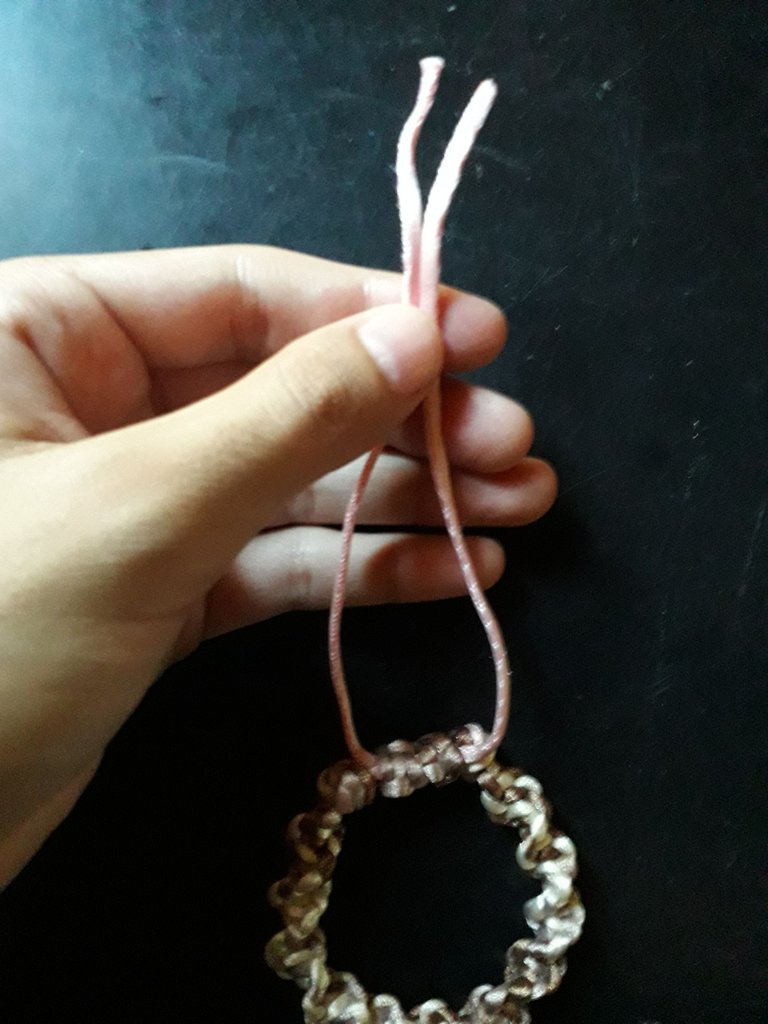
Now, comes the final step: the tips.
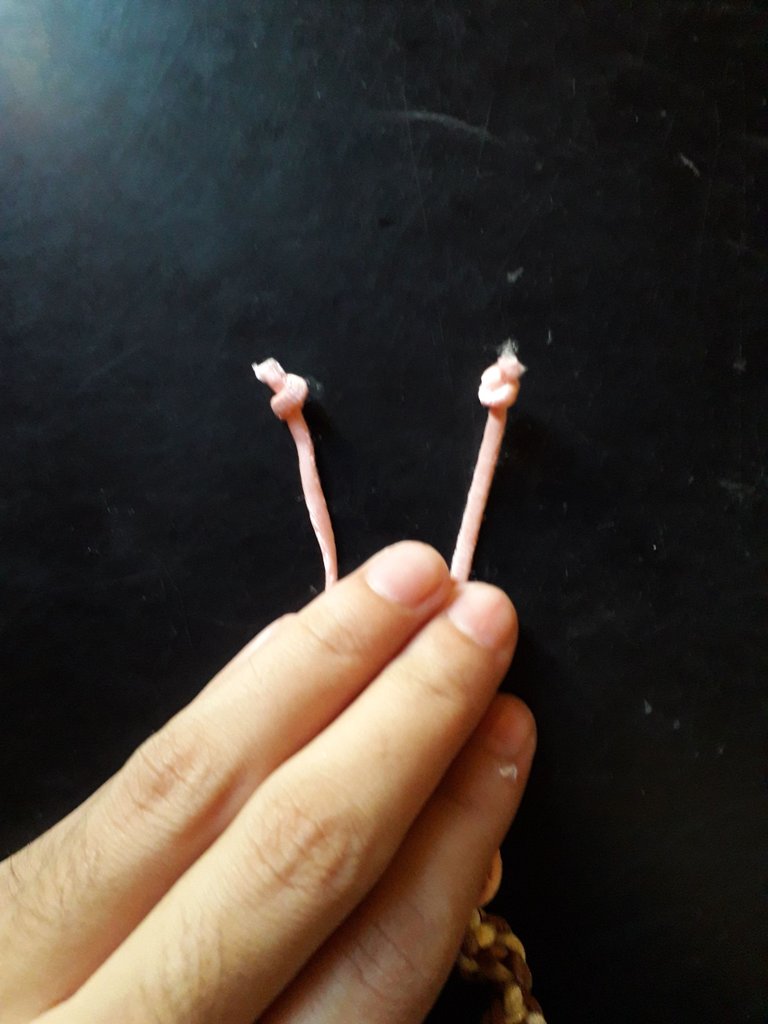
First, I cut them so that they are both exactly the same size, and then I made two little knots, as seen in the second picture.
The next step is… You guessed it, we are going to heat it to flatten it and set it.
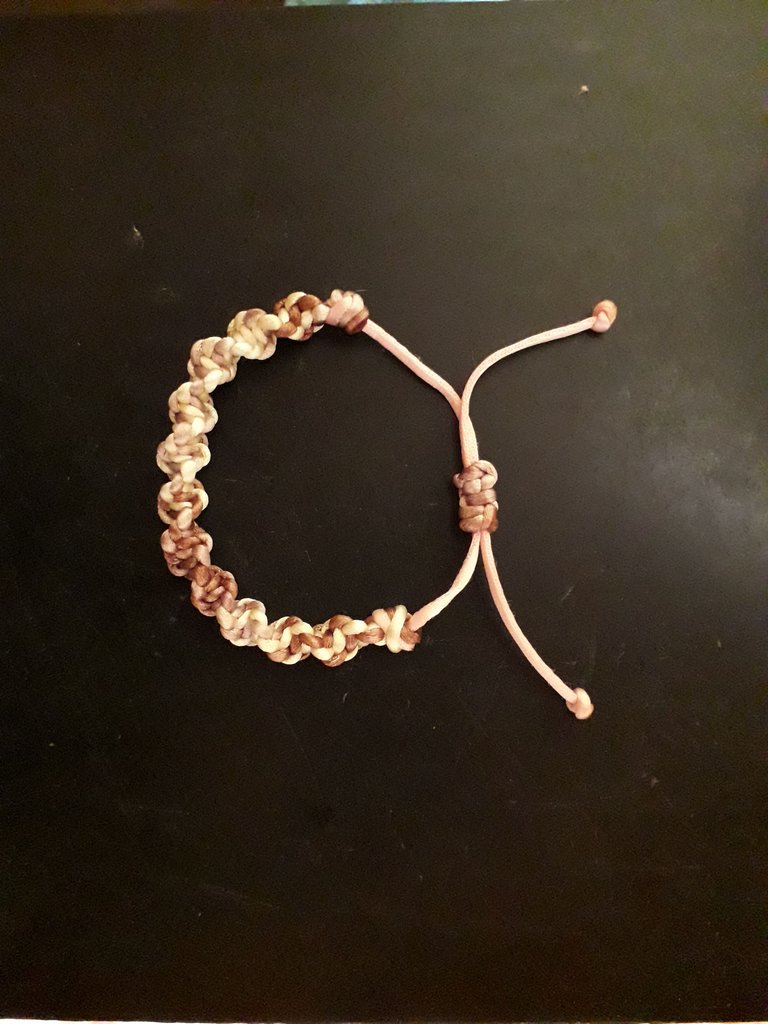
Once the ends are flattened and fixed very well, so that they do not come loose, it would be done.
I really enjoy making these knitted bracelets. I wanted to put some beads or embellishments on them, but the mouse tail thread is too thick for the beads I had… I will have to buy some that work, and also more thread. Likewise, I want to weave many more bracelets, I hope you will join me in the ones to come.
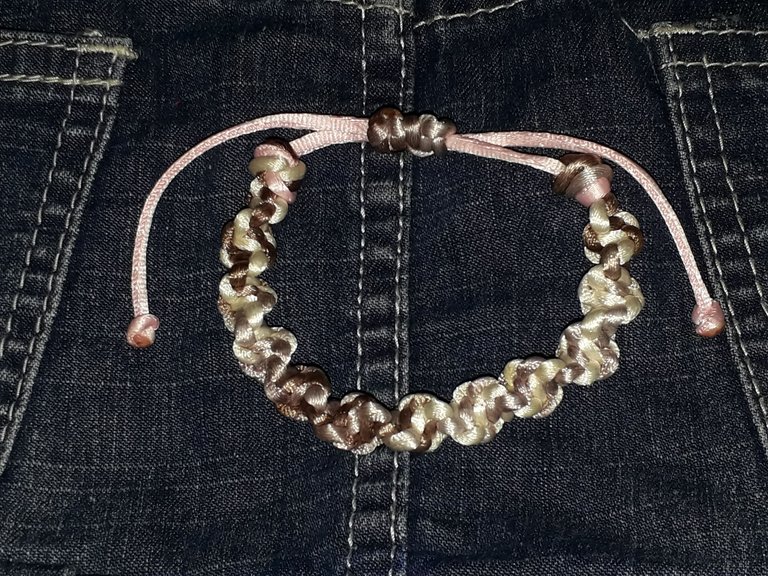


Without anything else to add, I hope you liked the post as much as I did. Take care, drink lots of water, don't forget to smile, and have a nice day!


Español

Holiii, amigos de la comunidad de Hive DIY, espero que se encuentren muyyy bien el día de hoy. Es la primera vez que publico por acá, después de pensarlo mucho.
En esta ocasión, quiero compartir con ustedes la elaboración de una pulsera macramé. Les cuento, como datito curioso, que yo aprendí a tejer algunas pulseritas cuando tenía como 11 años, pues vi unos hilos de cola de ratón que tenía mi mamá y ¡OMG! Logré hacer un tejido yo sola.
Luego de eso, los estuve investigando y aprendiendo, y llegué a vender algunas pulseritas. Pero me aburrí de eso y no compré más hilo, por lo cual dejé de hacer pulseras…
Pero hace poco, ya bastantes años después, estaba aburrida y quise hacer una pulsera con un hilo viejo que tenía ahí. Así que con un poco de hilo, entrelazado con memoria muscular, quiero que me acompañen en este proceso de hacer una pulserita. ¡Vamos allá!


Materiales

- 40 cm de hilo cola de ratón, color rosado claro.
- 280 cm de hilo cola de ratón, gradiente color marrón.
- Tabla con gancho.
No sabía como llamar al color del hilo que usaré para tejer la pulsera, porque es un hilo de varios colores, que va cambiando desde el marroncito hasta el blanco simultáneamente. Creo que es un hilo muy bonito que es perfecto para este tejido, porque da una variedad de colores armoniosa.
 |  |
|---|
Entonces, lo primero que haremos será doblar el hilo más largo por la mitad, de manera que las puntas queden ras con ras. Luego, vamos a tomar nuestro hilo rosita y los juntaremos todos al mismo nivel como se ve en la primera imagen. Lo siguiente es hacer un nudito simple, como el que se ve en la segunda imagen, que es solo darle la vuelta al hilo y jalarlo. Usamos el gancho de la tabla para pisar los hilos, y así podremos tejer nuestra pulsera sin que se mueva; creo que es especialmente necesario en este tejido, porque es muy fácil que nos quede chueco.
Algo que me pareció cute de la manera en que quedaron los colores de los hilos en el nudito, es que parecen un helado napolitano. El rosita es la fresa, el blanquito es vainilla y el marrón es chocolate, jiji.
 |  |
|---|
Para este tejido (o nudo), haremos lo siguiente:
El hilo de la derecha, pasará por encima del hilo del centro. Luego, el hilo de la izquierda pasará por detrás del hilo del centro, y saldrá entre el hilo de la derecha y el del centro, ¿me explico?
De todos modos, si no lo expliqué bien, en la foto se puede apreciar lo que hacen los hilos; yo siempre lo imagino como si los hilos abrazaran al del centro, se entrelazan entre ellos con el hilo central de por medio.
Una vez que entrelazamos ambos hilos, vamos a jalarlos en dirección a las flechas que dibujé en la foto. Se jalan hacia afuera, asegurándote de que quede bien apretado.
 |  |
|---|
Así va quedando el tejido. Se va doblando naturalmente, como si de un rizo se tratase, por eso es importante hacerlo apoyándose de una tabla con gancho, para que no nos quede torcido el rizo.
Dos detalles fundamentales:
El primero. Vas a hacer el mismo nudo siempre, es decir, lo que expliqué arriba. Durante todo el tejido, el hilo de la derecha, pasará por encima del hilo del centro. Luego, el hilo de la izquierda pasará por detrás del hilo del centro, y saldrá entre el hilo de la derecha y el del centro. Si lo haces bien, te darás cuenta de que él solo se va haciendo un remolino.
El segundo. Debes apretar bien el tejido, no solo cuando lo jales, sino que también debes rodarlo hacia arriba para que quede todo junto. Yo acostumbro a hacerlos bien fuertes y apretados porque en el pasado se me han deshecho las pulseras, o me ha quedado torcido el tejido porque no es consistente.
 |  |
|---|

Continuamos tejiendo, ya se la saben, van a abrazar el hilo del centro con los de cada lado.
Tejemos, tejemos, tejemos…
Una manera de saber cuando terminar de tejer, es porque cada tanto me detenía y lo examinaba. Doblaba la pulsera a la mitad, con las dos puntas al ras, y cuando vi que ya el final del tejido alcanzaba el nudo del principio, listo.
Cuando terminé el tejido, hice un nudo simple como el que hice al principio.

Ahora ven que nos queda este hilo doblado aquí en la punta… Lo que haremos es cortarlo todo, al ras del nudo.
 |  |
|---|
Aquí lo corté, pueden ver esa punta peluda de hilo deshilachado. Lo corté al ras porque ahora lo voy a quemar para fijarlo.
Con un encendedor vamos a quemar esos pelitos con cuidado. Yo uso la parte azul de la llama porque no chamusca el hilo (poniéndolo negro). Cuando se derrite el hilo, con el dedo mojado en agua, le doy golpecitos al hilo derretido, para aplacarlo y fijarlo; no sé cuantas personas hagan exactamente eso mismo, pero tengan cuidado que se queman, jiji. A mí me gusta aplacarlo bien, llegando a calentarlo hasta dos veces, pues me ha pasado que compro pulseras y el nudo se deshace, y yo no quiero eso para la mía, ¿cierto?
 |  |
|---|
Y queridos, después de repetir ese proceso con el otro extremo de la pulsera, ya la tenemos casi lista, que emociónnn.
Ahora viene el momento de hacer el cierrecito. Vamos a doblar nuestra pulsera así como está en la segunda imagen y tomaremos el hilo que nos sobró cuando cortamos la punta doblada, ¿recuerdan? Aquí no vamos a desperdiciar, no, no, no.
 |  |
|---|
Vanos a amarrar, así como en la primera imagen, un nudito. Y luego yo decidí hacer un tejido… Les explico el tejido.
Es bastante parecido al que usamos en esta pulsera.
El hilo de la derecha, pasará por encima del hilo del centro. Luego, el hilo de la izquierda pasará por detrás del hilo del centro, y saldrá entre el hilo de la derecha y el del centro. Ok.
Pero luego de esto, ahora tomamos el hilo de la izquierda, lo pasamos por encima del hilo del centro. Luego, el hilo de la derecha pasa por detrás del hilo del centro, y saldrá entre el hilo de la izquierda y el hilo del centro.
Después, otra vez. El hilo de la derecha, pasará por encima del hilo del centro. Luego, el hilo de la izquierda pasará por detrás del hilo del centro, y saldrá entre el hilo de la derecha y el del centro. Ya.
Así sucesivamente…
 |  |
|---|
No hay que tejer tanto tampoco, con tres nuditos bastaría, es solo un cierre.
Cuando terminamos de tejer, cortamos las puntitas sobrantes y las calentamos para aplacarlas y fijarlas, como les expliqué anteriormente.
 |  |
|---|
Ahora, viene el paso final: Las puntas.
Primero, las corté para que queden las dos exactamente del mismo tamaño, y luego hice dos nuditos, tal como se ve en la segunda imagen.
El siguiente paso es… Adivinaron, lo vamos a calentar para aplacarlo y fijarlo.

Una vez aplacadas y fijadas las puntas muy bien, para que no se suelten, ya estaría.
Disfruto mucho de hacer estas pulseras tejidas. Quería ponerle alguna cuenta o adorno, pero el hilo de cola de ratón es muy grueso para las cuentas que tenía… Me tocará comprar unas que funcionen, y además, más hilo. Quiero tejer muchas pulseras más, espero que me acompañen en las que vendrán a futuro.


Sin nada más que añadir, espero que les haya gustado el post tanto como a mí. Cuídense, tomen mucha agua, no se olviden de sonreír, ¡y que tengan un lindo día!


Credits | Créditos
- English translation DeepL (sorry for any mistakes, I don't know much English)
- Traducción al inglés DeepL (lo siento por cualquier error, no sé mucho inglés.)
- Cover, dividers, and banners made in Canva
- Portada, separadores y banners hechos en Canva
- Photos taken by me, using a Samsung Galaxy J6
- Fotos tomadas por mí, usando un Samsung Galaxy J6
¡¡¡Te quedó precioso el bracelete!!! ¡Deberías de poner a la venta! ¡Muchos saludos! !PIZZA !BBH HUESO
¡Muchas gracias por el apoyo! Y me alegro de que te haya gustado. Sí, estaba aprendiendo a hacer otros modelos para vender quizá jsjs
¡Genial! ¡Sé que te va a ir muy bien con eso! ¡Te quedan preciosos! !PIZZA !BBH
@celely! @cpol likes your content! so I just sent 1 BBH to your account on behalf of @cpol. (2/50)
(html comment removed: )
)
Very good job, considering you haven't done it for so long, you did it very well and you showed us a very neat and easy to follow step by step. Good luck to you.
Thank you very much for your comment and support! I'm glad I'm doing well. ☺️
Thank you very much for your support! 💖
excelente niña, te quedo hermosa, espero continues
Muchas gracias! Eso intentaré nwn
Te quedo genial.❤️
Muchas gracias, lindo día 💙🌻
Gracias, feliz día.🤗🌹
!HUESO
!HUESO
@celely! @cpol likes your content! so I just sent 1 BBH to your account on behalf of @cpol. (1/50)
(html comment removed: )
)
!HUESO
!BHRT
$PIZZA slices delivered:
@cpol(2/15) tipped @celely (x2)