
This is the first of a series of tutorials about this magnificent frontend or interface -whatever you want to call it- that is increasingly being used by #HIVE users for publishing content.
About a year ago I left the traditional interface of hive.blog at a time that presented several problems with the nodes, especially for loading images.
Even once, believing that I had not published the article because the interface did not recognize it in that state, I published it again, resulting in the same post repeated at an interval of a few minutes. I made the clarification, obviously it was silenced by the community in which I was publishing, and it served me as an experience.
From that moment on I started using PeakD without problems until today. Lately PeakD has incorporated new features of relevance, among which is the verification of the profile and the possibility of creating new accounts that you can consult from this link in an official publication of the Community.
Actually this series of tutorials or guides will be quite basic and mostly intended for the group of new users that day by day are peeking on the horizon of #HIVE and try a new experience making the logical mistakes that we all have made at the beginning.
Therefore, by illustrating the main features of this interface, we will try to reduce them (the mistakes) to the minimum necessary.
Many of the concepts presented in these tutorials have already been published before by other users. The purpose that encourages me to make this guide is to make a kind of systematically ordered manual for new users, with the help and contribution of those who have more experience.
In short, a kind of "PeakD for Dummies" as it is usual to title this kind of guides in English.
Here we go!
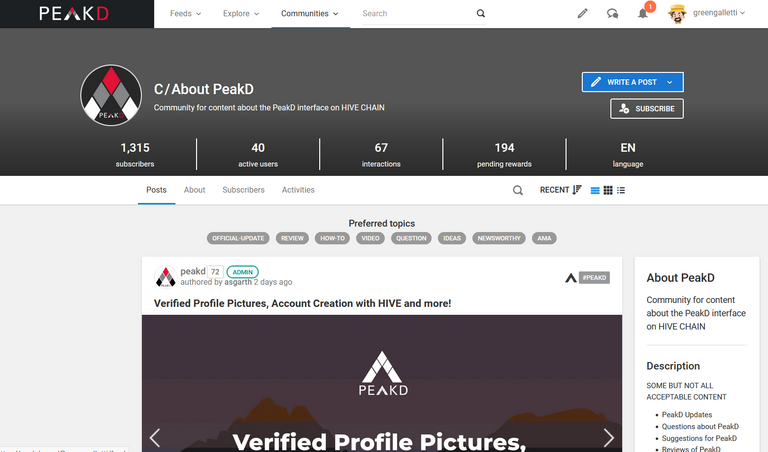
Este es el primero de una serie de tutoriales sobre este magnífico frontend o interfaz -como quieran llamarlo- que cada vez está siendo más usado por los usuarios de #HIVE para la publicación de contenidos.
Hace cerca de un año que he dejado la tradicional interfaz de hive.blog en un momento que presentaba diversos problemas con los nodos, especialmente para cargar las imágenes.
Incluso en una oportunidad, creyendo de no haber publicado el artículo porque la interfaz no lo reconocía en ese estado, lo volví a publicar, dando como consecuencia el mismo post repetido a intervalo de pocos minutos. Hice la aclaración, obviamente fue silenciado por la comunidad en la que publicaba, y me sirvió de experiencia.
A partir de ese momento comencé a utilizar PeakD sin problemas hasta hoy. Últimamente PeakD ha incorporado novedades de relevancia, entre las cuales se cuenta la verificación del perfil y la posibilidad de crear nuevas cuentas que pueden consultar desde este enlace en una publicación oficial de la Comunidad.
En realidad esta serie de tutoriales o guías serán bastante básicos y más que nada destinados al grupo de nuevos usuarios que día a día van asomando en el horizonte de #HIVE y prueban una experiencia nueva cometiendo los lógicos errores que todos hemos cometido al inicio.
Por lo tanto, ilustrando las principales características de esta interfaz, trataremos de reducirlos (loe errores) al mínimo necesario.
Muchos de los conceptos presentes en estos tutoriales han sido ya publicados con anterioridad por otros usuarios. El objeto que me anima a hacer esta guía es hacer una especie de manual ordenado sistemáticamente para los nuevos usuarios, con la ayuda y contribución de aquellos que tienen más experiencia.
En fin, una especie de "PeakD for Dummies" como se estila titular este tipo de guías en inglés.
¡Ahí vamos!
Interface login. / Ingreso a la interfaz.
The login can be done if they are already users through four different applications:
- Keychain for Hive
- Hive Auth
- PeakLock
- HiveSigner
Hive Auth is the last recognized application to login to PeakD, thus expanding the universe of recognized applications.
In my case I have gotten used to using Keychain for hive, since it is available as an extension for most browsers, but any of the three are extremely valid and secure.
In contrast, I use HiveSigner only for transactions. But these are personal choices that do not alter the validity and performance of one or the other.
Once logged in, the entire PeakD universe is displayed before our eyes.
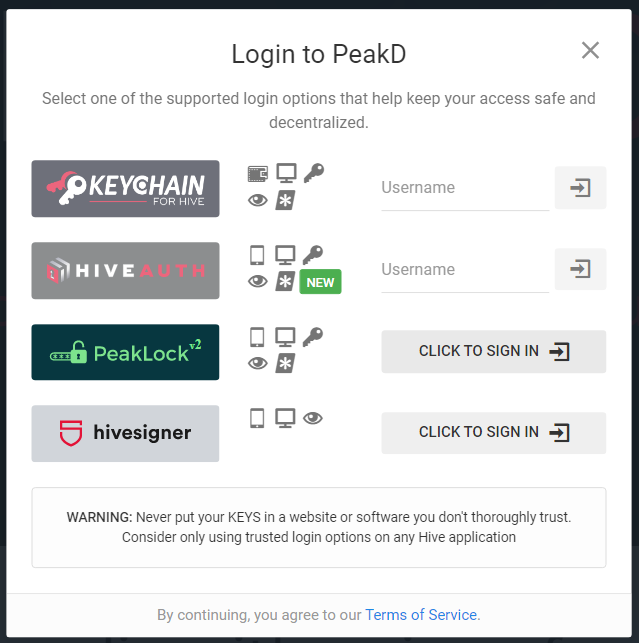
El login pueden hacerlo si ya son usuarios a través de cuatro aplicaciones distintas:
- Keychain for Hive
- Hive Auth
- PeakLock
- HiveSigner
Hive Auth es la última aplicación reconocida para ingresar en PeakD, ampliando de esta manera el universo de aplicaciones reconocidas.
En mi caso me he habituado a usar Keychain for hive, ya que está disponible como extensión para la mayor parte de los navegadores, pero cualesquiera de las tres son sumamente válidas y seguras.
Por el contrario, empleo HiveSigner solo para las transacciones. Pero son elecciones de carácter personal que no alteran para nada la validez y las prestaciones de una u otra.
Una vez ingresados tenemos desplegado ante nuestros ojos todo el universo de PeakD
Panorama general. / General overview.
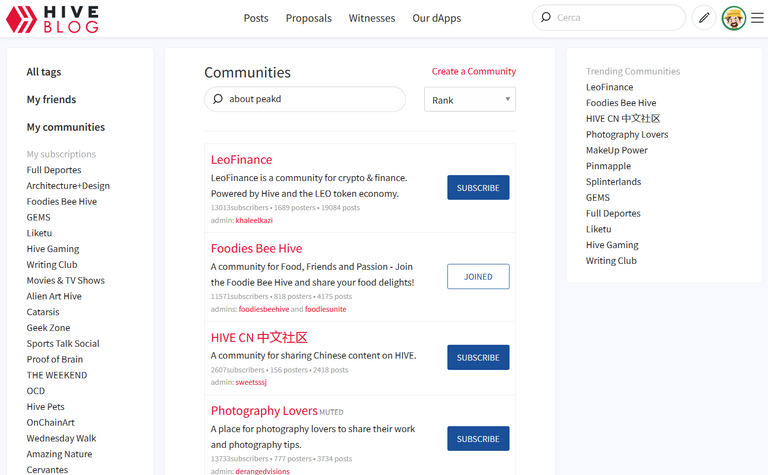
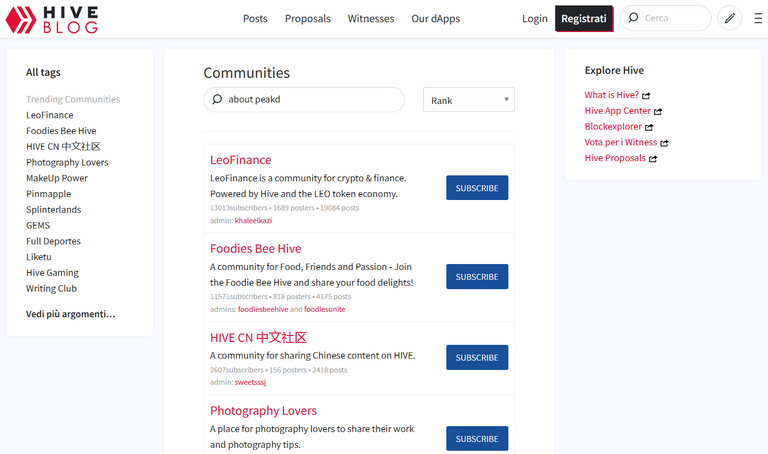
The first image we have in front of our eyes are the Communities sorted by their highest relevance, just as we see them in Hive.blog when we are not logged in.
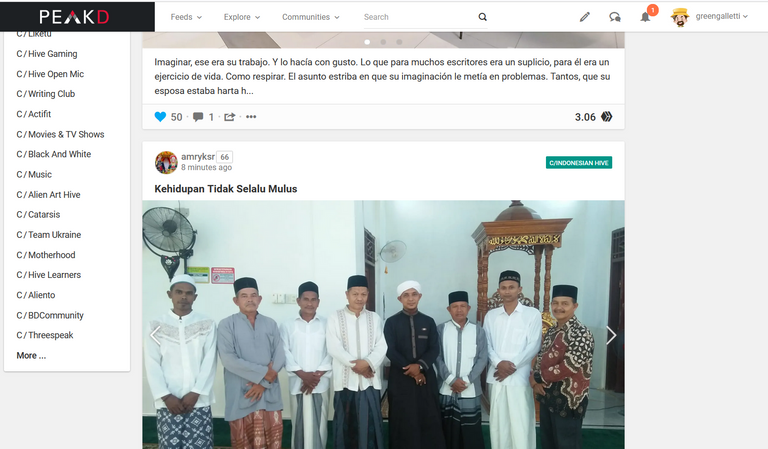
Here we see the first difference and I illustrate it with a triple screenshot.
In the first image on the left you see the situation in PeakD (in this case of this writer) when you are logged in. In the second image (corresponding to hive.blog) apparently the same as far as the order is concerned, the communities is a screenshot without having registered, i.e. generic. While the third screenshot always from hive.blog you can see the order of the communities once I have logged in.
I have pointed out this bug in the official #Hive interface more than once because it creates a kind of annoyance when I want to register in a new Community.
I explain it with pictures because, as the saying goes, a picture is worth a thousand words.
In this first post on the About PeakD Community, if I want to subscribe to it from PeakD, I can simply scroll down to click More, type About PeakD in the search box at the top, select the Community I'm looking for, and click Subscribe.
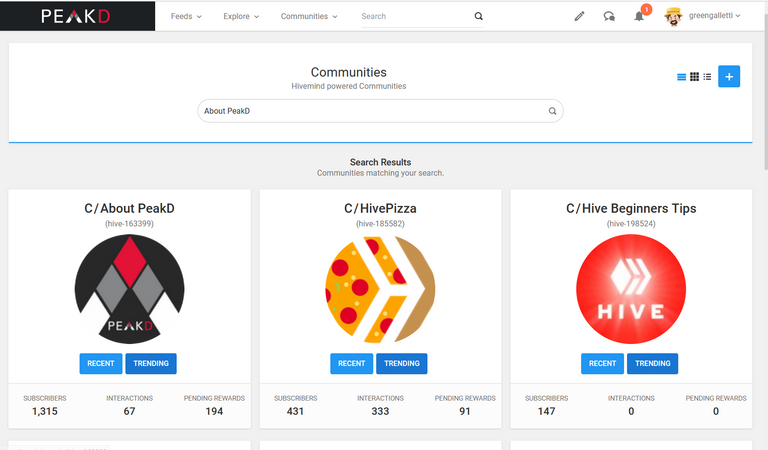
In the center of the page we see the feed of all the users we follow and in the right column our favorite curators and our favorite users.
We can also filter those users we want to exclude from reblogging, voting, my favorites and my lists, apart from the filter that allows us to choose the display style of the posts that appear.
By default the "blog" style is chosen but we can also select the "grid" style or the "list" style, perhaps the most practical for grouping results.
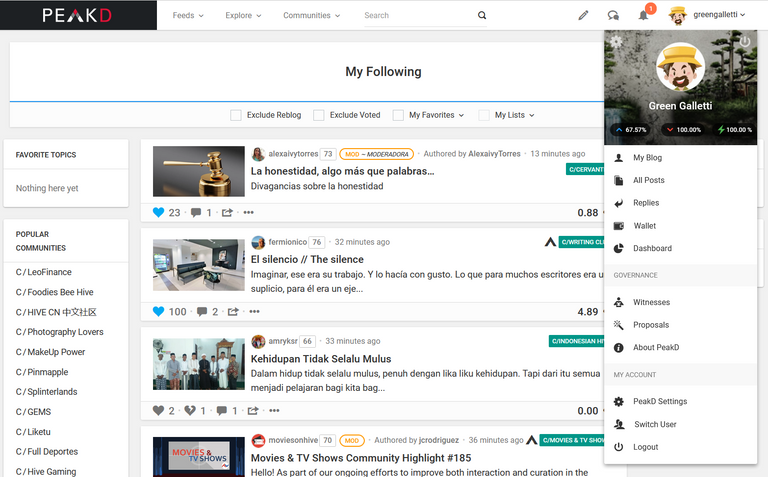
While if we click on the icon of our profile on the right we will see the general menu of the entire application.
Finally, at the top, we have three tabs, plus the search column "Search".
The first tab is related to "Feeds" and we can configure it by creating lists with specific topics and indicating who we follow in those lists.
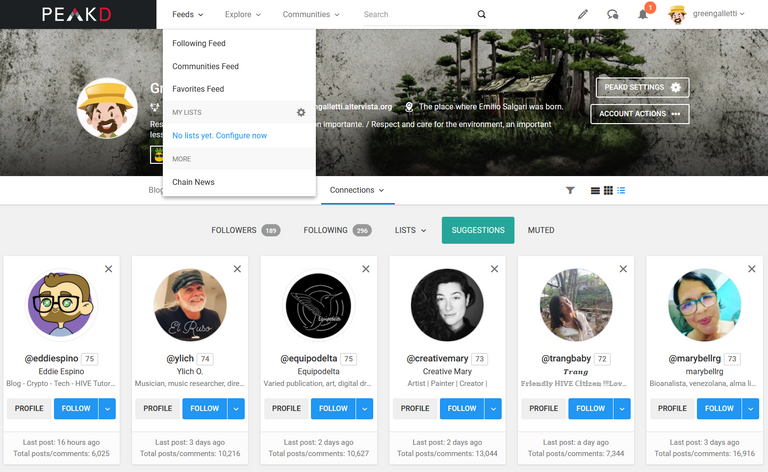
All of these topics will be discussed in more detail in subsequent posts. For the moment I try to mention only the features of each one.
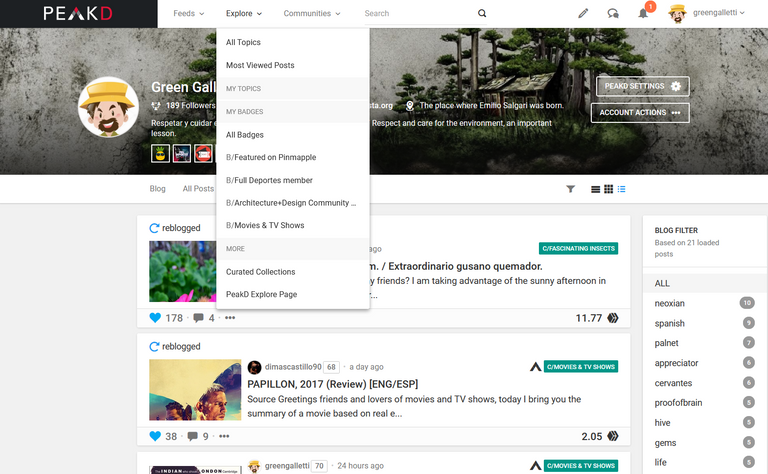
In the second tab "Explore" and through it we can filter the most voted posts, badgets, etc. while on the right we are presented with a list of the most voted tags. This is extremely important. Previously hive.blog had a page dedicated to tag popularity, but it is totally outdated.
Finally, the tab dedicated to "Communities". I randomly selected the Pinmapple community and on the right PeakD presents the best tags from the last 21 posts read, sorted from highest to lowest. A SEO information of paramount importance to attract the attention of curators and big whales. If we keep scrolling down, new posts are read and the tag information is automatically updated.
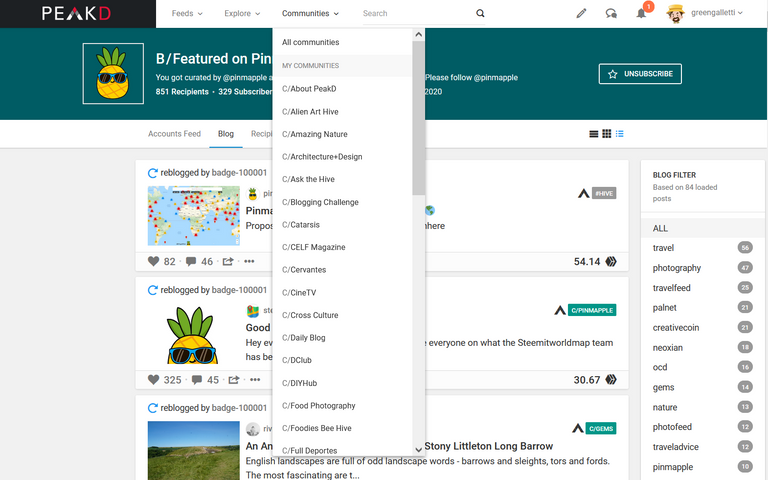
I just kept scrolling down the page and PeakD already has 84 posts with all the information related to the most popular tags.
All this is what the PeakD interface offers us at a glance without having made any decision yet, that is, without moving from it.
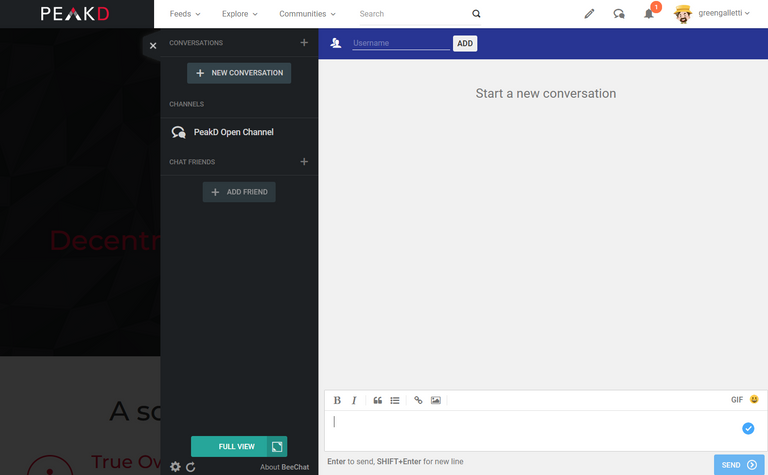
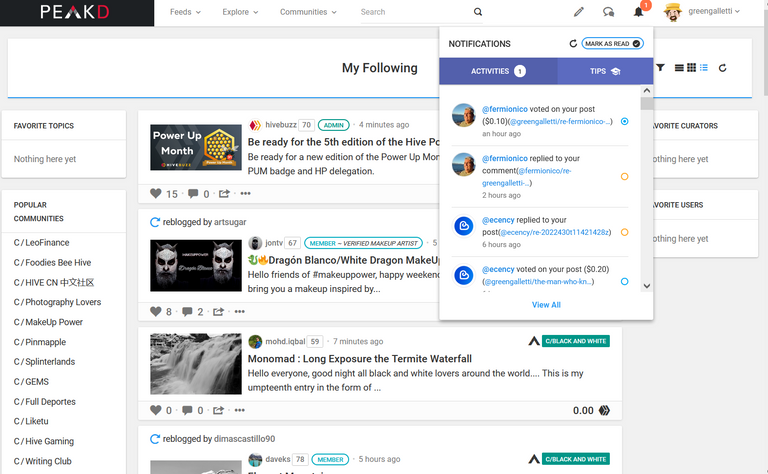
The last two buttons on the right are for:
- create a new post (indicated by the pencil), look at drafts, scheduled posts, change template models or create a collection of posts,
- start a chat conversation
- view the notifications received (in red the ones we have not read yet).
See you in the second part dedicated to PeakD.
 |  |  |
|---|
La primera imagen que tenemos delante de nuestros ojos son las Comunidades ordenadas por su mayor relevancia, de igual manera que las vemos en Hive.blog cuando no estamos logueados.
Aquí vemos la primera diferencia y la ilustro con una triple captura de pantalla.
En la primera imagen a la izquierda ven la situación en PeakD (en este caso de quien escribe) una vez logueado. En la segunda imagen (corresponde a hive.blog) aparentemente igual en lo que respecta al orden, las comunidades es una captura sin haberme registrado, es decir genérica. Mientras que la tercera captura siempre de hive.blog pueden ver el orden de las comunidades una vez que me he logueado.
He señalado este bug en la interfaz oficial de #Hive más de una vez porque crea una especie de fastidio cuando quiero inscribirme en una Comunidad nueva.
Lo explico con imágenes porque, como dice el refrán, una imagen vale más que mil palabras.
En este primer post en la Comunidad About PeakD, si quiero inscribirme en ella desde PeakD, puedo simplemente desplazarme hacía hacer clic en More, escribir About PeakD en la casilla de búsqueda en la parte superior, seleccionar la Comunidad que estoy buscando, y hacer clic en Subscribe.
En el centro de la página vemos el feed de todos los usuarios que seguimos y en la columna de la derecha nuestros curadores favoritos y nuestros usuarios favoritos.
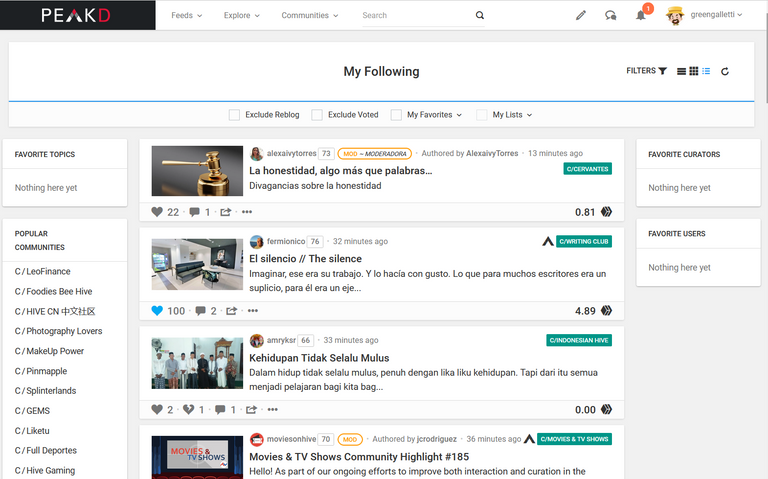
También podemos filtrar a aquellos usuarios que queremos excluir del reblog, del voto, mis favoritos y mis listas, aparta del filtro que nos permite elegir el estilo de visualización de los posts que van apareciendo.
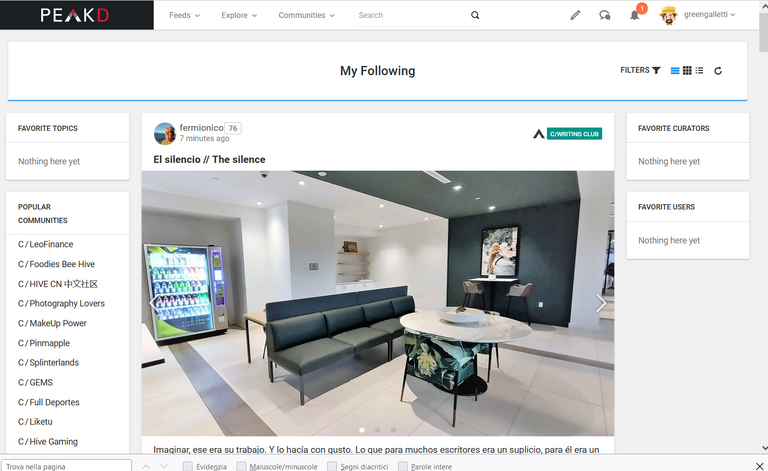
Por defecto es elegido el estilo "blog" pero podemos también seleccionar el estilo "grid" o el estilo "list" tal vez el más práctico para agrupar resultados.
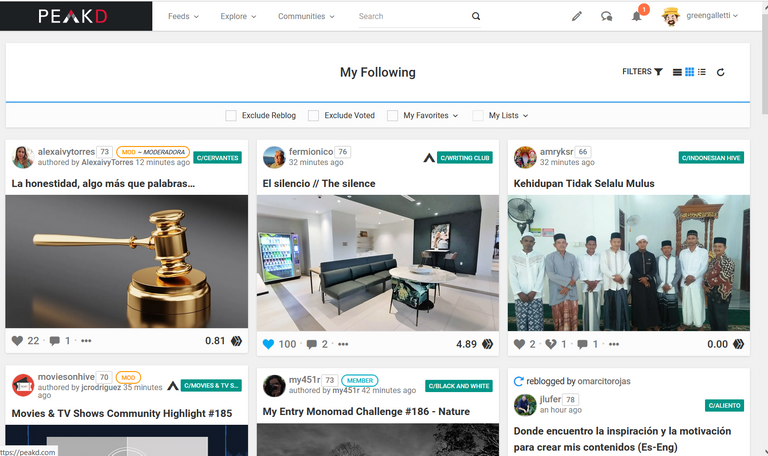
Mientras que si hacemos clic en el icono de nuestro perfil a la derecha veremos desplegarse el menú general de toda la aplicación.
Por último, en alto, tenemos tres pestañas, más la columna de búsqueda "Search".
La primera pestaña es relativa a los "Feeds" y podemos configurarla creando listas con temas específicos e indicando a quienes seguimos en esas listas.
Todos estos temas serán profundizados en posts sucesivos. Por el momento trato de mencionar solo las características de cada una.
En la segunda pestaña "Explore" y a través de ella podemos filtrar los post más votados, los badgets, etc. mientras a la derecha nos va presentando una lista de los tags más votados. Esto es sumamente importante. Antes hive.blog tenía una página dedicada a la popularidad de los tags, pero está totalmente desactualizada.
Por último, la pestaña dedicada a las "Comunidades". He seleccionado al azar la comunidad Pinmapple y a la derecha PeakD presenta ordenados de mayor a menor los mejores tags relevados en los últimos 21 post leídos. Una información SEO de capital importancia para llamar la atención de curadores y grandes ballenas. Si seguimos desplazándonos hacia abajo, nuevos posts son leídos y la información sobre los tags viene actualizada automáticamente.
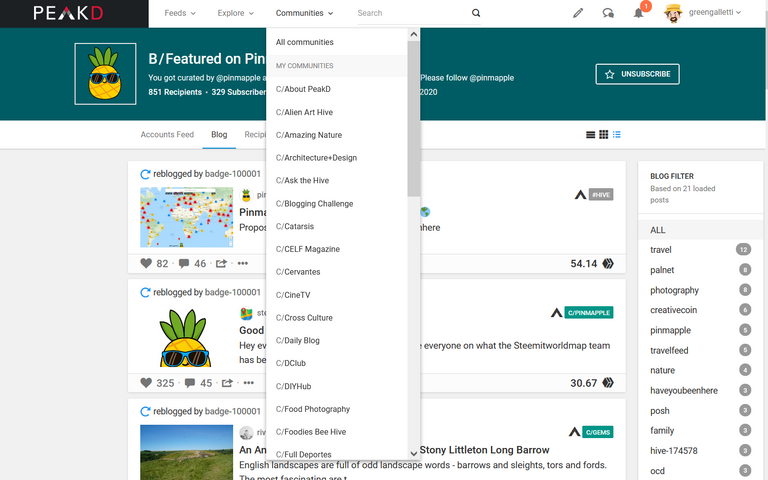
Me limité a seguir explorando la página hacia abajo y PeakD ya ha relevado 84 posts con toda la información relativa a las tags más populares.
Todo esto es lo que nos ofrece la interfaz de PeakD a simple vista sin haber tomado todavía ninguna decisión, es decir, sin movernos de la misma.
Los últimos tres botones a la derecha son para:
- crear un nuevo post (indicado por el lápiz), mirar los borradores, los posts programados, cambiar los modelos de la plantilla o crear una colección de posts,
- iniciar una conversación en chat
- ver las notificaciones recibidas (en rojo las que no hemos leído aún)
Nos vemos en la segunda parte dedicada a PeakD.
 |  |  |
|---|

Thanks for this post. But I want to share that access to the portal through login is your key to a world of convenience. Shop seamlessly for groceries, manage my sainsburys login to your account, and enjoy exclusive deals. It's a one-stop shop for all things Sainsbury's. Simply enter your login details and open the door to savings and ease. Join the community and improve your shopping experience.