Good day friends!!
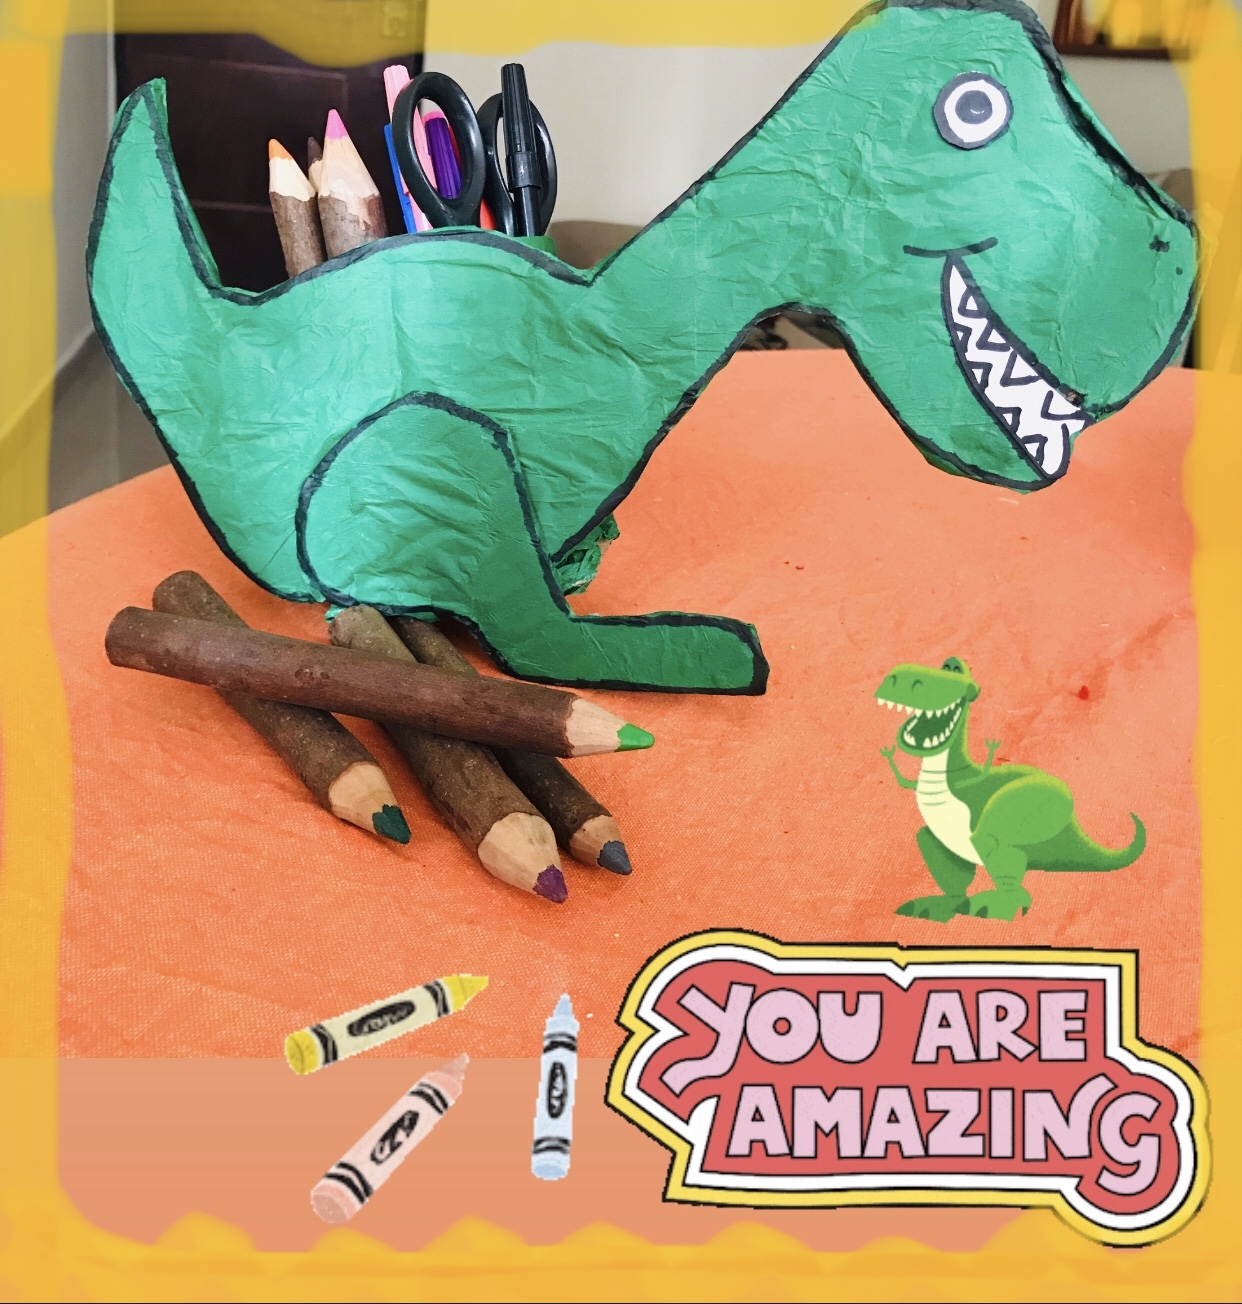
I want to share with you today, how to make an organizer of materials for the children's room.
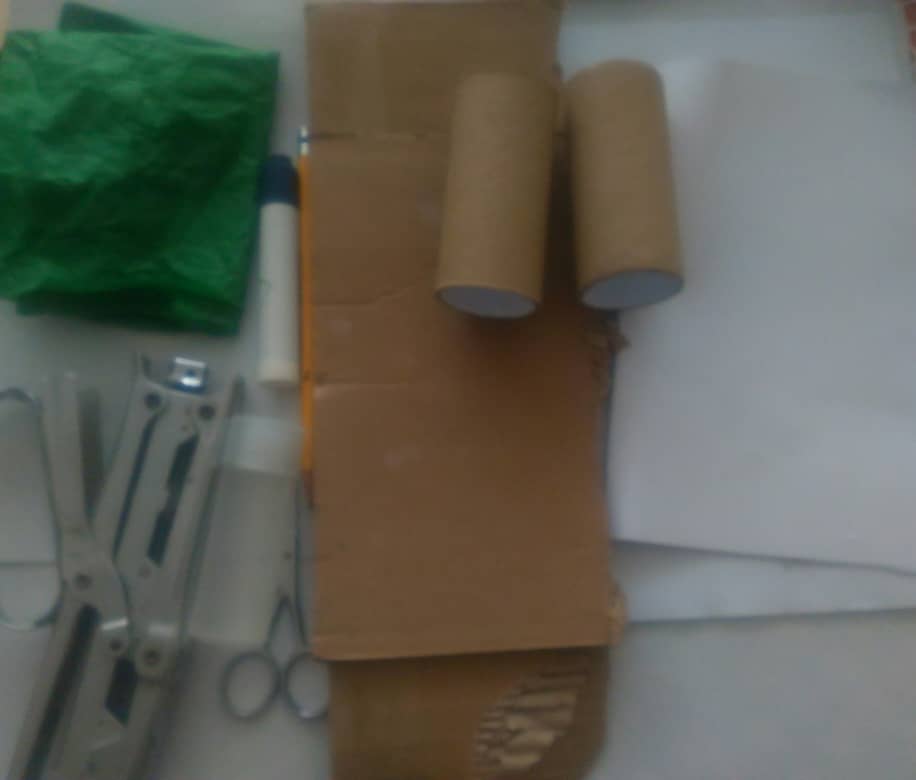
You will need:
• White sheet of paper.
• Cardboard rolls (2).
• Cardboard.
• White cardboard (square).
• Marker black.
• Green paper
• Glue
• Stapler
• Pencil
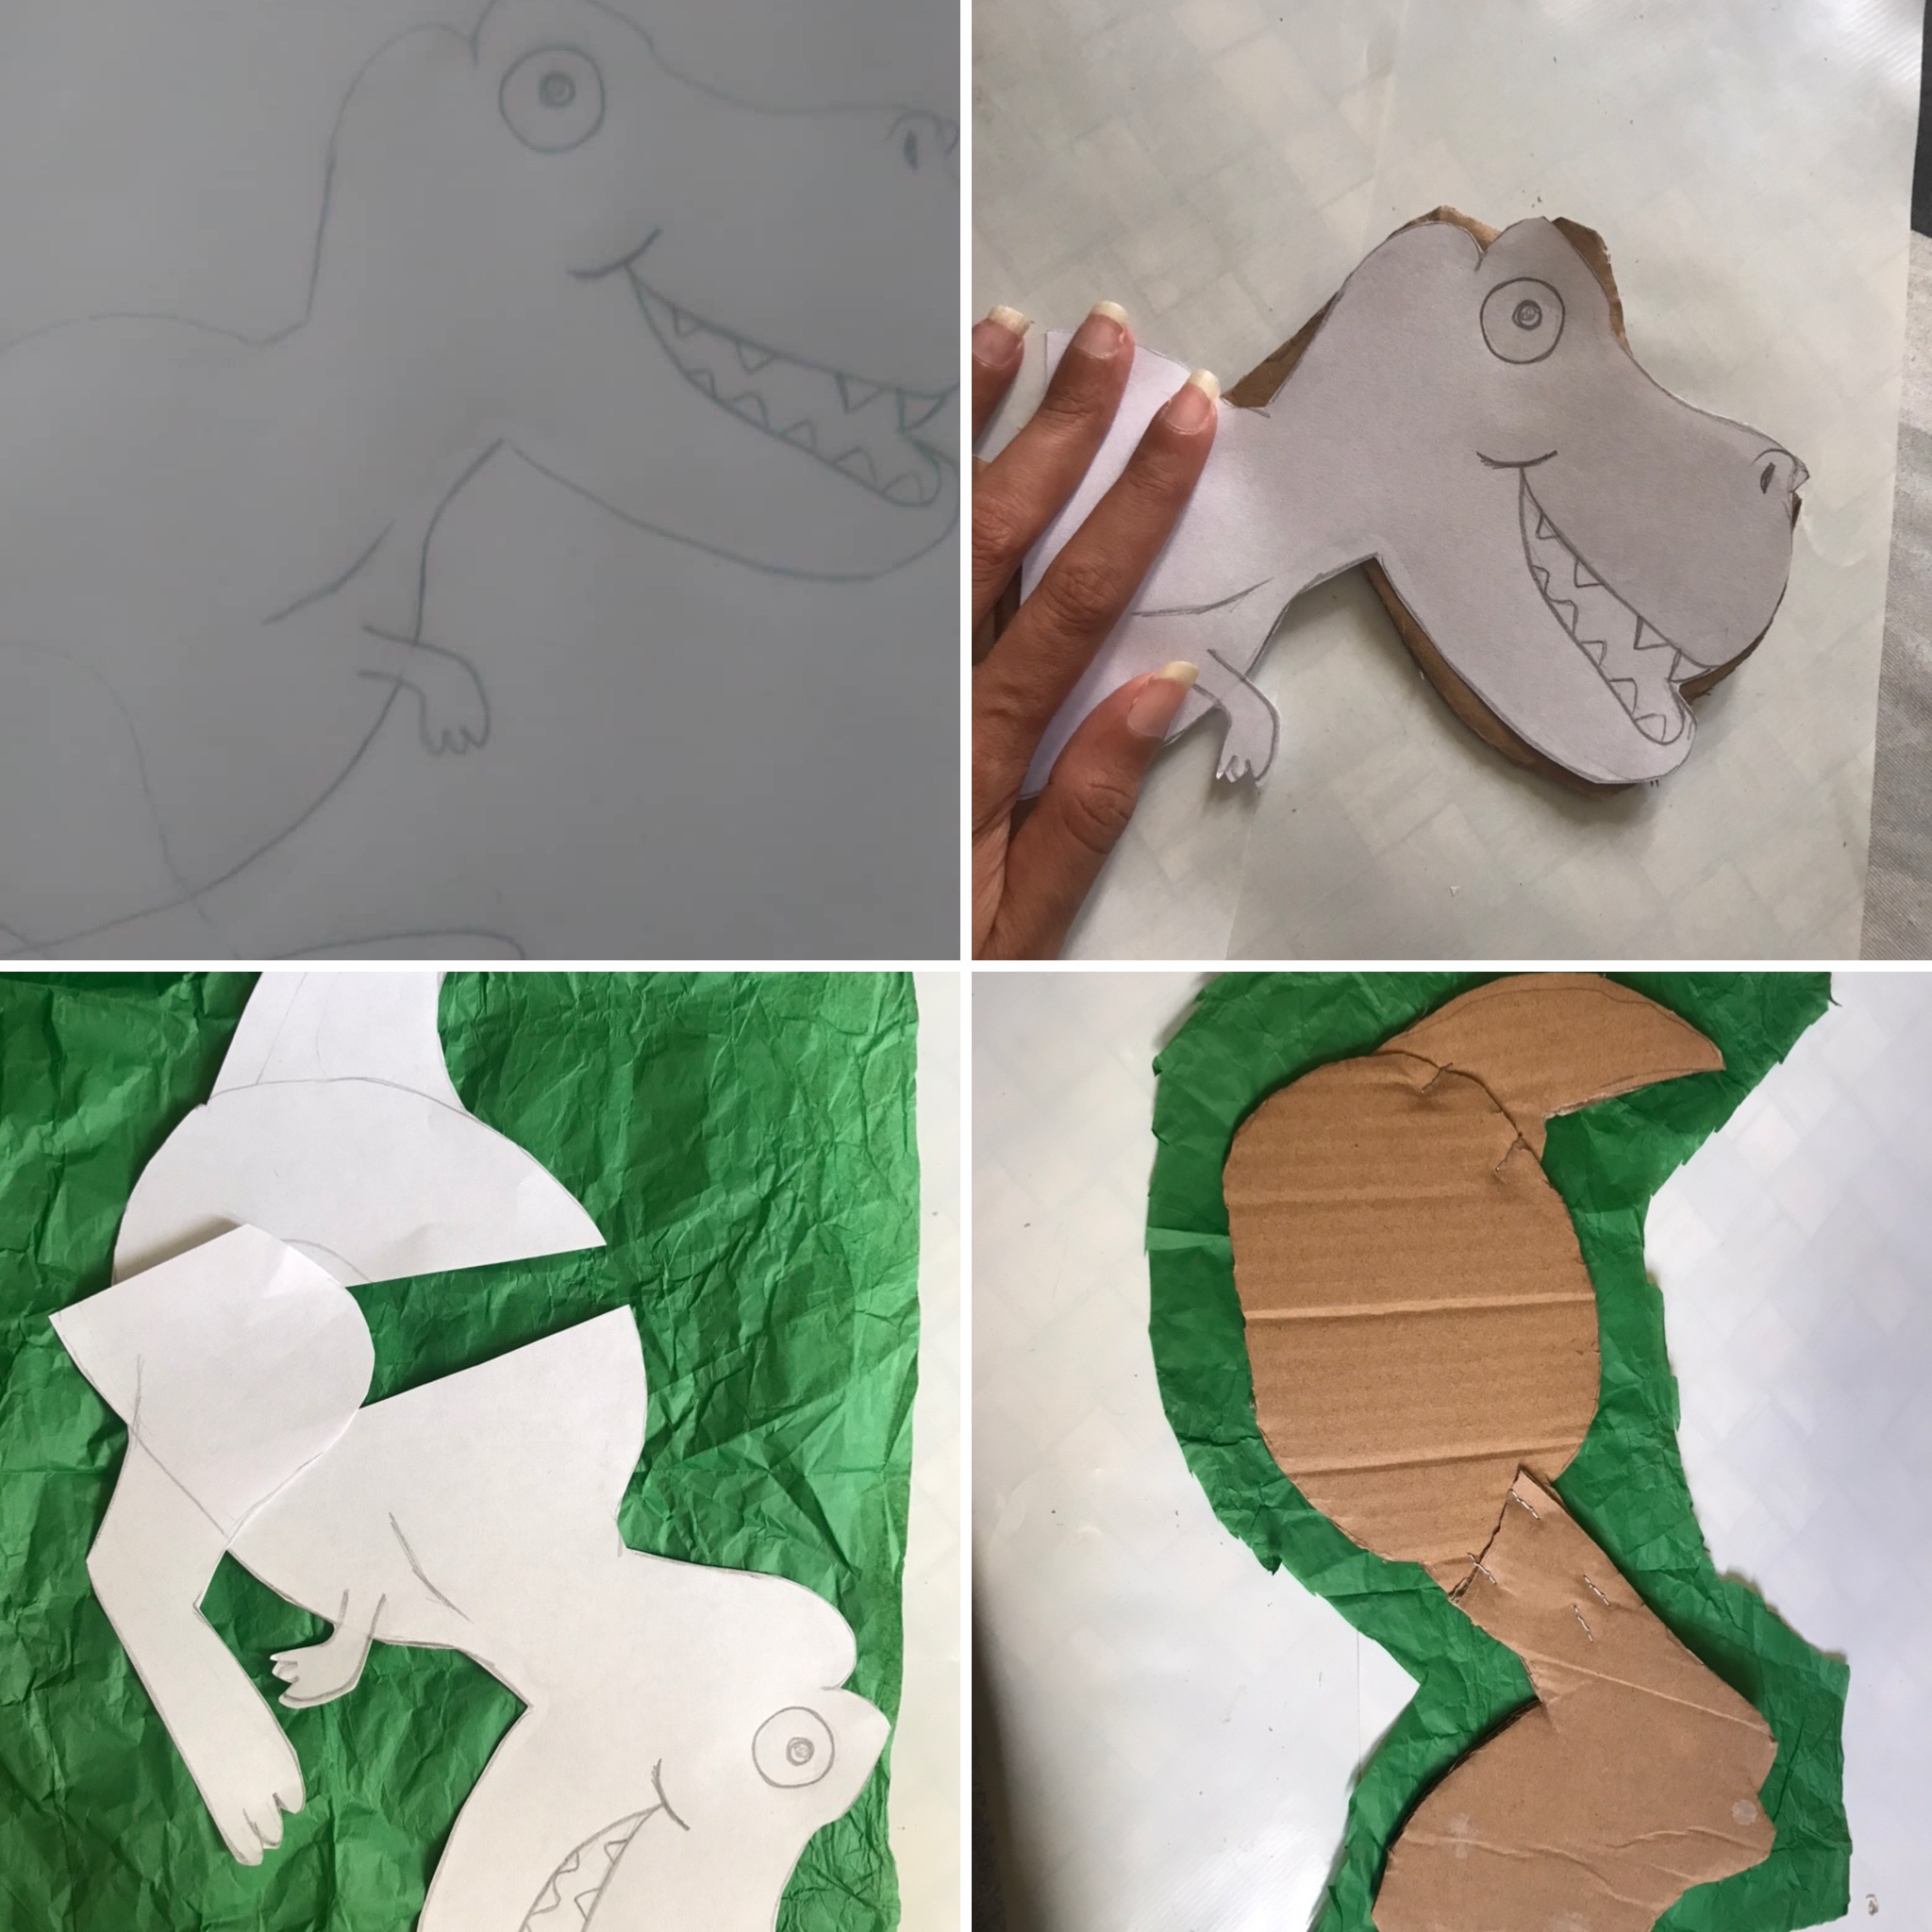
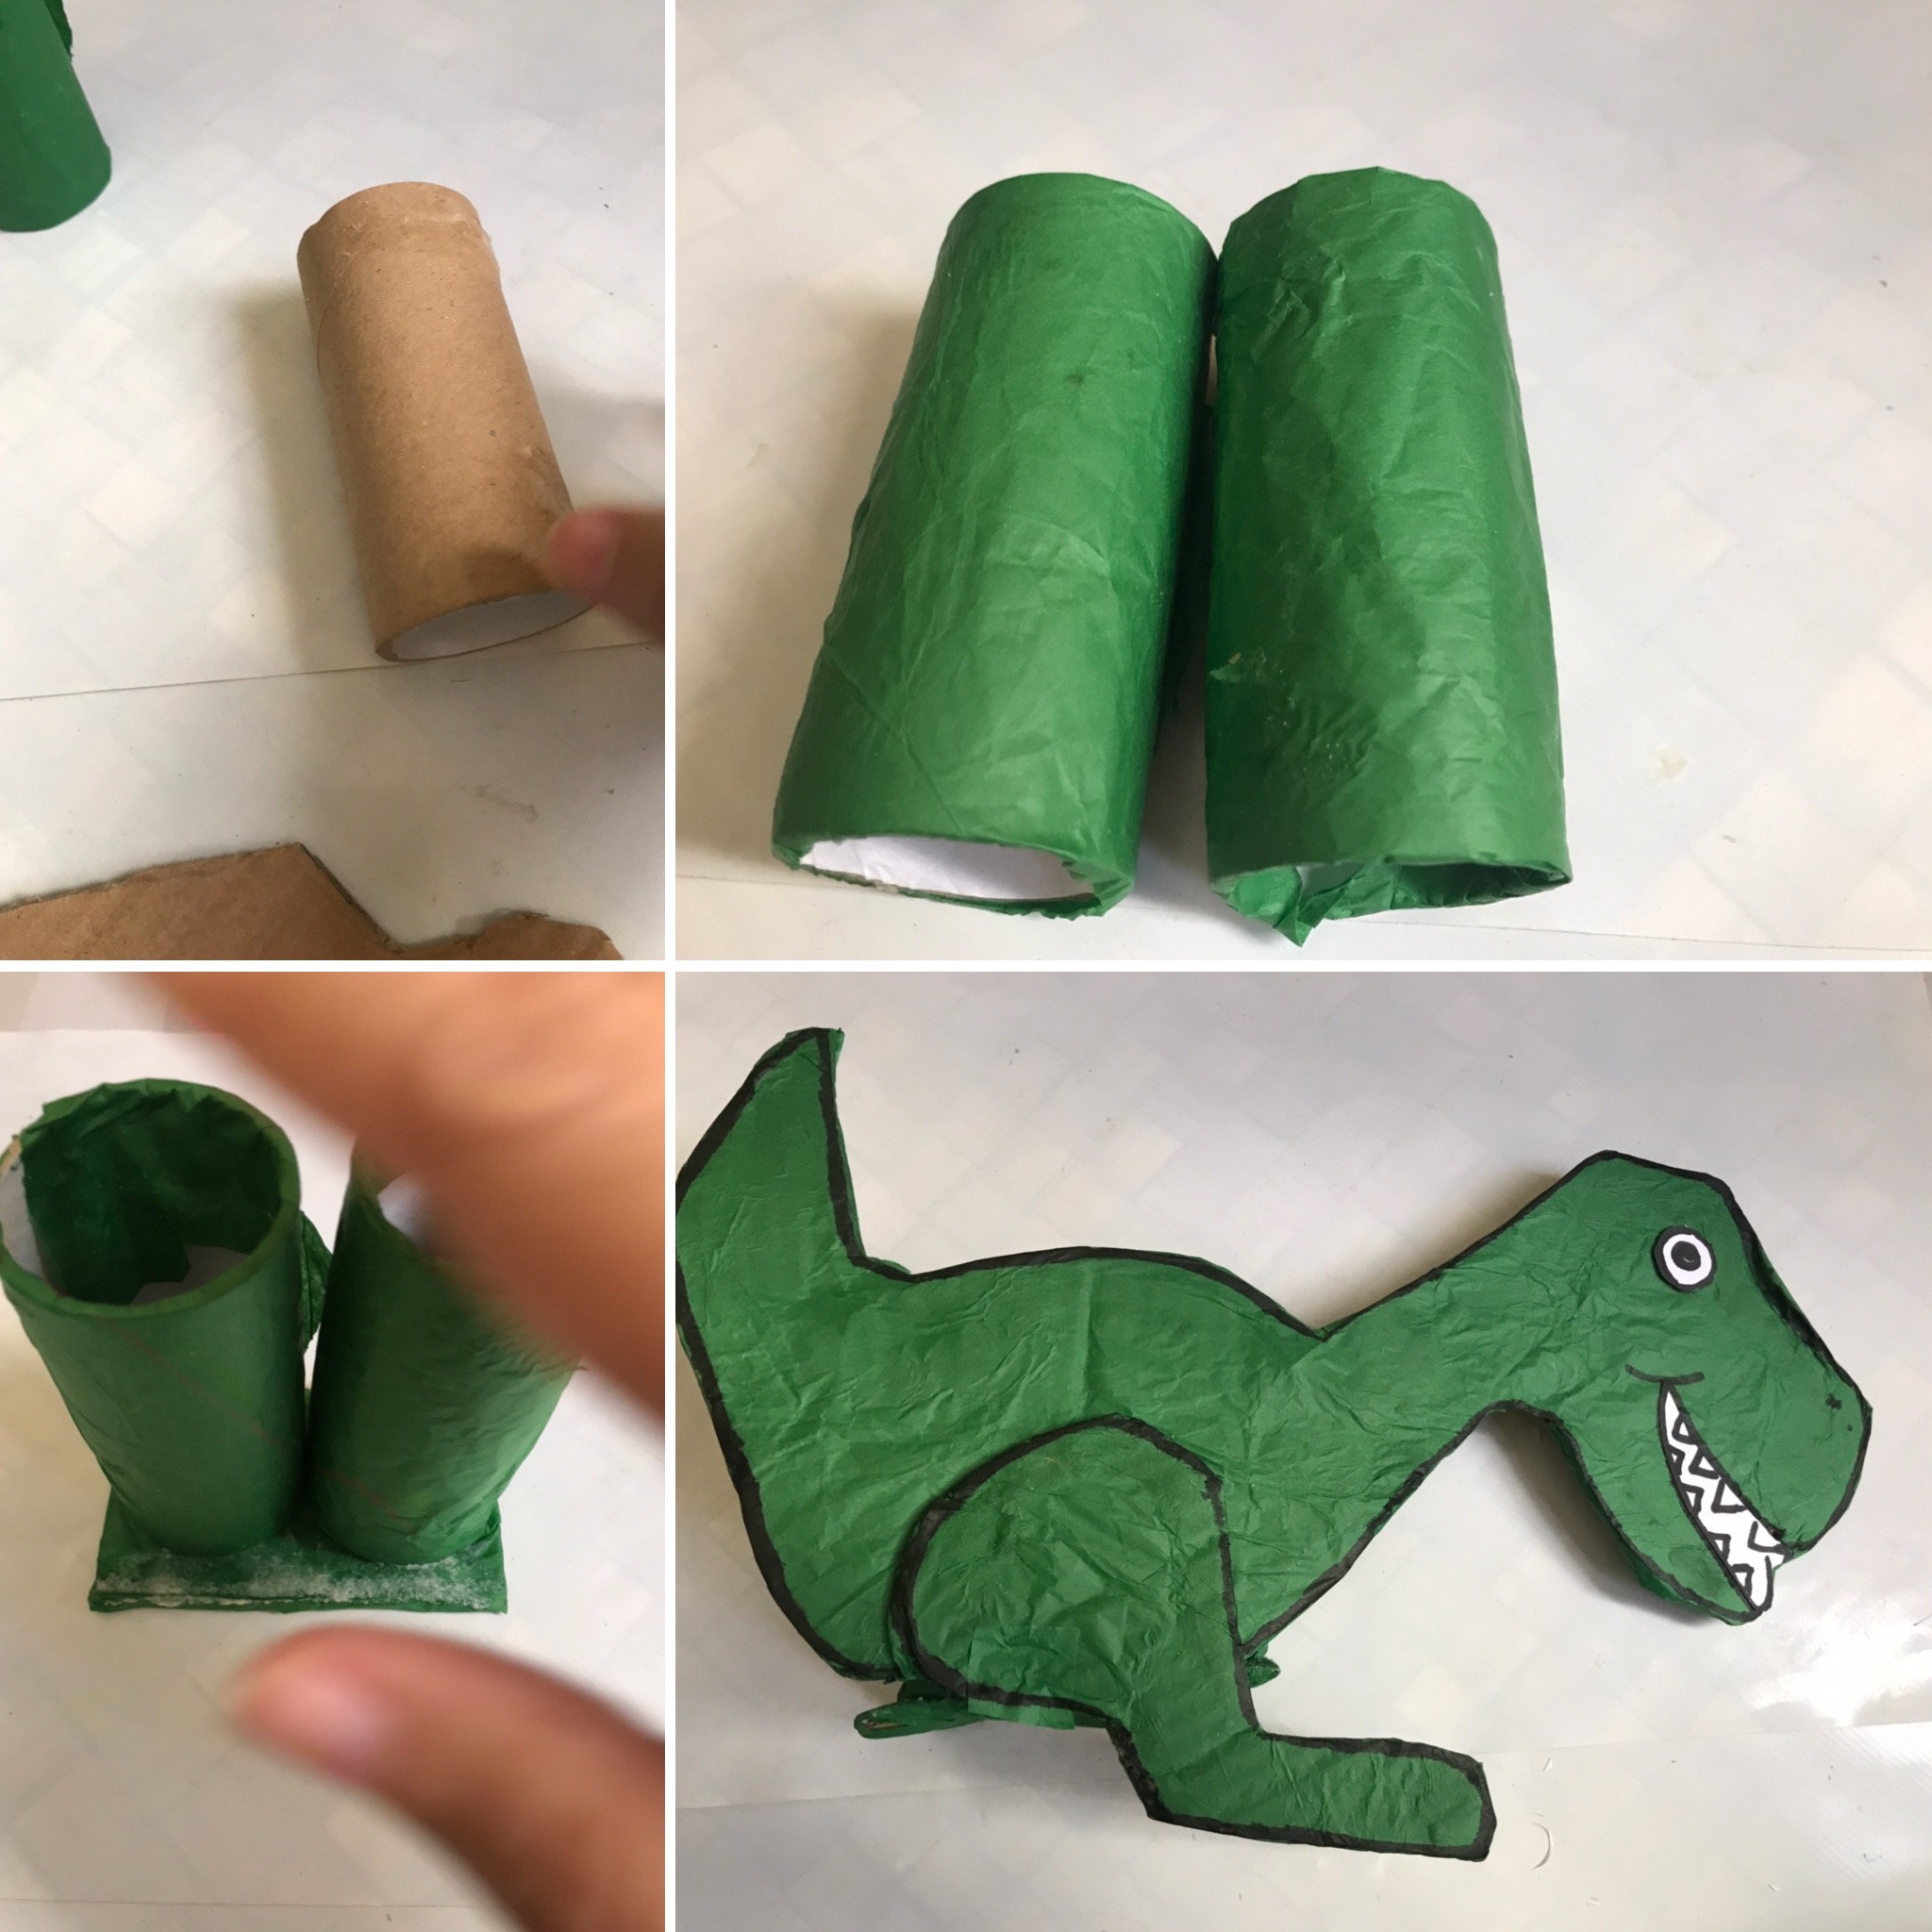
On the white sheet, design and mark the reference figure (dinosaur); then with the help of the scissors trim along the edge and take out the figure and mark on the cardboard; then use the drawing as a pattern and mark on the green paper and cut each of the parts.
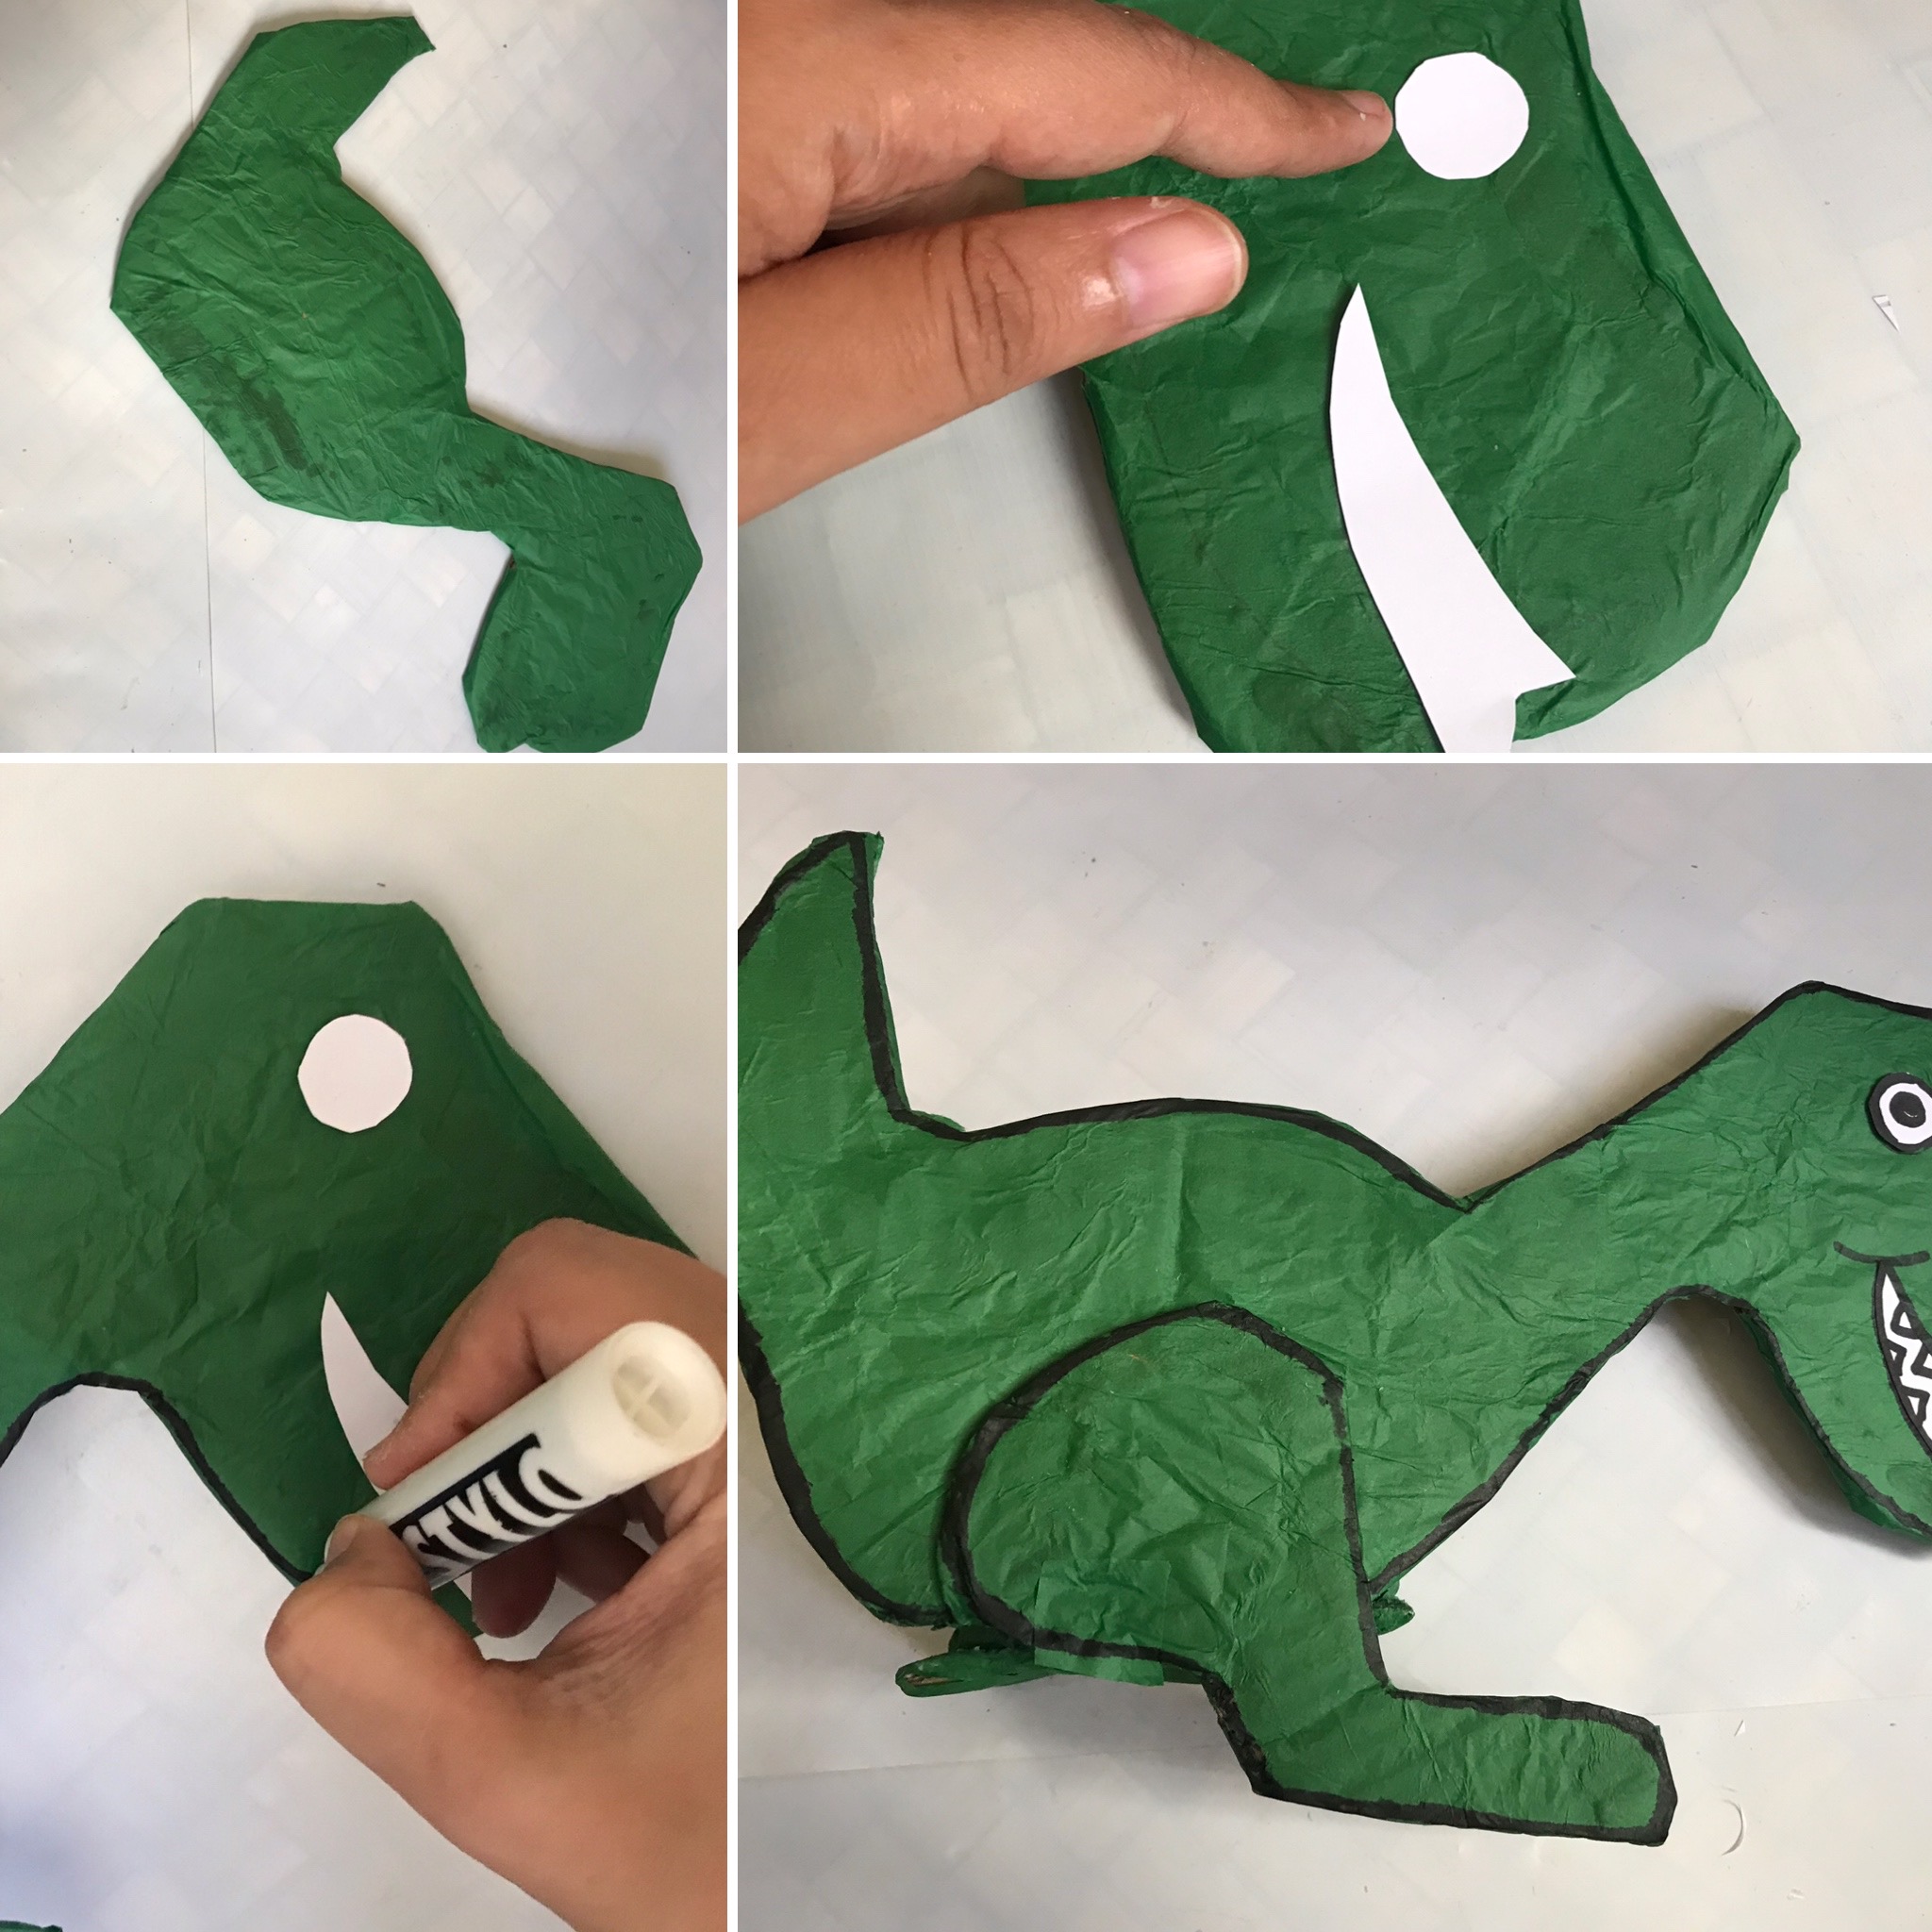
Once the figure is ready, paste on the cardboard, wait a few minutes for the glue to dry to cut on the white cardboard. eyes and teeth, glue and mark the figure with the black marker.
For the base, place the 2 rolls side by side, place on the cardboard, mark a rectangle, cut, proceed to line the rolls and the rectangle with the green paper, with the help of the glue, glue both rolls, fix them on the cardboard to finish, glue the dinosaur figure on the rolls listed.
I hope you like this fun and simple idea to make at home, that will help them to have the children's materials organized, visible and at hand, and to decorate their rooms.
I say goodbye to you, you want them .....

I want to share with you today, how to make an organizer of materials for the children's room.
You will need:
• White sheet of paper.
• Cardboard rolls (2).
• Cardboard.
• White cardboard (square).
• Marker black.
• Green paper
• Glue
• Stapler
• Pencil

On the white sheet, design and mark the reference figure (dinosaur); then with the help of the scissors trim along the edge and take out the figure and mark on the cardboard; then use the drawing as a pattern and mark on the green paper and cut each of the parts.

Once the figure is ready, paste on the cardboard, wait a few minutes for the glue to dry to cut on the white cardboard. eyes and teeth, glue and mark the figure with the black marker.

For the base, place the 2 rolls side by side, place on the cardboard, mark a rectangle, cut, proceed to line the rolls and the rectangle with the green paper, with the help of the glue, glue both rolls, fix them on the cardboard to finish, glue the dinosaur figure on the rolls listed.

I hope you like this fun and simple idea to make at home, that will help them to have the children's materials organized, visible and at hand, and to decorate their rooms.
I say goodbye to you, you want them .....
What a cute idea! Perfect to make with kids!