Hello, and welcome to my page!
In my last post, I talked about some tips for making an archery bow from a piece of wood. I don't have the pictures to support a step by step post on making a bow, so I did the best that I could with describing the process, and pointing out some of the steps involved in the process. For this post, I took a few pictures of the bows that I've made to show you some of the things that I wanted to talk about in this post.
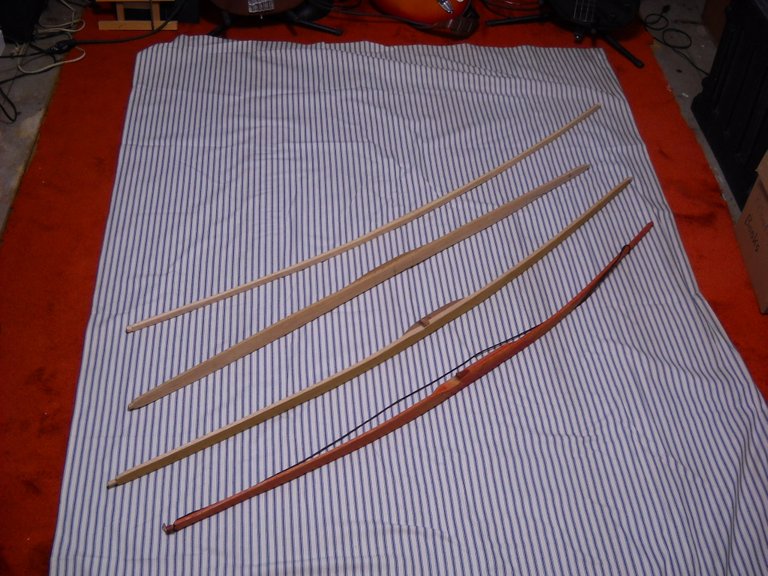
This is a picture of the four bows that I've made.
These are lined up from first to last. The first 3 are made from oak boards, and the last one was made from a hickory board that I got from the lumber store. The first bow is a reddish color because I finished it with a mixture of an artist red oil color and linseed oil. I have not put a finish on the other three.
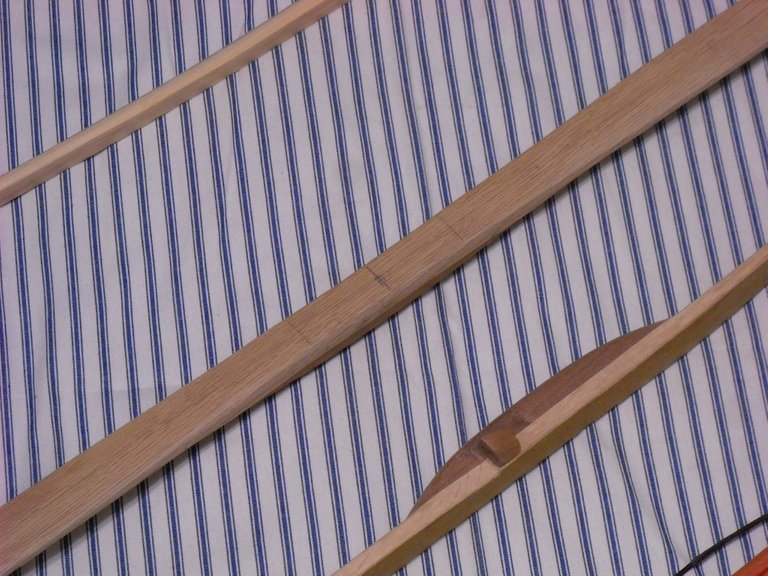
This next picture is a good example of how I laid out the middle of the bow and the grip area. The heavy line across the middle of the bow marks the center between the limbs. The line across either side of the center line marks the grip area. You may be able to see a pencil line going down the length of the bow. That line marks the center of the limbs and helps to keep the limb shape straight and symmetrical when you're shaping the limbs. You want them to both be as close to the same as you can make them.
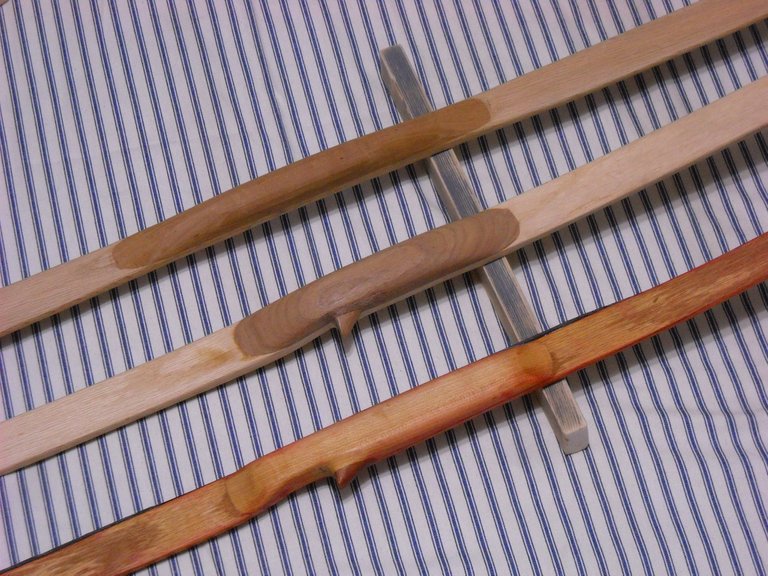
You can see how the grip area is more narrow than the limbs, and how I shaped that area. You also get a pretty good view of the grip on bow #2 in this picture. That grip was made by gluing a piece of walnut to the oak and then shaping it. I also glued a separate piece of walnut onto the side of the grip area and shaped it for an arrow rest.
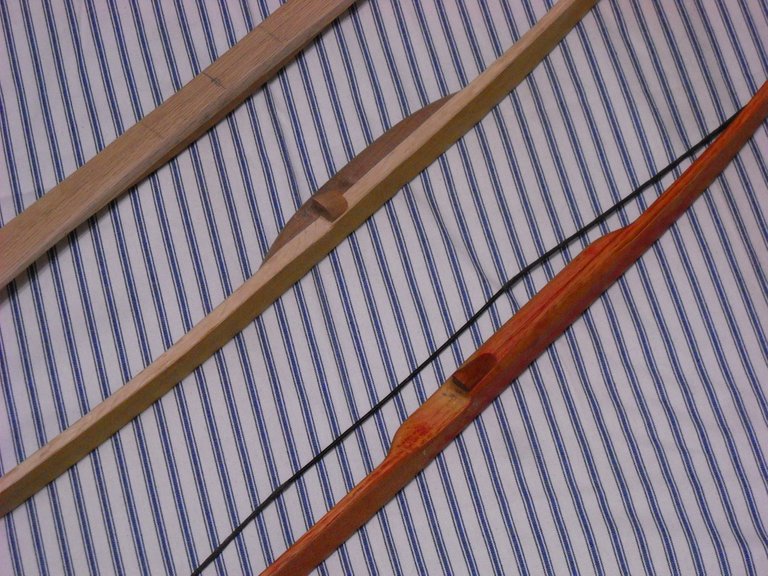
Here's another look at the arrow rest that I put on bow #1 and #2
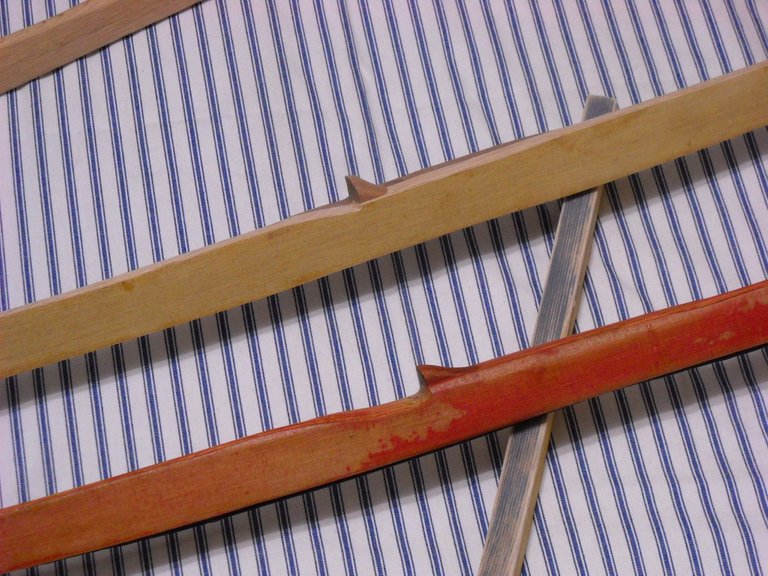
In this picture, you can see how I shaped the grip area above the arrow rest on bow #1, I cut into the side of the bow a bit for the arrow rest. The odd look of the red finish on bow #1 is due to the way that the artist's oil color mixed with the linseed oil that I finished it with. It didn't cover the surface as well as I wanted it to.
There's another look at the grip area of the first 3 bows. For bow #1, I used a piece of maple to glue onto the grip area. For bow #2, I used a piece of walnut that I had. For bow #3, I used a piece of what I think is cherry wood. You can see how the grip was contoured into the rest of the bow.
A few extra thoughts on these wood bows. If you go back and look at the bows in the first picture, you'll notice that 3 of the 4 have a curve to them, even though they're not strung. This is what is called "taking a set". This basically means that the wood does not completely return to straight after being strung and shot. Oak wood seems to be susceptible to taking a set, making it not necessarily the best wood for making a bow that will last a long time. The bow loses a bit of it's draw weight when it takes a set, and it can get worse, like bow #1 has done. Bow #2 has not been strung and shot as much, so it hasn't taken as much of a set as bow #1. Bow #3 has not been shot, I've never finished it because I discovered something that I had overlooked when I was making the bow. The grain does not run straight down the length of the bow, it's at a bit of an angle to the length of the bow. That makes it a bit more likely to break with use.
Interestingly enough, bow #4 also has a set, and I've only strung it a few times to test it. That bow is made from a hickory board, which is usually a good bow wood. I was trying to make a traditional longbow shape with it and I may have made the limbs a bit too thin. Usually, hickory makes a pretty good bow.
These bows that I've made are the 2 basic shapes for making a bow, the flat bow and the long bow. The flat bow is called that because the limbs are straight and more or less flat in cross-section. The longbow is normally straight, the limbs are narrow and have a "D" shape to the limb cross-section, with the flat part of the D facing away from the user.
You can make a recurve bow without laminating it, but you have to steam the wood and put it in a shaping jig for drying to get the wood to retain the shape. I have not tried making anything that complex, steaming the wood is the tricky part, and I don't have the equipment for that.
Well, that's all that I have for this post. Thanks for stopping by my page to check it out!

I've been toying around with making bows over the last couple years, nothing serious. I've had some excellent failures. Mine are more caveman than your own work and to date not one has worked although I'm not deterred. Every so often I get out there and have a play around, fail spectacularly, then give up for a few more months. It's so much fun.
such a wonderfully informative post and such an craft you have in creating these Bows.

curated for creativecoin