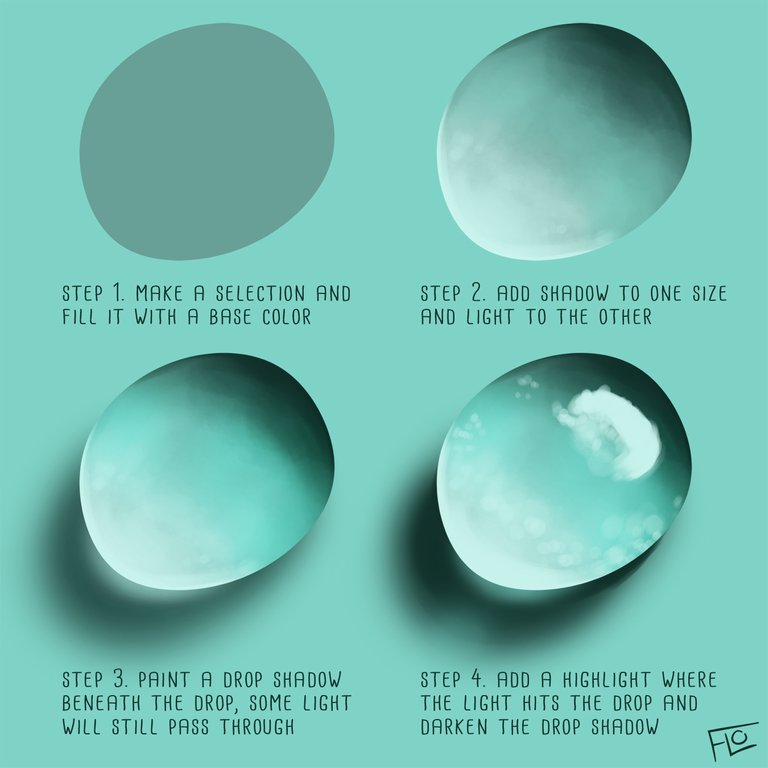
Digital art tutorial - How to paint a waterdrop step by step
Waterdrops are fun to draw and can actually be pretty simple to paint in Photoshop. In this digital art tutorial I'll be showing you how to paint a waterdrop using digital painting software and (preferably) a drawing tablet.

STEP 1 - Make a selection and fill it
First make a round selection and use 'transform selection' > 'warp' to alter the shape a bit. Fill this selection with a base tone, slightly darker than the underground.

STEP 2 - Add dark and light
Add a new layer and use 'create clipping mask' (right click on the new layer) to connect it to the base tone layer. Now you can only paint inside the basic shape of the waterdrop. Paint a slightly darker tone to the upper right of the drop and a lighter tone to the lower left of the drop.

STEP 3 - Drop shadow
Make a new layer beneath the base tone layer and paint a drop shadow. I prefer using a soft edges brush with a low opacity (around 30%) for this. Some light will pass through the drop, so also add some light on the underground.

STEP 4 - Highlight!
Add another layer and paint a bright highlight on the waterdrop. Also darken the drop shadow a bit. And you're finished!

Wanna paint a waterdrop too?! Be sure to show me your final result and tag me in your post.
Here is a little recap of the steps taken

Or watch the timelapse video of the painting process!
Have fun practicing and be sure to share your work once you're done!
Follow my account for digital art tutorials every week!

wow good work @artwithflo :)
Thank you!
WOW!
Thank You!
You're welcome, glad to hear you like it!
I love you so much!!! <3