Digital Art Drawing- Classic Lady - Step by Step progress
Hello, everyone! :)
I found some old sketch in my sketchbook and got inspired to bring it to life. This time i made screenshots of my progress, so I can show you the development of the drawing. Hope you enjoy it! :)
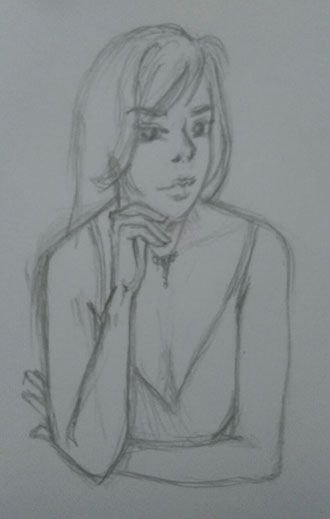
1 Step: sketch - As you can see at this stage is very rough and just a photo from my sketchbook
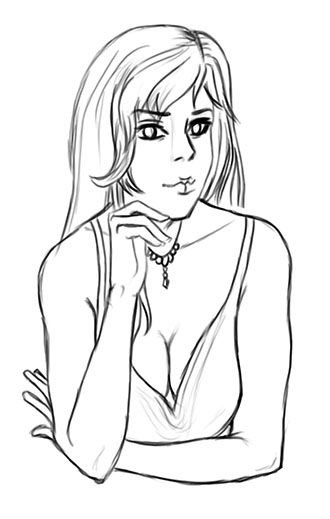
2 Step: linework in Photoshop - Here I just made a rough pass of the linework in photoshop, in order to have a transparent layer underneath, in order to be able to color without losing my lines.
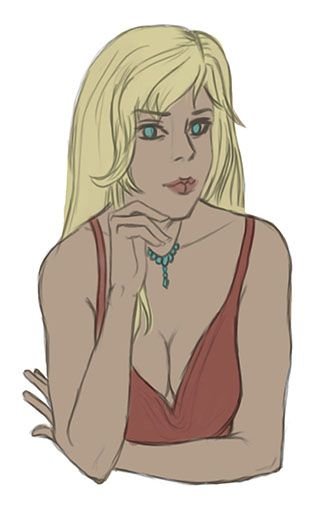
3 Step: Basic color - I put the lineart on 80% opacity and set it on multiply. Underneath on a separate layer i added the basic colors of all the elements.
4 Step: Adding shadows - After I apply the basic tones, I set my brush on multiply and pick a darker grey tone and pass all over the places where shadow falls.
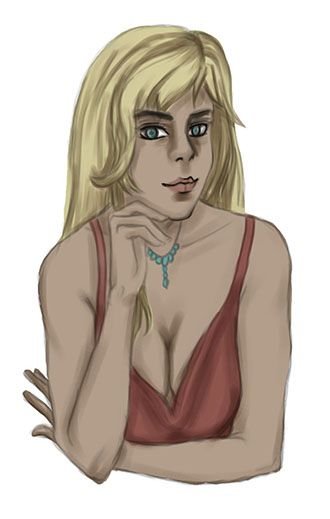
5 Step: Adding highlights - I pick a lighter shade from all the basic tones and pass on all the places where highlight from natural light occurs. In this case I don't have any light source, so I just place the highlights on all the places that are sticking out.
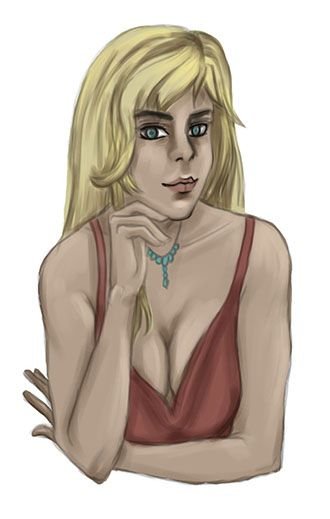
6 Step: Merging lineart and painting - At this stage I don't need the lines anymore, since I pretty much put my shadows and highlights, so I merge both layers together. At this point I also noticed that I didn't like the shape of her hair, so I changed it. I also put a more pink tone into the skin to make it appear more natural and I started blurring in the colors together.

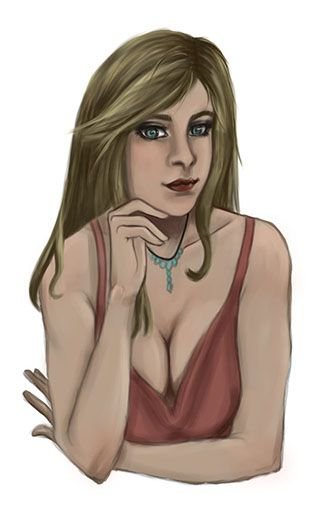
7 Step: Detailing the hair - Here i started making the hair look more textured.

8 Step: Detailing the face - I didn't like the form of the face and the nose, so using the transform tool I made few adjustments until I was happy with the result. I made her have smokey make up and gave the eyes and lips a more realistic look. I also started outlining some parts to make them pop out.
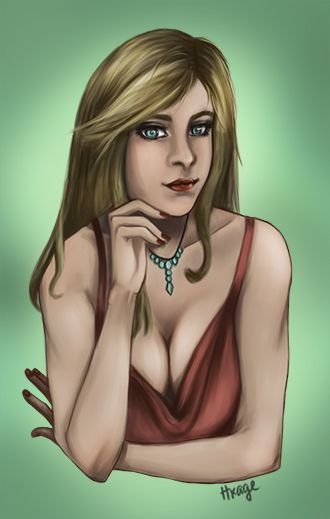
9 Step: Putting final details on the skin and dress - As you can see I polished the skin to look more of a uniform color and outlined it.
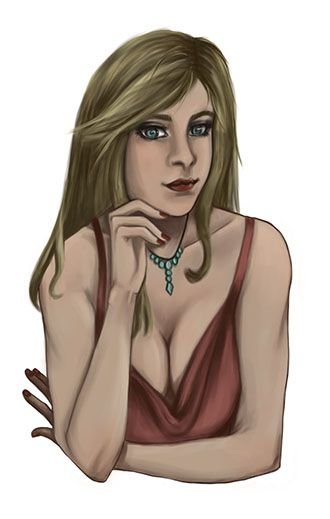
10 Step: Adding a Background and Final adjustments - For a background I wanted something simple, so I chose a color that goes well with red and blond, so on a separate layer underneath my drawing I added a greenish background. I also put final touches like highlights with the Dodge tool and shadows with the Burn tool, so it can have a bit of a more contract. And this is also the finished result.
Hope you guys enjoyed it and found it helpful! :)
very beautiful.
Thank you :)
Awesome tutorial. In no time they will be calling you from P.A. Works :)
haha, I am not sure my style is very suitable for their needs :)
But if I get such an offer would be great
If I ever get into drawing, I'll be sure to follow your tutorial :)
Hope it will help :)
It is mostly knowing the nooks and crannies in Photoshop and what it can offer you, that will make your life way easier. ;)
click here!This post received a 1.9% upvote from @randowhale thanks to @hentikage! For more information,
That's a great tutorial! I love drawing!
Thanks! Hope its helpful :)
it is very helpful!
great work :D
Thanks ^_^
Made made it look easy !! Thanks for sharing
It is not so hard actually, just need to give it a try! :)
Glad you like it
wow it's astounding how you are able to bring a few strokes of pencil to life like that. Simply amazing!! :)
Thank you! Comes with lots of practice and being able to visualize :)