Do you know that feeling, when you wake up knowing you absolutely have to do something, before the thought fades away?
Well, I've been experimenting on different sorts of materials lately, to get my stock up and increase the volume of my Etsy shop, and so it's always somewhere in the back of my mind. And today I woke up with an insight about some of the components I've recently purchased, and I couldn't resist. The fact that I woke up an hour too early (again, probably an effect of spring that's starting to creep up here) didn't hurt - I had time to work before having to do anything else, which is always great.
Short story: the experiment was a success. Here you can see the result.
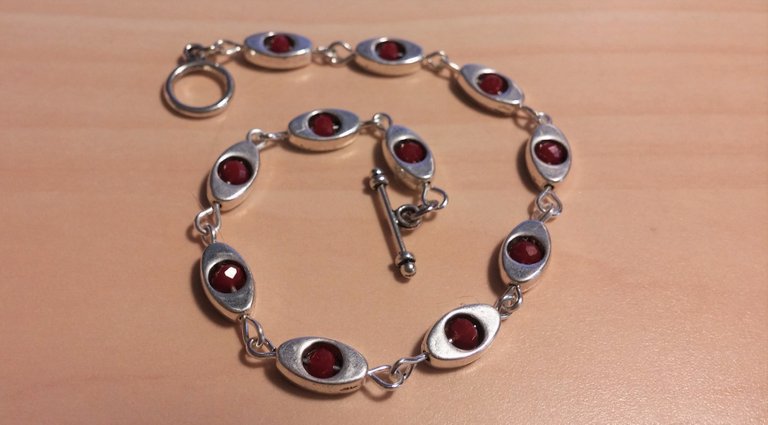
So how did I do this?
As usual, the actual work is very technical, and the thing that takes the longest is thinking just about what you want to do - the shape, the colors, the beads and components you're about to use, and making sure that all of them can actually work together before starting doing all of the technical stuff.
Luckily, I woke up with the design bugging me to begin with, and I knew I had the right materials, and so I went straight to work. I did have a slight miscalculation with the beads, and so I had to replace the original ones I was thinking of to those you see in the photos. However, it still came out nice, so you won't see me complaining.
First of all, I prepared my materials. There are a little too many of them in the photo, I wasn't sure how many I'll need at that point.
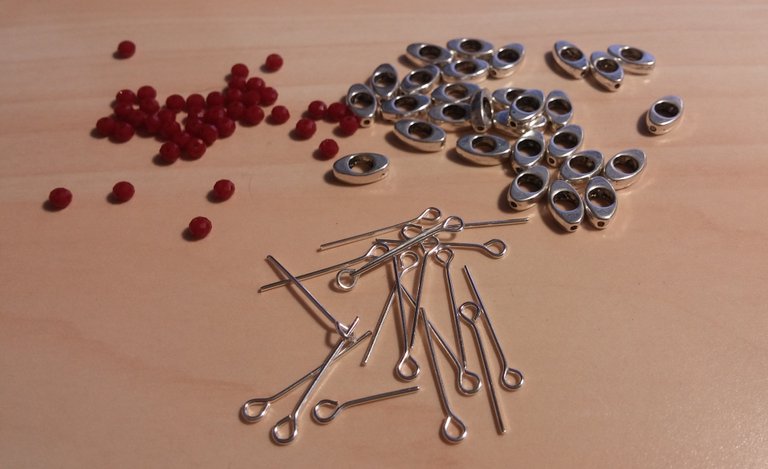
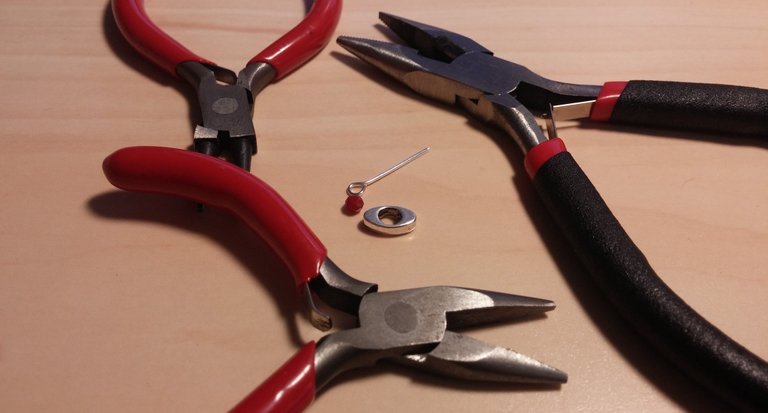
The next step was arranging those materials in "sets", so to speak - a set for every link in the bracelet. To that I added my three loyal pliers, so that you can see just about what's going on there. As you can see, I used two pressing pliers (one larger and more serrated, the other smaller and smoother), and one pliers with round tips, which helps me in creating the loops for the links.
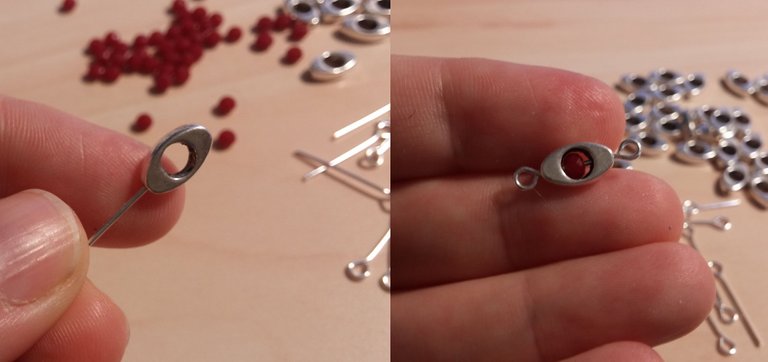
The next stage was a bit hard to photograph live, since unfortunately I only have two hands and I was alone in the studio, with no sophisticated tools of the trade that could help. So I took one photo in the beginning of this stage and one in its end, and if anymore clarifications are needed, please don't hesitate to ask.
What I did here was first to take the pin, and "dress it up" with the silver component. Not all the way, just until the hole. This is important, because you really do want to place your bead there at that point, otherwise you're just stuck with a component and a pin in it. As you can see in the photo, the beads are very small (and they're not the smallest ones I work with, too), and therefore you should be very careful when placing them at the spot, as they may fall and you'll never find them again. I usually try to work above a large desk or even a tray, so that when they do fall (and they do, I assure you), they mostly land where I can see them, and not on the floor, where the only ones who'll find them are, maybe, the cats and the vacuum cleaner.
Once you place the bead and push the pin all the way into the component, you take the end of the pin (about 6mm) and gently twist it to a loop using the round-tipped pliers. This, after some practice, creates a loop like the one shown on the right part of the photo.
Next, we have all of our links (or at least some of them), like so:

Now we measure - I always have a ruler nearby, and measuring is really important, otherwise you end up realizing that this bracelet will either drop from your hand or won't fit at all.
My wrist size is about 16cm (some 6.5", I think), and usually I make my bracelets to fit that size.
And so, you measure the links, and don't forget to add to that about 0.75cm for the clasp (because this also has its own length).
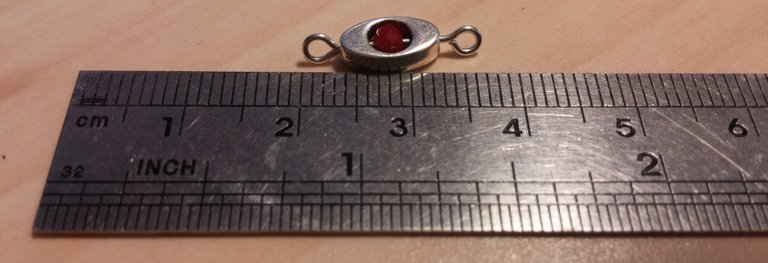
I figured I'd need 11 links to get to the bracelet to a good size. I actually needed 10.5, but since this is what I have as measurements, and 10 would have been too small, I decided to just add that extra one.
Once you have all the links, you need to connect them. The way to do that is by slightly (slightly!) opening up a single loop in each link, connect it to the next link, and close it. Do this separately for each link, don't do it for all of them at the same time, it might get messy and confusing.
After all the links have been connected, my bracelet finally started taking shape.

Now it's time for the clasps. I like using toggle clasps, they always seem more sophisticated yet elegant to me, and they're easier to deal with when you have to put a bracelet on your own, instead of asking people for help. They also seem to break my fingernails less as I try to operate them.
I added the toggle clasps, one part on each side, and connected them using 4mm jump rings, which I slightly opened, slid the toggle and the last bracelet link onto, and pressed them closed very carefully, using my large pliers.
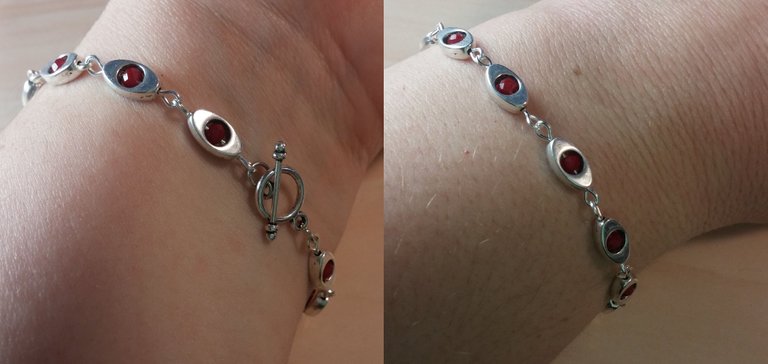
And here we close the circle. The bracelet is ready, and I have a lovely new piece of jewelry to go meet my friends with quite soon.
If you liked this post, please upvote and resteem, and maybe follow me on Steemit, too!
To take a look at my photos (mainly Paris related), visit my Instagram account.
For planning your dream vacation in Paris or France, come visit my website.
Or, if you just want to see more pretty things, go to my Etsy shop and see what I have there for you :-)
And in the meantime – don't forget to have a wonderful day.
That's a tidy blog. I wish I were a jeweler. Hey! My kid sister is :), and she is coming back from boarding school in a week. So I have already sent this to her Whatsapp. Thanks for sharing. And, great Etsy catalogue you got there.
Thanks! Tell your sister she's very welcome to follow, I'll post some more stuff like this soon. As well as other things :-)
The Etsy shop is going to grow soon, too. I promise. As soon as I have some free time to update those listings!
very nice job, obviously will show it to my wife, she's also a fan of these jobs :)
If you're in Paris and the area, I also give workshops :-)
את ממש יצירתית ומוכשרת😊 בהצלחה!
Thanks! It's always nice to hear kind words, I appreciate it. Hope to see you around for future posts, too :-)
You are really creative and so dynamic. This with the jewellery is a great idea! Thank you for sharing.
continue to work, keep the spirit of looking for brilliant ideas, may always be successful with all his efforts
Thanks! Come by every couple of days if you're interested, I'll post some more of those, since it's very fun to share the process of making these beautiful things.
wish you success always,
if I have a lot of time will always see the post you share.
World of Photography Beta V1.0
>Learn more here<
You have earned 5.70 XP for sharing your photo!
Daily photos: 1/2
Daily comments: 0/5
Multiplier: 1.14
Server time: 09:09:13
Total XP: 107.25/200.00
Total Photos: 20
Total comments: 0
Total contest wins: 0
Follow: @photocontests
Join the Discord channel: click!
Play and win SBD: @fairlotto
Daily Steem Statistics: @dailysteemreport
Learn how to program Steem-Python applications: @steempytutorials
Developed and sponsored by: @juliank
Congratulations @leurbanexplorer, this post is the seventh most rewarded post (based on pending payouts) in the last 12 hours written by a Newbie account holder (accounts that hold between 0.01 and 0.1 Mega Vests). The total number of posts by newbie account holders during this period was 4295 and the total pending payments to posts in this category was $2539.89. To see the full list of highest paid posts across all accounts categories, click here.
If you do not wish to receive these messages in future, please reply stop to this comment.