Last year I painted this view of the Remarkables mountains in Queenstown, New Zealand and I thought I'd share with you the painting process of how I created this art work.
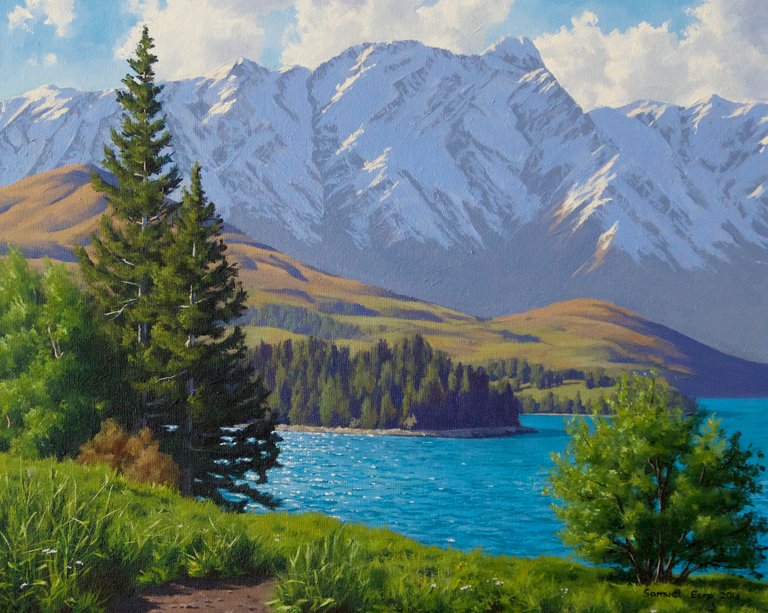
The Remarkables, 400mm x 500mm, oil on canvas.
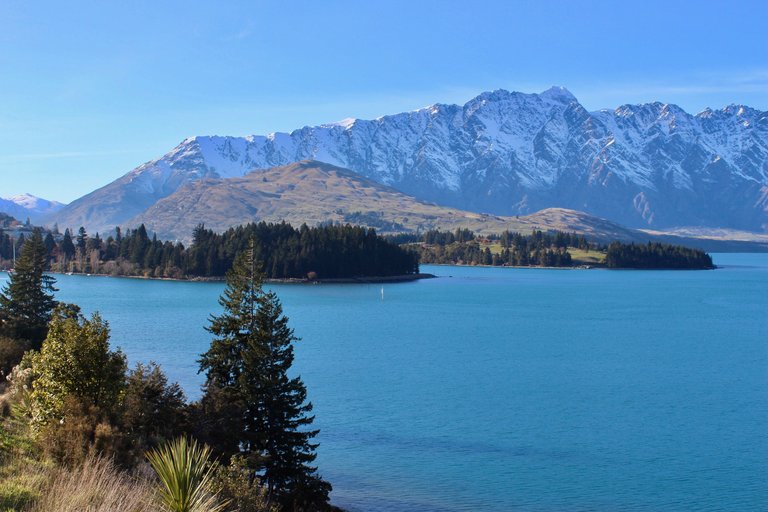
The composition was inspired by the works of the 19th / 20th century landscape artist Edgar Payne. Below is one of the reference photos I used to create the composition.
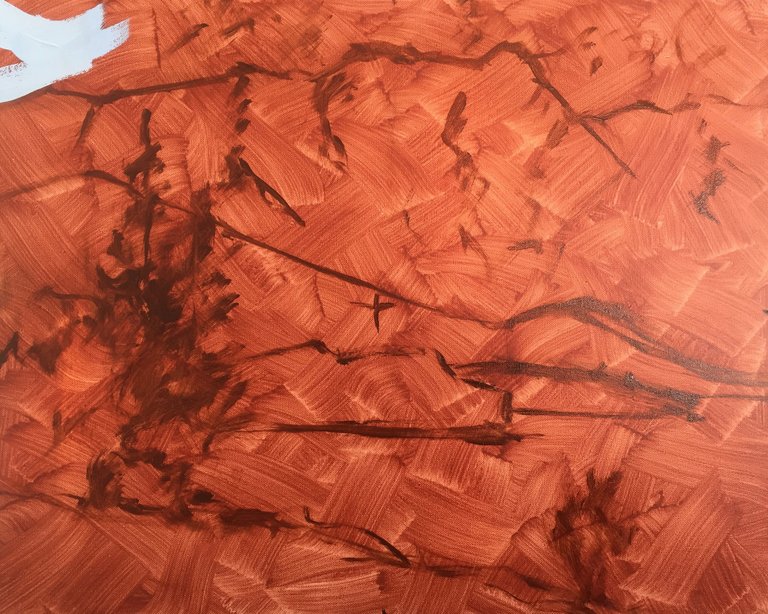
I started of my canvas with a layer of burnt sienna which I had preprepared. This gives vibrancy and warmth to the painting as well as an overall traditional feel. I sketched out the scene with burnt umber.
I always start by painting the sky first so I can gauge the overall tonality of the painting, then I block in the mountains. I am conscious to keep my colours and tones subdued in the mountains so the recede in the painting, if I use colour that is too saturated it will come too far forward and the illusion of depth will be lost. I increase the saturation and tonal values in the mid-ground mountain and lake to bring it forward.
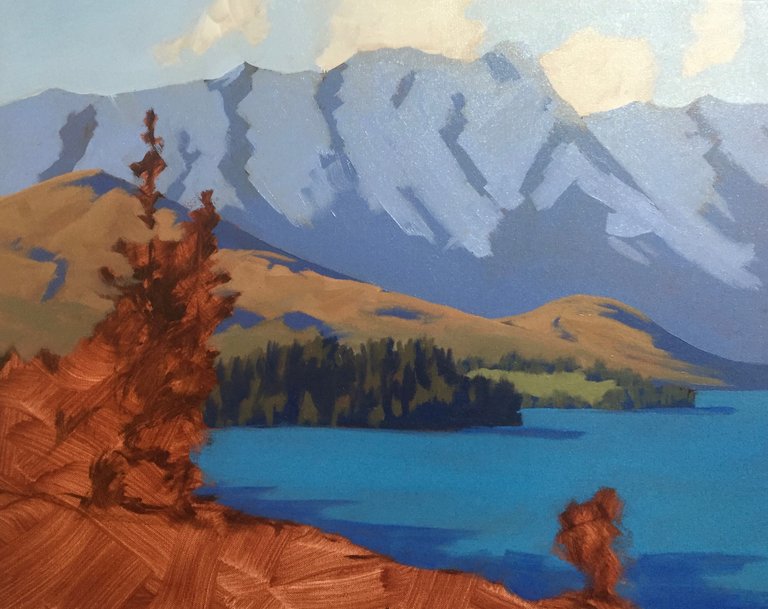
As I finish blocking in the painting I paint the fir trees on the left side and paint the grass in the foreground. I use my darkest tones and most saturate colour for the foreground as the tonal scale between light and dark increases.

This is the stage where I spend time modelling the paint and building up the detail of the painting overall. Often I have to repaint areas and make overall adjustments to the tonality of the painting.

In this later stage of the painting I am working in the fine detail and adding in the highlights in the trees, mountains and water. At this stage the painting is really starting to take form, however I will still save my lightest tones until the end.
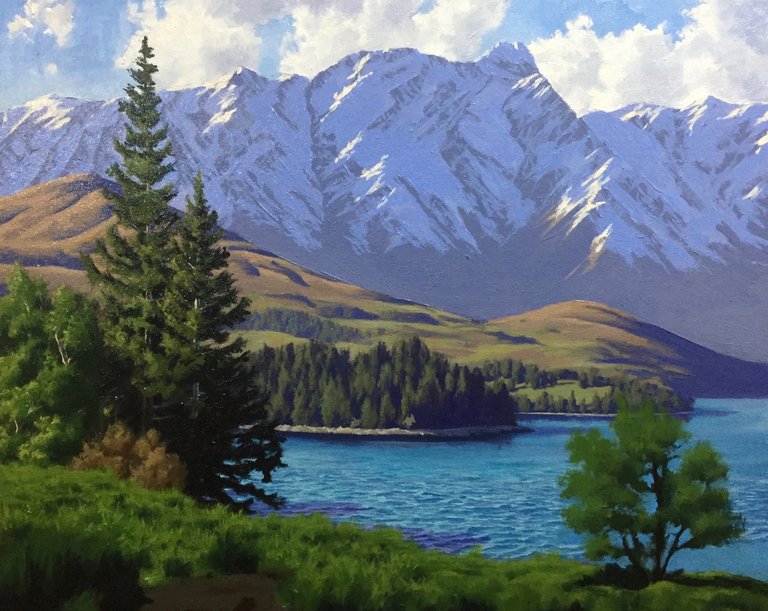
In this stage I add the suggestions of blades of grass and the leaves on the trees as well as refining the painting as a whole. This painting overall took many weeks to paint.

I hope you enjoyed this blog post and if you like what I do, any tips to help support my art career would be greatly appreciated.
Bitcoin: 1Px9bSmVfw69F2uEUso8Zz46BV2DmGLZJg
Litecoin: LQYz47A7pZfMLRjqpR29YbxnY36aoLrFAT
Dash: XmHqFwzmyhax3zm2Q3hVhqAYfMZ2AqaZ3f
I have more painting demos on my website: samuelearp.com
Wow, refreshing to discover that you do edgy blocky brushstrokes from the early stages!
Most painters I've seen go from a very blurry looking painting to more and more defined/crispy/sharp looking ones.
Is that a consious decision?
And do you use a thinner/oil at any stage?
I find that brushwork is the most significant aspect of any painter's 'handwriting' so to say, and I like your sharp bold brushstrokes. I feel difficulty making them not blurry.
Any tips for that?
Thanks @walperion and please forgive the lateness of my reply. When I block in a painting I am not interested in detail, I just want to get in the basic forms and colours and set the overall tonality of the painting.
After the blocking-in process is complete I build up the layers and refine the detail. Whilst I like detailed paintings I try not to go overboard as I feel that too much detail often kills the vibrancy and life of the painting. Often the suggestion of detail is more than enough as the human brain fills in the rest of the details.
I have been using liquin to thin the paint and it also speeds up the drying. Quality of brushes will help with the blurriness issue. I'd recommend adding Rosemary and Co, Ivory Dagger brushes to your collection, you can achieve some beautiful brush strokes with them.
Thank you really much, very helpful!
I think HQ brushes is the maiasset to making blocky strokes.
Definately will find those!
Staying tuned for your awesome work!
Cheerz! =]
Absolutely stunning paintings! You are really skilled, upvoted :)
P.S I have a SBD giveaway happening on my most recent post, check it out for some free SBD ʕ•ᴥ•ʔ
https://steemit.com/steemit/@retrac/my-first-week-on-steemit-or-free-sbd-giveaway
Thanls @retrac :)
Everytime, I am amazed by how you do it. Great work.
Yeah, no kidding!
Thanks @sjennon :)