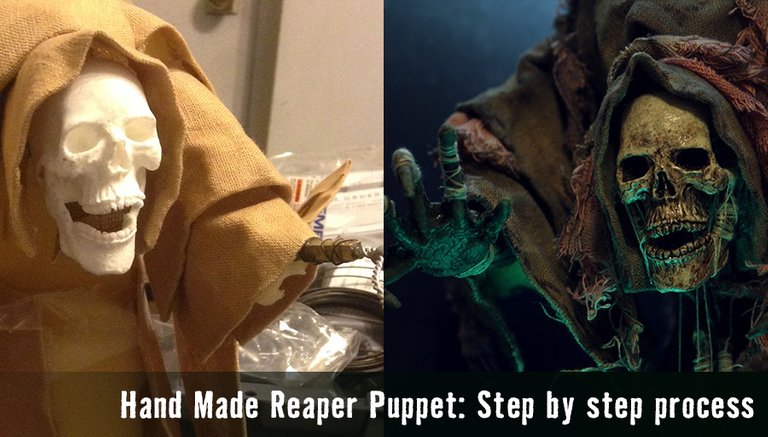
Hello Steemit peoples! I finally got around to compiling a long post showing how I built my stop motion reaper puppet!
I promise that soon I'm going to make him a little set and get some motion going!
I was taught by the awesome artist and stop-motion wizard David Bell
www.instagram.com/davidbellstudio Check out his amazing work www.davidbellstudio.com
Inspiration

I never really had a specific plan for a stop motion film or anything like that. I was more interested in building a posable figure based off some of my art. I gathered up a pile of inspiration inlcuding my own Ritual Master drawings, puppets by Phil Tippet, the Skeksis from The Dark Crystal and a dash of Nazgul.
Sketching
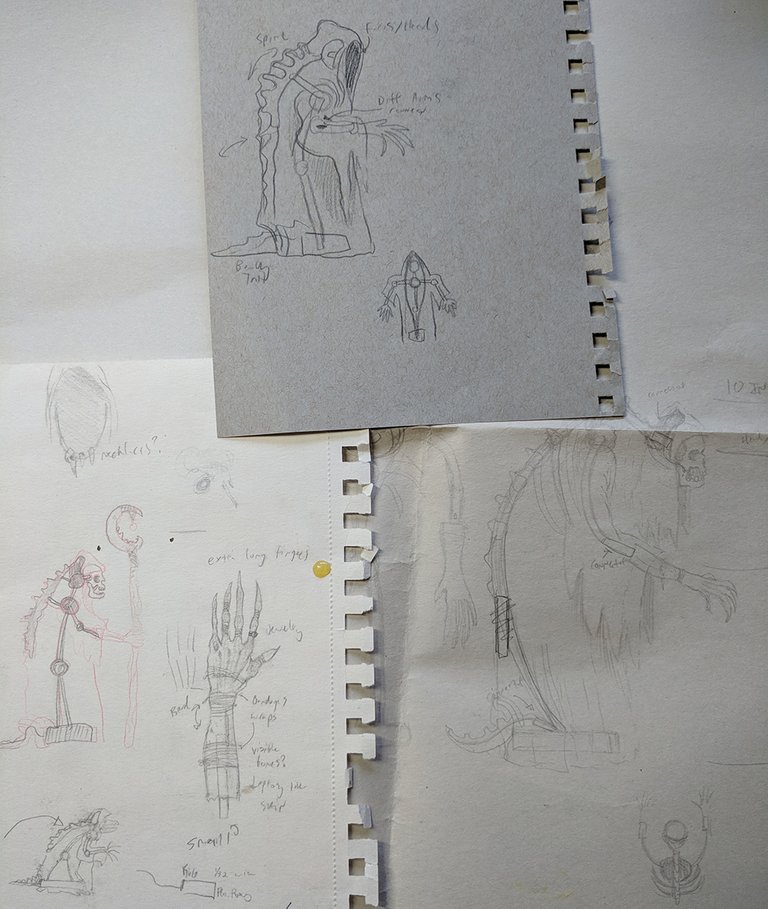
Next up was a lot of loose sketching trying to get the shape and some details figured out and how the maquette wire would be shaped and work for bending and posing both from the front and side.
Wire Maquette
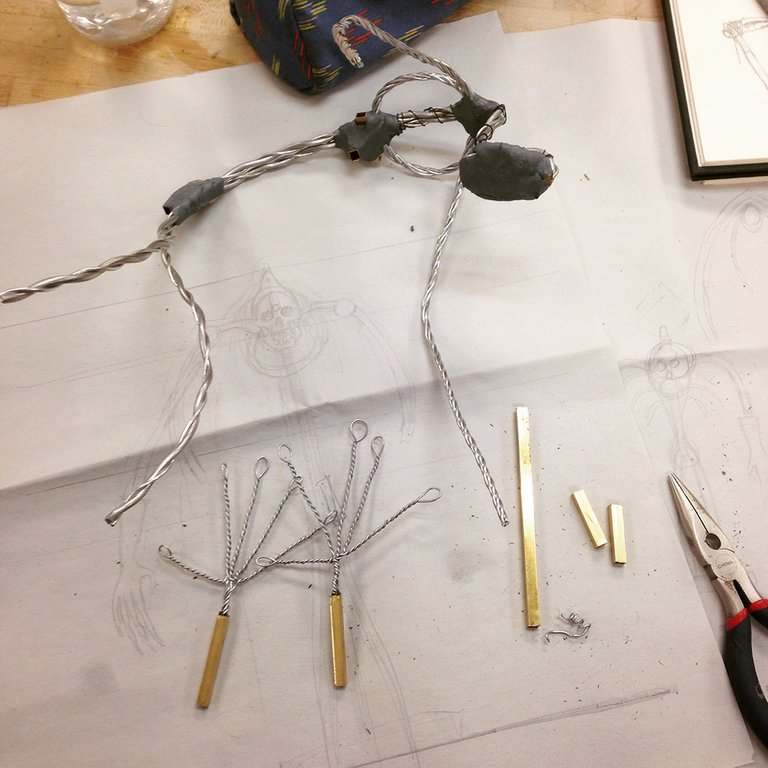
Once I had the size and basic shape figured out I wound some wire together and figured out the lengths for the torso, arms and neck. I used 2 part plumbers epoxy putty to join the wire and create the points where the wire would bend.
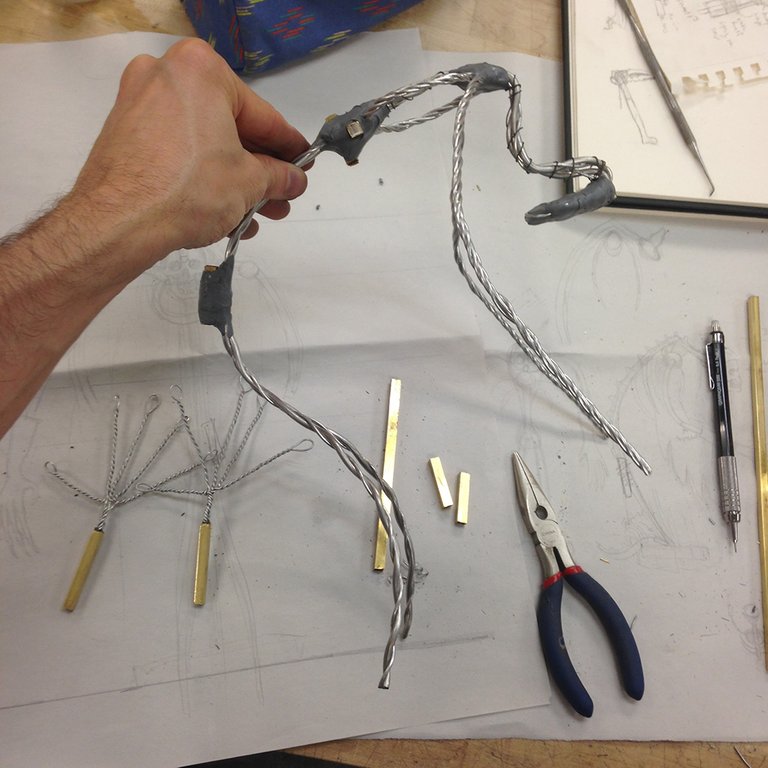
The little pieces of brass square tubing are used to create removable parts. For instance at the forearm there will be a slightly larger piece that holds the slightly smaller piece to slide the hands on and off. You can see the wire for the hands laying on the paper in this photo with the brass tubing at the wrists.
Sculpting
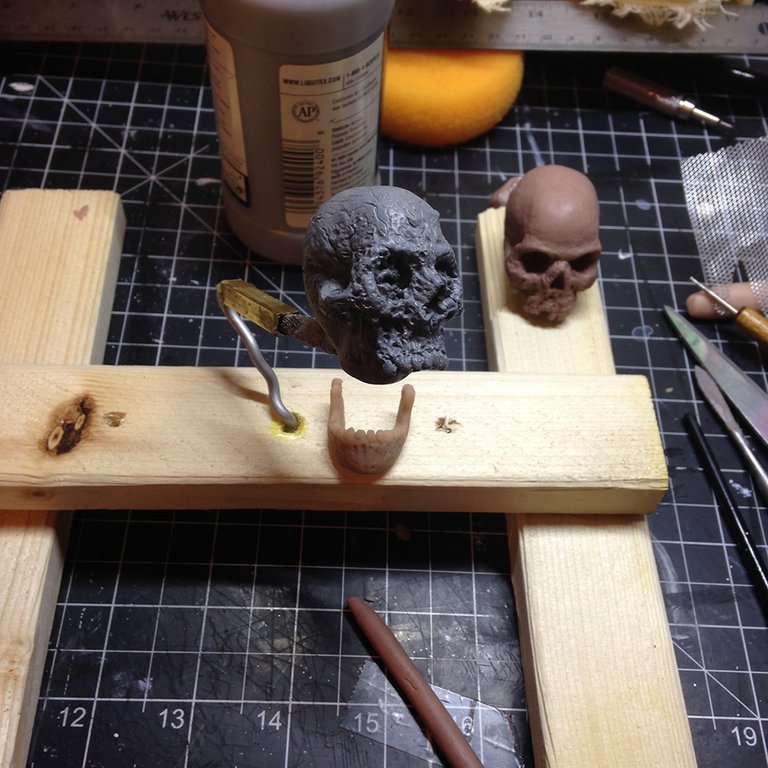
I built a little wooden stand to hold the various pieces as I sculpted them. There are a couple different skulls I sculpted in this photo, one with a 2 part epoxy and the other in super sculpey. In the end I scrapped both of these because I found a new medium called Monster Clay that I LOVE to sculpt in.
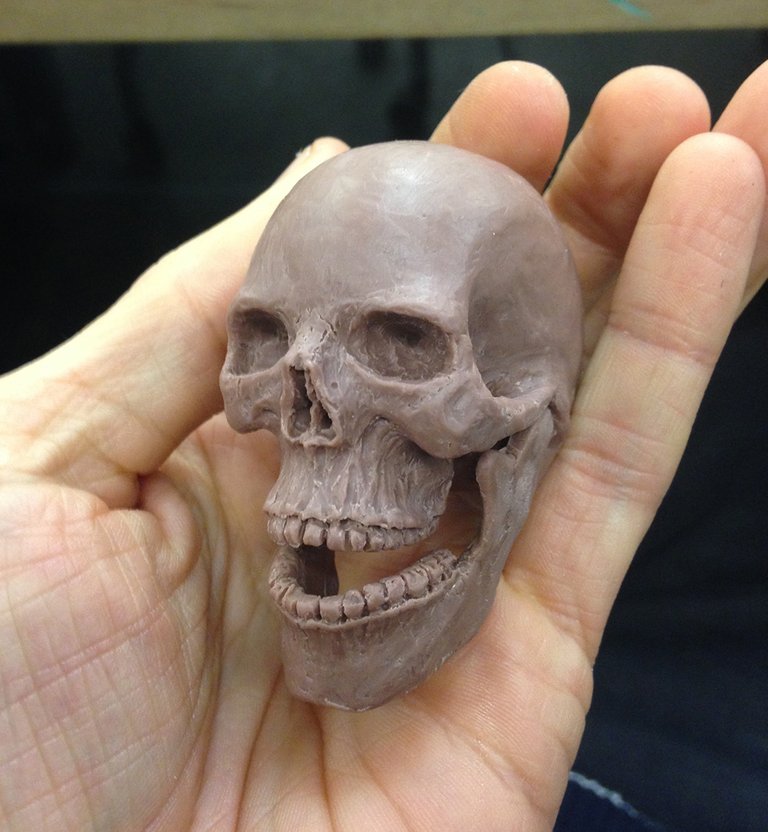
The final skull sculpted in 2 parts in Monster Clay. A waxy clay that can be heated for softness or stuck in the freezer if you need it to harden up. Highly recommended!
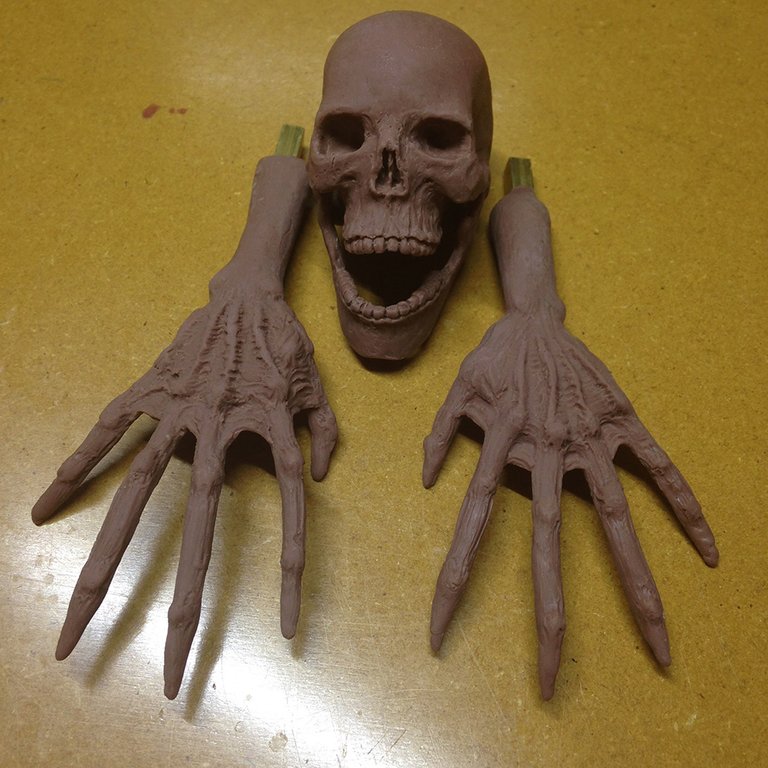
A shot of the final skull sculpt and the hands which were also done in Monster Clay over-top of the wire hands I had made earlier.
Molding
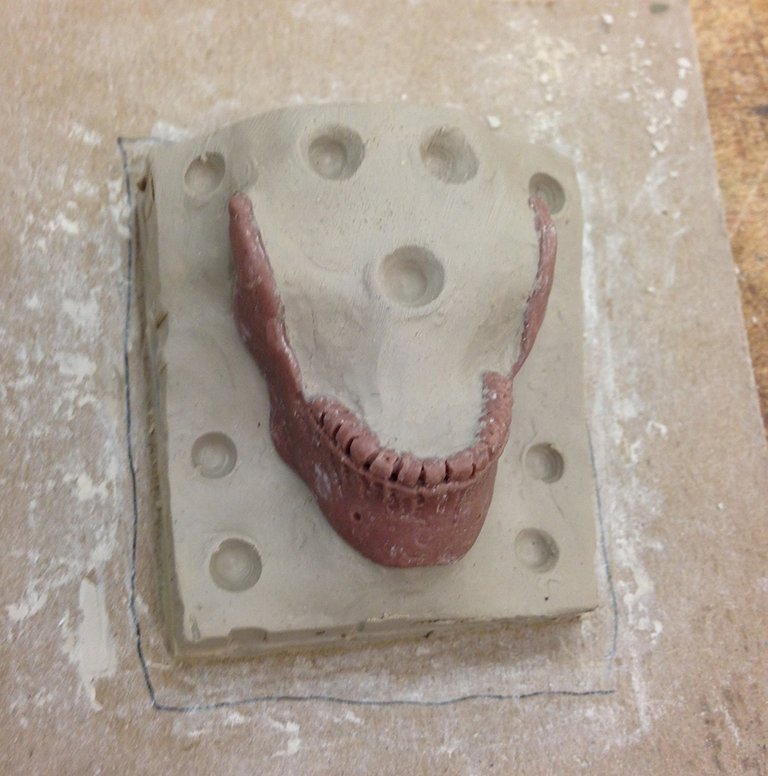
I took all of my sculpted pieces and using a different type of waterbased clay I began building them molds to cast. This involved sculpting up to the edges of the piece and also adding divits in the mold to help it all fit together.
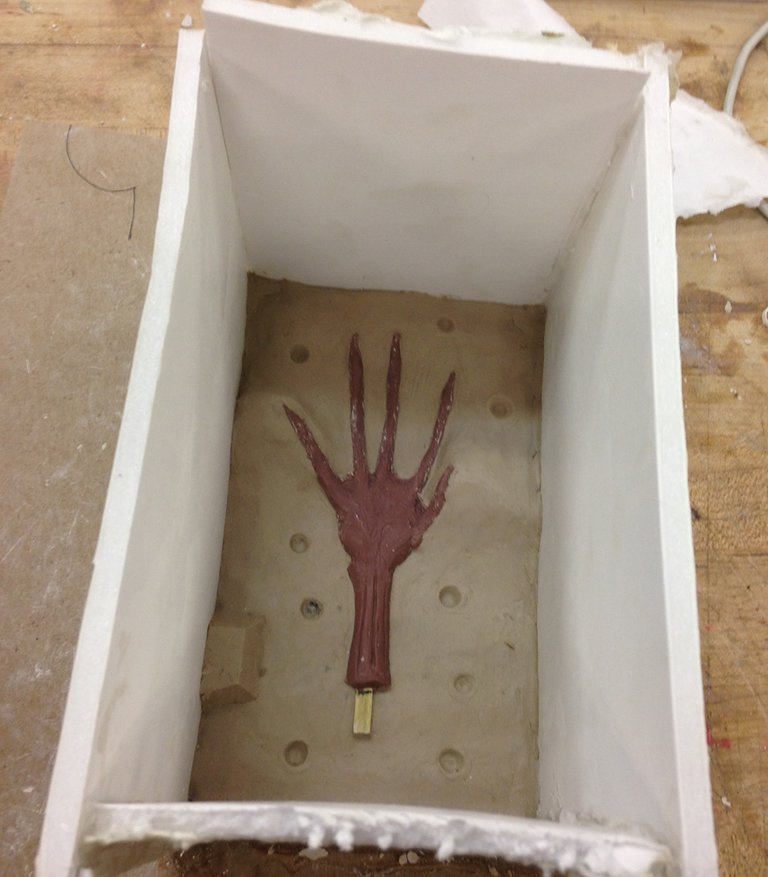
One of the hands in its sculpted bed with some quick walls erected before pouring the mold material. The mold for the hands was actually done in a type of cement since the final product would be soft. The skull pieces were done in a 2 part rubber because the final pieces were going to be cast in hard plastic.
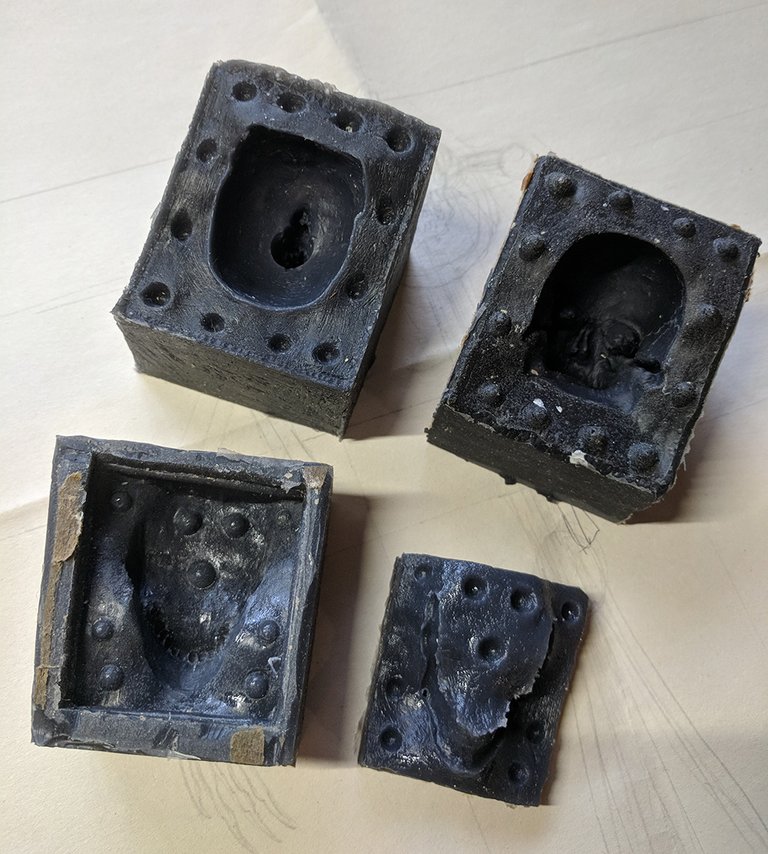
The soft rubber mold of the skull and jaw.
The basic rule of making molds and casting is "soft product/hard mold" "hard product/soft mold" and use a lot of vaseline so nothing sticks!
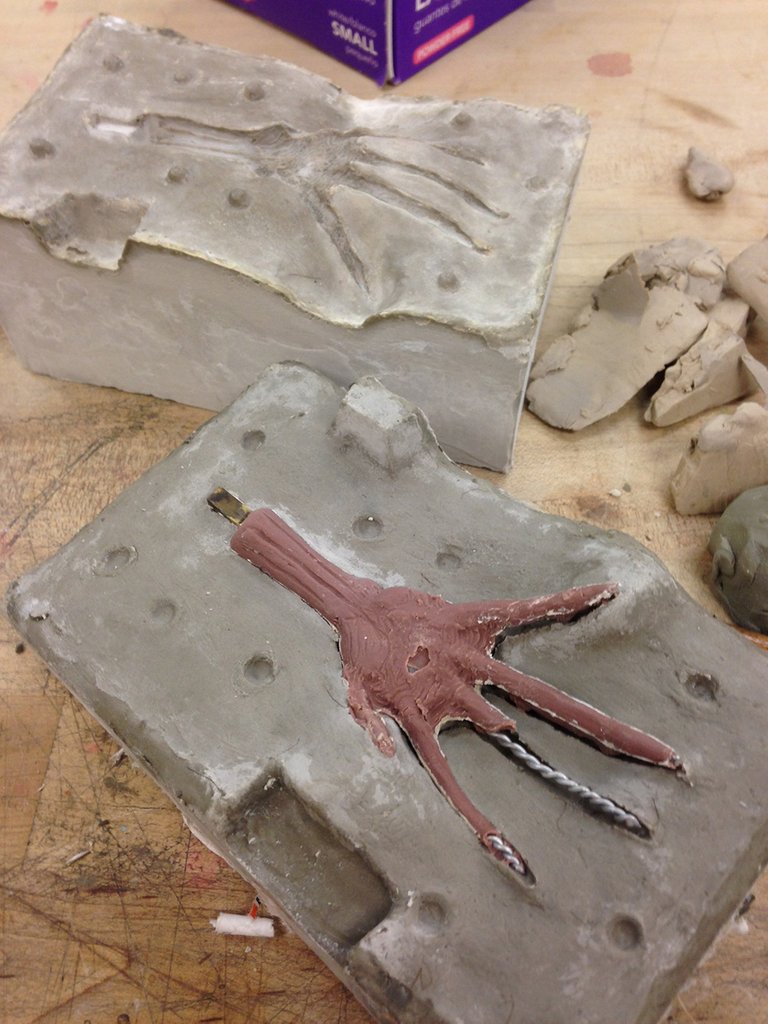
The hands being removed from the cement mold. At this point I also had to peel all the clay off of the wires so I could re-use them when casting in the softer rubber.
Casting
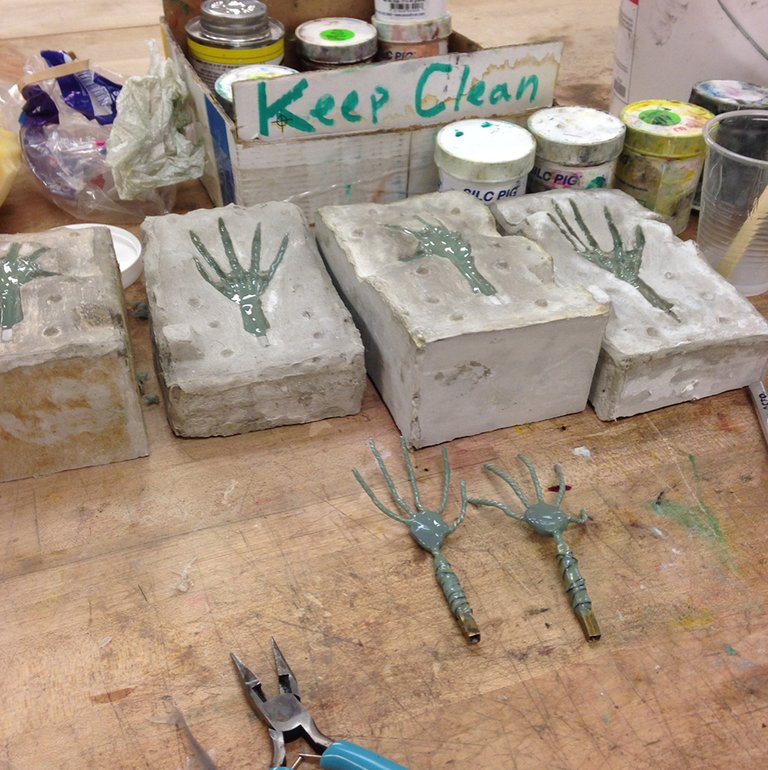
I mixed up some 2 part rubber and dyed it to the color I was looking for, a pale green. Then brushed it all over the inside of the molds and all over the wires for the hands. I then poured in a bit, laid in the hands and covered them with extra so when I pressed the mold down the extra could squish out.
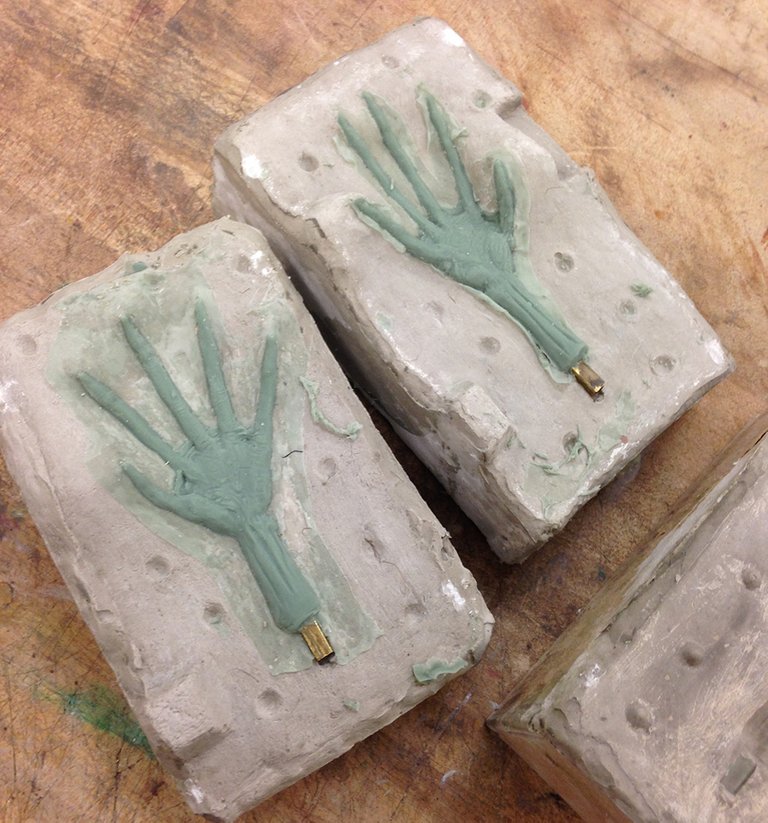
Once cure I opened up it up, removed the hands and trimmed off the excess rubber from the mold.
Building the cloak
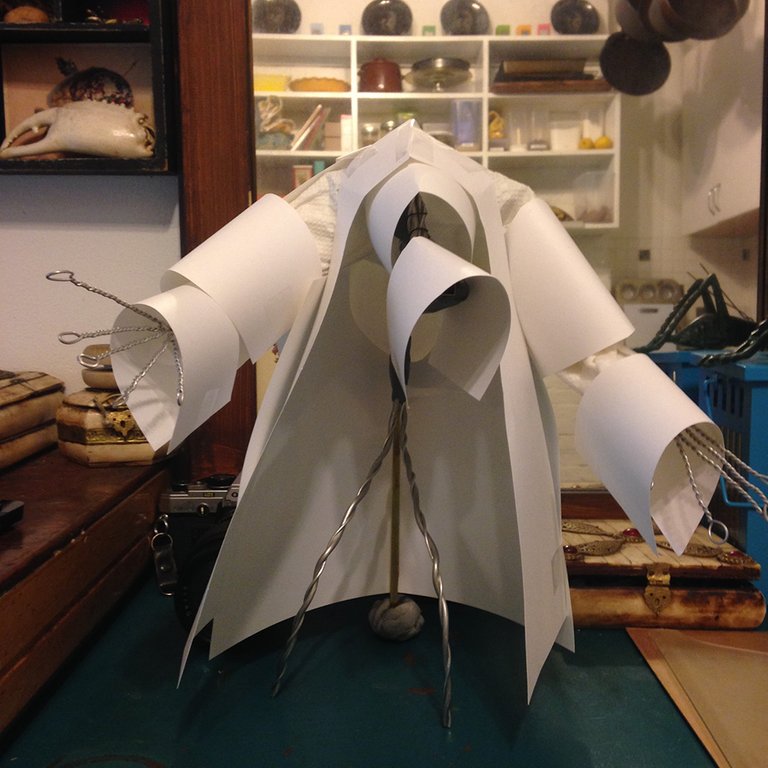
While all the mold making and sculpting was going on I was also working on the body and cloak. I figured out the rough shapes I wanted to make using some paper and trial and error.
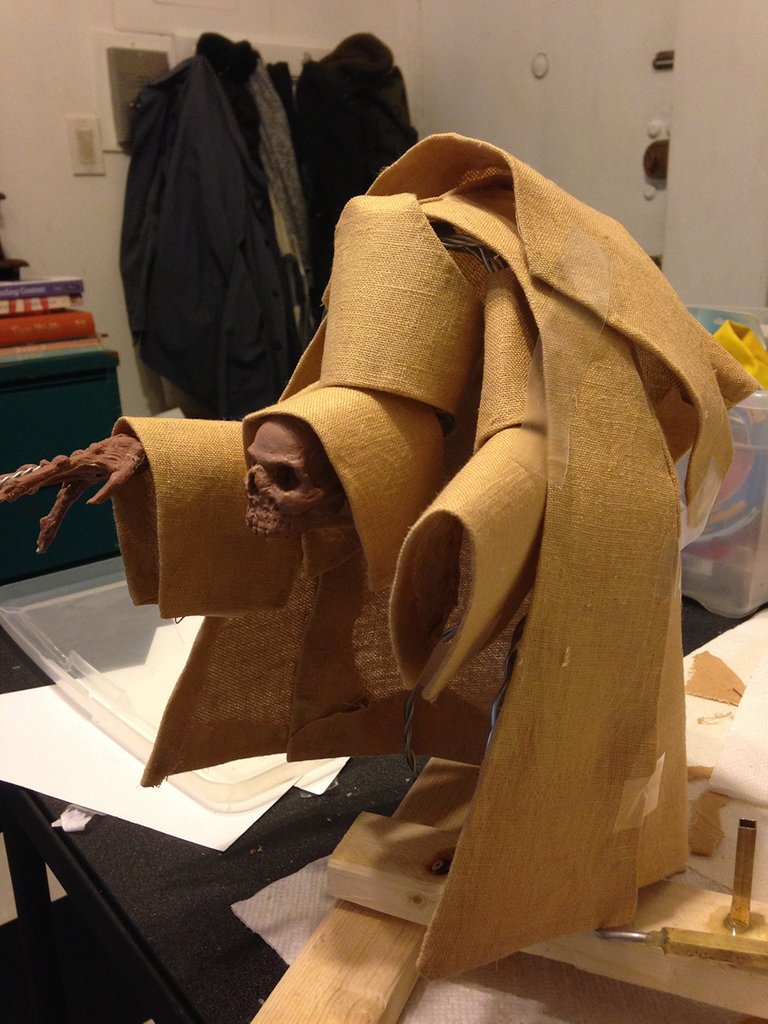
I bought some fabric and a fine wire mesh which was glued inside to provide shape and 'posablity' for the cloak itself. I cut the pieces to match my original paper bits and began piecing it all together.
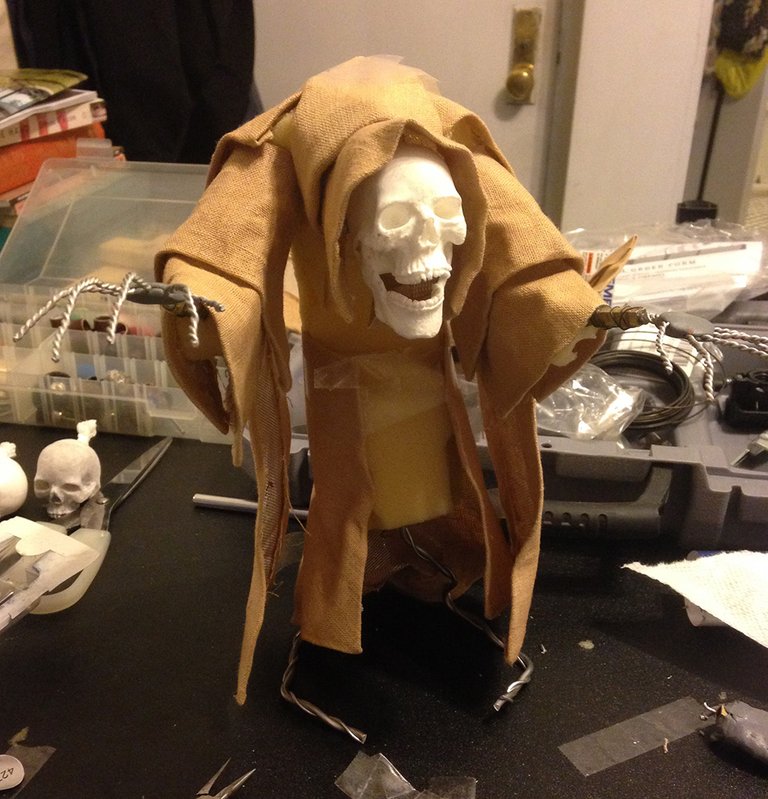
The body was filled out with foam cut and glued around the wires. This was a test with the actually skull and jaw after I cast them in hard white plastic. The jaw is attached with little pins so it can move.
Painting and finishing touches
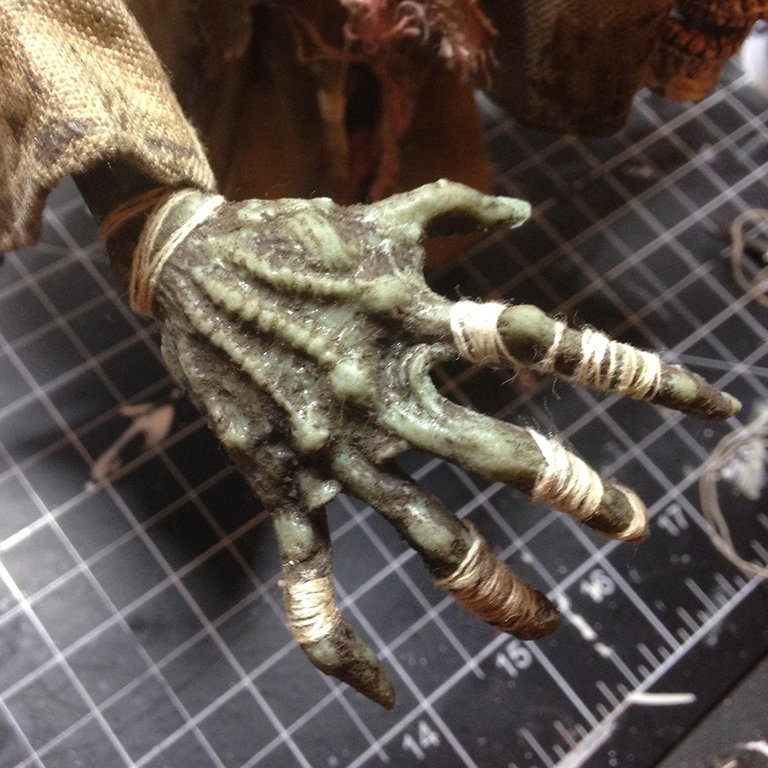
A shot of the hands after I began painting, weathering and detailing them. The rubber does not really hold paint at all so I loaded them up with a lot of grit to highlight the cracks and crevices and details. I also used tea-dyed threads to wrap various parts.

A shot of the hands before painting. I also made lots of rough strips from the fabric which I dyed and used to strategically hide seems and joints and just as a decorative element.
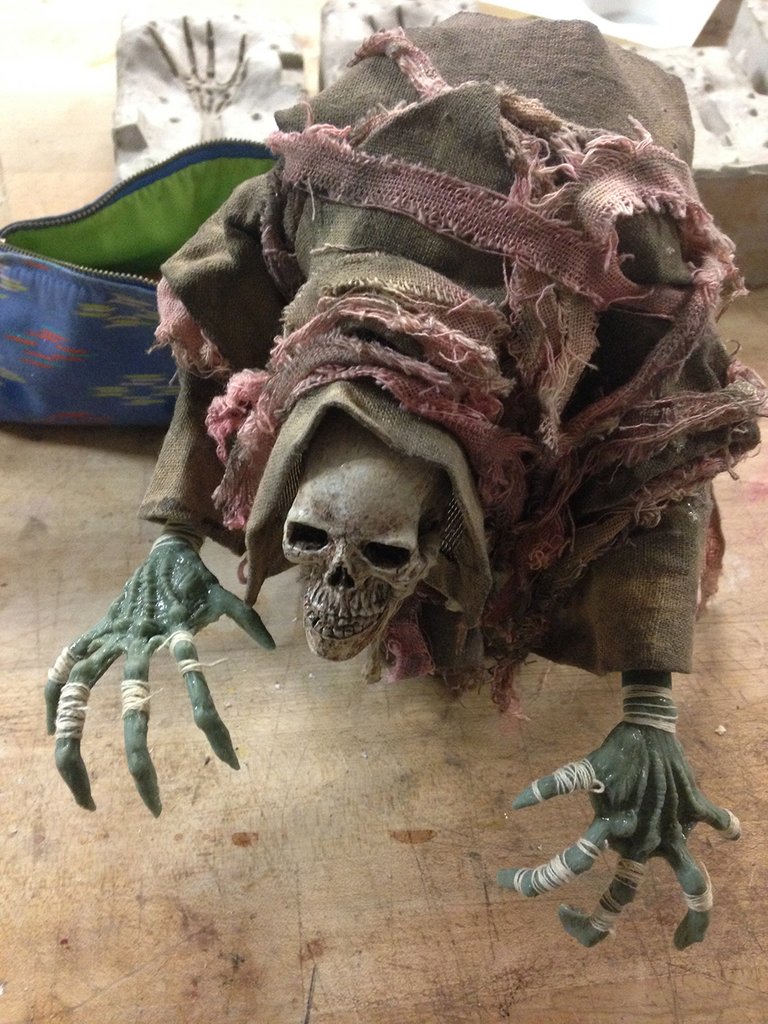
The cloak itself was splashed and soaked very randomly with a lot of muddy colors and black grime until I was happy with how old and weathered it looked.

A 'glamour shot" of the final product.
The green lighting is just my cellphone with colored light app. I unfortunately did not take any process shots while painting the skull.
I base coated the skull in a bone color and then once it was dry I gave it a couple washes with browns and blacks to pick out the detail. Then it was highlighting certain parts again with the bone color and a final light gloss varnish to seal it.
I also built him some weapons and other little accessories which may end up in a future post!
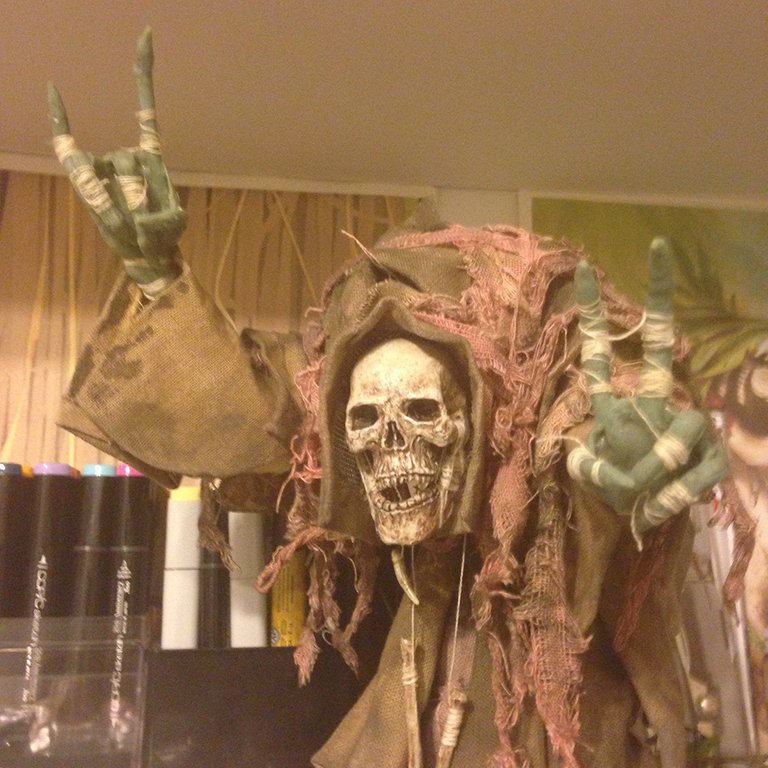
I hope you enjoyed this process post! Rock on!
The Original Reaper Puppet Post with more photos
Let me know what you think or if you have any questions!
Holy cow, I love this kind of stuff -just started to follow you!
Thanks! Your stuff is really cool! Followed
Thank you!
Thanks for posting this, it was quite interesting. The puppet is not as large as I thought it was for some reason.
Glad you liked it! Yeah that's actually a comment I get with a lot of my art. I work very small and it's hard to tell once the art is scanned.
This is so cool. I have used form making before for some jewelry. I love puppets, though have not made them at this level. Have you used 3D printing yet? I wonder how that technology would aid or add in such an endeavor as this?
Thank you! I have thought about 3D printing before in regards to this and other projects. Other than cost I think I'm wary of having to learn 3d modeling software. I think at this point though the big stop motion companies use 3d printing extensively.
I've been waiting for the price to go down on the printers. Although my next big thing, when price comes down, is painting/arting in VR. There is a programme that allows you in VR with goggles to paint in 3d virtual space so you are within the work you are creating and you can move it about and all around you virtually. The world is a vastly changing and also exciting place for artists I think. I wonder what 'virtual reality' puppet building will be like ;)
Yeah 3D printers get cheaper and higher quality every day. I can imagine a future where every house has one and you no longer purchase a lot of small things. You just print them. Maybe. I will have to check out the VR art you are talking about!
This is such an amazing post and you are super creative and talented. I love that you shared your initial thoughts and ideas, and then stepped through the process so we could see how your reaper transformed from thought to awesome and scary looking puppet.
Thanks so much! I look forward to sharing more projects soon!
Thank you for sharing. I never knew until now that there are a lot of steps in making puppets! Great post i love it!
Thanks! Depends on the puppet type really, sock puppets don't take nearly as much work! ;)
Haha yeah i never thought of that haha 😁
wow ,really fascinating :) real deal
Thank you! :)
Good post! Visit our blog and enjoy the content, greetings :D
Thanks!
Oh man, this is awesome! Are u also on Artstation? I am digital 3D artist but I very like traditional way too.
Thanks a lot! Glad you like it! I do not have an Artstation account. I am also a fan of both digital and traditional, I especially like to mix them.
Great post, I am a photographer, it passes for my blog and sees my content, I hope that it should be of your taste :D greetings
Thank you! I will check it out
hello friend was watching your work is very brutal, step by step there is this monster process @terrofirma
Thank you! Brutal is a great compliment.