Damn this post had to be rewritten all over again. Well, that is life, there is nothing I can do about it anyway. Like I said in my previous post, this post will be the all new version of what I wrote a year ago. I'm doing these to revisit and explore what I was able to accomplish after over a year of writing posts. My old posts are so terrible to the point that I laugh at myself whenever I see a lot of wrong grammars and wrong spellings in it.
Maybe I am still terrible and I am not just aware of it but who cares, LEL.
For this post I will be talking about Manga tones. Manga tones for those who do not know them are those grey parts in a Manga page that makes the drawing have more volume. Manga tones aren't limited with just being gray they can be either a set of flowery patterns, halftones(polka dots), rocky texture, net like texture(do they call that kakiame or kakigyoumo, I am not sure about this one) and even objects like vehicles if you're that lazy.
But I will not be discussing about those complicated tones because I will be saving them for another post. Instead, I will be talking about the basic and easy one which is the plain gray one that you can adjust the darkness easily.
For just a short introduction on the component, I will be talking a little about why they are widely used in Japan and almost not seen in western comics and webtoons(oh boy, I will be talking about you soon). In Japan, Comic or also called Manga are produced and published in a weekly basis. The chapters of different series are compiled in a magazine like Weekly Shounen Jump and then are released in a Tankoubon per series after every 10-12 chapters. Tankoubon is that small book that you buy that is translated by viz media or other foreign company that adopts a series like Dragon Ball into an English version.
For a weekly setting with a considerate length and quality, making a full colored series will be a stretch unless you are working with a group of 20(which is also not the case most of the time) and if its just around 50 panels short. To enhance the quality of the work with the limited things given to them, Manga tones were invented, it was a fresh hip thing before but is an old style now considering that people on the internet are most of the time demanding colored stuffs.
BTW, magazine in Japanese is zashi.

A year ago when after a few months after I learned about Bitcoin, I got into blogging in a website called Steemit.com. Back that time I didn't think if either I can do it or not, all I wanted was just to get started. I didn't think of things like people would laugh at my writing for its cheap narrative and wrong grammars. All I wanted was to get right into it.
One thing that I had to go around that time is producing original pictures. I had always considered a post that have it's photos original way valuable than a post with a lot of borrowed photos from Photobucket or pixabay. Don't get me wrong, I also borrow pictures from other websites but I wanted to do more than just writing. I wanted to express myself not only by writing and typing, I also want to express with my original produced visuals. I wanted to draw for my blog.
One problem that I have that time is that I don't have a camera and I don't know how to do digital art. I have basic knowledge with Photoshop but in a level where I can just move things and color stuff. Back that time all I had was a phone with a 13 mpx built in camera and some old art supplies that got stacked up because I kept buying and practicing with them. I knew that time was the time for me to put what I had learned into action. What will I produce aren't comics yet but somehow I will get to the point that I will be producing them soon once I get better (and I was right).
To cut it short, this post is more about how I did my tones rather than how do most people do the tones right. I wanted to share how I exactly did it so that people who are in the same situation as me that time can use the same technique and hone their skills and climb their way into getting better into something. Just remember that the force that will keep you on moving forward is most of the time your own will.
Let's get started
That time whenever I do a post there are certain things that I had in mind. One is how long and short a post should be, what niche or subject should I talk about, what time should I post and how much visuals will I add in my post. During that time I was producing so much time a day in multiple accounts to heighten up the chance of me getting whale votes. Considering that time was a factor for me I had to draw everything and write everything the fastest that I can so that I can get results right away.
With all that said, this is how exactly I did the drawings:
Step One
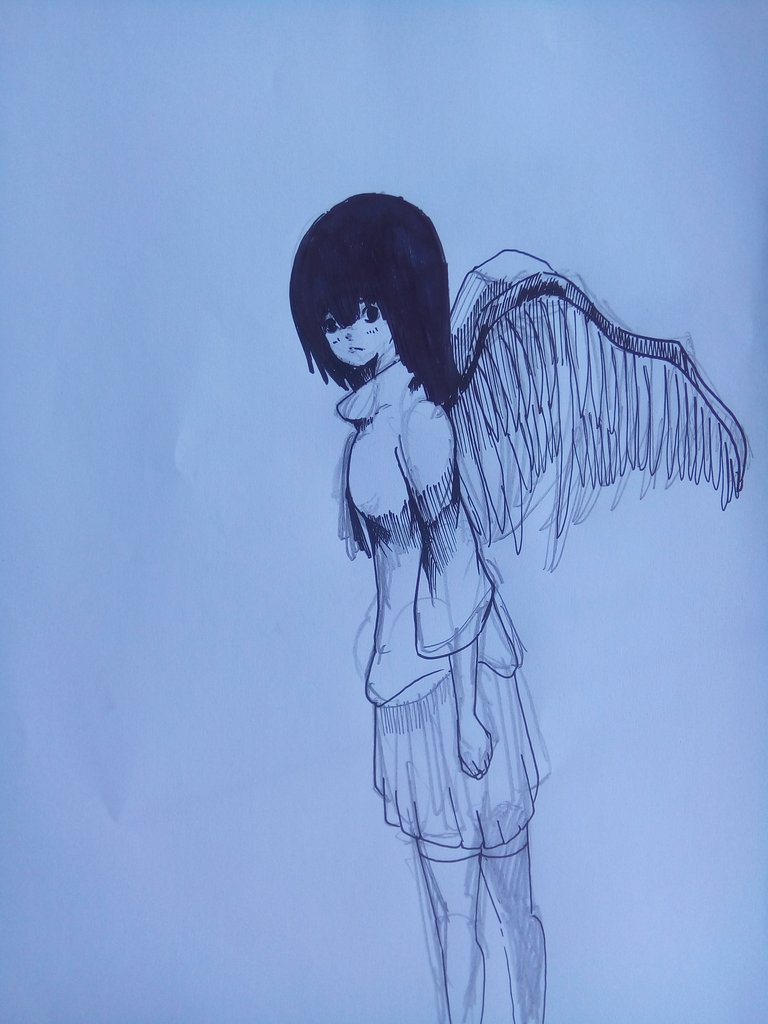
Draw the picture and take a photo of it with your camera with at least 13 megapixels. A camera with a lower specification than that will not work as a decent drawing for a post. Believe me, I tried cameras lower than that and its terrible. If you have a small amount of money to invest into a cheap phone I suggest that just buy something cheap as long as it has 13 mpx. I bought my phone for around 80 dollars considering that I can buy something cheaper with the same camera specifications. The camera is the important thing, just think of buying something else once you are able to get some money out of it.
note: when taking a photo from your drawing pick a place with a good lighting and take the photo as parallel as possible to the paper. Remember that you are using a phone camera here and not a scanner
Step Two
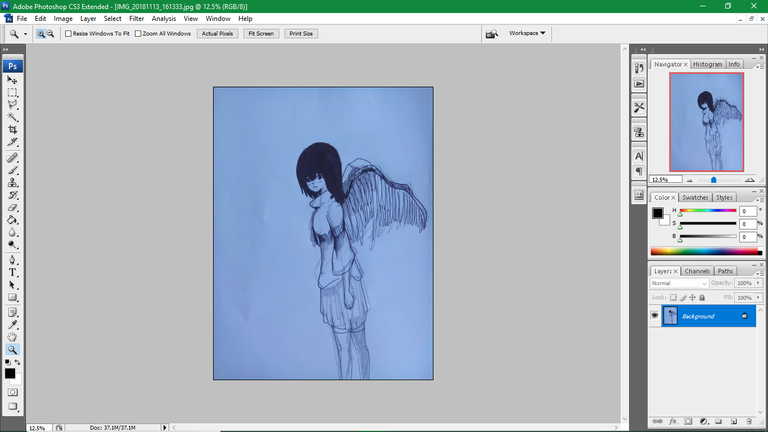
Open the image in Photoshop, any version is good as long as its Photoshop. You can use Gimp for free but I personally used Photoshop that time so I will stick with it here in this post. If you do not have Photoshop, just fucking torrent it. If you do not have your own computer and just rents on a net cafe, try downloading the file via torrent as long as the cafe has not limitations like netopia or TNC(these are net cafes here in Philippines). If you cannot do that in anyway, you're screwed, do not read further in this post and find a net cafe where you can use PS or Gimp. If you downloaded Gimp, just look for another tutorial.
Step Three
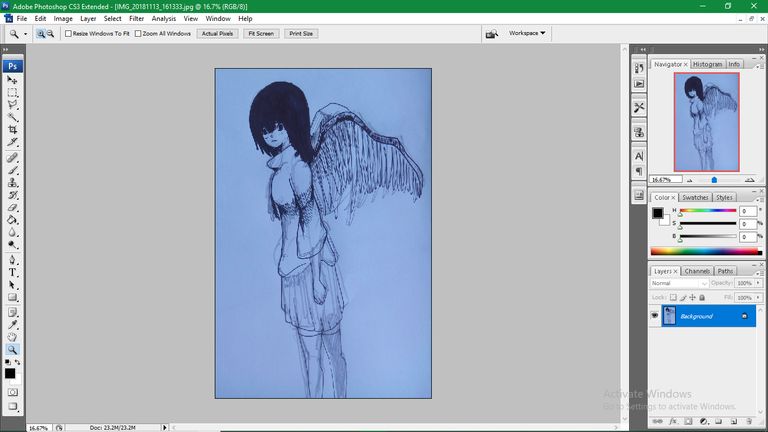
Crop the Image. Make sure that the subject is in the middle of the picture and resize the whole work if needed. If you do not know what crop is, for God's sake, just press "C" and drag it on the picture. If you made a mistake, press CTRL+Z.
Step Four
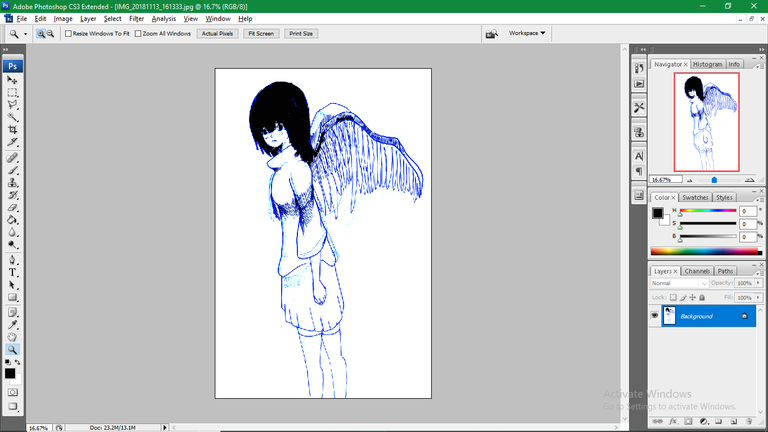
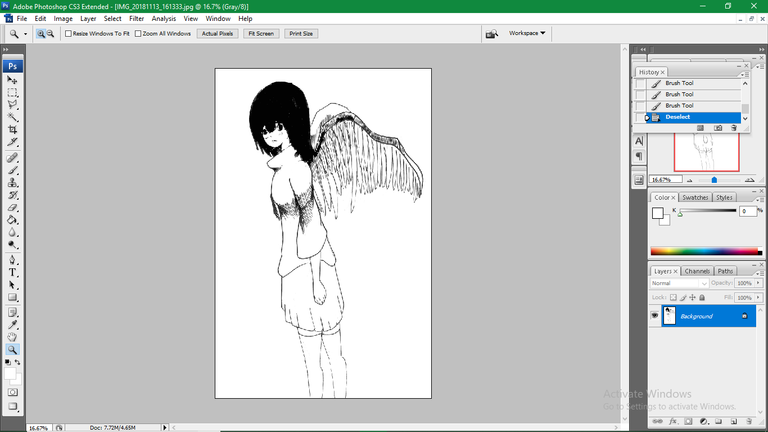
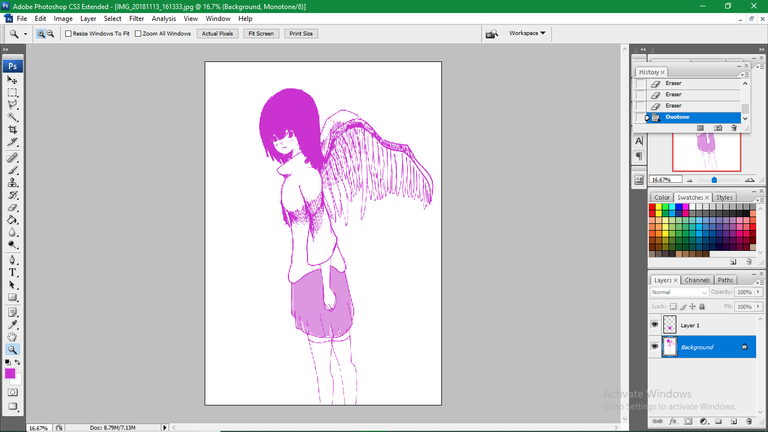
Adjust levels until you make the work look brighter. Adjust the contrast of black and whites so that only the line art appears.
This sample I made is a good work as sample. It wasn't cleaned and erased manually that is why some blue lines appeared on it after I applied levels. To avoid this, simply erase the pencil marks on the work. The pencil marks or the art work shouldn't be perfectly clean, just remove as much pencil marks and stains as you can. If there are other colors that still exists after levels, convert the file into grayscale(image>mode>grayscale).
Step Five
Erase unnecessary marks that wasn't removed by applying levels. To do this, use the brush tool and load it with white paint then apply on work.

Step Six
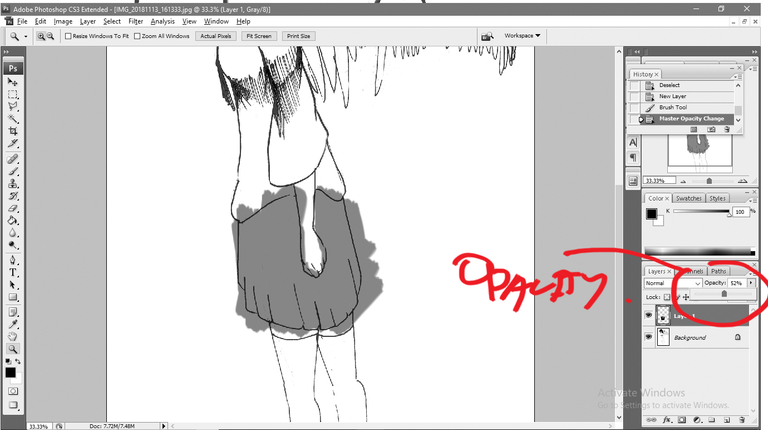
Make a new layer by pressing SHIFT+ CTRL +N. On the new layer, apply black paint over the area where you want to put the manga tone. For this drawing, I decided to add tones on the girl's skirt.
Step Seven
Adjust opacity. The opacity bar can be found in the layers section at the bottom right of the screen.
Step Eight
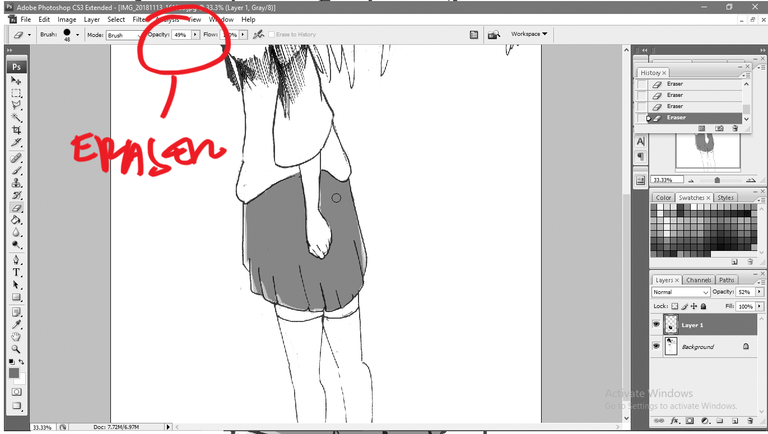
Erase excess Manga tones. Using the same eraser, you can make variations of the tones by adjusting the eraser's opacity. You will find the eraser's opacity at the top middle of the screen/ Photoshop app once you choose the eraser tool by pressing the "E" button.
Step Nine
For fun, you can change the color of the whole composition into another color if you want by converting the file into duo tone. The save the file into JPEG or PNG format. Find the saved file on your computer and drag that dang drawing on your post. And bwala! You're done!
Everything in this post are mine!
:-D
Hi turtledancedaily!
I am (currently @eaudebla) a curator for AkibaSteem and this is just to let you know that I upvoted your post:
Also, feel free to join our community on Discord!

https://discord.gg/7JQruwm