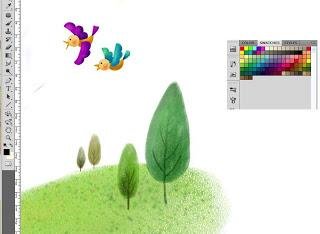
Photoshop painting
Once upon a time, the pictures were used to scan the animation in the Disney Studio, then were used for scanning and animation. In the middle, traditional drawing and digital drawing were both launched, currently only digital drawing. Take a look at how much digital drawing and painting progressed. Many artists use digital canvas instead of normal canvas.
The painting issue is quite complex. Artists use different types of puffs, they create new colors in combination with multiple colors, and bring out different variations from the palm of the hand. As an alternative, when the software is used, there are also these opportunities. Photoshop has everything.
source
Photo Learn how you can do the painting work. It is good to know one thing earlier, using graphic tablets instead of the mouse at the time of painting will be easy to work and get some advantages that can not be found in the mouse. This is mentioned here.
# Background and foreground color, select the color of the choice
In Photoshop you can set two colors for any time. Photoshop default is that these two colors are white and white. You can see these two colors in the toolbox. The foreground is foreground, the bottom background color. If you mark the canvas using the brass it will be in the foreground color.
If you delete some using Eraser Tool, then the part will be filled with background color (if not transparency). If there is another color, you can get the default white-colored color by clicking on the small black icon on the left side. The foreground and background color will be changed by clicking on the icon marked on it.
You can also select the color of choice at any time from the color palette, swatch.
. Open the color palette. According to your document type RGB / CMWY value will be shown.
. There is a color bar in the color palette. Here you can see the mouse pointer as an eyed tool. Click the preferred color.
. The color RGB (or CMWAY) values can be seen in the upper part. You can change the value using the slider here, or if you know the value of the given value then you can get the correct color by typing it.
. To use the preferred color from the switches panel, click the swatches tab and click the desired color.
After selecting which color it will be available as a foreground color and it will remain there until it changes.
###### ### Select colors from the picture
There may be times when the colors on the canvas need to be used in color painting. Even from photographs
. Select the eyedrop tool in the toolbox.
. Click on the highlight color of the place.
Without selecting the iDropper tool, selecting the brass tool can be used temporarily by using the alt key.
Select the brass
Using a brass tool you will paint. Bram size, type, etc can be different for correct paint.
. Select Brustula in the toolbox
. Click on the Brass icon in the Properties bar. Here are three types of brush options: Airbrass, Paintbrush and Transparent Spray. Airbus can be softened, and when used in full color paintbrushes, sprayer-like effects can be found. Select any of your work type.
. Click on the next icon, choose the brass seam (brass-tip), how thick it will be, and how much light the edges should be. First select the type of brass from the bottom, then if necessary, change its size and hardness.
Different types of bras can be installed separately. Photoshop is also provided with many brass separate files.
. Select the mode for painting from the next part. If you paint one color in one color in normal mode, the previous color will be covered. Other modes will have different types of feedback.
. Decide how transparent and opaque the part of the painted part will be opaque. Oppati 100 will cover some of the back of the money. If there is a decrease, the rear portion can be seen within it.
. Click on the Brass Panel button to make your own choice of brass.
In addition to this there are some settings for pressure sensitized tablets.
Painted
Select your favorite brass, color of choice, and drag it on canvas. Paint according to the direction of the mouse or graphic pane. The best picture is certainly another qualification.
Eraser Tool
Eraser Tool is used to remove some. In the case of Transparent Layer, this tool will select which tool to click and drag it will be deleted.
Various types of brass can be used for eraser tools.
Some Noteworthy Things
. One can use Undo only once in Photoshop. If you have to paint after some paintings use the recipe.
. Photoshop uses bitmap art. Once you paint, you can not change it. It can either cancel or delete it.

Congratulations @abdulmatin69! You have completed the following achievement on the Steem blockchain and have been rewarded with new badge(s) :
You can view your badges on your Steem Board and compare to others on the Steem Ranking
If you no longer want to receive notifications, reply to this comment with the word
STOPVote for @Steemitboard as a witness to get one more award and increased upvotes!