Introduction
Managing your AWS costs can feel like navigating a maze. AWS services offer unparalleled flexibility and scalability, but if they are not carefully monitored, they may also result in unexpected charges. AWS CloudWatch billing alerts are useful in this situation. They help you monitor your expenses and prevent unexpected charges at the end of the month. In this guide, I’ll walk you through the process of setting up billing alerts on AWS CloudWatch, ensuring you stay on top of your expenses.
Step 1: Enabling CloudWatch Billing Alerts in the Billing Console
Our journey begins at the AWS Management Console, the control center of your AWS environment. Here’s how you can enable billing alerts:
- Sign In: Open the AWS Management Console.
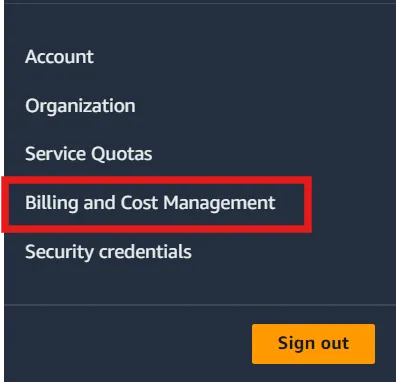
- Navigate to the Billing Dashboard: In the top navigation bar, click on your account name and select Billing and Cost Management.
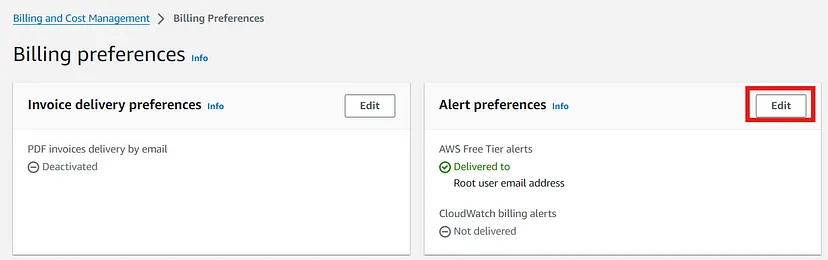
- Billing Preferences: On the left-hand side, you’ll see a menu. Click on Billing Preferences.

- Enable Alerts: Look for the alert preferences and edit them.
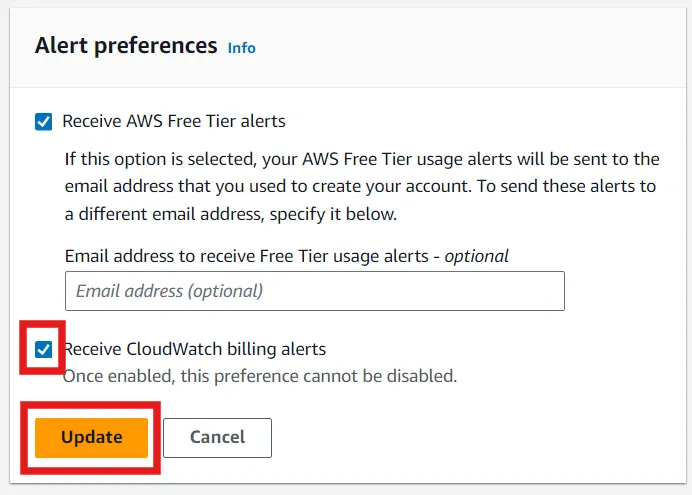
- Update: Don’t forget to hit the Update button to apply your changes.
With billing alerts enabled, you’ve taken the first step towards cost management mastery. Now, let’s set up a CloudWatch billing alarm to notify you when your costs exceed a certain threshold.
Step 2: Creating a CloudWatch Billing Alarm
Before creating the billing alarm, make sure to set the region to US East (North Virginia).

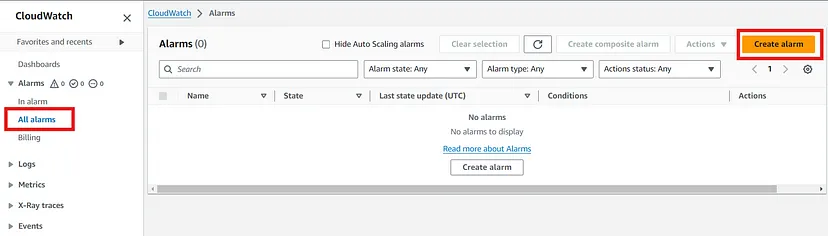
- Open the CloudWatch Console: Navigate to the CloudWatch console.
- Create Alarm: In the navigation pane on the left, click on Alarms, then choose Create Alarm.
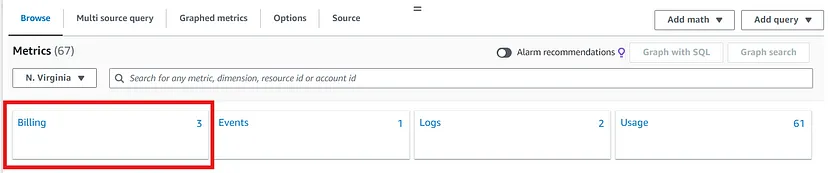
- Select Metric: Click on Select Metric to start defining what you want to monitor.

- Billing Metrics: Under the Browse tab, find and click on Billing.
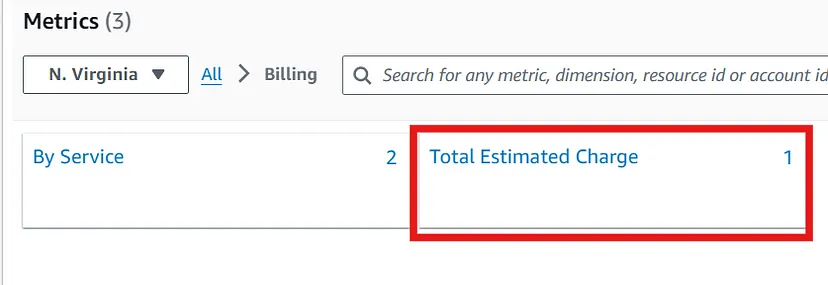
- Choose Metric: Select the Total Estimated Charge. You’ll need to pick the currency your account is billed in, like USD.
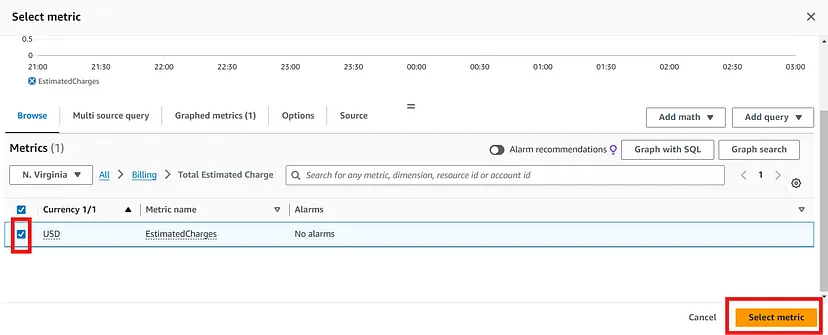
- Configure Metric: Click Select Metric to move to the configuration page.
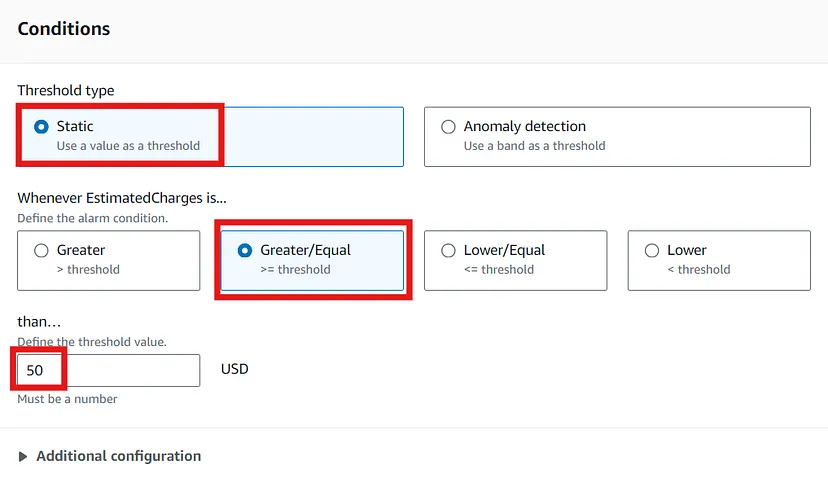
Step 3: Configuring Alarm Conditions
- Set Period: Choose how often you want the alarm to evaluate your spending. A common choice is every 6 hours.
- Threshold Type: Select Static.
- Set Condition: Define the threshold that will trigger the alarm. For example, if you want to be alerted when your spending equals or exceeds $50, choose Greater/Equal and enter
50.
Step 4: Setting Up Actions
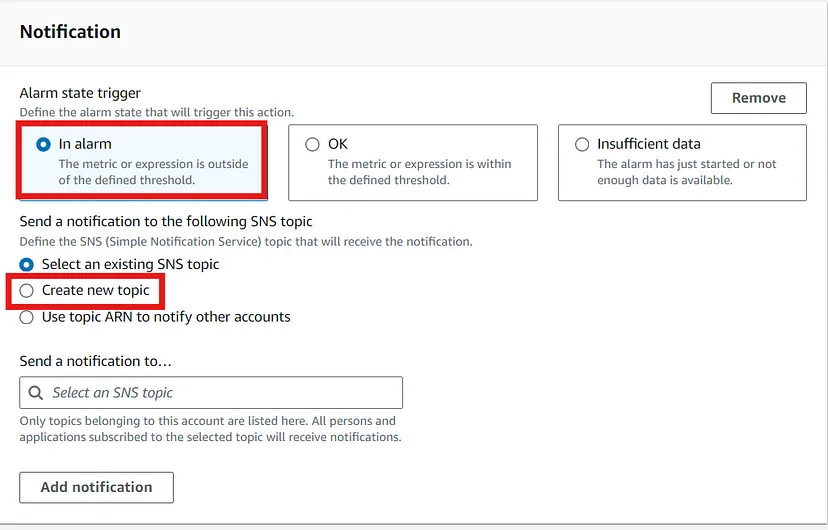
Actions define what happens when an alarm state is triggered. Typically, this involves sending a notification via Amazon SNS:
- Add Notification: Under Actions, select In alarm, then choose Add notification.
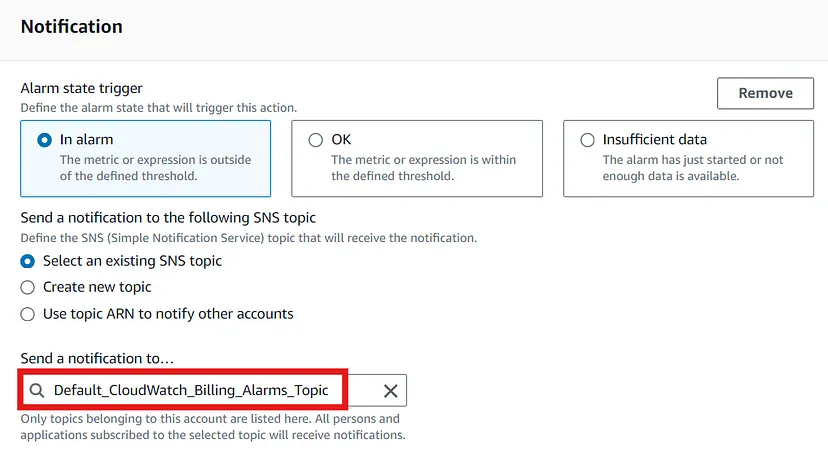
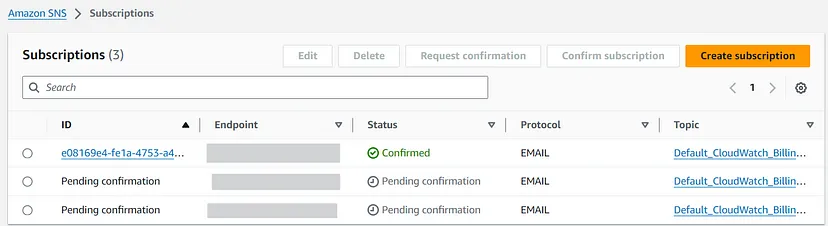
- SNS Topic: If you have an existing Amazon SNS topic, select an existing Amazon SNS topic. If not, create a new one. This is where notifications will be sent. In this guide, I’ll create a new Amazon SNS topic.
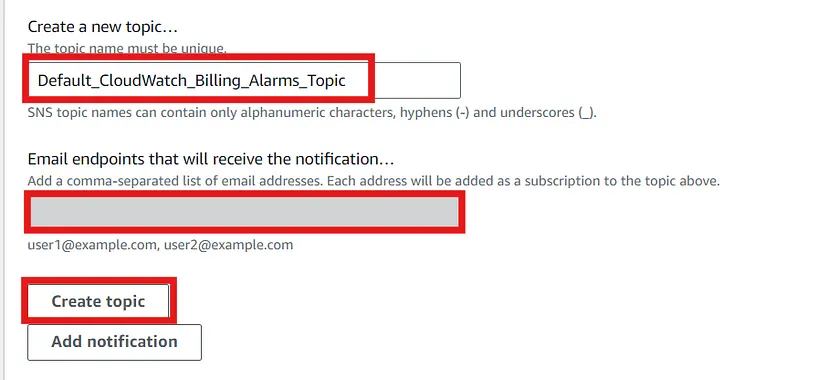
- Name Your Topic: Give your topic a name and enter the email that will receive the notification, then create a topic. If you want to enter 2 or more emails, you can separate them with a comma
,. For example,[email protected], [email protected].
- Configure Notification: Add the necessary details and click Next.
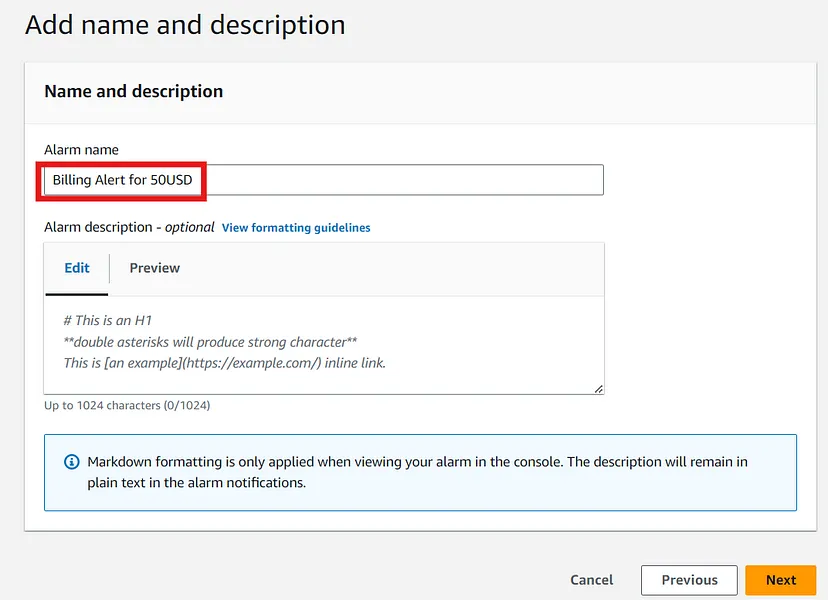
Step 5: Naming and Reviewing Your Alarm
- Name Your Alarm: Give your alarm a descriptive name and add a brief description if needed.
- Review: Double-check all the settings.
- Create Alarm: Click Create Alarm to finalize the process.
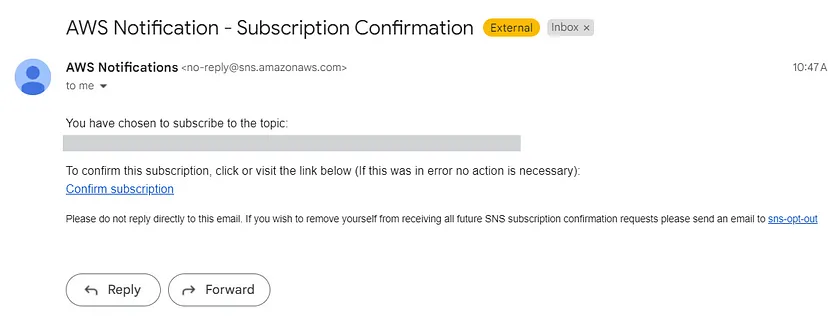
Step 6: Amazon SNS Subscription Confirmation
This is the final step. You’ll get an email from AWS and then confirm your subscription using the link.
And there you have it! You’ve successfully set up a billing alarm on Amazon CloudWatch. This proactive measure will help you stay informed about your AWS spending and avoid any budget overruns.
By following these steps, you’re not just enabling billing alerts; you’re taking control of your AWS environment. So, next time you log into your AWS account, you can do so with the confidence that you’re on top of your costs.
Happy cloud computing!