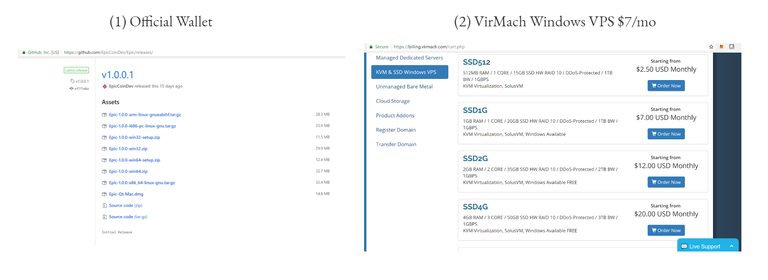
What you need to get started:
10,001 EPIC coins Official wallet - https://github.com/EpicCoinDev/Epic/releases/ Windows VPS - https://billing.virmach.com/aff.php?aff=4458 ($7/mo is plenty)
WRITTEN STEPS:
- Download and install wallet.
- Make sure you have 10,001 coins in wallet.
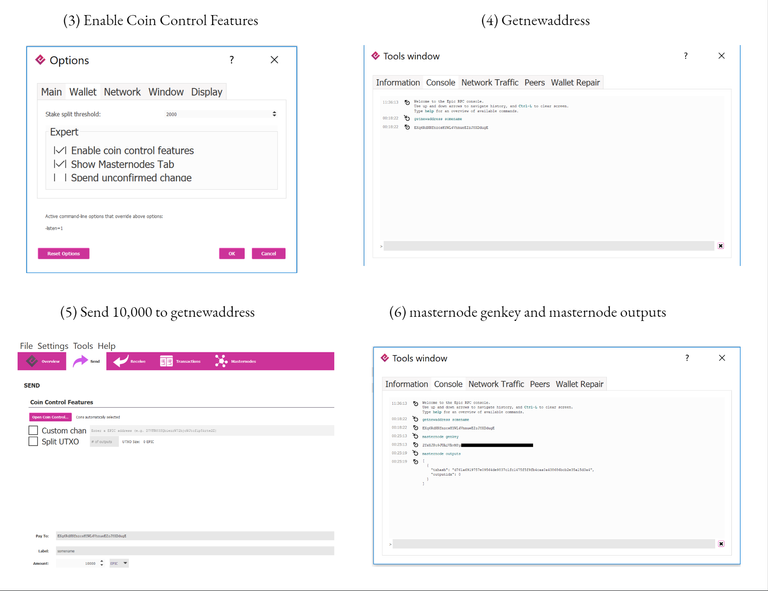
- In the wallet, go to SETTINGS > OPTIONS > WALLET > ENABLE COIN CONTROL FEATURES
- Next, TOOLS > DEBUG CONSOLE enter command getnewaddress < somename >. Save this address for the next step. (< somename > is what you want your Masternode to be called, without the < >)
- Using that address you just received, send exactly 10,000 EPIC. (You should see a transaction that says ‘Payment to yourself’)
- Go back to TOOLS > DEBUG CONSOLE and enter masternode genkey (Save this as well.)
- Still in DEBUG CONSOLE enter masternode outputs. Save the TX ID and Output.
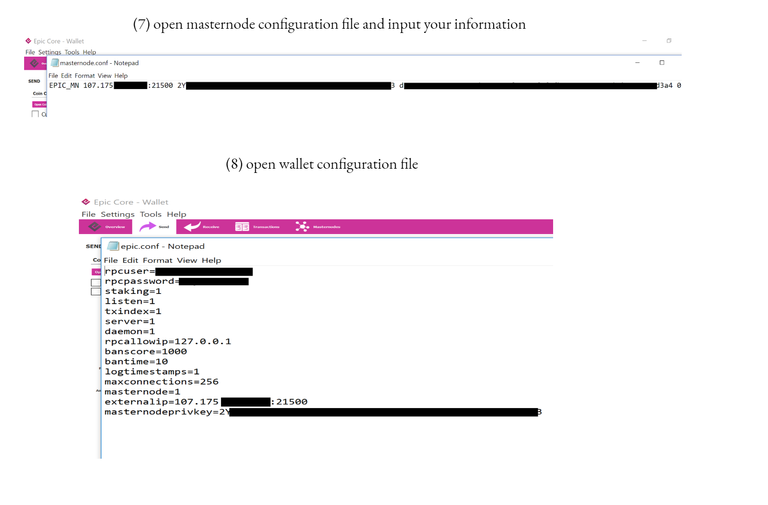
- Now open TOOLS > OPEN MASTERNODE CONFIGURATION FILE. Here you need to enter your alias (name) of your masternode, windows vps IP address:21500, masternode genkey you got from Step 6, and masternode outputs from Step 7. Save and Exit.
- Next, TOOLS > OPEN WALLET CONFIGURATION FILE. Enter the following:
rpcuser=< somename >
rpcpassword=< somepassword >
staking=1
listen=1
txindex=1
server=1
daemon=1
rpcallowip=127.0.0.1
banscore=1000
bantime=10
logtimestamps=1
maxconnections=256
masternode=1
externalip=yourwindowsIP:21500
masternodeprivkey=(Genkey from Step 6) - Save and Exit.
- Restart your wallet.
- After it’s opened, it should begin to sync. Click on the MASTERNODES tab and you should see the masternode you just created.
- Right click on your masternode and select START ALIAS. Should say Masternode Started Successfully.
PICTURES


