Create an Account
This first step is easy and only takes a few minutes. Let’s start by visiting the website and registering for a new account. https://3commas.io/?c=gnome
After filling in your email and password you will need to confirm your account. You should have received a confirmation email from 3commas. The link inside will allow you to verify your account and give you access to the dashboard.

Choosing a Subscription
Now that you have access to 3commas’ GUI you’ll need to sign up for a subscription. At the bottom left you’ll see “My Plan”. There are several plans to choose from along with detailed descriptions of each one’s traits.

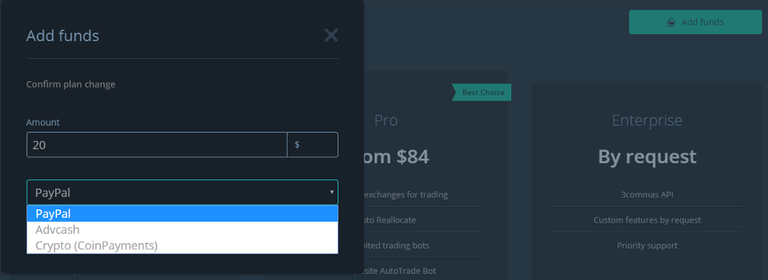
In the top right you’ll be able to add funds to the exchange which can also be used to pay off the subscription. They include three ways of payment.

Connecting to an exchange
The third step requires us to connect an exchange to our account. You’ll need to get an API key
from the market you chose. G back to the main page and click “My exchanges”

You’ll be taken to a screen that will allow us to join your 3commas bot with the exchange so that trading can begin. At the top click the blue button [+Connect to new exchange].

Once you’ve filled both your API keys in and chose your exchange we can move onto actually setting up the bot.
Creating a bot
Alright now we can finally start setting up a bot. Go ahead and click “My bots”, right under Bots. You’ll be able to see several versions of creating a 3commas bot.

The Short and Simple bot are fairly similar besides Simple bot having more options and being more difficult. Although within each bot configuration there are useful sections. “Assistant” which is located at the top right. This allows you to see whether or not you’ll be able to afford the settings you’ve chosen.

Balance: The amount of available coins you have on your exchange account to start trading.
Max amount for bot usage: Needed amount of coins in case all of the safety trades are filled.
Max safe order price deviation: Displays how low from the safety trade will be sold..
Percent %: Percent of your coins that the bot can use to trade.
Note: If you are using Binance make sure to always have BNB when trading, otherwise there could be issues with trading.
Trade Start Conditions
Scroll all the way down and on your right there’ll be three sections. Let’s start with the Trade Start Conditions.

Those 5 selections are what your bot will be taking buy signals from, but most people use Trading View since it’s easier and doesn’t require much handling.
QFL (QuickFingers Luc)
This is very technical and too advanced for someone who is just starting. You botr would be looking for bases after the drop under the price that will bounce because of a Dead Cat Bounce (https://www.investopedia.com/terms/d/deadcatbounce.asp). Afterwards the bot will start to make new deals due to the drop.
Manually/API (Bot won’t open new trades automatically)
The bot won’t start opening new deals until you press on “New trade ASAP” on the bot page.
The last section (Info) is simply a quick definition of various terms that’s required to be known so you can understand what means what in your settings.
Final
Congratulations! You’ve come to the end and learned how to set up a 3commas bot. Go ahead and click Create bot.

Go back to the main dashboard and once again you’ll need to click “My bots”. You should see the bot you’ve created.
EX:

Press the button under “Working” which will turn the bot on. Move over to the eye icon to the right and click it so we can observe the commands it’s executing. The following screen will give you a list of all the settings you’ve chosen including a record of your profits and how many shares of a coin you own. Thank you for reading this guide and always know that the support team is always here to help out.