"COSMETIC BAG WITH YOUR HANDS - Craft Collection #01 ~ "

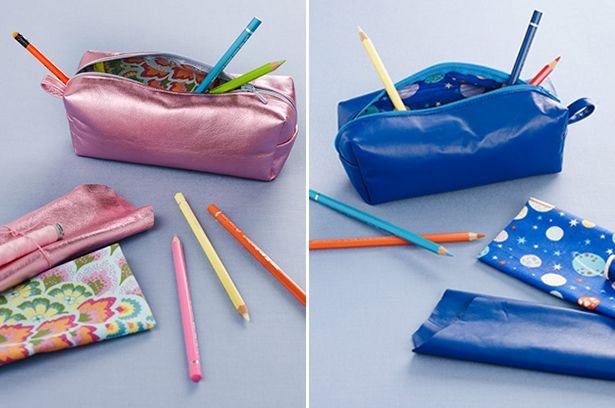
This time I will introduce how to make such a pencil box useful not only for schoolchildren - not only beautiful, but also very practical.
- YOU WILL NEED:
- Leather or fabric (30 by 30 cm), and also a piece of 4 by 10 cm for the loop.
- Cotton for lining (30 by 30 cm)
- Glutinous (30 to 30 cm)
- Lightning (30 cm)
- Adhesive for fabric
- Slanting Bake
- Pins or clothespins
이 시간 나는 연필 케이스를 만드는 방법을 소개합니다 같은 유용한뿐만 아니라 학교 어린이 - 단지 아름다운뿐만 아니라, 매우 실용적이지.
- 너는 :
- 가죽 또는 패브릭 (30 x 30 cm) 및 루프 용 4 x 10 cm 조각
- 라이닝을위한면 (30 x 30 cm)
- 찹쌀 (30 ~ 30cm)
- 번개 (30cm)
- 옷감 용 접착제
- 기울이기 베이킹
- 핀 또는 옷핀
STEP 1

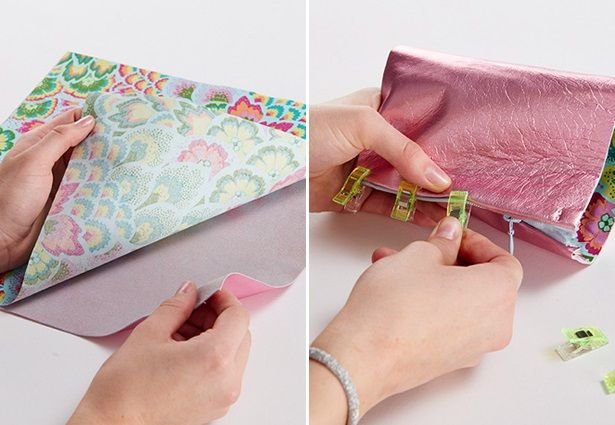
Glue the lining adhesive.
안감 접착제를 붙입니다.
STEP 2

Unfasten the glue so that the glue remains on the fabric, and then press the lining to the skin from the wrong side. You can also do this by using a double-sided glue fleece. Turn the edge by 1-1.5 cm and using special clothespins (you do not want to use pins, because they leave punctures on the skin), fix the zipper. Repeat for the other side.
접착제가 섬유에 남아 있도록 접착제를 풀고 틀린면에서부터 피부에 안을 눌러주십시오. 양면 접착제 플리스를 사용하여이 작업을 수행 할 수도 있습니다. 가장자리를 1-1.5cm 정도 돌리고 특수한 옷핀을 사용하십시오 (핀을 사용하지 않으려는 경우 피부에 구멍이 생기므로). 지퍼를 고정하십시오. 다른쪽에 대해서도 반복하십시오.
STEP 3

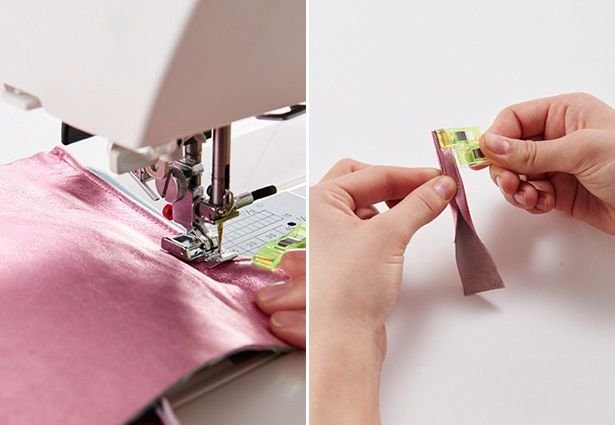
Using a teflon foot that does not adhere to the skin, stitch, retreating 3-4 mm from the fold. For the loop, rectangle 4 by 10 cm and, with the cuts inside, stitch or glue.
피부에 달라 붙지 않는 테플론 다리를 사용하여 접어서 3 ~ 4mm 후퇴시킵니다. 루프의 경우 직사각형을 4 x 10 cm 잘라내어 안으로 자르고 스티치 또는 접착제를 사용합니다.
STEP 4

Place the zipper in the center and fold the sides face-to-face. Secure with clothespins. Stitch, starting and finishing for 3.5 cm from each side.
지퍼를 중앙에 놓고면을 대면으로 접으십시오. clothespins로 고정하십시오. 스티치, 시작 및 마무리 각 측면에서 3.5cm.
STEP 5

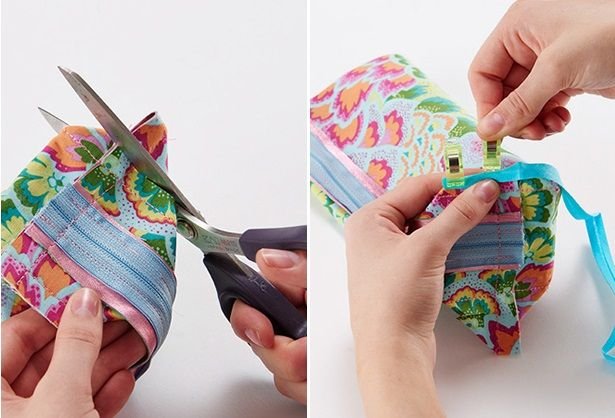
Fold so that the line laid in the previous step was in the center. Cut the stock up to 7-8 mm. Treat the slices with the oblique bake.
앞 단계에서 놓인 선이 중앙에 오도록 접으십시오. 최대 7 ~ 8 mm의 재료를 자릅니다. 비스듬한 빵을 사용하여 조각을 처리하십시오.


Hey, Welcome aboard! Love your story.
I’m curating interesting postings on Science, Crptocurrency Traveling. Here’s some recommendations just for you!
If you liked my recommendations Follow me
 #f4f #iFollowback
welcome @Steem-kr-newbie to Steemit !! Glad to see you. I hope you enjoy your time here, its a great community :) Nice post, i will follow your account, please follow me at @khunfarang
Hi @steem-kr-newbie welcome to Steemit, have a nice time ahead.