It's summertime and many of us are thinking of doing something outdoorsy. If you've been camping before, you might have noticed hammocks starting to pop up at campsites. I wrote the Ultimate Beginner's Guide to Hammock Camping for anyone that was curious about sleeping under stars in a comfy hammock.
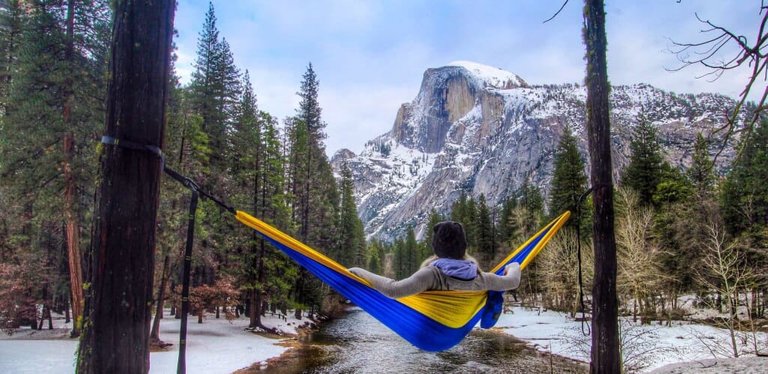
The first thing I do when setting camp up is dig out my hammock. This is always followed by stares while everyone else is setting up their tents. Sleeping under the stars in a hammock might seem a little crazy for those used to sleeping in a tent. The confusion usually leads to questions. “What about the bears and bugs? Aren’t you going to be cold? Won’t that hurt your back?
For me, sleeping in a hammock not only feels great for my back, but the benefits outweigh the being in a tent.
Hammocks have been used as traditional bedding for thousands of years. But just now, they’re starting to gain ground in modern sleep science. The indigenous people of Latin America have long embraced the use of hammocks. Even to this day, some people grow up sleeping in a hammock every night. The Navy also replaced their cots with hammocks shortly after Europeans discovered them in South America. Sailors spent months at a time aboard sea vessels where each man was assigned a hammock.
If all throughout history people have relied on hammocks, why is it that campers and hikers are hesitant to camp in one?
The negative ideas you have about long-term hammocking might stem from a few bad experiences with the typical backyard hammock. We’ll explore the myths about hammocking and how to get you started camping in a hammock.
The Wrong Type of Hammock
When most people think of hammocks, they immediately picture a Pawley’s Island rope hammock. Or maybe they imagine of a heavy canvas hammock set up in the backyard. The hammocks are widespread but so different than the traditional Latin American hammocks. This popular hammock is actually quite uncomfortable for sleeping longer than a minute in. Besides the uncomfortable fabric, rope hammocks have a incorrectly implemented spreader bar.
But why are spreader bars bad? It might seems like a good idea to spread open the hammock and create a flatter appearance. By spreading open the hammock, it appears to be a more inviting surface. But these spreaders created many unnecessary problems. For one, the spreader bars disrupt the natural center of gravity on the hammock. Spreaders cause the weight to distribute unevenly. You may have experienced the unbalanced shaking while getting into these hammocks. Or have even been a victim to sudden flips when you make the wrong move. Many people new to hammock camping recall experiences with these poorly designed hammocks. They end up associating all the negative experiences of rope hammocks with all hammocks.

Not only do spreader bars cause hammocks to flip over, the poor implementation of them makes them uncomfortable. The wooden bars at both ends prevents your weight from collecting at a lowest point. Pressure points develop from the unnatural weight distribution. The uneven tension on the ropes can also make your back sag in strange ways, leading to back pain.

That’s not to say that all spreader bars are bad. Some companies have designed camping hammocks with well positioned spreader bars. They’re known as bridge hammocks. They differ from the rope hammocks in a few important details. Your typical backyard hammock spreads the entire hammock fabric. While bridge hammocks only spread a part of the material open. The picture on the left shows a Warbonnet Ridgerunner hammock with spreader bars. Notice how it keeps a natural sag (we’ll get deeper into this later). This reduces the awkward center of gravity from a backyard spreader bar hammocks.
Rope hammocks are just one of many styles of hammocks. But there are many options out there that provide a superior night’s sleep. Besides the bridge hammock, there are gathered end, and bed hammocks. Gathered end hammocks have each end tied together to a point. The camper lies along the horizontal plane of the hammock. Bed hammocks are designed so that you lie perpendicular to the plane of the hammock instead. We’ll be walking through the more popular gathered end hammock. Let’s first weigh the pros and cons of hammocks.
Hammocks vs. Tents
If you’ve gone camping before, you’ve probably spent some time in a tent. While tents are great, they do have a few drawbacks. Some people find it uncomfortable to sleep on the ground without a large inflatable mattress which isn’t very practical to bring if you are camping as you hike. Other people don’t like looking for the perfect campsite that has a flat area for the tent while also being away from potential rain runoff. Modern tents are very intuitive to set up, but many people still don’t enjoy fumbling with poles and keeping track of where to stake the tent down. Tents are also a bit heavy and bulky, unless you are willing to spend a lot of money on a premium backpacking version. Additionally, while tents provide great protection from the elements, they also confine you within its walls instead of letting you experience the full majesty of the outdoors.
Hammocks have numerous advantages over tents when it comes to camping:

- Since they are suspended in the air, they are much more comfortable to lie in than most sleeping pads on the ground.
- With accessories, a hammock can provide as much protection from the elements as a tent.
- Hammocks are lightweight and portable. There’s no tents or stakes involved in the set up. Even a full set up (mosquito net, -rainfly, hammock and suspension system) will weigh less than most tents.
- For a tent of comparable lightness and portability, a hammock setup is much cheaper.
- It’s much quicker to setup and easier to find two trees than to find a suitable spot for a tent.
- Fall asleep in the open air instead of being confined to a stuffy tent. There’s nothing like counting stars until you fall asleep.
But that’s not to say that hammocks don’t have disadvantages compared to ground shelters:
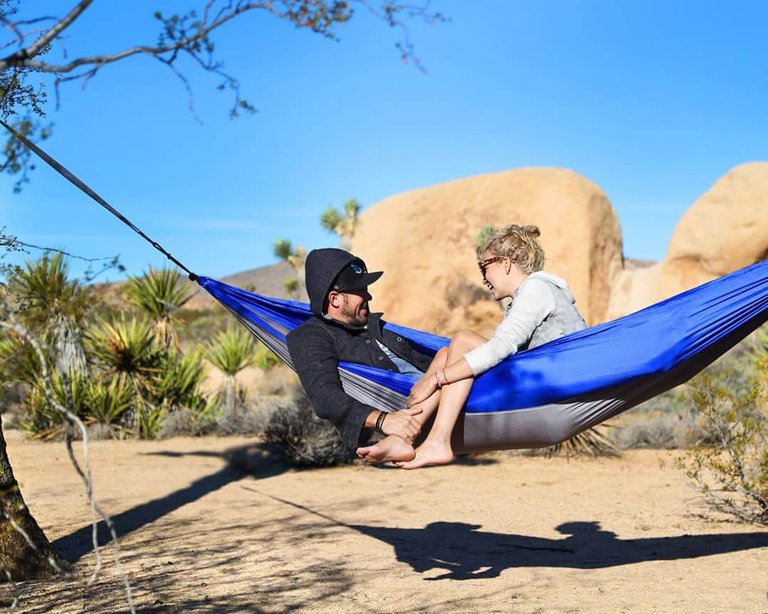
- Hammocks are most comfortable when used by a single person. Double hammocks exist, but they’re not usually meant for 2 people.
- If you hike with your dog, Fido will have nowhere to sleep except on the ground.
- There’s not as much privacy if you’re camping in a busy campground. It can be tricky changing your clothes from inside your hammock
- It’s harder to find a place for your gear and back. Especially when it rains. It can go under your hammock, but the ground might still get wet.
- You’re completely reliant on trees. No trees means no hammocking. Stick to a tent if you’re heading into the alpine zone.
How to Get a Flat Lay
Now that you’ve sorted through the myths and misconceptions, you’re eager to try hammock camping. But you still have a few doubts. How can sleeping in such a curvy cradle be comfortable? That looks painful for my back…
Soon, you’ll see that, in fact, you can comfortably sleep in a hanging bed the shape of a banana.
When setting up the hammock, the first mistake many people make is to hang it up too tight. The logic is simple to understand: if I hang the hammock tighter, it’ll be flatter and more bed-like. But, that logic doesn’t work in practice! What will actually happen when you get into a tight hammock is:
Photo originally posted by Derek Hansen of theultimatehang.com
- Your body weight pulls the hammock in even tighter and the sides will cocoon around you.
- The two sides will rise above your head and become huge claustrophobic walls.
- The walls will pull on both sides of you and force you stay still while the hammock squeezes your shoulders.
- The extra tension on the hammock increases the chances of damage to both the hammock and the trees.
Instead, resist the urge to keep the hammock taut, and loosen it all up. Give your hammock a good amount of slack to work with. Take advantage of the loose material to stretch out and use the full width of the hammock. By lying at an angle, you can get a flat lay even when your hammock looks like a loose curvy sling.
Get your hammock set up with plenty of slack. It’s important to lie at an angle to get comfortable. All you are doing is shifting your body from the midline of the hammock 30 degrees so that you are lying at a diagonal. What you’ll notice is that the center of the hammock is the tightest, while the sides remain loose. By adjusting the angle of your body, you’ll be cutting across the curve of the hammock. The hammock will flatten out underneath you and give you a flat lay without pressure points. Your neck and feet will maintain a slight elevation and the hammock will conform to your back.
Illustration by Derek Hansen of theultimatehang.com
When lying at an angle, you’re not restricted to only sleeping on your back. You can move around into all sorts of positions. Just find one that you are most comfortable with. I prefer to sleep on my side and I can comfortably sleep in that position when I angle my body. Since it’s almost impossible to flip in a well designed hammock, feel free to toss and turn as much as you want. Check out this hammock hang calculator to figure out your perfect hang!
Now that you know how to lie down in the hammock, the next step is to make sure you can stay warm! Most people associate tropical beaches and warm sunshine with hammocks. Unfortunately for the backpacker, chilly nights and an icy butt are much more common.
Staying Warm
Unless you’re camping out in the hot tropical rainforests, you’ll need a way to stay warm. The traditional sleeping bag and sleeping pad combo works just as well suspended in the air. But why do I need a sleeping pad? Since I’m not on the ground, shouldn’t my sleeping bag be enough? That is not the case! The breathable fabric of a camping hammock that is so comfortable in the summer heat, also allows for the cold night air to pass through just as easily. A sleeping bag will cover your top insulation, but it is less effective underneath . A cheap foam pad can go a long way oftentimes. An inflatable pad can also work well in a hammock.
Hammock with foam sleeping pad and sleeping bag.
The best kind are styles that are designed to fit inside the sleeping bag such as the Kylmit Inertia X Frame. One of the biggest annoyances when trying to use a sleeping pad with a hammock is staying on top of the pad. It’s easy to shift your weight and move the sleeping pad from out underneath you. Some hammocks feature two layers to hold sleeping pads in place. Other hammockers like to stuff their pad inside their sleeping bag as long as it fits.
A problem that may arise from using a sleeping pad in a hammock is that the pad may be too narrow for your shoulders. Depending on the slack of your setup, the sides of the hammock may give your shoulders a slight squeeze. Even if it’s slight, it can compress your sleeping bag in that area. This will reduce the amount of insulation around your shoulders. Luckily there are a couple easy solutions for this. You can stuff your extra clothes along your sides to give you some extra protection. You can also buy specially designed sleeping pads for hammocks that feature “wings” on both sides. The “wings’ add insulation for your shoulders and arms when in a hammock. You can also modify your foam pad to make your own “wings”. Just cut two pieces off a cheap foam pad and attach it to your main pad with some duct tape.
One thing to keep in mind though is that sleep pads are vapor barriers. Vapor barriers can cause condensation on your hammock or sleeping bag throughout the night. Any moisture that passes through the sleeping bag will become trapped by the pad. The moisture condensates, reducing the loft and insulation of your sleeping bag by morning. This is why some people wake up feeling cold even though they felt toasty in the middle of the night.
For the seasoned hammock camper, the ultimate form of insulation comes from an under quilt-top quilt combo. Under quilts provide an insulating layer beneath your hammock that you hang on the outer layer. Since the under quilt is on the outside, it can expand and provide a ton of insulating surface area. And it won’t compress when you lay in your hammock. The camper then uses the top quilt as a blanket while the under quilt keeps his bottom warm. When used together, a top quilt and under quilt function like a sleeping bag around the whole hammock. The only downside is the high price tag attached to purchasing a top quilt and an under quilt.

Though down quilts are superior in many respects, there are also synthetic versions available. Like sleeping bags, these share the same advantages and disadvantages. Synthetic loft quilts are cheaper than their down counterparts. Unfortunately they are also heavier and do not compress as well. One advantage is that synthetic materials are resistant to the delofting effects of moisture. They keep their insulating properties even when wet. This is not true for down which ends up being completely useless if it absorbs too much water. A synthetic under quilt will cost more than a foam pad, but it can be cheap enough for budget campers. Keep in mind that quilts can only be used with a hammock. If for whatever reason, you end up sleeping on the ground, only a pad will provide your insulation!
Quilts are ideal for the hammock camper, but new hammockers might not want to break the bank. Fortunately, are a couple tricks to get great insulation without buying a new quilt.
Bug Nets
Another common complaint from tent campers is the insect problem that comes with any open air camping. A tent protects you from biting buggers as long as you’re not leaving the door open. But most hammocks will leave you completely exposed to mosquitoes. Fear not! Many options exist for you to protect yourself from biting insects. Many bug nets are designed specifically for a hammock. They’ll give you complete 360 degree protection.
There are different options for bug nets when hammocking. Nets designed for hammocks are set up by stringing the hammock through the two open ends. The open ends are tightened once the hammock is inside. The net is then attached to a ridgeline with loops located at the top of the net. These mosquito nets have a zipper or velcro opening to allow you to get in and out. You can also use an all purpose mosquito net and drape it over a ridgeline above your hammock. Then just let the sides fall to the ground or tie them together once you’re in your hammock.
Full camping hammock set ups complete with tarp and mosquito net for full protection.

Sometimes the best defense is to avoid camping near hubs of mosquito activity. Stay away from camping near large pools of stagnant water where mosquitoes breed. The shore of that crystal clear lake might seem like a great campsite, but it’s also mosquito heaven. Just moving a few hundred feet away from the edge of the lake can reduce the amount of mosquito activity.
Many hammocks come with built in mosquito nets for people that camp in heavy mosquito areas. While these hammocks can prevent insects from getting in, persistent buggers will bite you through the fabric. That’s where the dual layered hammock comes in handy again! You’ll have extra protection from bug bites.
Camping Hammocks with a built-in mosquito net covering the top half.

Permethrin is a common pesticide used to treat mosquito nets to act as an extra level of protection. Most mosquito nets will let you know ahead of time if they’ve been treated. If you are unsure if you’re hammock has been treated, don’t be shy about giving yourself a liberal dose of regular insect repellent before you head to sleep.
Bad Weather
Just because a hammock is best enjoyed in sunny weather, it doesn’t mean that you can’t use them in all weather conditions. Bring a rain fly and you can beat the weather. Relax in your hammock while you enjoy the pitter patter of raindrops on your lightweight roof.
Rainflys come in many different shapes and materials. Almost any kind of tarp can turn into a sturdy shelter to protect your hammock from the elements. But there are several rainflys out there that are specifically designed for hammocking. These have some hammock specific features to differentiate them from a standard ultralight tarp. These rainflys are made with silnylon, a strong waterproof material. Silnylon is much lighter than the standard blue plastic tarp but just as effective of a shelter.

These rainflys can be set up by creating a ridgeline above your hammock to suspend the tarp. The tarp is draped over the ridgeline. It is then tied in place with either some cord or a hook to keep the fly taught on both ends. Guylines pull the sides of the fly down and keep them in place. Just like a tent. Depending on the weather conditions, you can adjust the tarp accordingly. Keep it more open when there’s a light drizzle or pull the sides in if you’re facing a massive squall.
While silnylon is superior, any kind of tarp will work to create an effective shelter from the rain. The plastic blue tarps can make a variety of effective shelters for your hammock. They are also durable and cost only a fraction of a silnylon fly. The downside of these tarps is the bulk and weight, making them less than ideal for ultralight packs.

So you’ve decided to stick with your hammock even through the thickest of storms. Don’t fret, there are shelters designed to encase your hammock on all sides – complete with zippable doors. These extreme shelter systems will convert your hammock into a floating fortress. You’re now protected from anything the clouds are going to throw at you (just as long you’re not hammocking on the tallest tree in a lightning storm). Essentially, your shelter becomes a suspended tent. You’ll have the comfort of sleeping in your hammock with the complete protection of a tent. But these fully enclosed shelters are restricted to a single hammock. If you are trekking with a group, each person will need their own fortress. In lighter rain, a single rainfly can provide enough coverage to protect 2 or even 3 hammocks. With a large tarp, you and your friends can hang together while waiting for the bad weather to pass.
Straps or Cords?
Another common source of confusion is attaching the hammock to the trees. Many hammocks come with a set of paracord or some other type of rope as their “suspension system”. Using a bare rope on the tree will dig into the bark of the tree. This damages the bark and causes stress on the tree. To avoid this, always use some form of webbing or tree straps when setting up the hammock. The width of the tree straps spreads the weight across a larger surface area. Remember that you’re using a living tree to get that perfect hang. Do it a favor and don’t cause unnecessary damage with cords and rope! If you need to tie your hammock to the webbing, here’s the only knot you’ll need.

Safety
Like any activity outdoors, be aware of your own safety when hammocking. Before you set up your hammock, check your gear. Make sure there are no defects or signs of significant wear on the hammock or the suspension. When you choose a hammock spot, make sure you pick sturdy trees that can bear your weight. Avoid saplings as they will bend and stay away from dead trees because they can snap under the load. The ideal tree should be at least thick enough that you aren’t able to completely wrap your hands around the trunk.
Another thing to look for are widowmakers. Named for their potential to seriously injure the unaware. Make sure you’re not hammocking underneath sections of dead branches. This is especially important if you are camping in the winter where ice and snow can accumulate on branches above. The increased weight can be just enough to send the heavy branch falling on top of you.
When you think you’ve found a good spot, keep an eye out for any hazards that may be on the ground in case of a fall. While falls are unlikely, it’s not always a great idea to make a habit out of hanging above sharp rocks. It might look cool to hang your hammock high off the ground, but it doesn’t make a lot of practical sense. Hanging a foot off the ground is just as comfortable as hanging five feet off the ground. A good rule to follow is to always hang as high as you’re willing to fall.
A prime example of hanging your camping hammock higher than you're willing to fall.
Leave No Trace
Part of why we all love the outdoors is that it provides an escape from our human society. The wilderness recharges our spirit and reconnects us with life. We get so much out of these places, and it’s our responsibility to keep them wild for future generations to discover and enjoy.
No matter if it’s camping, hiking or just having a picnic, it’s up to each of us to leave no trace that we were there. The impact that we have on our natural spaces is huge whether we know it or not. Even when we have the best of intentions, it’s easy to overlook how we may be affecting the ecosystem with our actions.

Leave No Trace is a set of outdoor ethics built on a code of seven principles:
- Plan ahead and prepare
- Travel and camp on durable surfaces
- Dispose of waste properly
- Leave what you find
- Minimize campfire impacts
- Respect wildlife
- Be considerate of other visitors.
A fire pan significantly reduces the amount of impact that a campfire will have on the topsoil and the local ecosystem. Image provided by U.S. Government National Park Service
Hammockers should keep in mind these principles so that the outdoors remain unspoiled for all. Having a hammock to camp in can reduce your ecological footprint. You won’t need to clear out space on the ground and disrupt undergrowth like you may have to with a tent. But you do need to be aware of the anchors you use so as to not cause unnecessary harm to the trees.
As mentioned previously, never use rope or paracord to directly tie your hammock onto a tree. The weight exerted by your body causes a rope to dig into a tree. This can severely damage the bark, especially if the tree is being constantly used to hammock from. The bark protects the soft layer underneath that brings food from the roots to the leaves. If the damage to the bark goes more than 50% of the way around the trunk of the tree, the tree will lose branches and leaves if not completely die.
While some manufacturers still sell camping hammocks with a piece of rope to act as suspension, avoid using it when hammocking.
While some manufacturers still sell hammocks with a piece of rope to act as suspension, avoid using it when hammocking.
Be mindful of how strong and stable the tree that you plan to be using is. Don’t hang from saplings or small trees. Young trees haven’t hardened yet and do not have deep root networks in place to safely support the extra weight. The softer wood can bend and snap as well.
Photo by Derek Hansen from theultimatehang.com
Educate yourself on the local area you plan to be camping in before you head out. If there are protected species of trees, refrain from using those as anchors. For example, Joshua Tree National Park is dotted with thousands upon thousands of Joshua Trees. However, Joshua Trees are not actually trees and are protected with their population numbers are decreasing from climate change. They have shallow root systems that cannot easily support the horizontal force exerted by a hammock in addition to a trunk that isn’t as solid as a true tree. Due to their hollow structure and the dry ecosystems they live in, they are also brittle and can break off from the strain.
The outdoors are important for so many people, but unless we are responsible when enjoying it, we might lose a piece of what makes it so special. No matter what, when you are out in nature, leave it as you found it so that it will always continue to inspire.

In case of emergency
Having a hammock is not just great for relaxing and getting a great night’s sleep. The bright colors and large fabric makes the hammock a perfect item to have in the worst case scenario. If you ever find yourself lost, the eye-catching colors of a hammock can be an excellent flag to signal rescue crews. The large surface area allows the hammock to catch the wind and let’s you fly a bright, visible flag.
If you damage your sleeping bag, or end up lost without one, create an emergency sleeping bag with your hammock. Fill your hammock with grass, moss, pine needles. The hammock will keep these in place while you wrap yourself inside.
Your hammock can also collect rainwater for you if you don’t have a water source. Set up the hammock and place a rock in the center. When it rains, the water will flow to the lowest point of the hammock – where your rock is. Place a water bottle under the hammock and catch the rainwater.
When you’re lost, you might find yourself stranded in a place where there are no trees for your hammock. In this case, your hammock can be your impromptu bivvy and provide some protection from the elements. Crawl into the hammock on the ground and wrap the sides around you. This might not be the most comfortable, but it’s better than no protection.
You can also tie your hammock into a makeshift backpack to carry any survival items you come across. Your tree straps are also useful to have. Use them to fasten branches together into an emergency raft. The large hammock can form a makeshift sail to increase how far your raft can take you. Get creative, there’s unlimited ways to put your hammock to use.
And that’s all there is to it! With this, we’ve busted through some of the common myths about hammock camping. Now grab a hammock and start your next adventure!
I originally wrote and posted this guide on my website
Hi! I am a robot. I just upvoted you! I found similar content that readers might be interested in:
http://www.exploreserac.com/the-ultimate-beginners-guide-to-hammock-camping/
Awesome! This was a great post and thank you for clearing up some myths. I will really consider buying a hammock in the future. The weight benefit over a tent must be great!
Congratulations @raincoat! You have received a personal award!
Click on the badge to view your Board of Honor.
Congratulations @raincoat! You received a personal award!
You can view your badges on your Steem Board and compare to others on the Steem Ranking
Vote for @Steemitboard as a witness to get one more award and increased upvotes!