Hello Steemit community. I enjoy caricature immensely. I love the challenge, trying to maintain a likeness while, at the same time, distorting the image significantly. Drawing celebrity caricatures is a popular form of expression followed by many artists worldwide - some being very successful with this art-form alone.
What follows shows the process in stages so you can see how my mind interprets the shapes as I proceed. Here is a thumbnail of the final image:

Step 1 - The structure:

A few quick, rough pencil sketches are done so that shapes are previewed to see which distortion works for the sketch. One a shape is selected, I begin with the "framework" of the face . Its a standard method of drawing a sphere to represent the skull and then marking out the brow-line and the eye-line and a center line to ensure the nose and lips are running true. From that point, all norms are thrown aside as I proceed to indulge in exaggeration....The jawline will be big, the teeth will be exaggerated - so here goes!
Step 2 - The "gesture" sketch:
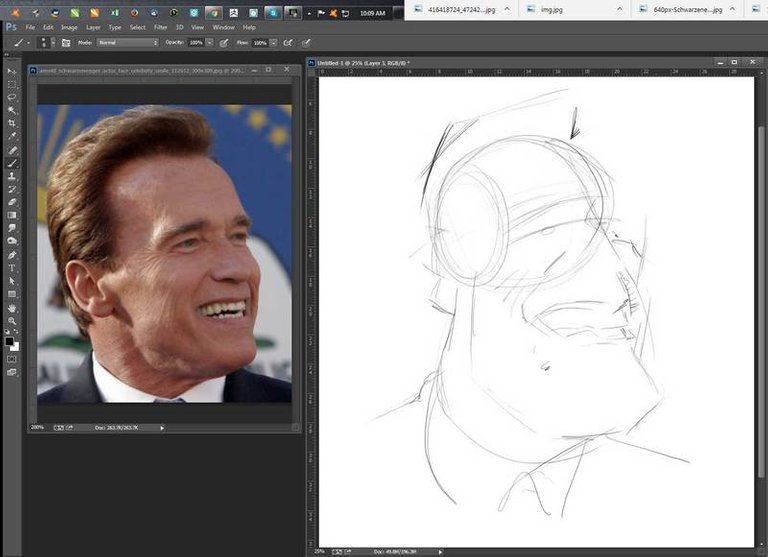
Using as few quick lines as possible, I indicate subtle details as a guideline and then draw the basic shape of the face as a "feel" of where the sketch is going. As I proceed adding details, the previous image is faded back so that I don't get a confusing mess to deal with on the subsequent layer.
Step 3 - It's all in the "detail"
 I
I
Still keeping the pencil strokes quick, I start documenting the image that I have in my mind. "Capturing my thoughts on paper" as it were.
Step 4 - More detail:

Now the basic framework is captured, I can concentrate on some details without the fear of losing the shape I have structured.
Step 5 - Reverse the image:
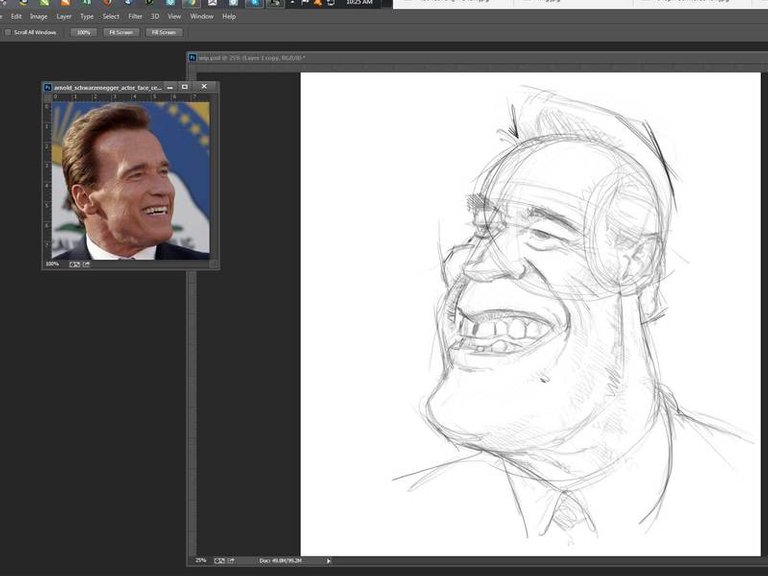
Reversing an image is a common practice used by many artists. Once this is done, glaring mistakes suddenly become clear and can be corrected. In digital art this is quite easy and simply involves flipping the image along the vertical Axis. Traditional artists often use a mirror for this purpose.
Step 6 - The final refining:
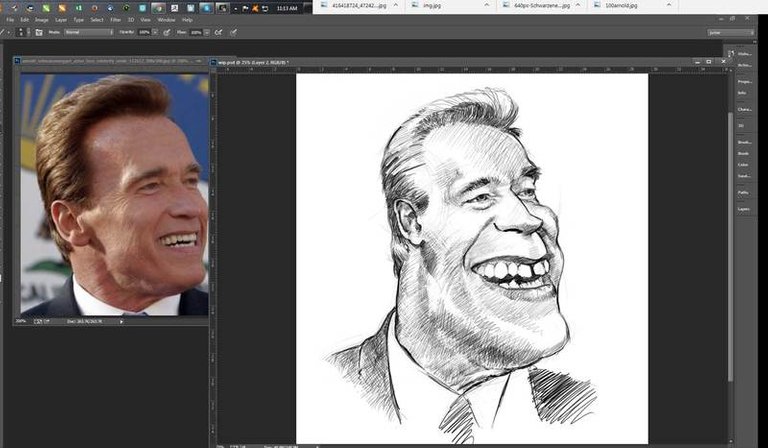
Putting down the shadow areas and getting important details sketched and finalized. This is where the likeness needs to be correct.
Step 7 - Adding the colour:
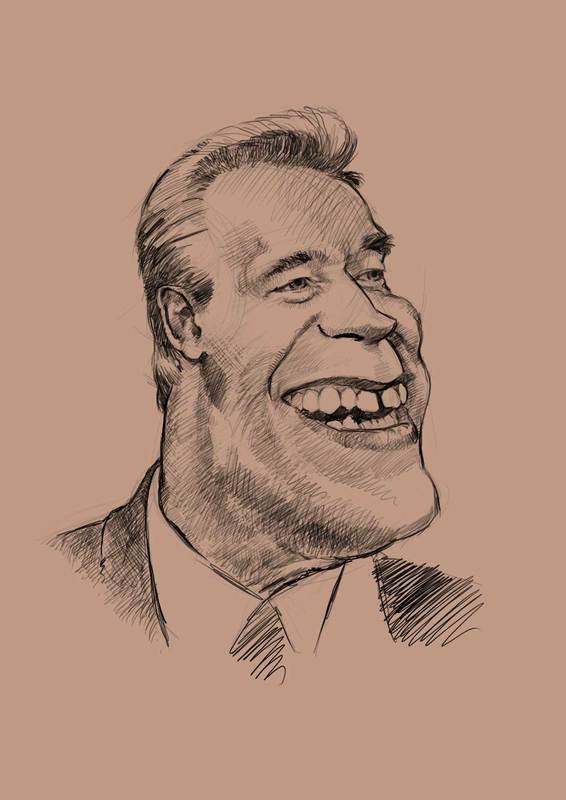
There are several ways to do this. I have chosen the method of selecting a mid tone skin color and dropping it into the background. This way only shadows, highlights and values an be focused on.
Step 9 - Basic color values:
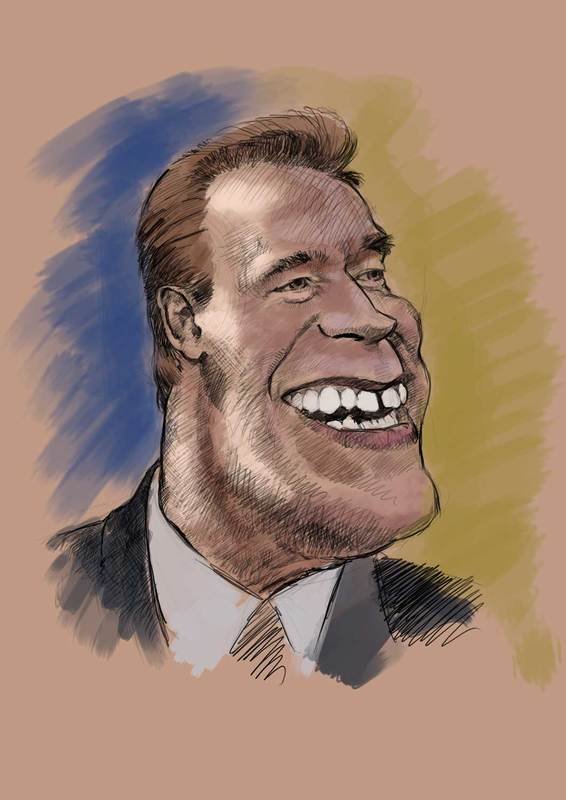
In digital painting, colors, in basic shades are painted on a "layer"under the sketch lines. The image begins to emerge and the final result can begin to be perceived.
Step 11 - Finalizing the painting:
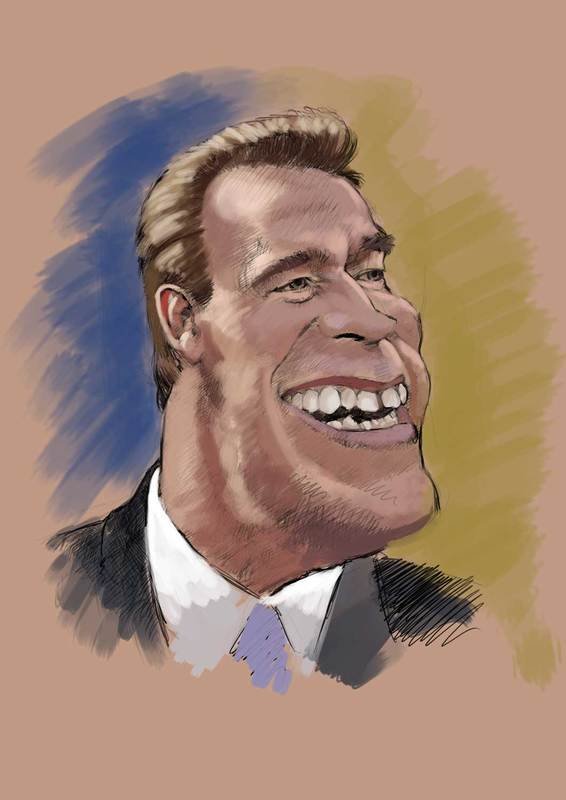
Now the fun starts. I paint over the line work and block in the color values. I use as large a brush as possible to stop the temptation of getting in to too much detail at this point.
Step 12 - The finished artwork:
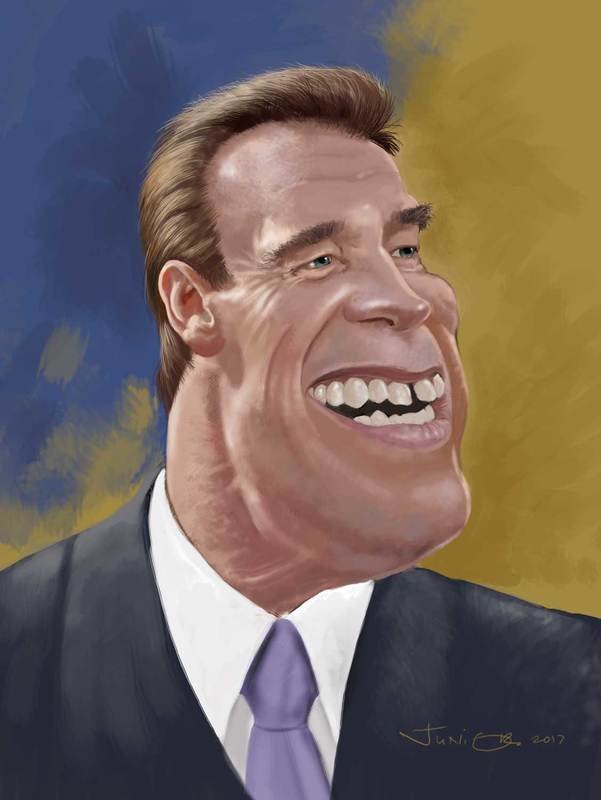
Here I can take time and focus on details, exaggerate the features and poke some fun on my chosen character. The hair can be rendered with fine, tapered brushstrokes, wrinkles can be added and some random textures included.
I hope this has been enjoyable to follow and that artists can find some ideas and inspiration to do caricature. Its fun and expressive and is a great way of expressing yourself! Thanks for visiting.
Woooow , Great skill in adobe photoshop
Followed ♥
Thank you ahmedezzat. I really keep trying to improve and hone my skills. Positive feedback, like yours, is a great boost!
You're welcome
Can you check out my blog ?
I have visited and upvoted
Thx dear
wow, have always been envious of people who can do caricatures, great work! Upvoted. Check out my piece on charcoal :) Peace
Will do so now
Young Arnold.
Cool!!!
Beautiful post. Upvoted.
Thanks Please visit @natashamariya and support me.
I have been to youir site, followed and upvoted
Wow! A++ stuff. Bookmarked it! :)
Hope you post more guides and how-tos like this. Always wanted to learn how to do caricature art in the proper way :) Starting from basics.
I intend to keepdoodling. I am learning as I proceed and its clear that THIS is what people want to see....
Thanks for bookmarking
very nice ! thank you for sharing
It's a pleasure, thanks for showing an interest @justmousepixels.
wow wow Great skill, I love it very much. Upvote!
Thank you so much wahyurahaddiann appreciate the upvote...followed you too
wowo this is awesome yuo realy have a talent and thank you for shraing this with us
Thank you jack123. I will do some more soon
Arnie never looked so good. This is a great piece of work and you are very talented. PS in your hands is like a paintbrush. Brilliant execution of this caricature.
You got my vote and resteemed.
LOL molometer. In his advanced years he had the tooth gap fixed but I used creative licence to put it back...forever part of his personality.
That's brilliant !!! Congratulations! Continue
Thank you amadeo...will do!
I never would have thought of flipping the picture to find mistakes. Amazing artwork!
Yes ak86rockstar. Sometimes mistakes can show up glaringly. Try it some time. Thanks for the feedback.
Wow ,,, you have that skill. I really like art. Thankyou for sharing @juniorshelver
Thanks for looking at my post nazarwills. Thanks for your feedback too
that looks real cool
Thank you pancheta
oh my god
I have to learn a lot about the art of you this is awesome @juniorshelver
I will keep them coming raviyanda
respect for you
and back at you @raviyanda
I want to get better at art but I don't know what I want my art to look like so I just keep being kind of okay at sketching/doodling
I went and looked at your site. You should post your art@akareem
Looks really nice, but the gap in his teeth kinda ruins it. Terminate the gap!
I'll do another sans the gap @remain.ambitious LOL
Please resteem my daughter pictures , tanQ You