Part 4
I Need a Block
So I really was going into a bygone era where tuning of naturally aspirated (NA) engines was very common and enjoyed huge popularity so people weren't afraid to invest a lot (A LOT) into NA tuning for a relatively small power gain as opposed to say a turbo or ECU mapping nowadays.
The pillars of classic NA tuning are:
more displacement
higher compression
optimized intake and exhaust
performance camshaft(s)
adapted ECU mapping (yes the E30s of the late 80s already had BOSCH Motronic Digital Engine Management)
heavy duty components to strengthen the engine
most importantly someone who can put the thing together so it doesn't blow up on first start
and clean parts so the power doesn't get stuck on the sidewalls...
The M20 was the most popular engine in the E30 and offers a variety of options when it comes to getting more performance out of it. The trickiest part was how to go from 2.5L to 2.7L without much hassle? Would be great if BMW themselves had built a 2.7L variant of the M20 right? Luckily they did in something called the 325e. In contrast to the 320i and 325i it wasn't a classic high revving engine, rather it used the added volume for more low end torque and added a throttled cylinder head with a reduced redline at 5000rpm. The result was a fuel savvy, smooth and fast car that ran out of steam at around 3500rpm.
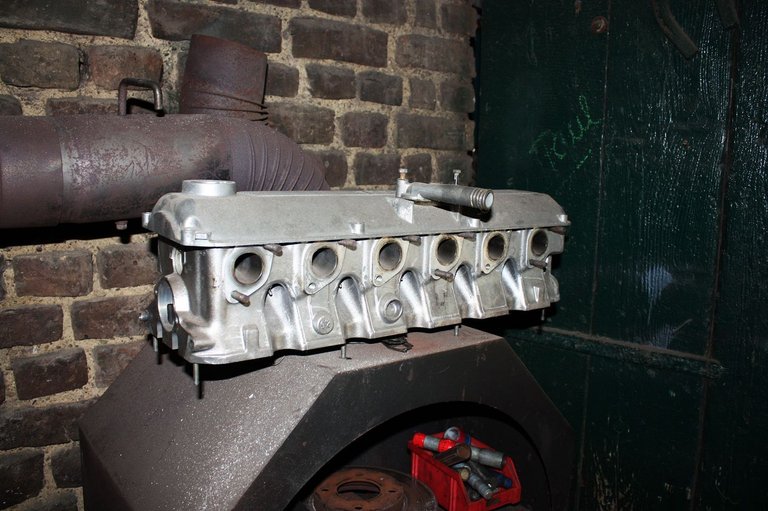
Point is that there's a variant of the 325e that uses the same cylinder head as the 325i. See how the recycling is coming together? This is my old cylinder head after a good cleaning.
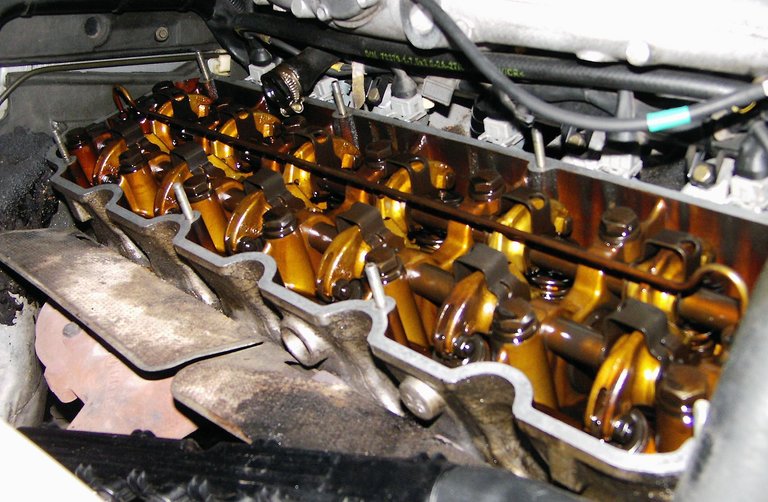
Turned out it really was in very good condition.
So I needed a block, a specific block from a car that had only been built for less than 12 months and wasn't very popular. By chance I found someone who was selling a complete 325e engine with transmission and some peripherals for 400 bucks not 150mls from where I lived. It was exactly the version I needed and apparently had 130k mls on the clock.
A quick phone call and negotiation, 300 miles and a back ache later (try to lift a 400lbs engine into a van with two people without an engine crane...don't even ask) I was the happy owner of this weird throttled 'ETA' engine.
Detailed planning and buying the parts would take a while and I needed the car so we decided to go for it and throw the eta engine with its own ECU into my car and see if it runs. First that would show if the engine and therefore the block run fine and second it would buy me some time while still being mobile. Third even if the engine had some weakness it wouldn't be in the car for long anyway.
Lesson with engines you bought that you don't know is simple: make sure you can manually turn the engine at the crankshaft. It should rotate without any harsh sounds or resistance. Drop a lot of WD40 into the cylinders through the spark plug holes. Fill up the oil to maximum. After installation remove the ECU relay so that fuel and ignition are powerless, take the spark plugs out and start the engine. It will not fire but build up oil pressure while not under load. That way you can be sure that oil is everywhere it's needed. You can then reinstall plugs and ECU relay and then...try your luck!
In my case it started right away and ran fine. Total installation time of engine with transmission at that point (after having done it how many times) was 4 hours...yeah we pride ourselves on silly shit like that :).
So in November of 2011, 3 months after the old engine blew up, I drove off in a 325i'e' :)
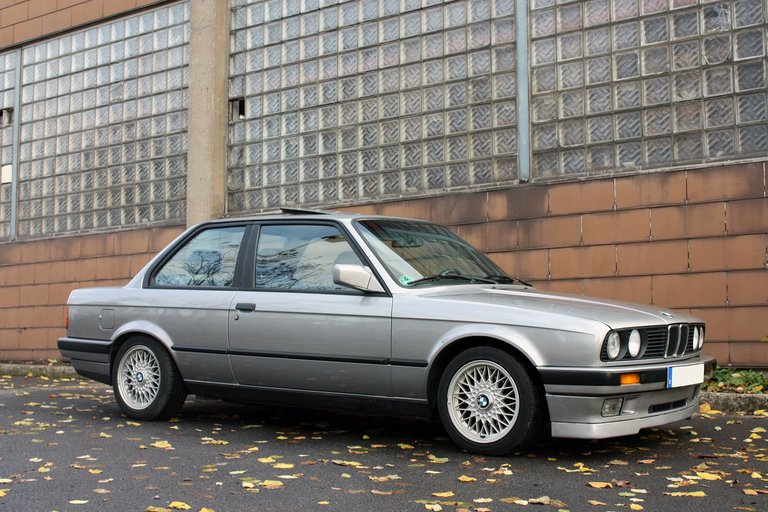
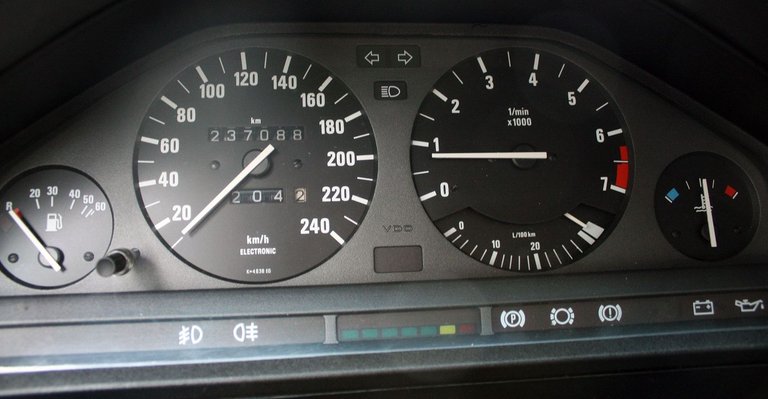
It was a vastly different driving experience. Huge torque from idle up like a modern diesel, all the while it used less than 7L/100km and was silky smooth with a very particular almost absent sound characteristic. Of course on the top end I missed my good old 2.5 which would keep on pushing even if you put the hammer down at 120mph/180kmh.
So the goal was to get that back and enjoy the performance knowing exactly what's under the hood and being able to push it like a new engine because well, it would be.
I drove the car with the throttled 2.7L for about 10.000km/6.000mls until late summer of 2012. By then I had the engine blueprint in my head and was ready to pull the trigger.
Meeting in the Countryside
This part of the story will dive deep into planning, building and setting up a complete engine from air intake to exhaust tip and everything inbetween. I'll also touch on some basics of naturally aspirated petrol engines and what matters when you aim for maximum performance without compromising daily usability or engine durability over the long haul - which was the goal.
So first thing to deal with was finding someone who can actually build the engine and preferably has some experience with the M20. My mechanic referred me to a guy who's been building engines for 30 years and used to build race engines for endurance sport. We went to this farm out in the countryside with a small garage attached to it. When I saw the Denso hat the guy was wearing and listened to him speak for 5 minutes I was sold. He had enough tools in that place to build a f***ng F1 engine let me tell you.
When I told him that I planned to build a 2.7L M20 with all new components he took a good look at me and literally went: "you're the first person in this shop who wants me to build this engine since 1997". Not sure how that made me feel but at least then I knew he's done it before.
He asked me about the head how hot I wanna go with it, I told him Alpina have used a 268 degree camshaft in their engine which was my reference. Since I didn't wanna push it too far I decided to go with a Schrick 272 cam, he nodded approvingly. Valve springs? Also Schrick, slightly tighter than the regulars, my goal was a head that was bullet proof up to 7500rpm. Regular redline is at 6.500 and anything over 7500 is overkill anyway. "You're gonna need new valve stem seals, that's no problem." he said. "What about the valves you want me to prop up your old ones?".
I'm telling you guys in a moment like that you literally feel like you're standing in some garage at Le Mans planning you're next race engine. It was an incredible feeling and for the first time I realized what that sparkle in people's eyes is about when they tell you 'I built it'.
Back to the dimly lit shop way out in the countryside with two guys looking at me with a mix of disbelief and excitement. "Valves will be new Schrick ones all around." I later found out that original valves are perfectly fine and rarely fail but wanted to make sure everything is rock solid. He went on "Rocker arms, planning to take the regulars?". Good question as these parts tend to break which can have grave consequences so I asked if there's an alternative. "Race parts" he said "close to 800EUR for a complete set". Mind you the standards can be had for 200 bucks - all of them. I put it down on my to do list.
## On to the compression...
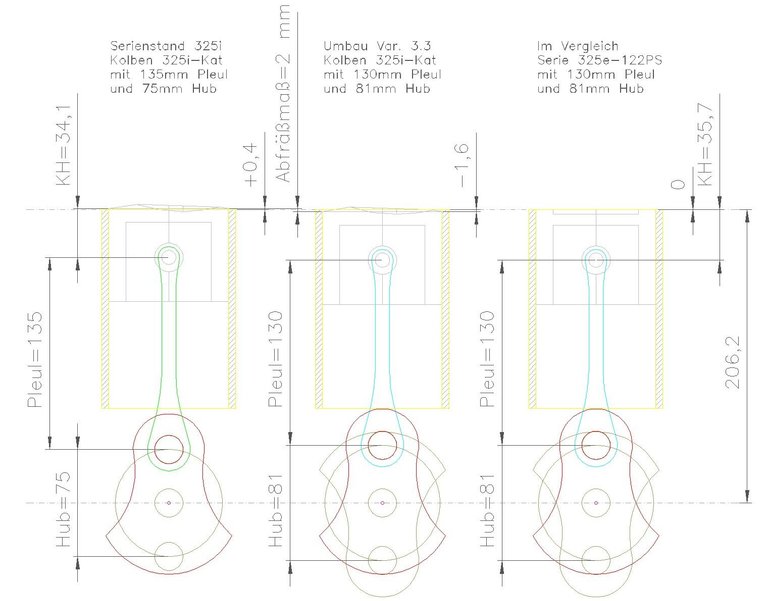
(Picture courtesy of www.e30.de)
See the way you increase the displacement here is by increasing the stroke which is achieved by using the crankshaft and piston rods from the M20B27 eta engine. In order to get to high compression though you must use the pistons from the original 325i engine.
On the left you see the regular 325i with a crankshaft with 75mm stroke and on the right the 'eta' one with 81mm stroke, that's the crankshaft we want. As we've seen before the 325e is a low compression motor so when combining that block with the 325i head and pistons we have to offset the low compression by bringing the chamber closer to the piston. This is achieved by decking the cylinder head i.e. milling off some material.
The problem is that the regular 325i piston skirt collides with the 'eta' crankshaft weights. Alpina have used specially produced MAHLE pistons to solve this problem (thousands of dollars again). Cutting the existing piston skirt on the other hand creates the issue of having to balance the pistons later on - something I wanted to avoid. Early 325i versions without a catalytic converter had pistons that would fit, so called 'catless pistons'. But they're just about as rare as the Alpina ones and equally expensive.
In the end I settled for so called 'weight optimized' late 325i pistons which do fit and are a bit more common. I only had to buy two sets until I found one that wasn't damaged - welcome to the world of hunting for spare engine parts :).
"If you provide the pistons" he went on "I'll put the head and the block together, see how much I have to deck each and mill the valve pockets in the piston to create the necessary crushing gap for high compression." If you just didn't understand a single word of that - neither did I at the time.
He's talking about this:
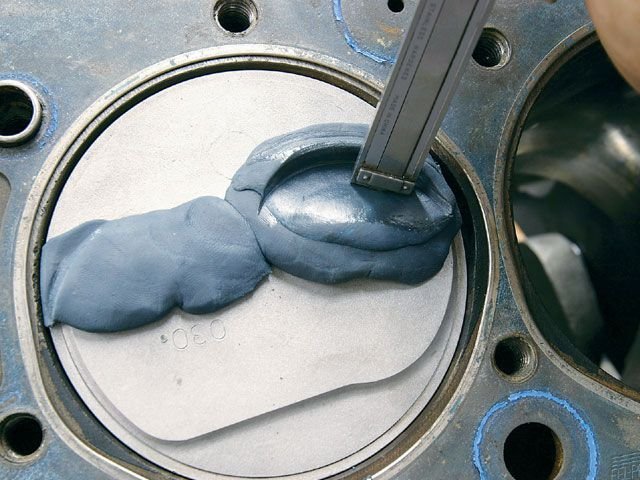
(Picture courtesy of GrumpysPerformanceGarage)
After decking the block and the head the motor has 2.7L displacement and a compression ratio of close to 10-1 but now the valves will collide with the piston as it moves to the dead center so what you do is measure how much it indents and then mill the valve pockets into the pistons accordingly. The way this is done you can see above.
So we were good to go and all I needed to do was bring him the head, the parts and the block and I'll get back my new engine...or something like that.
"What you're building here this is a beautiful motor, you won't regret it. Can't compare them engines to the planned obsolescence of today..." how right he was.
Headwork
After ordering some beautiful engine parts from Schrick and a wonderful BMW parts store in California called 'Ireland Engineering' I had it all together for the upper part:
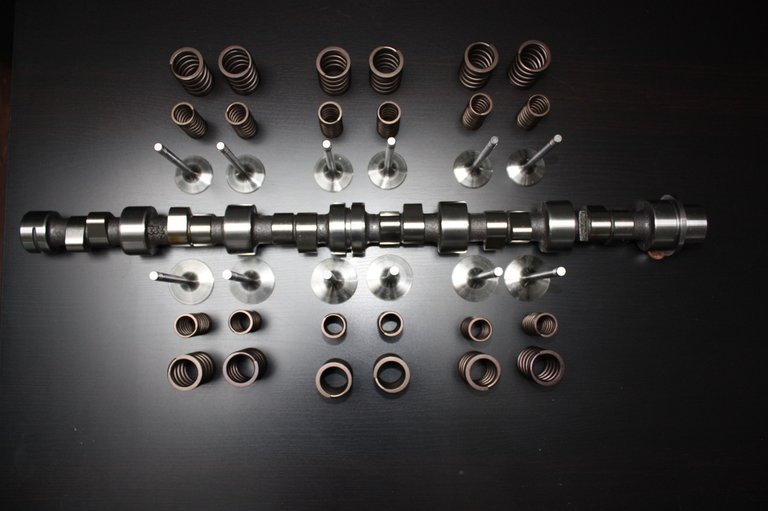
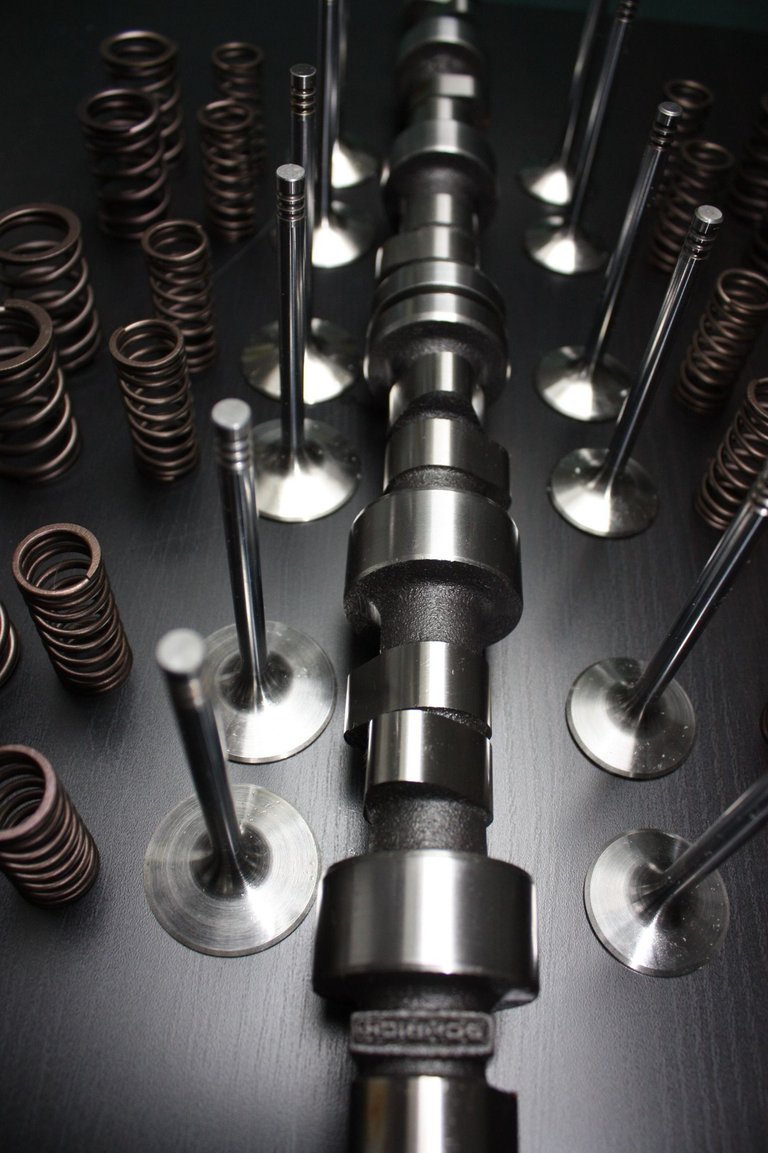
Schrick 272deg symmetric camshaft, new valve springs and 12 shiny valves. Valve seats were standard BMW parts.
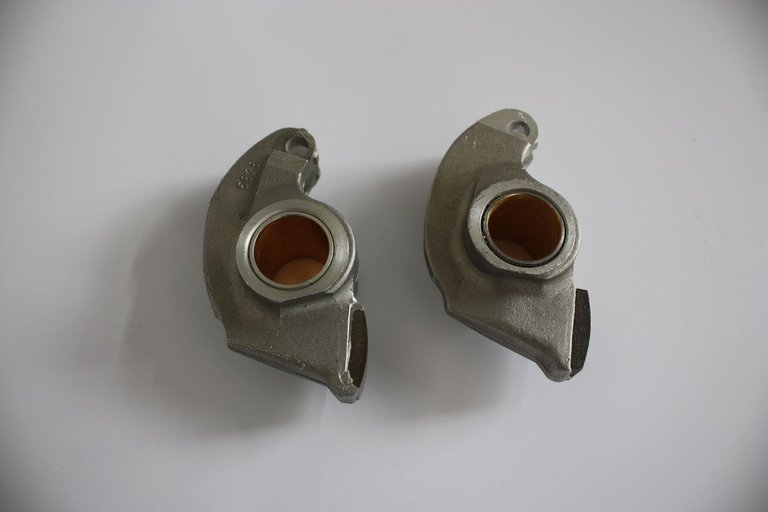
The solution for the rocker arms came from the Cali guys. Above a nice comparison of a standard (truly terrible quality) part and their offering. Much more refined, strengthened and stable up to 8000rpm - I like! In addition to that they were even cheaper than the regular part and light years away from the 'race grade' parts.
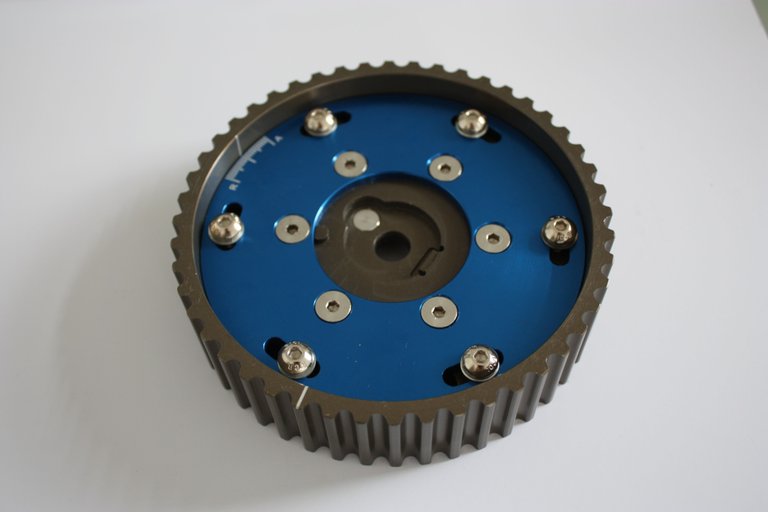
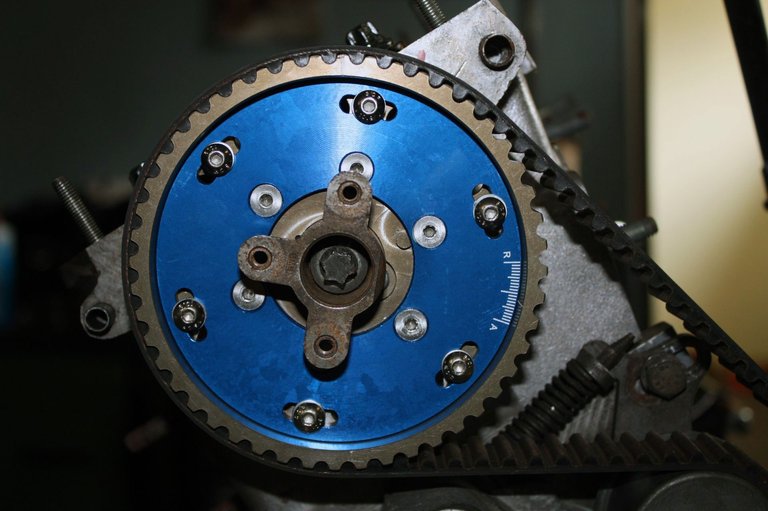
Ireland Engineering adjustable cam-wheel. Because I changed the distance between camshaft and crankshaft by decking the parts this wheel helps to offset that difference by tightening the drivebelt.
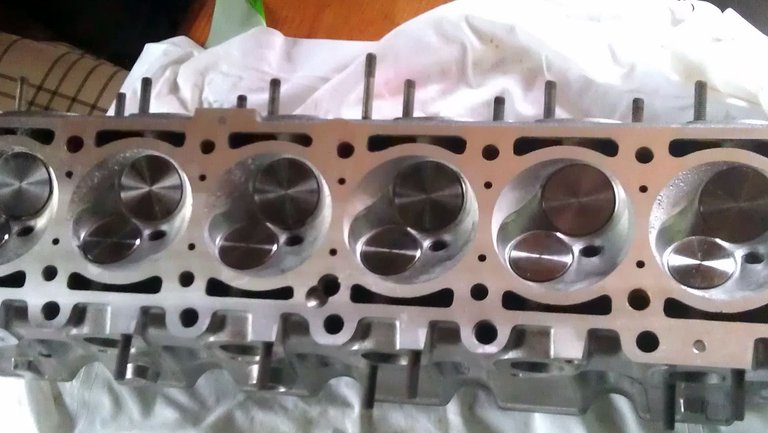
In October 2012 the head was ready:
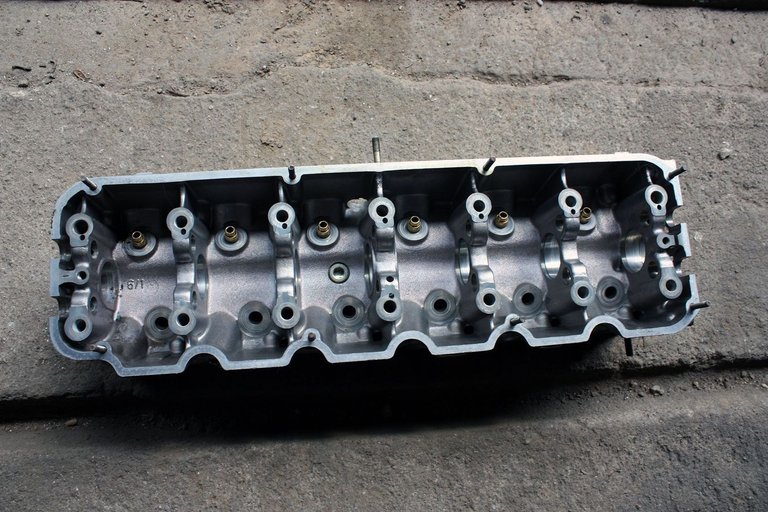
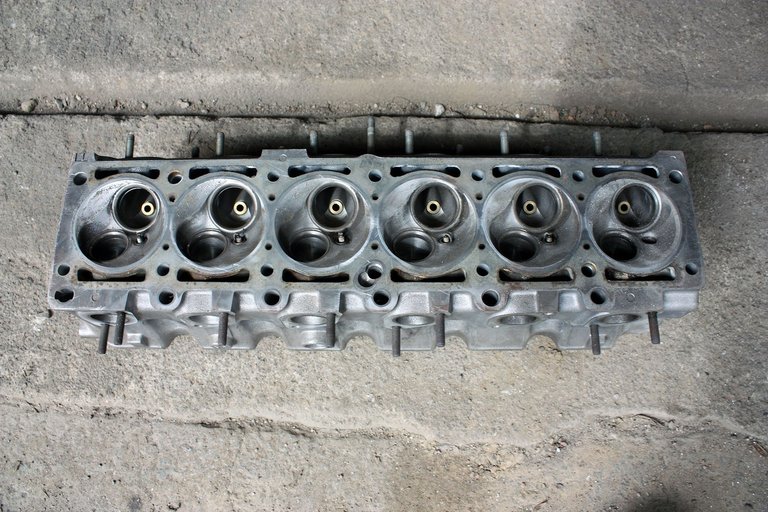
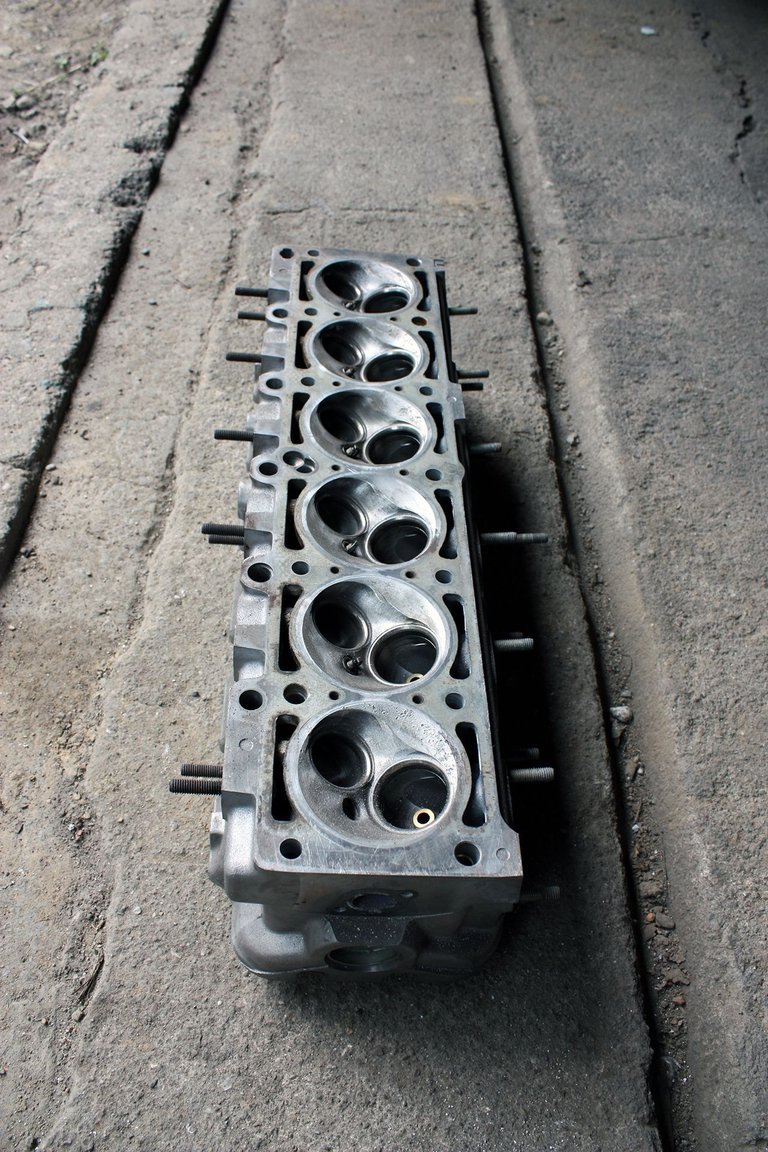
Shortly after all components were installed and it looked beautiful. Excuse the poor quality, didn't have my camera on me at the time:
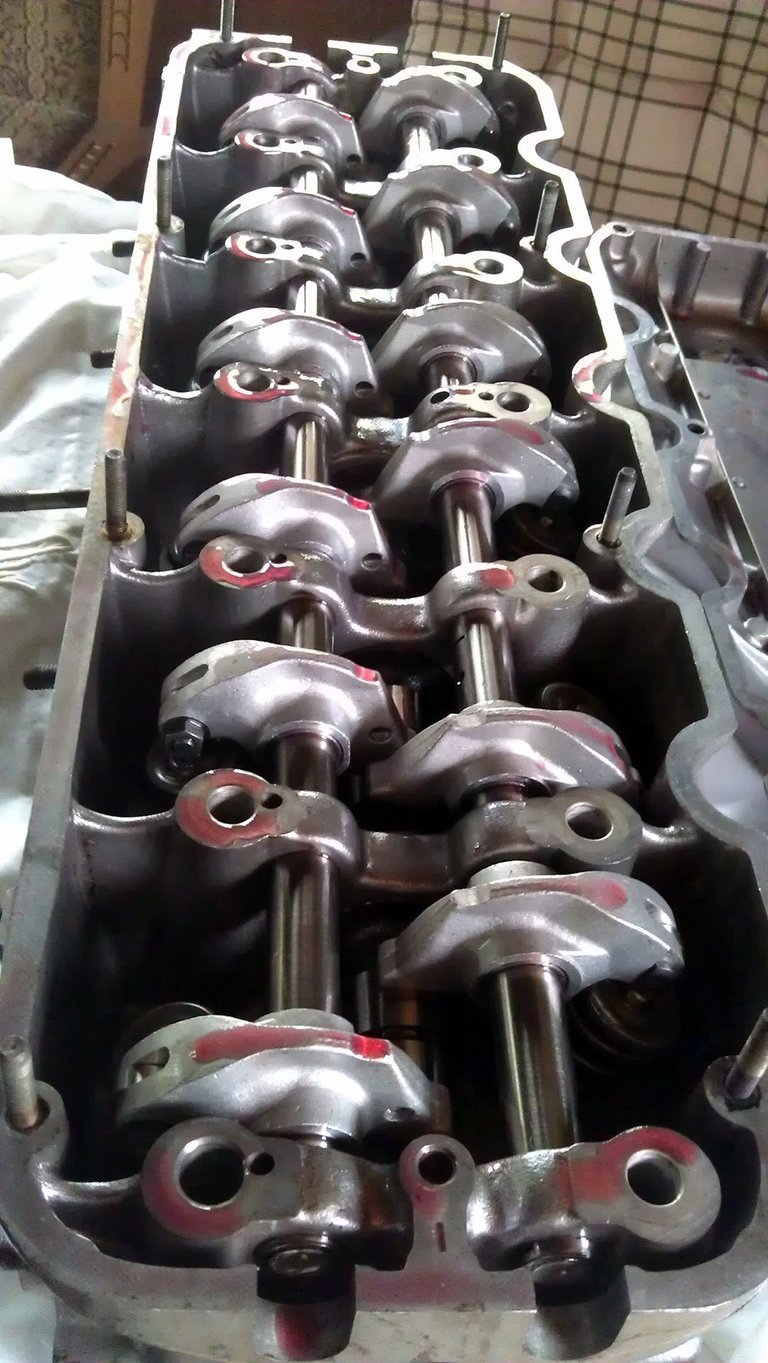
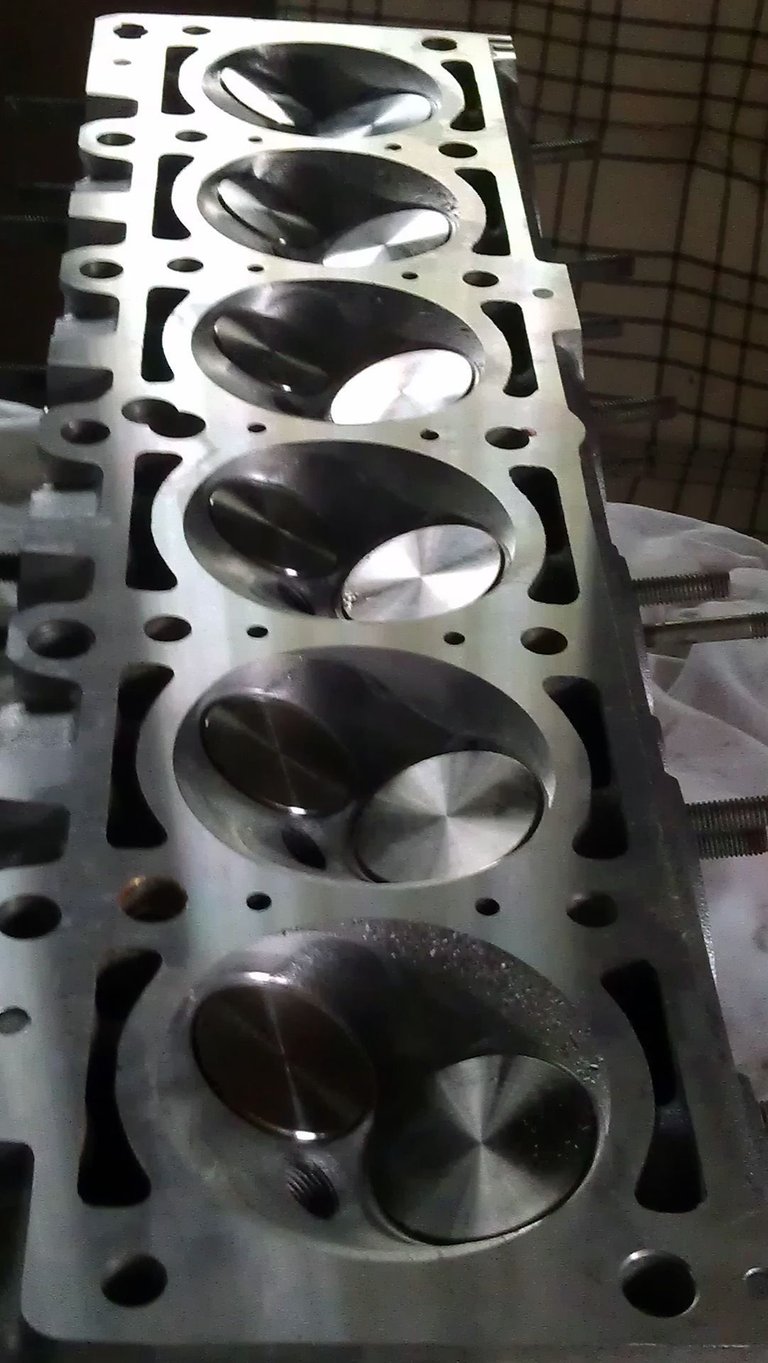
If you've stuck with me to this point I guess now you're hooked.
Part 5
So with a rebuilt cylinder head, decked by 2.1mm to get a crushing gap of 0.8mm, an estimated compression of 9.9-1 and around 2.69L of displacement.
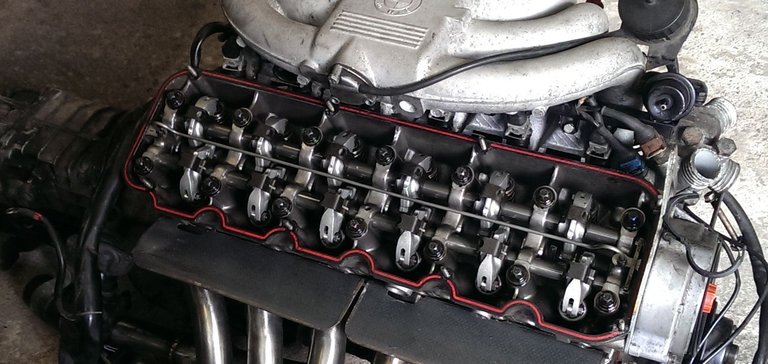
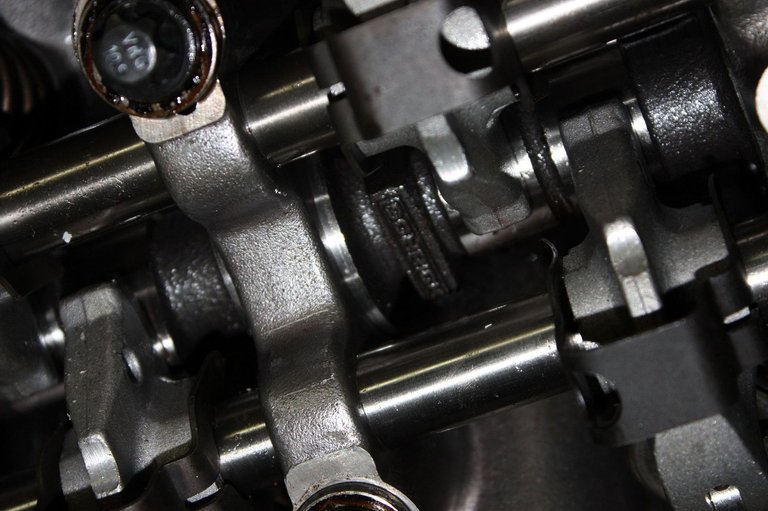
Just to give you an idea this is the cylinder head valvetrain after 247.000km:

This is the newly rebuilt one after the break-in of 4.000km:
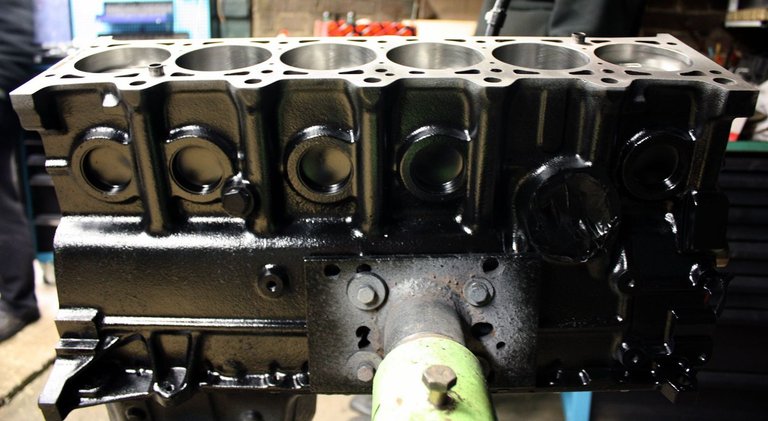
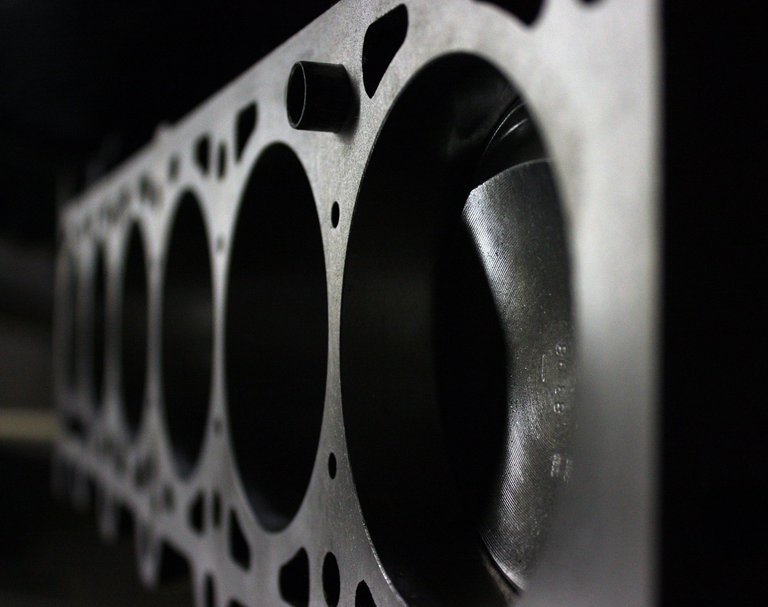
In January 2013 I got a call from Paul, the trusted engine builder, telling me the block is ready and that I'd really like the result. He didn't have to tell me that twice so went to the shop and was awestruck by the simple beauty of my engine's block.
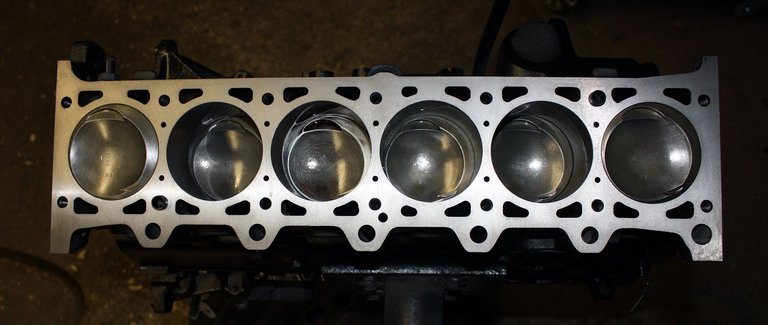
So there it is, firing order 1-6-3-4-2-5 easily remembered by an old BMW saying: 15's too young, 36's too old, 24 is just right :)
He had taken the 2.7L M20B27 block, cleaned it, decked by 0.3mm (just barely milled to get the full surface), rebalanced the crankshaft, put the original piston rods combined with the 'low-sideskirt' M20B25 pistons on it, replaced all bearings and installed everything with the specially ordered MAHLE piston rings into it.
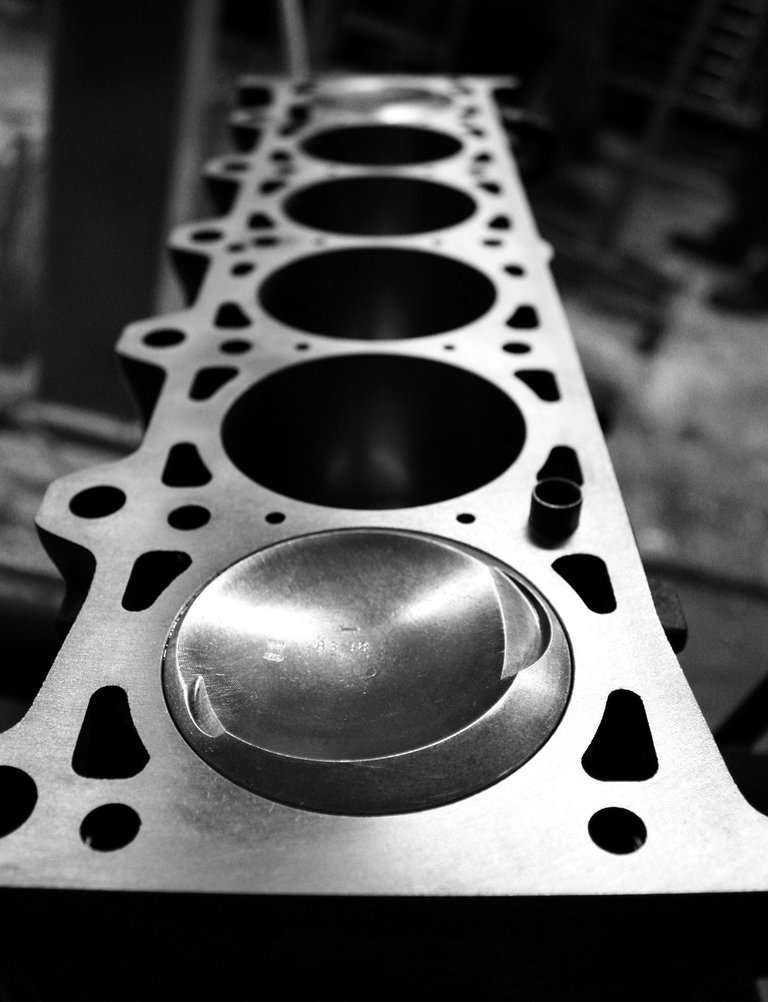
I had it painted in plain black, lesson learned here as I later realised if you do this have your guy paint the block in matte black, that way coolant and especially oil leaks can be recognized more easily later on!
In any case the brand new engine slowly came together:
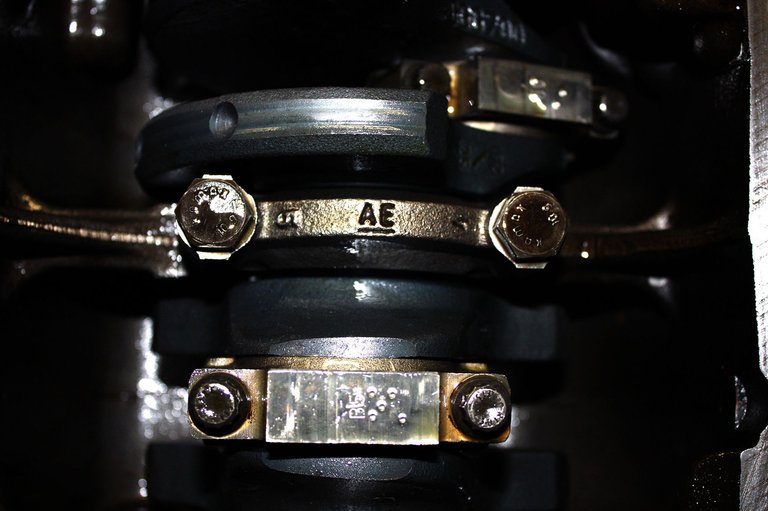
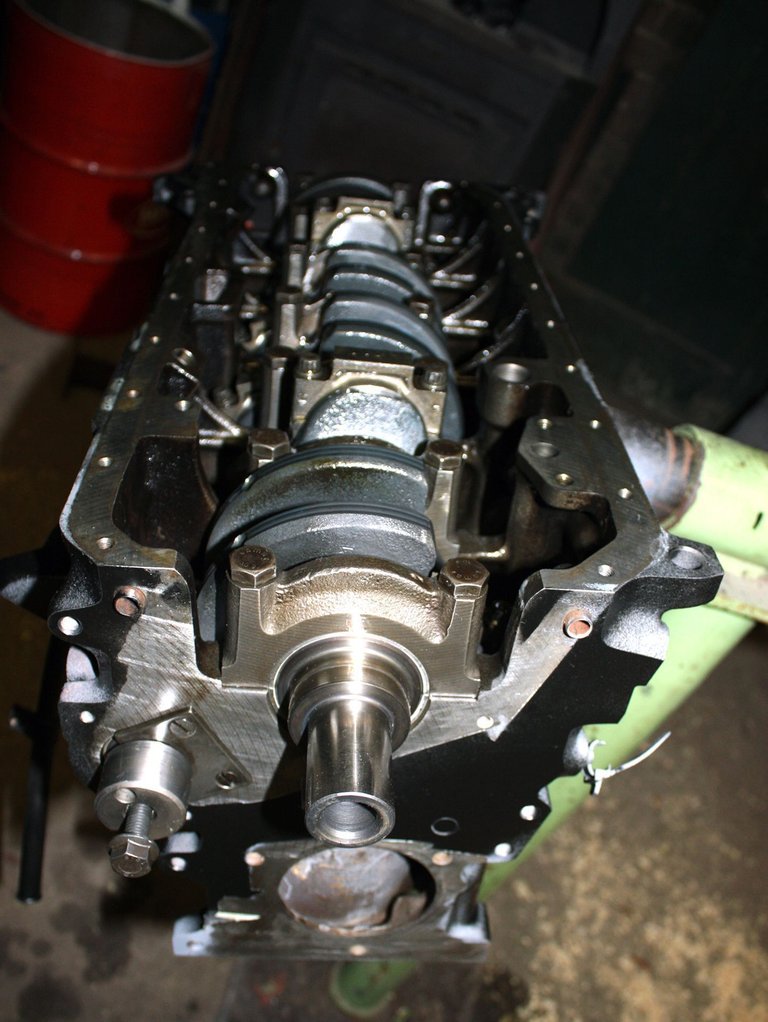
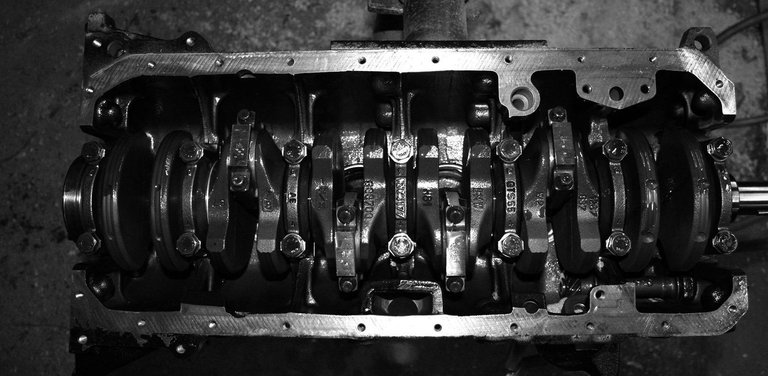
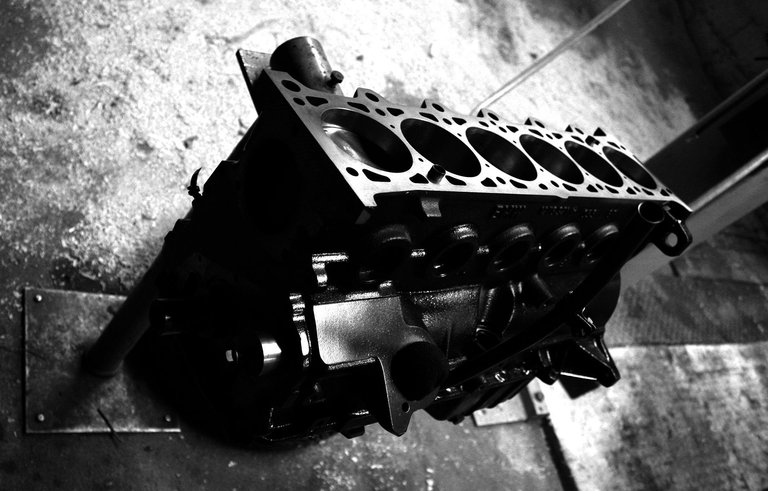
I LOVED IT!
In March 2013 it was time to put it together. Once this step is taken there's not much left to do:
Move the camshaft into a 'zero position' meaning valve-train needs to be in dead center position, more on that below
Move crankshaft into dead center position
When both are set, drivebelt ist put on the motor and the adjustable cam wheel is used to compensate for the amount head and blocked were decked thereby decreasing the distance between crank and cam
Following that valves need to be adjusted and the oil-pan is mounted
Now moving the crankshaft to dead center is easy because the crank and the block both have an indentation which when aligned signals 'dead center'. When is the valve-train in dead center position? That's quite hard to tell here actually, you can't look inside the cylinder and there is no certain way of telling visually.
However, the geniuses at SCHRICK have put a small flag on their camshaft which when pointing at 12 o'clock means 'dead center' position.

Took us about 2 hours to figure that out :). I said dead center and not valves closed position because SCHRICK also offers asymmetric camshafts with timings like 284/272 which means the valves are never fully closed. With these asymmetric camshafts the valve overlap is such that the valves themselves push and pull the combustion gas into and out of the chamber thereby sort of charging the combustion process which gives you extra bang. It also increases idle and does what all sharp cams do: more power on top, moving the torque curve to the end of the spectrum and robbing the lower rpms of most of their power. Since I didn't want that I settled for the symmetric 272, 4 degrees more than the ALPINA 268 the reference engine uses.
Anyway having it all assembled and adjusted the camwheel could be used to tighten the drivebelt and connect the shafts at the correct timings, in my case adjustment was 0.3mm.
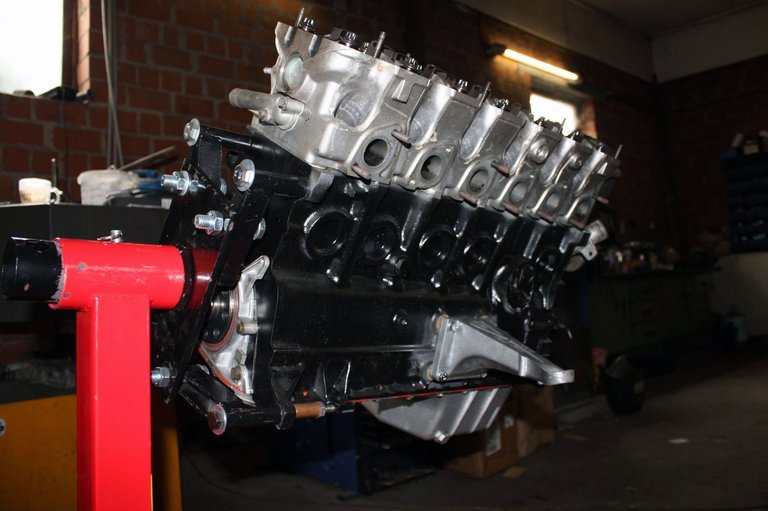
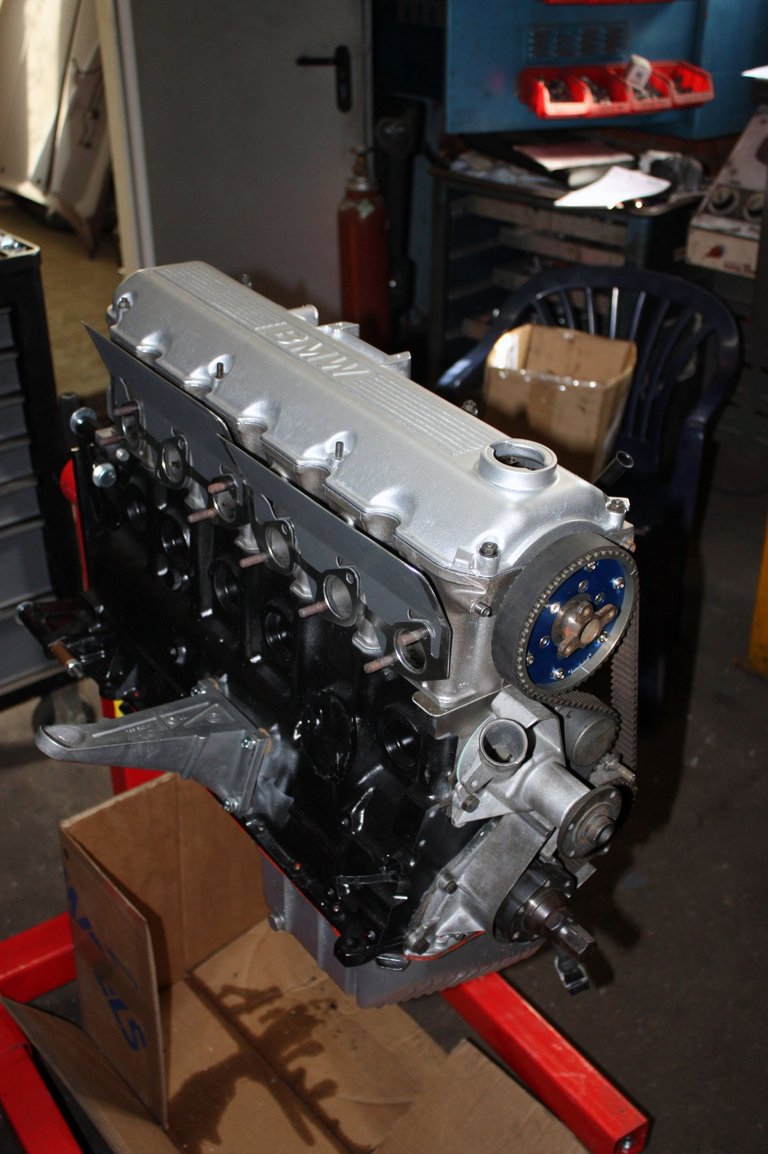
Remaining core parts followed:
Intake, oil pan, head cover, transmission and the so called 'shorty headers' - more on those later. Let's just say they're not headers as in pipe length is not equal. The only thing they facilitated in the end is to help cool the cylinder head by escaping the exhaust gas more quickly and, more importantly, separately out of the chamber.
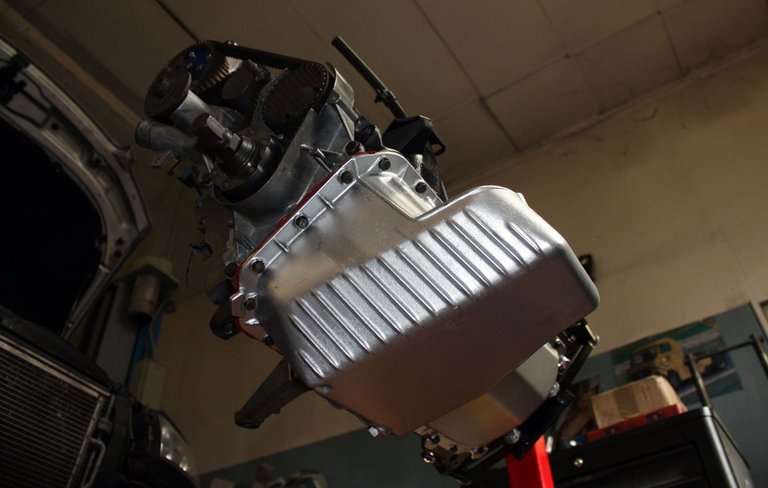
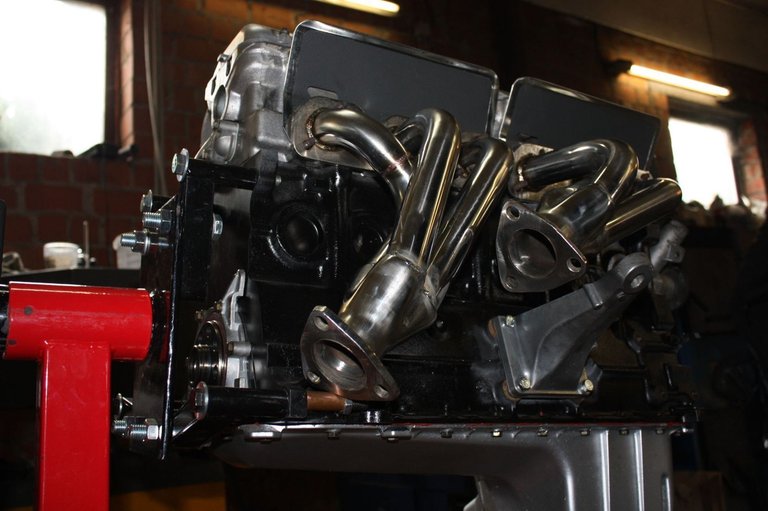
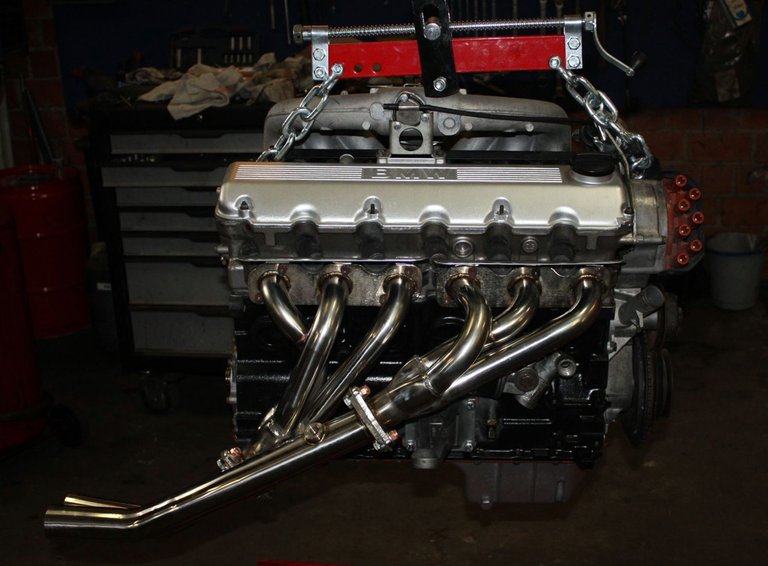
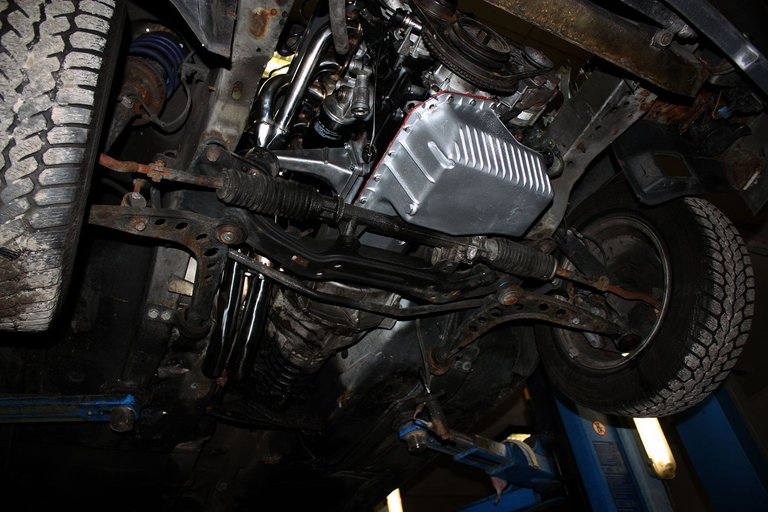
At this point so much time had passed by that I decided to ditch the cosmetics for the moment and focus on mechanical and functional finish only hence some components were simply checked for workable condition and reinstalled. Plan being that once the engine is in and running the suspension parts and other dirty/rusty components could be dealt with once enough motivation and time were 'regathered'.
It never came to that with this chassis but looking back at it now I can only appreciate the current condition even more. The fact was that it became more and more evident that the chassis would not last forever as the rust and wear on structural components would be too severe at some point down the road. Having finished the engine I couldn't bare throwing the body into the crusher then and decided to put the engine in and see how long it lasts - turned out it wasn't long :).
Lesson learned here is don't make any compromise when it comes to body shell or chassis integrity with cars older than 20 years. It will cost you down the road no matter what. In the end this was a mistake and should have been done right the first time around BUT as life will have it time, money, motivation and just going the 10th extra mile at some point you just run out of steam. I knew I had to pick this up later on I just didn't expect the 'later on' to come around as quickly as it did. So if you see a problem with the body, fix it and fix it right. If not expect to be hit by a sledgehammer any day.
On to the exhaust system which was a hybrid combination of a standard 325i muffler, the 'Ireland Engineering' headers with X-Pipe and a set of metal-cats out of the E36 M52B28. Using these cats had multiple advantages:
epic sound :)
BMW logos which would make it easy for the authorities
equal pipe diameter front and back
designed for a comparable throughput (high compression 2.8L engine)
disadvantage being that they're quite large and even when mounted to the upper most point still stick out quite a ways from under the car
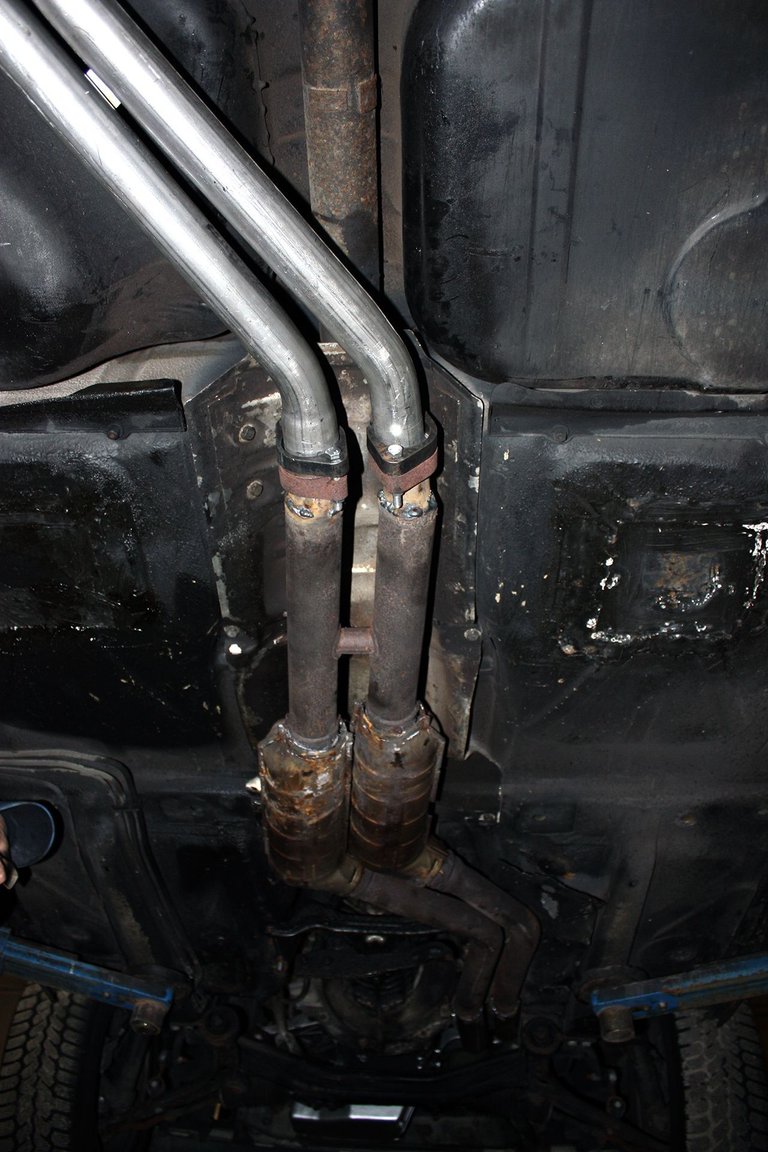
Anyway VIN # 3541187 had a working engine again and I started breaking that in. The Russian paint job still held its own at least in terms of paint finish...
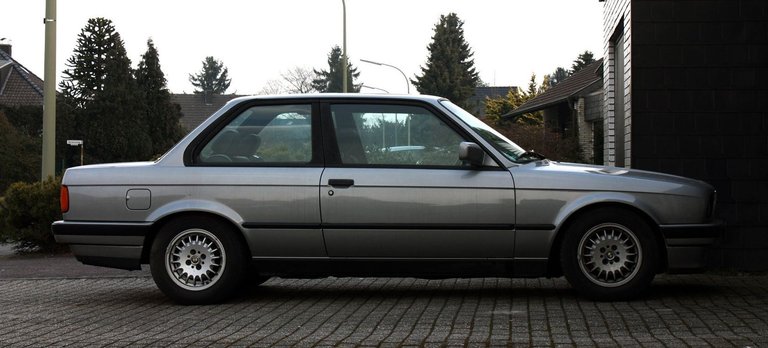
So there were some months of enjoying the car. I don't have much video or image material from that period so I'll just provide some late night car wash impressions.
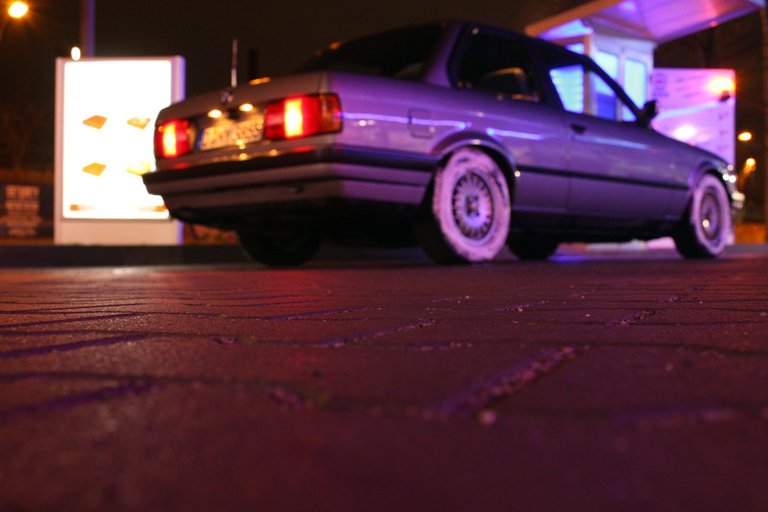
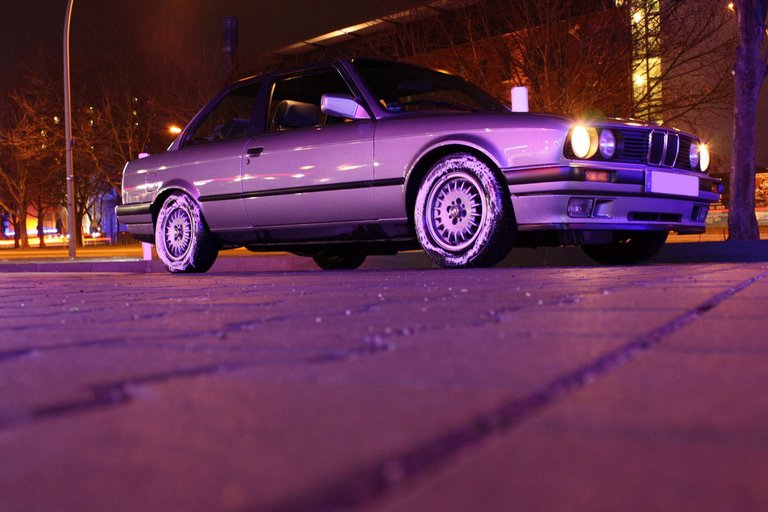
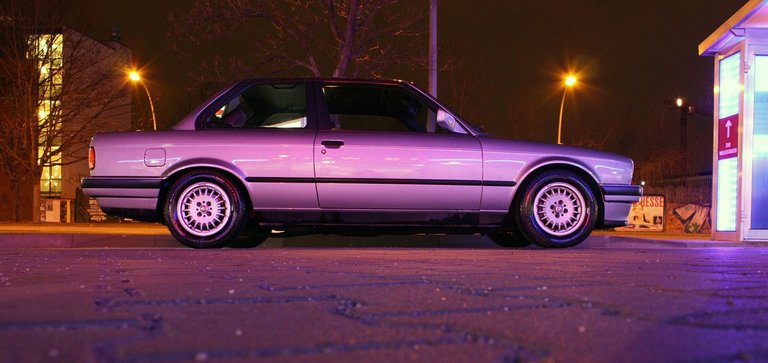
The engine had just clocked 3.800km when it was time to bring the car into the shop, adjust the valves and have it pass the bi-annual check of vehicle safety, roadworthiness aspects and exhaust emissions when I got the call in late November of 2013:
"I have your car up on the lift and I'm telling ya it's not gonna pass like this. Condition has deteriorated severely in the last 6 months, don't know exactly what happened but it looks like swiss cheese. Some of it can be fixed but the rear axle mounts and rear axle frame have tennis ball sized holes in them, I'm sorry, I don't know how to tell you this but this chassis is finished."
Like I said, I knew it was coming but I didn't expect the body to disintegrate within 6 months...but it did.
You wouldn't believe the damage which is why i'm gonna show you :) Neither I nor anyone I know who works on these cars has ever seen something like this. It looked like someone had parked it next to the shore for 12 months straight after dipping it into a container of salt. To this day I don't really know what happened to it but that last winter in 2013 killed it.
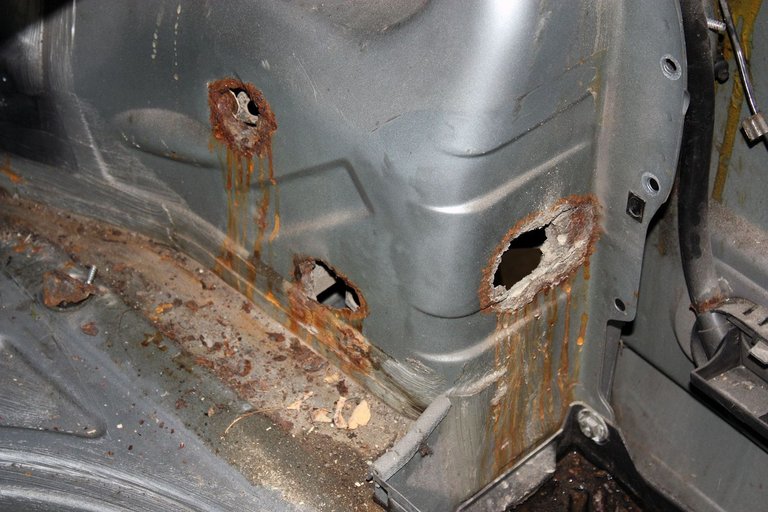
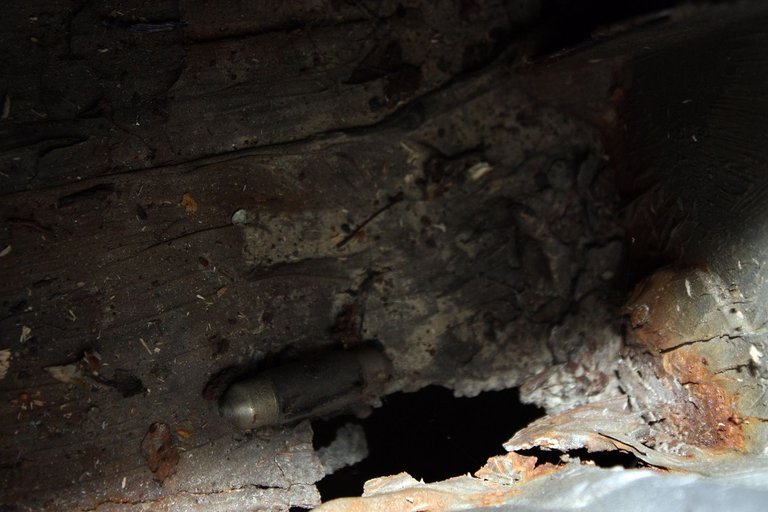
This is trunk left and right, the axle mounts and frame rails below it were completely destroyed. I don't have images for that but suffice to say this thing was finished.
So because it's so much fun...let's disassemble the whole thing, conserve interior, electrical and drivetrain including the shiny 200hp engine and find a new body. Yeah, I'm certifiable.
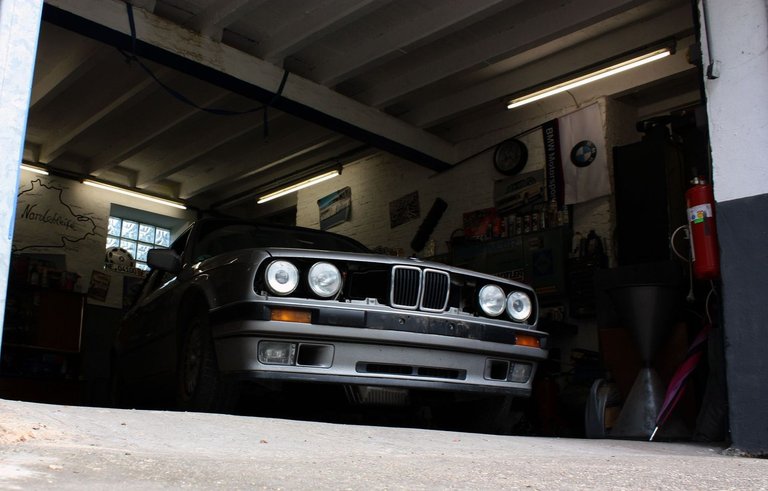
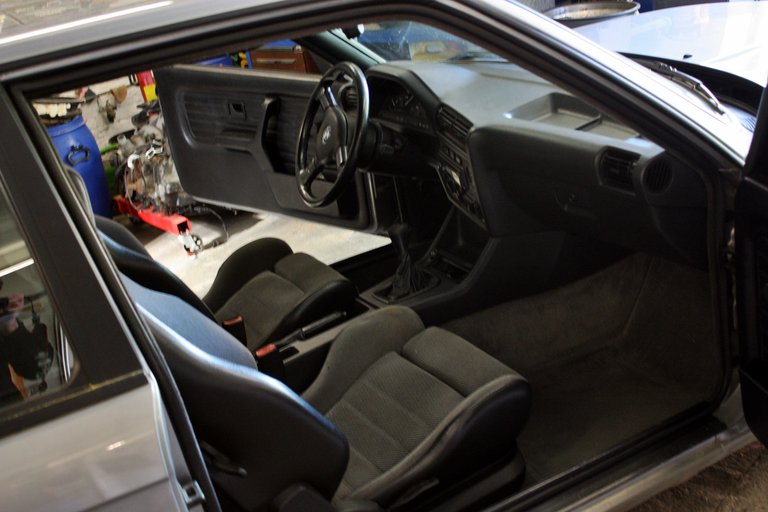
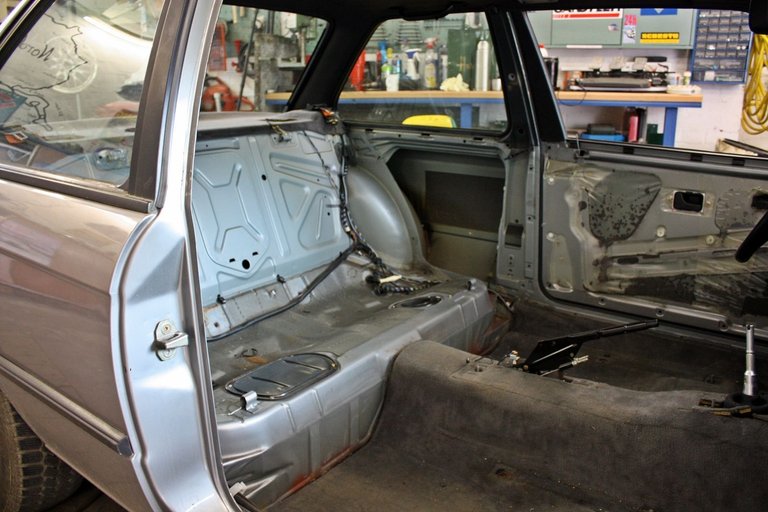
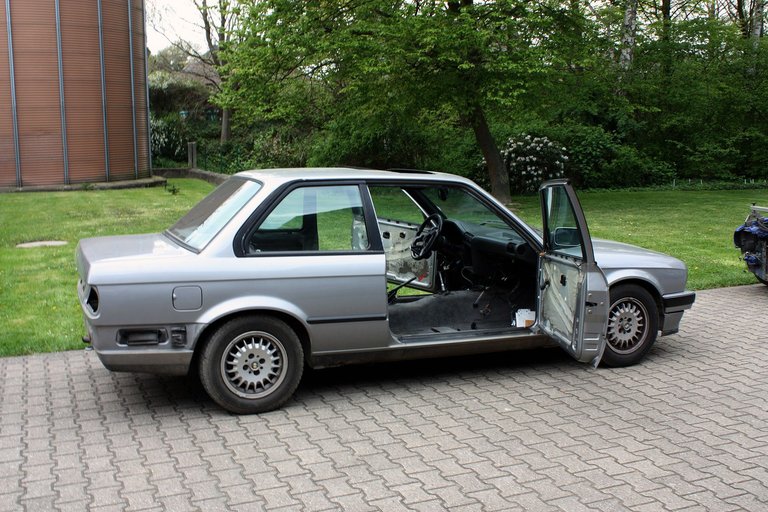
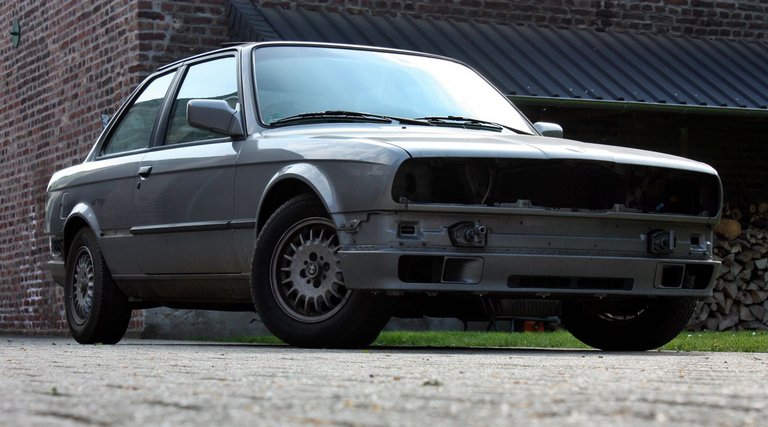
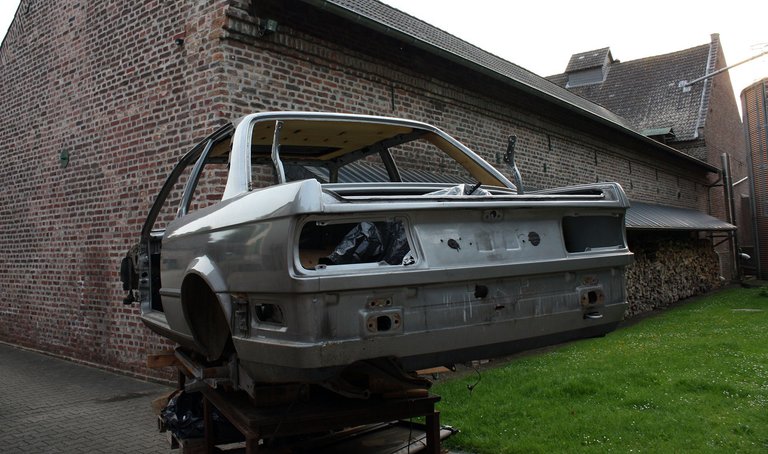
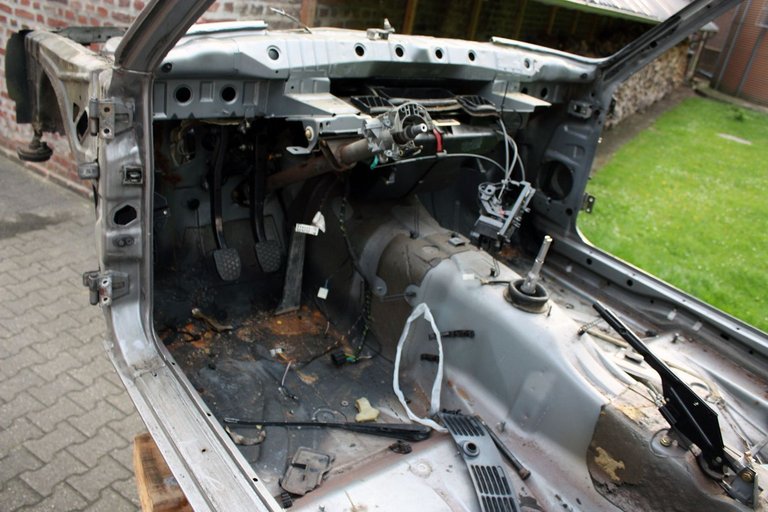
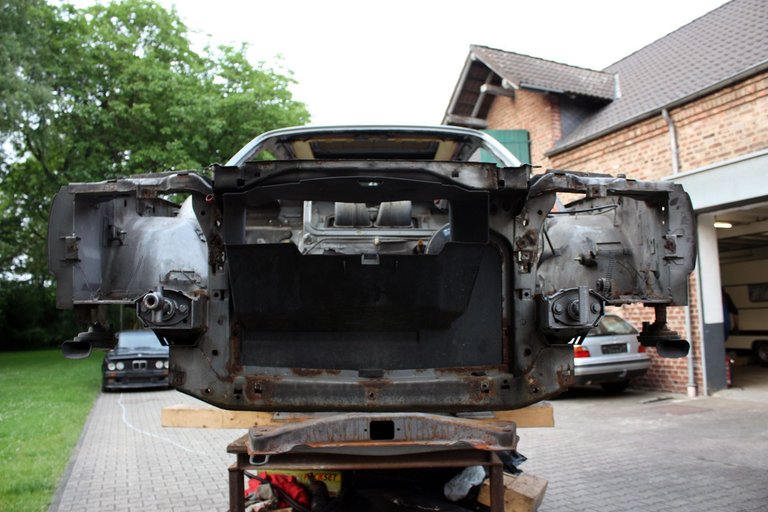
Of course the VIN and remaining necessary parts to transform another body in the future into a genuine 325i were extracted :)
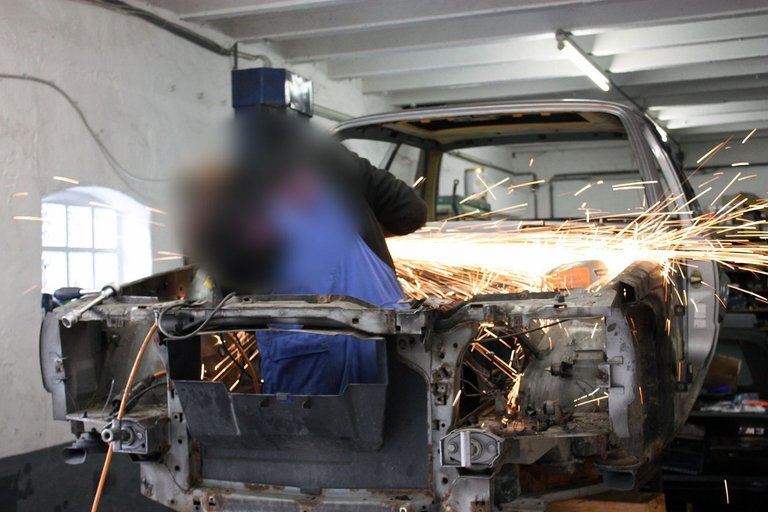
So off to finding a new home for this motor, it was April 2014.
Part 6

:)
This is in May of 2015:
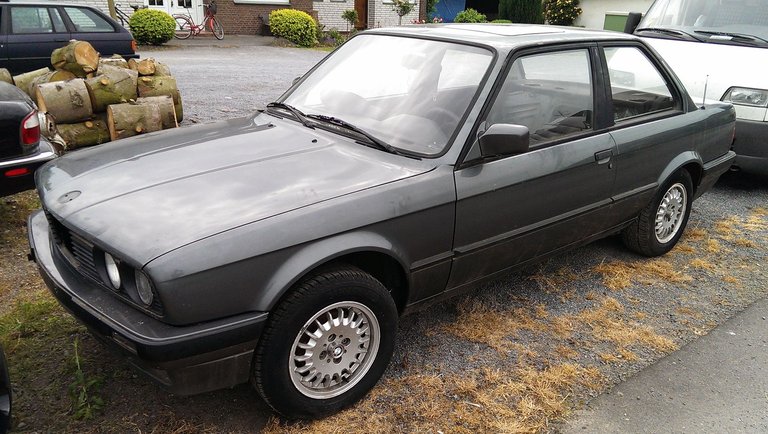
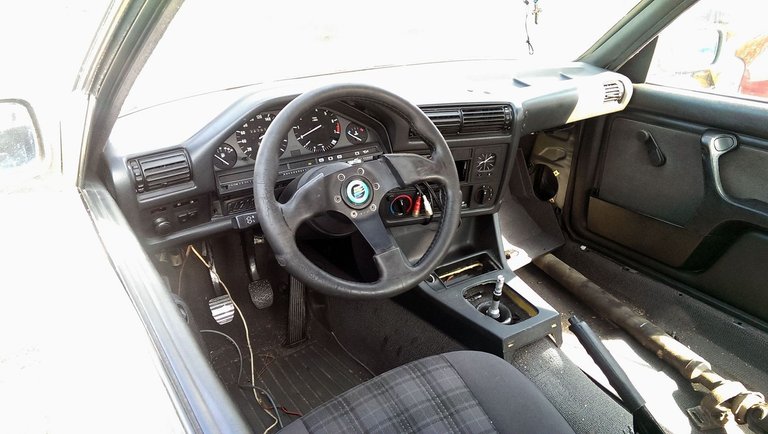
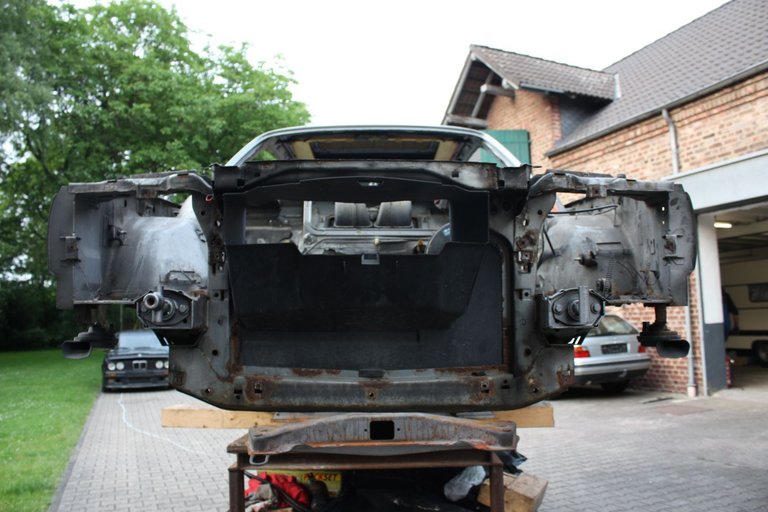
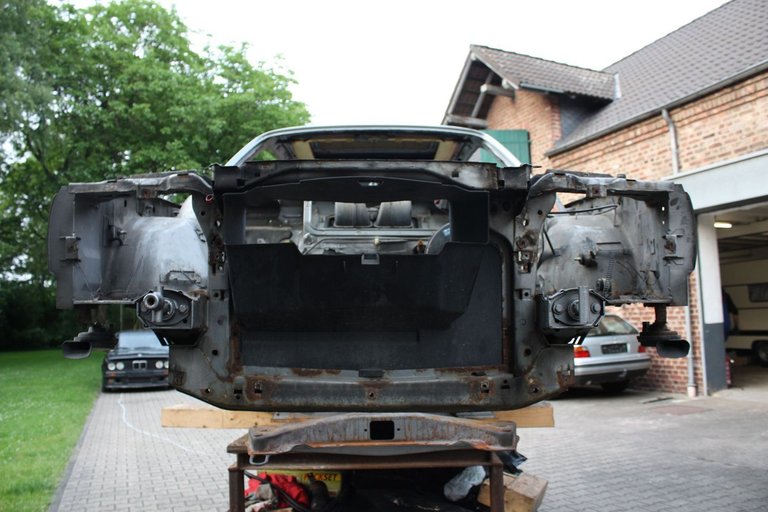
So after stripping the old body due to catastrophic corrosion...
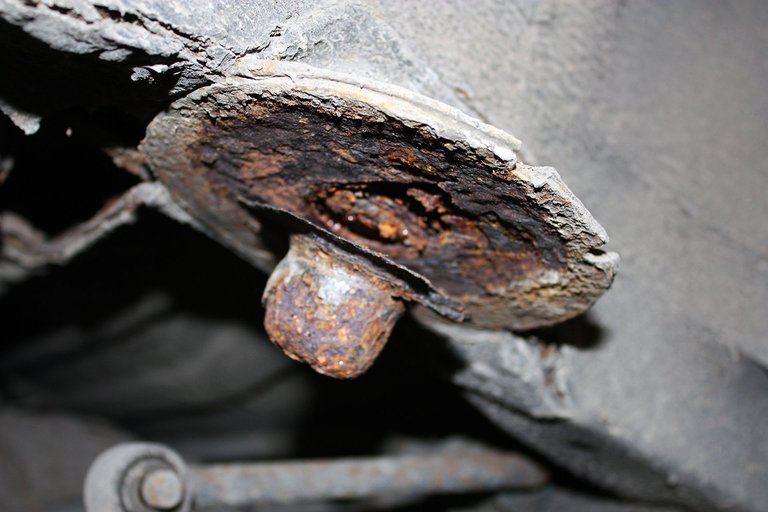
Yeah that was a rear frame spring mount. Instant death sentence basically.
I guess you spend most time during restorations with stripping and reassembling cars. Lesson learned and I can't emphasize this enough is that you should take great care in labeling, sorting and storing old parts. You're gonna need some of them, will want to get rid of others later on, will need to restore/fix some and nothing will be more frustrating or time intensive as searching for parts you need and know you have but are unable to find. I learned that the hard way. In the end I put more than 100 parts, screws, etc. on a big table took a picture and posted it on a forum to have the old cracks tell me what's what - true story!
So I had my interior set aside...
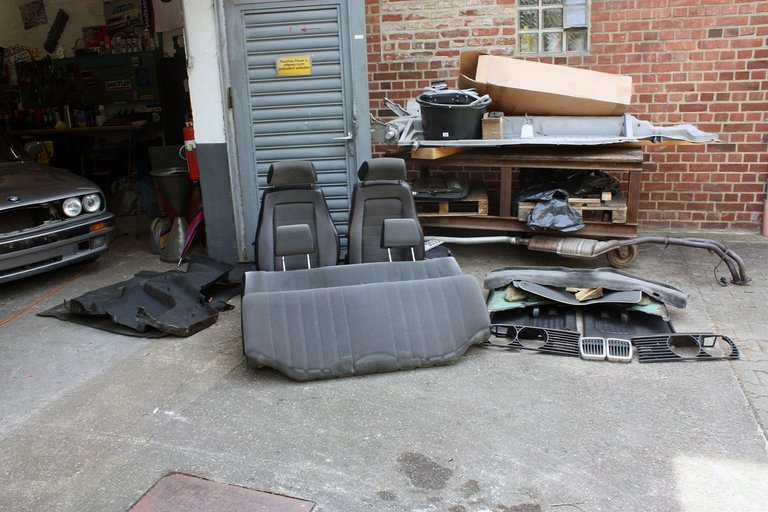
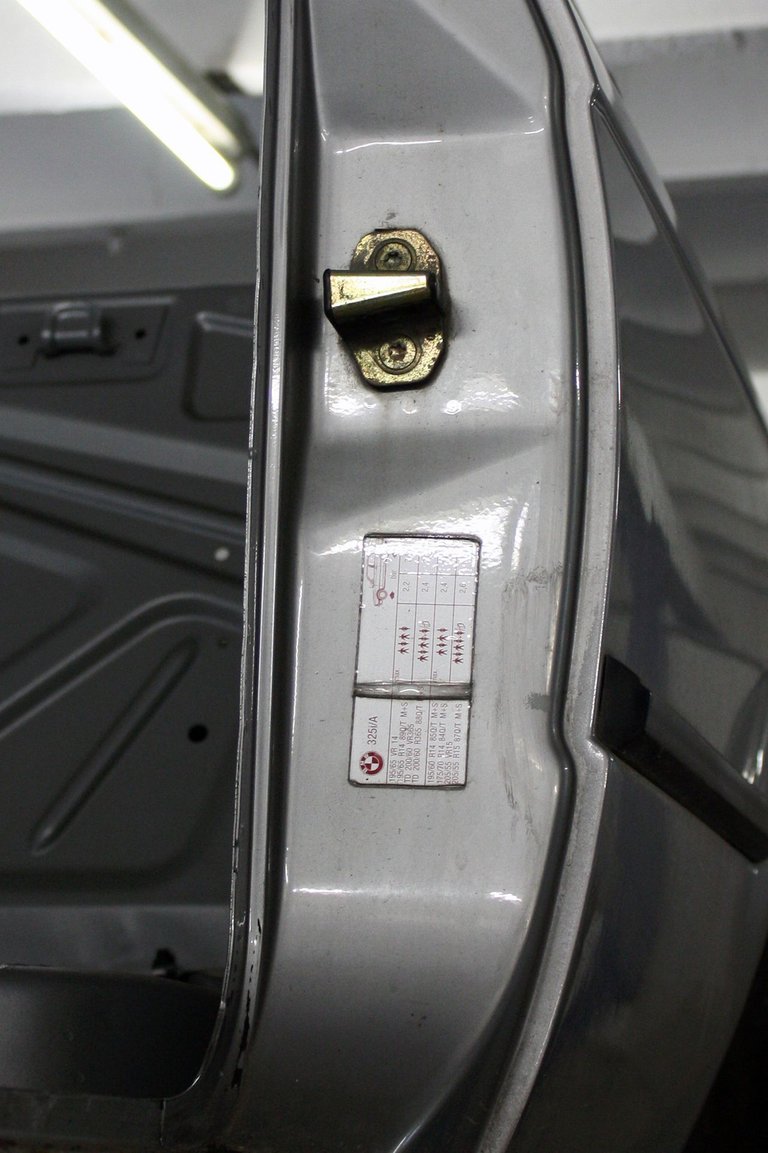
...and stripped the rest to prep it for the crusher. One last look at that genuine tire pressure sticker confirming it is an authentic 325i:
And off it goes...
Time then to disassemble another E30 only this time the body condition warrants spending more time on it :)

As you can see the engine is out as I'll be putting in my newly rebuild stroker engine later. Good thing is this car had an engine failure years ago so it was largely disposed of. I bought it in 2014, it had been deregistered since 2008. The fatally damaged engine block:
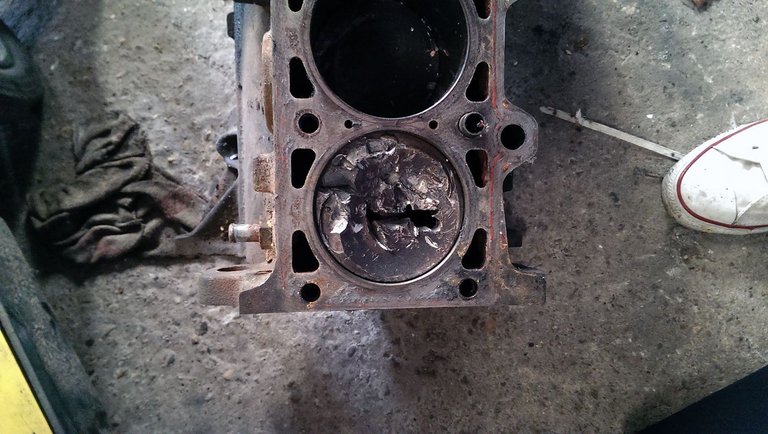
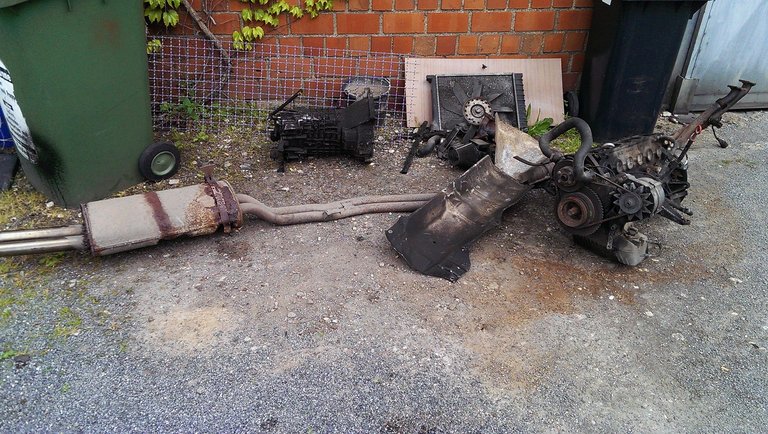
So lot's to chew on for the metals scrapper: engine block, rusty exhaust from header to muffler, transmission and some more 'spare parts':
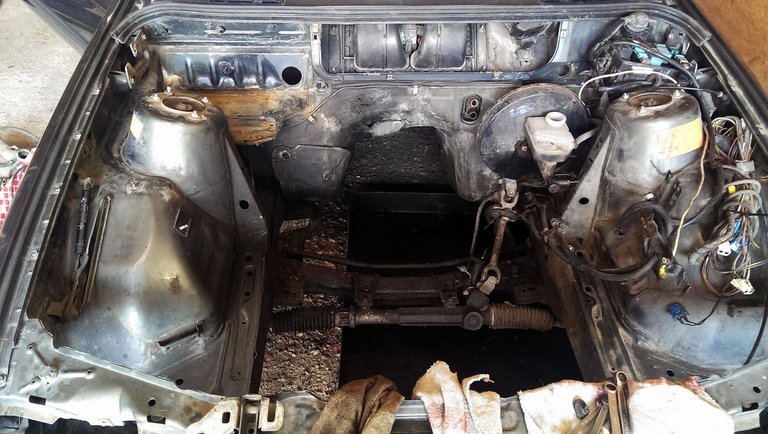
Enough room then for the new engine but first some work to do in the engine bay in terms of cleaning and painting.
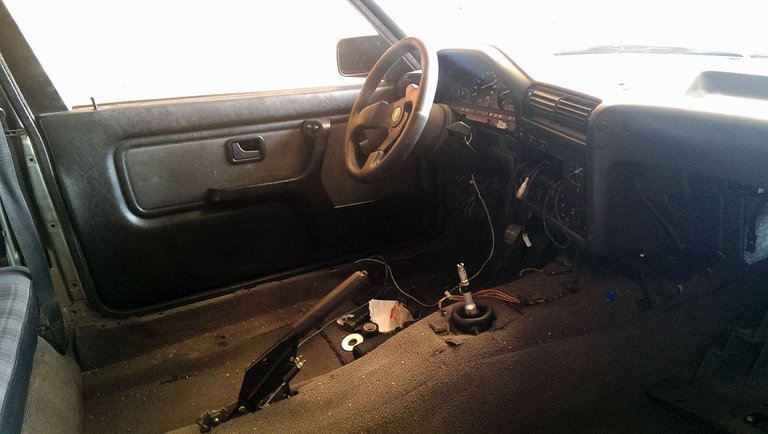
Lots to do on the inside as well. Long story short EVERYTHING goes including the carpet and that rather tasteful if completely out of place Personal Nardi steering wheel which was quite popular in 70s and 80s Porsches, Ferraris and Audis.
So up it goes let's check the substance of this bugger...
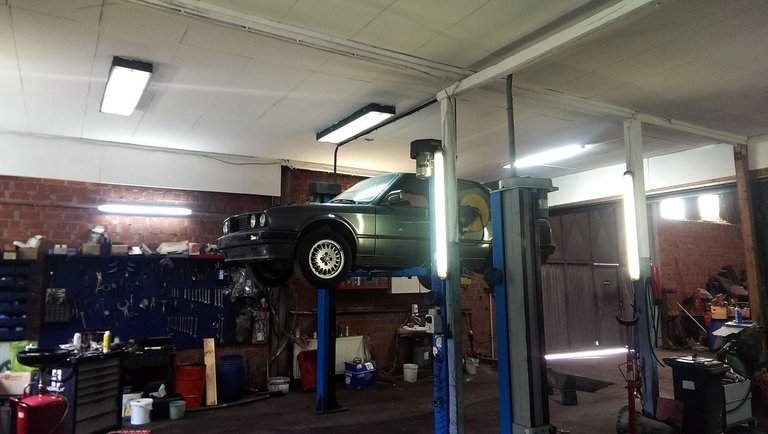
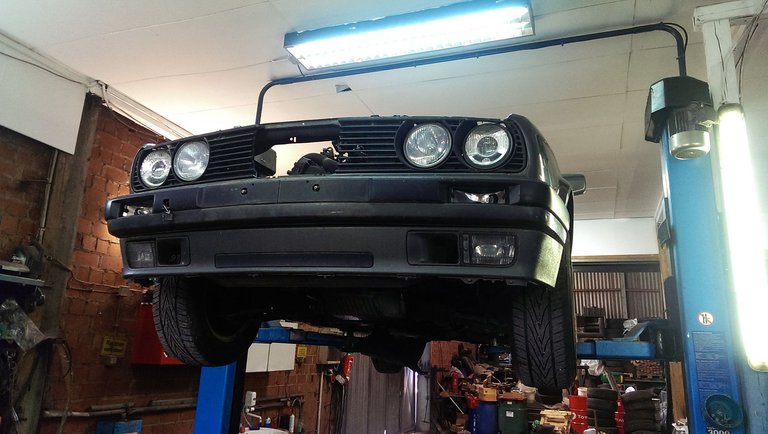
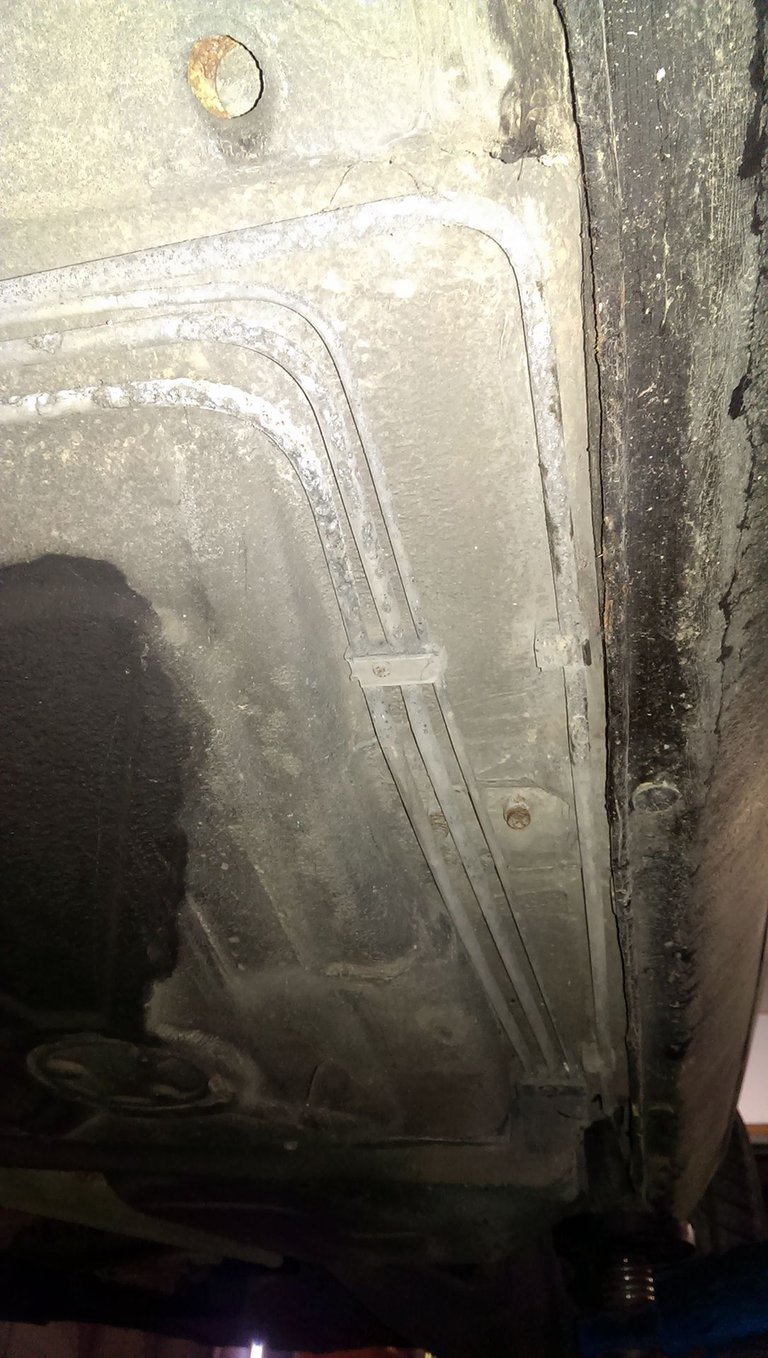
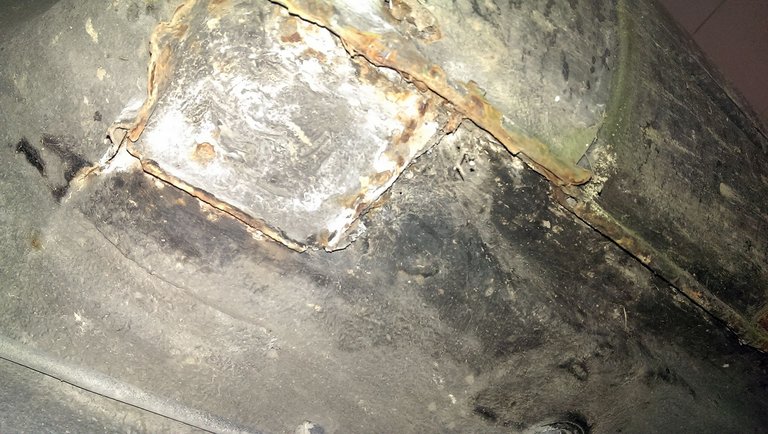
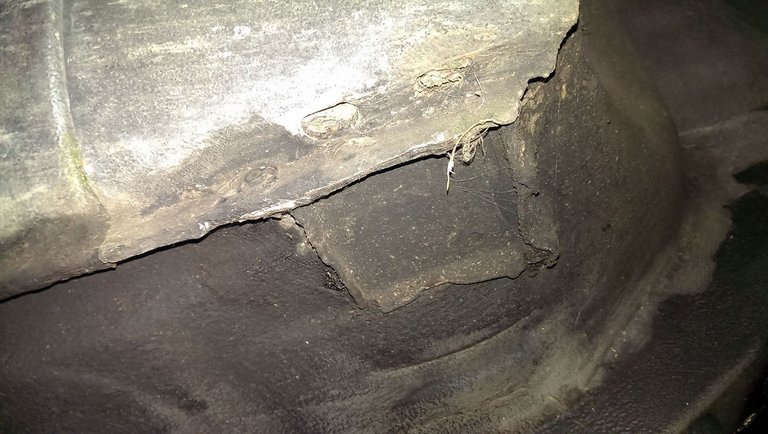
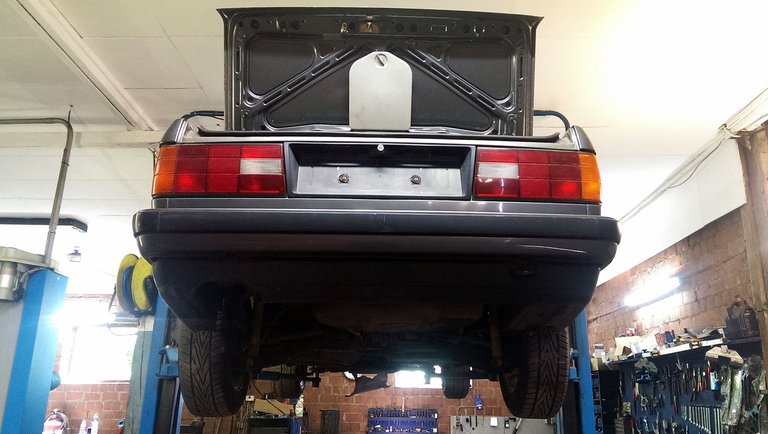
Hmmm...there's nothing there really. Not even a fluke of rust only some botanic signs of life due to the long early retirement. These are just the top spots to check on E30s along the rocker panels, rear apron, jack attach points etc. and they all looked great.
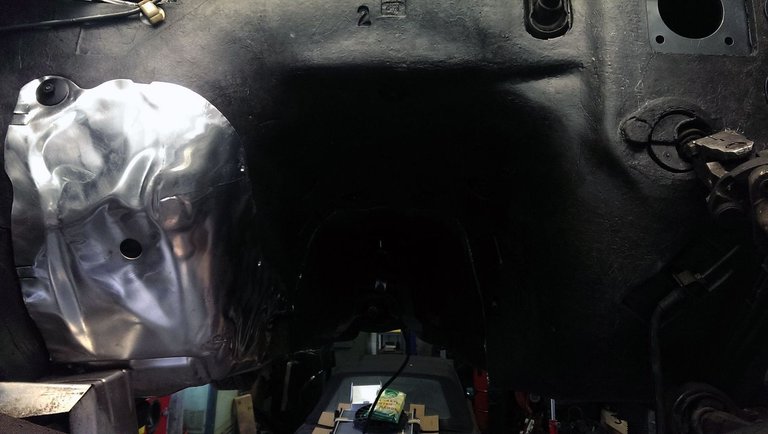
First order of business before putting anything back into that engine bay was the removal of any dirt or surface corrosion and seal and paint it good. We did that in January of 2016 including manually removing all rusty paint, sealing and priming it and in the end putting some fresh paint on. The main part to watch here is the horizontal plane next to the firewall which often gets hit by corrosion. I even took the trouble of photgraphing the bottom side :)...
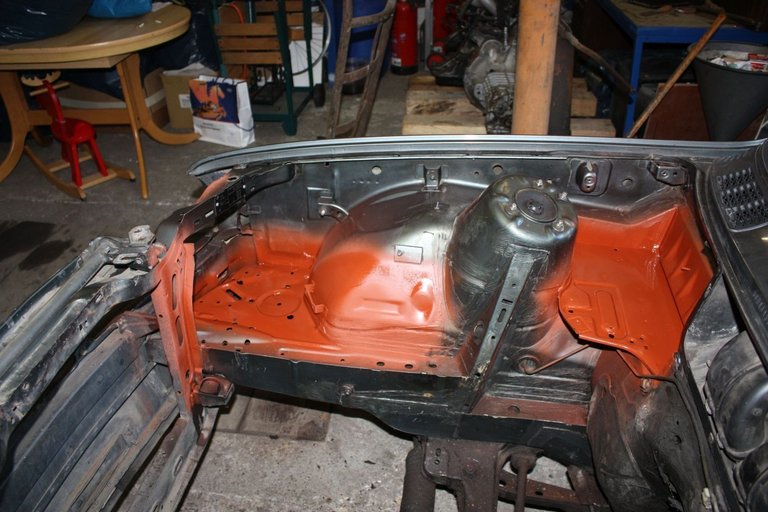
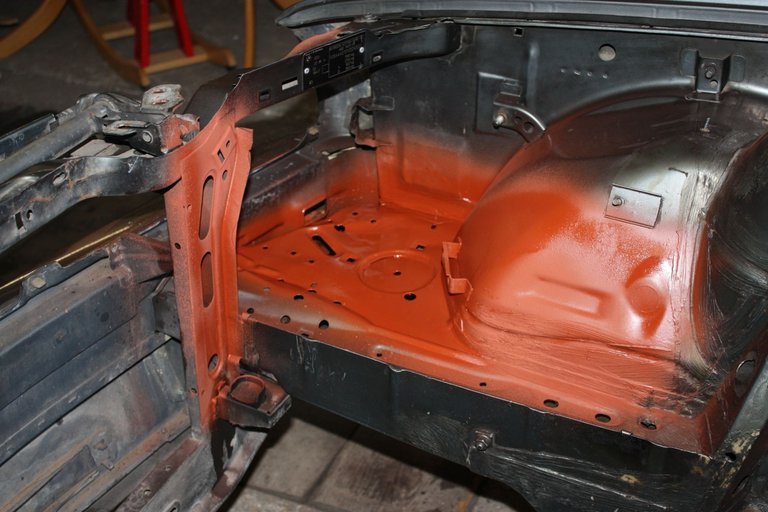
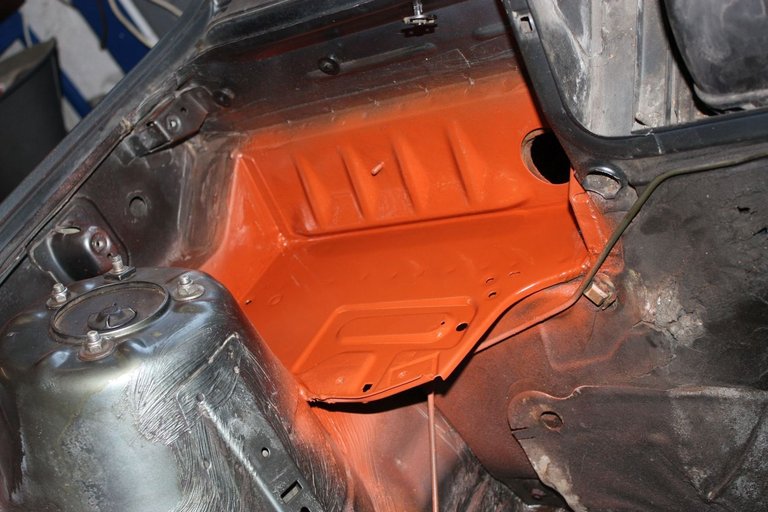
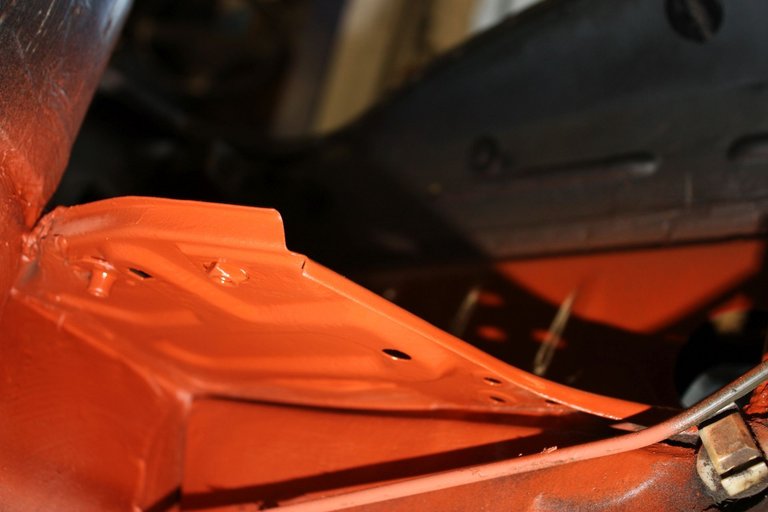
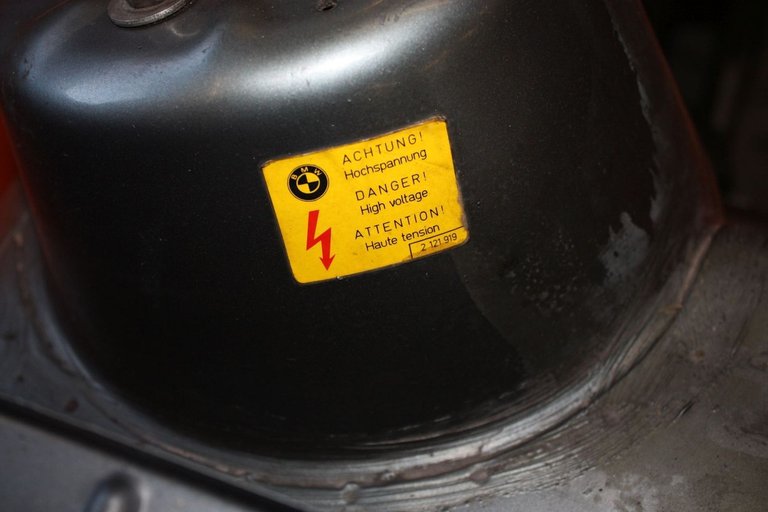
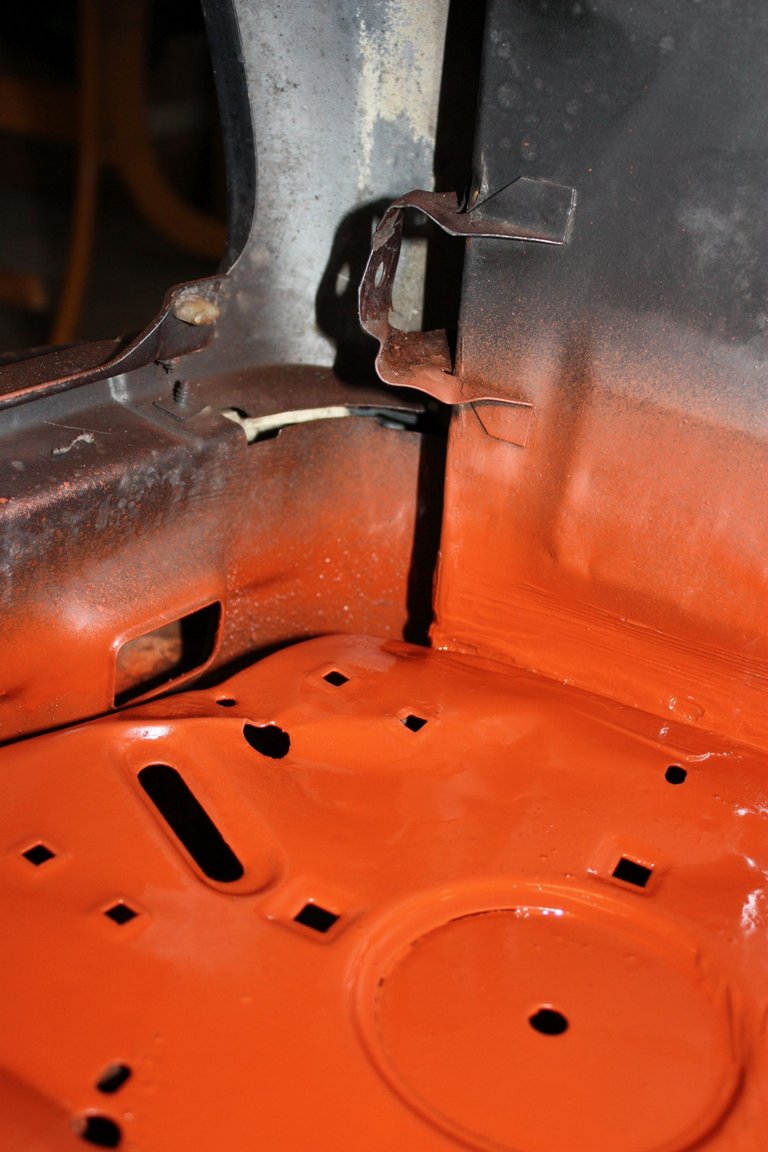
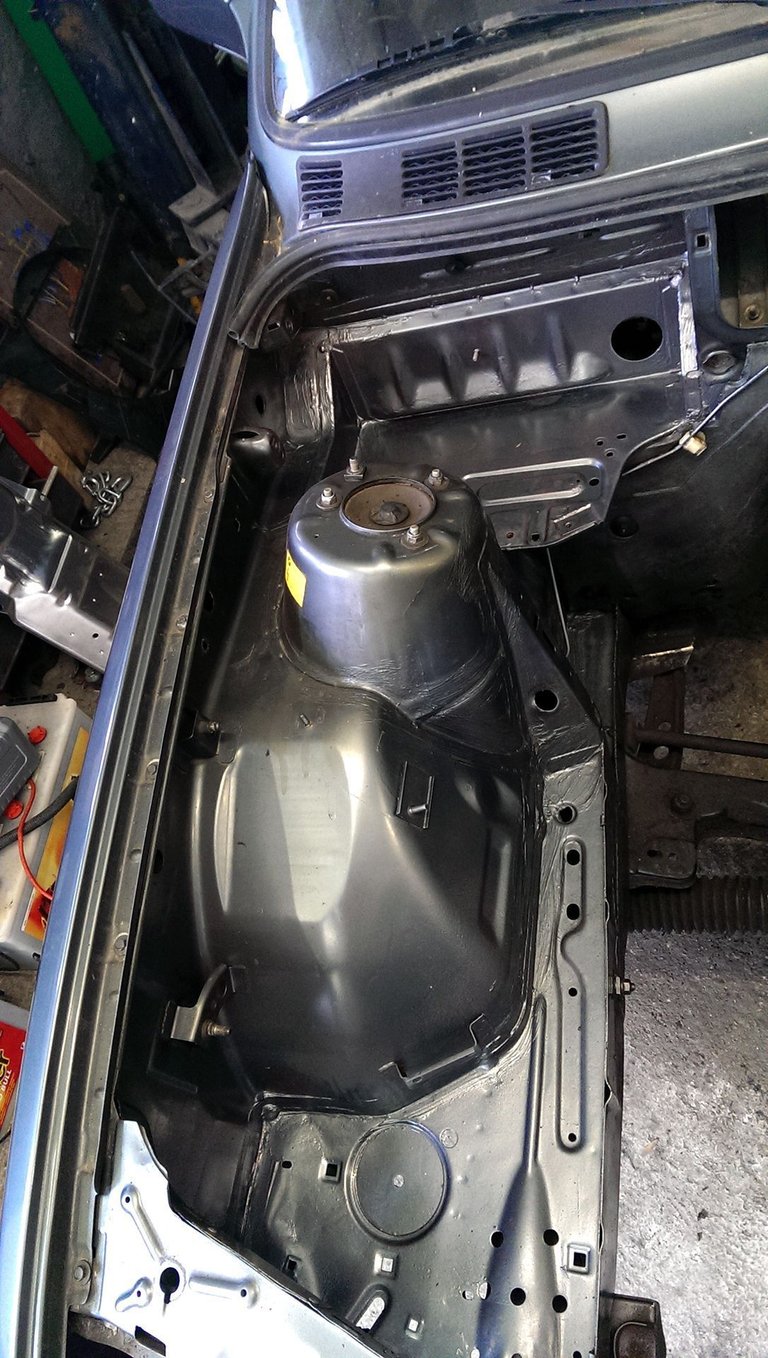
There we go then. We let it dry a bit and let RL issues take over for a while until continuing on March. Issue on that day in March was that it was unusually hot in the shop somewhere around 30deg C which meant the paint didn't stick at all. It works for now but will need to be taken care of by a professional at some point to give it a perfect finish.
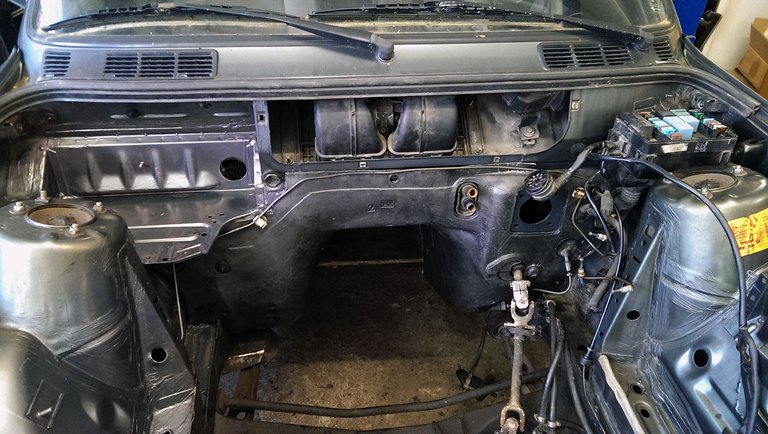
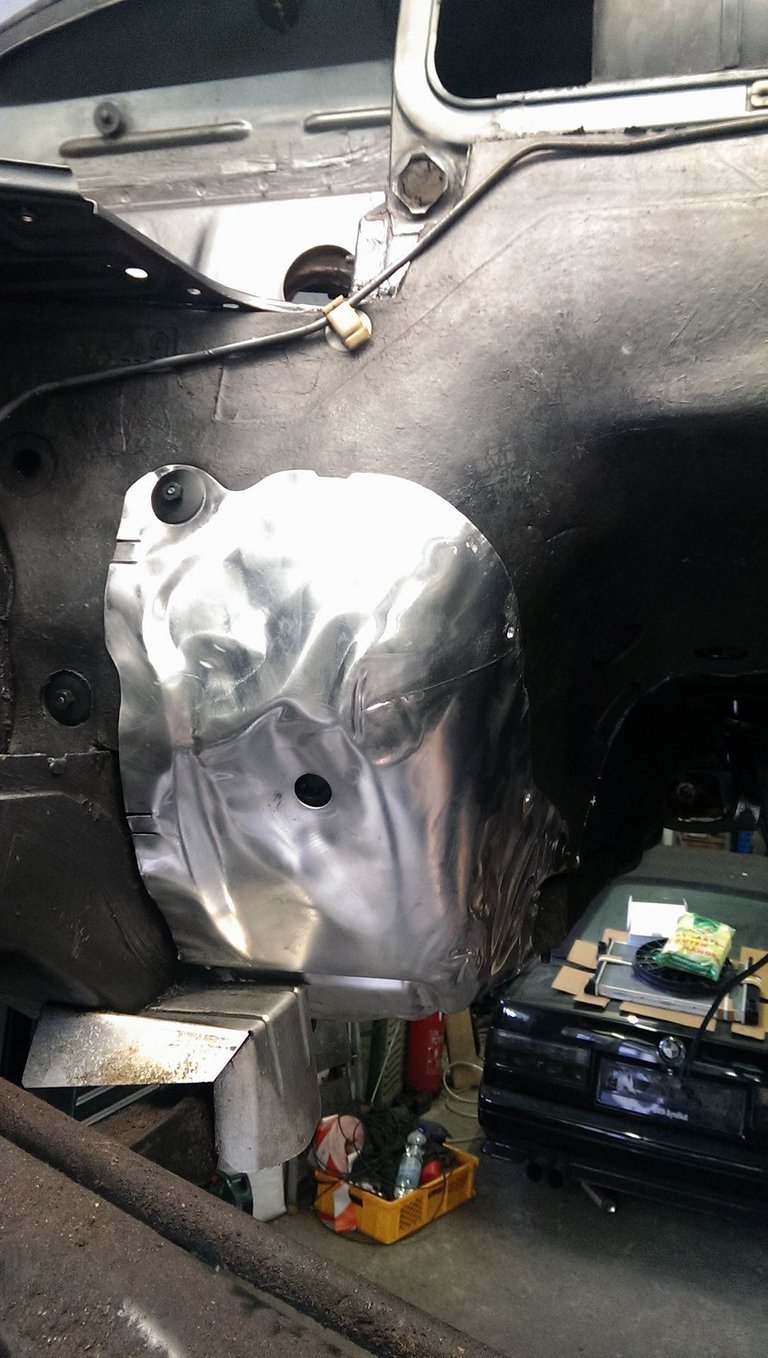
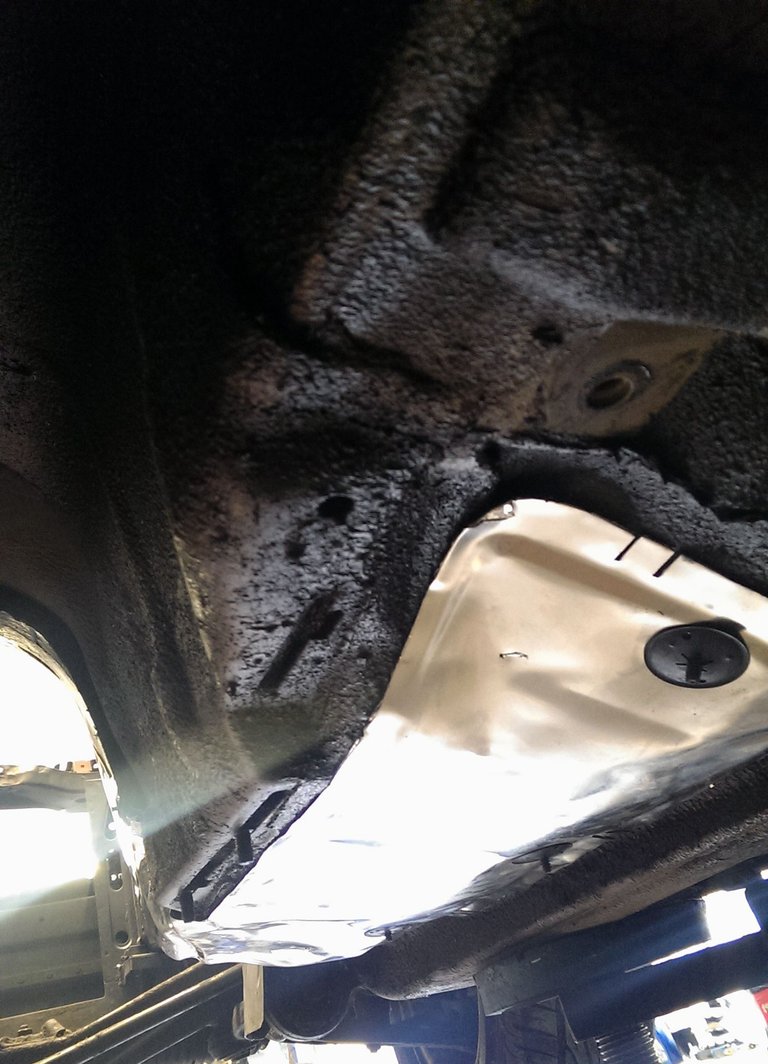
So after that paint had dried and some more parts had been sourced the often completely rotten heat and sound insulation in the transmission tunnel and along the firewall was replaced and fitted.
The engine then, it was broken in proper more than a year before, had clocked around 4.000km and was fresh as ever.
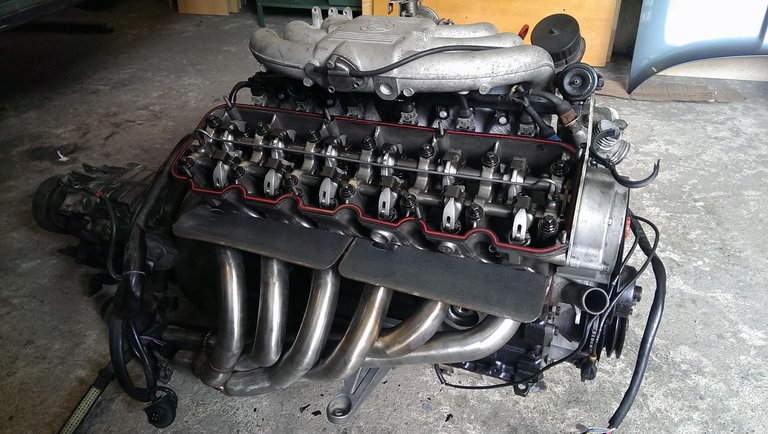
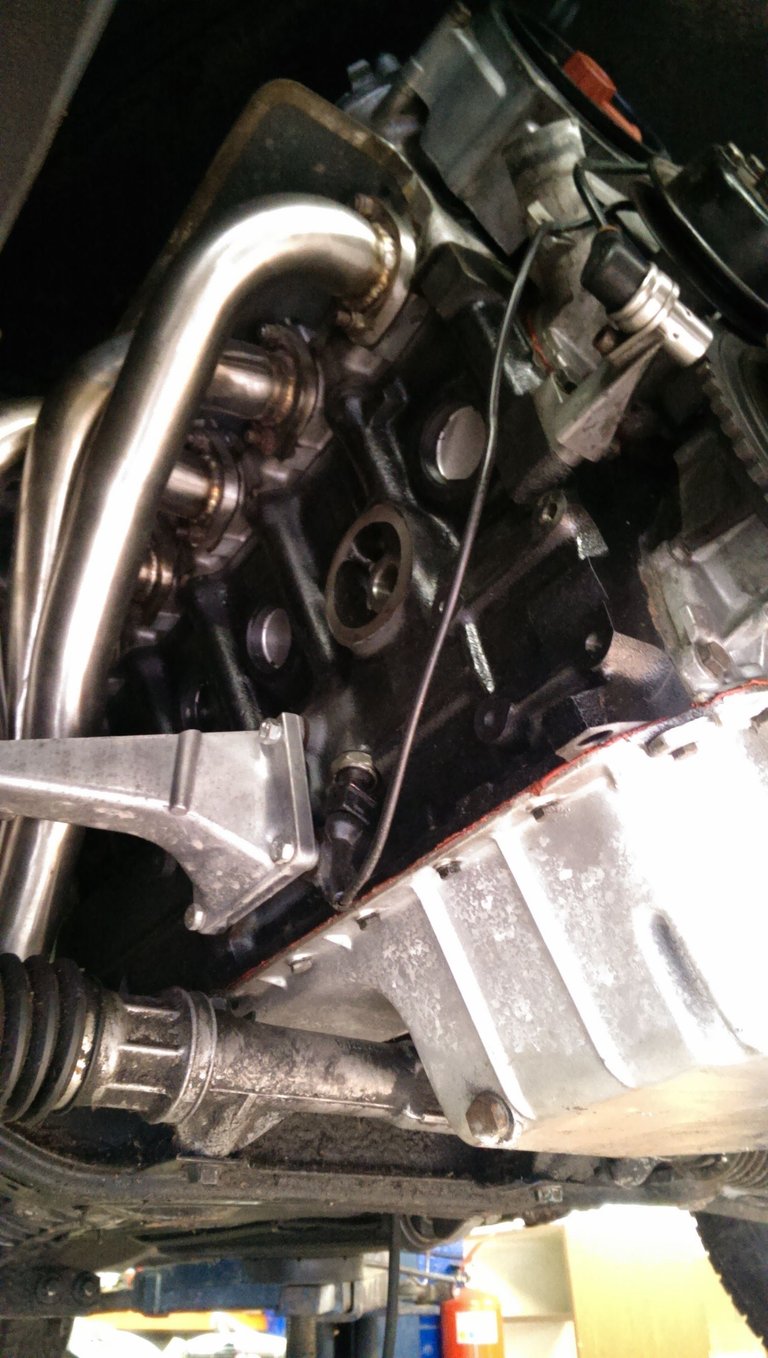
You might notice the headers are different ones. That is due to the fact that my original so called 'shorty headers' by IE in California didn't have equal pipe lengths thereby completely obliterating any potential performance gains. It did sound nicely but as I've always put a priority on mechanical perfection and sensible changes to the motor and car in terms of performance I went out and found a nice little shop who sell customized headers for BMW M20 engines with equal pipe lengths, stainless steel and a nice fit and finish. It fit nicely even though one exhaust header sealing had to be replaced because the old headers partially destroyed one sealing due to a tiny deviation in fit along the cylinder head.
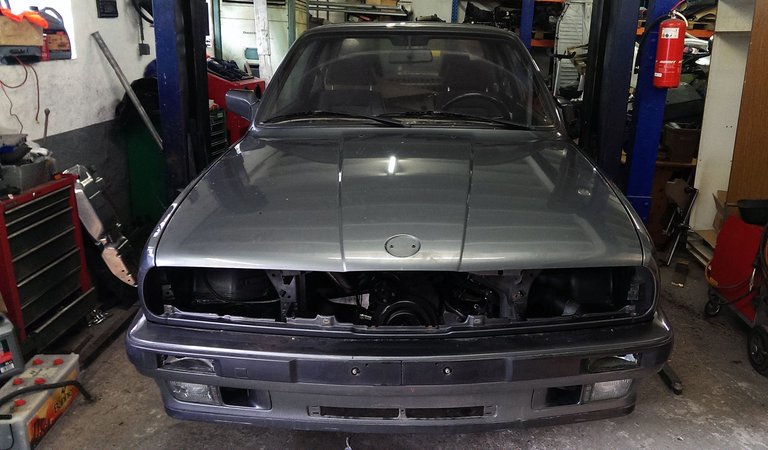
Long story short we put it in the same day:
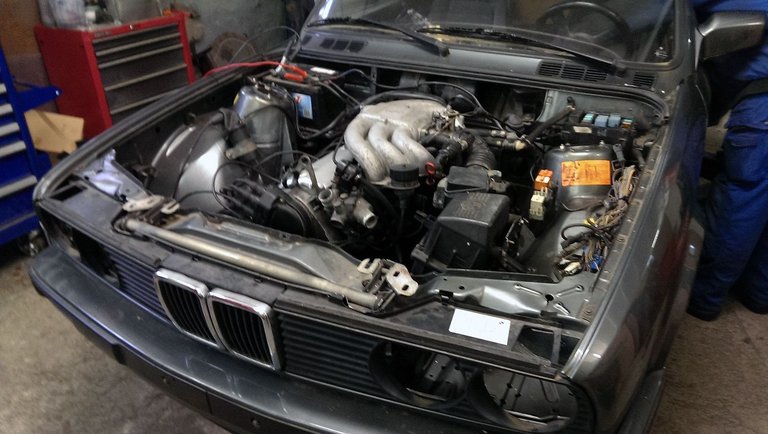
Whadda ya say shall we try to start it and check out the sound with open headers!? Yeah I thought so...put some good headphones on if you have some handy:
Ok so that's working. No worries as always in this epic story it will fail to start at some point but that won't be the engine's fault. Check parts 2 and 3 if you'd like to know how this motor came together.
Anyway unfortunately one can't leave the exhaust open like that in civilized driving conditions so I needed a cat. Preferably one that can facilitate good outflow, doesn't have too much resistance and most importantly fits inbetween the headers' X-pipe and the muffler which I chose to leave stock M20B25 - in this case it's a BOSAL one. I'll later find out that the near racing metal cat I aquired in combination with the headers are so loud and distinctive that a bassy and deep growling muffler is actually better suited to this than the stock one but more on that later.
The first choice however fell on a standard M20B25 BMW catalytic converter. Well it was worth a shot shall we say as it didn't fit AT ALL.
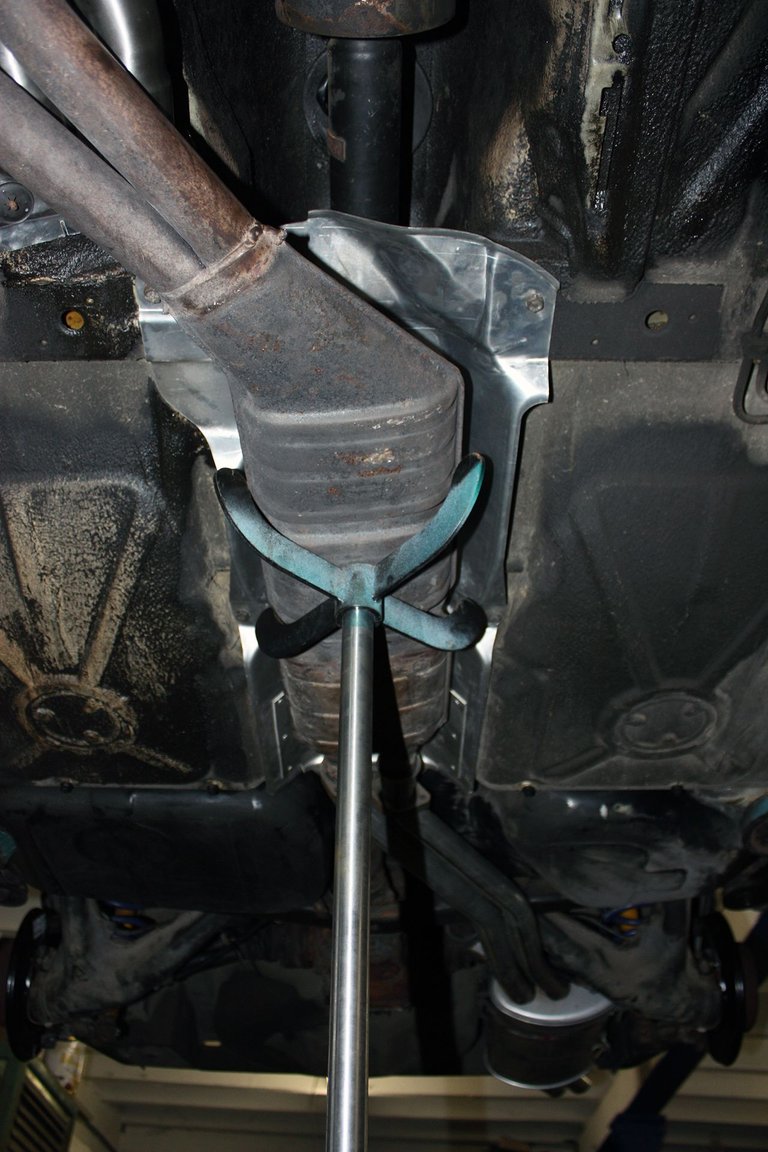
Looks alright you might say. Well, yeah only that the front was a complete misfit with the x-pipe:
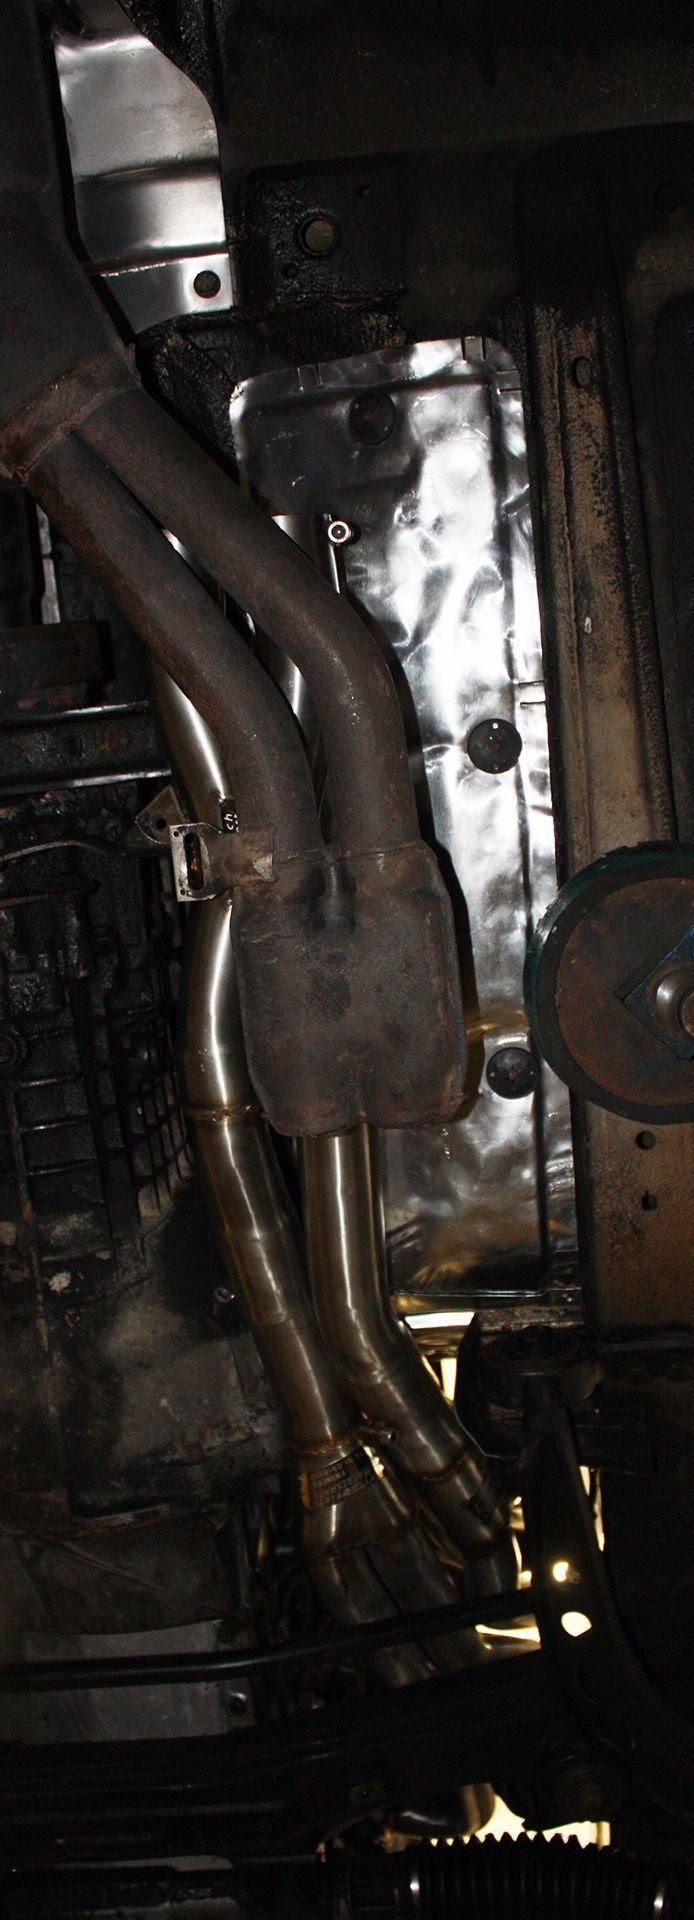
See here:
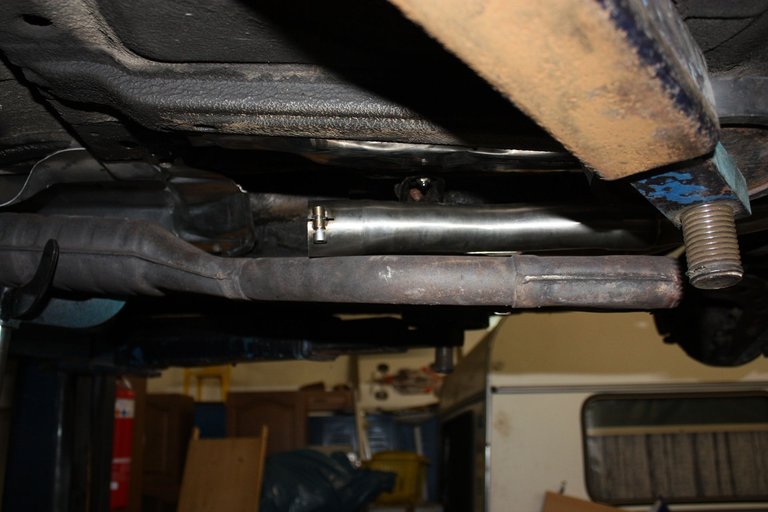
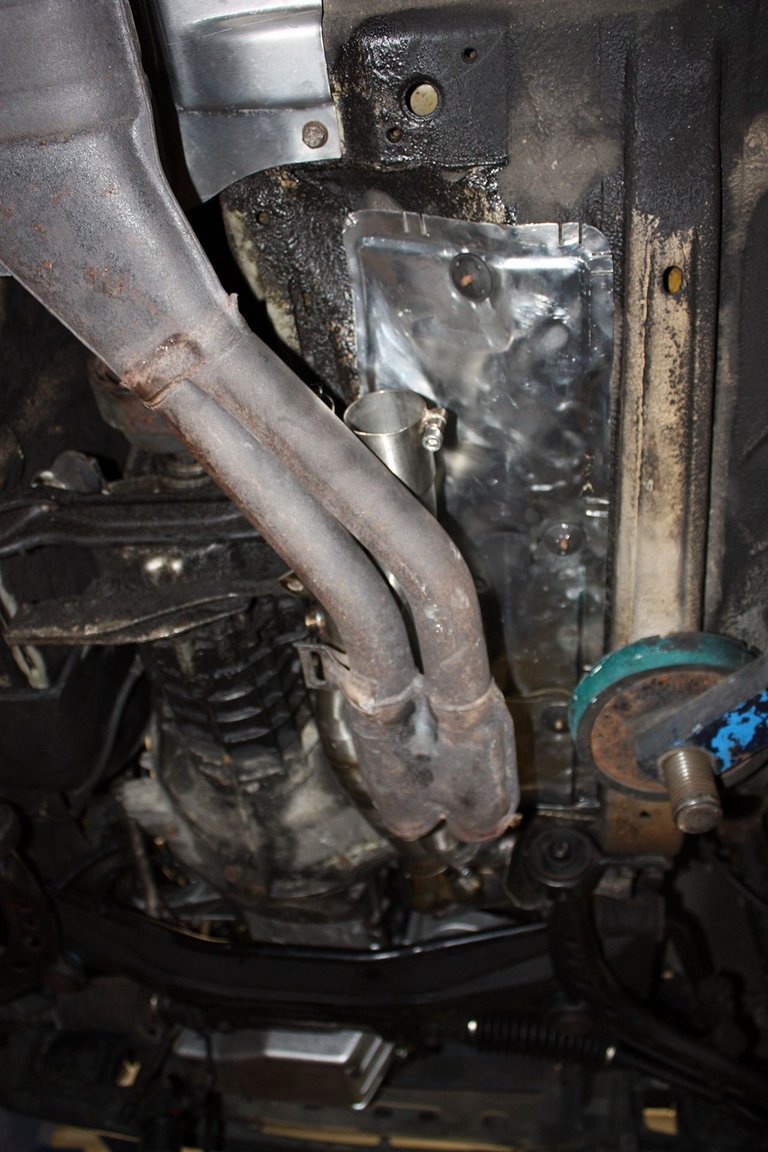
No welding in the world is going to make that work. Thing why I opted for the stock cat in the first place was that it would facilitate a near stock exhaust system combined with headers. At this point I realized that won't happen. There is no way to alter the header/x-pipe location at all and so there had to be a compact cat solution that fits under the car and has roughly equal pipe diameters from front to back.
I went out to hunt for a good cat and bought some stainless steel exhaust pipes with a diameter of around 55mm.
For now this was my exhaust setup :)
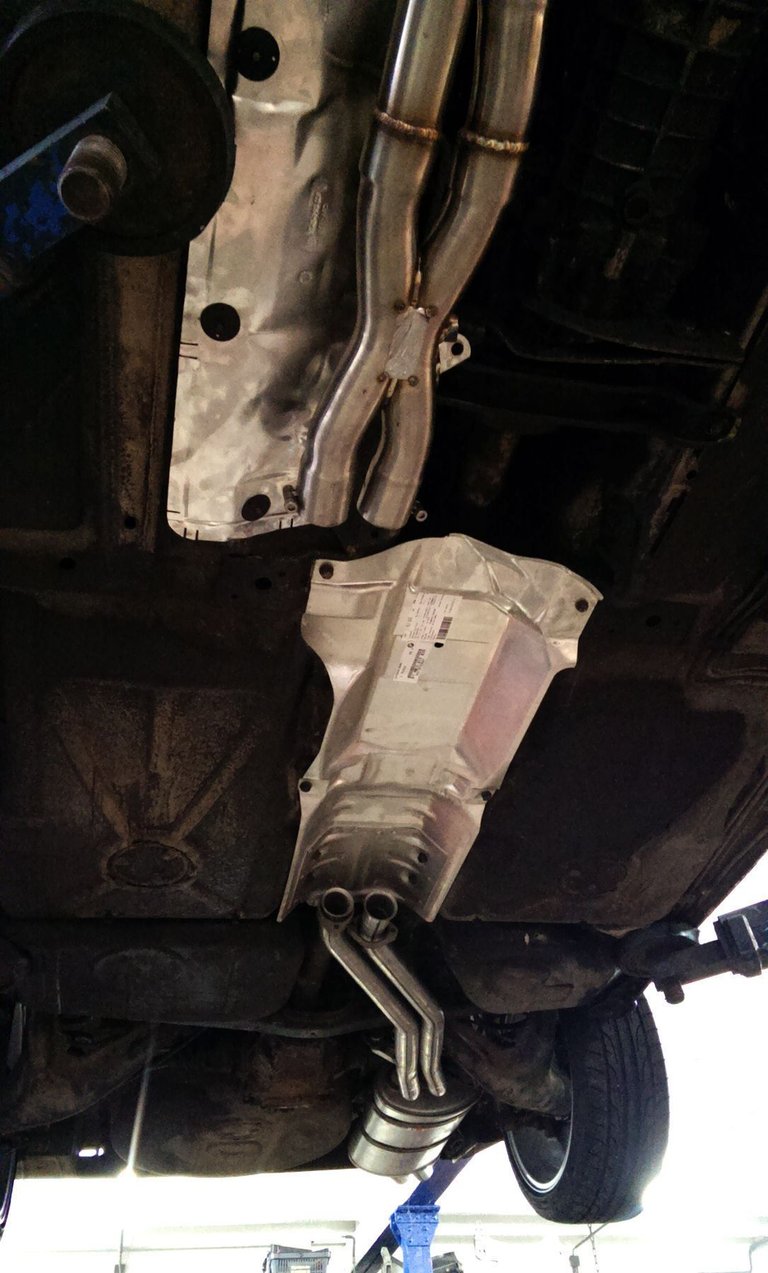
Part 7
200 Cells and Stainless Steel Welding

No welding in the world was going to make that work. Thing why I opted for the stock cat in the first place was that it would facilitate a near stock exhaust system combined with headers. At this point I realized that won't happen. There is no way to alter the header/x-pipe location at all and so there had to be a compact cat solution that fits under the car and has roughly equal pipe diameters from front to back.
I went out to hunt for a good cat and bought some stainless steel exhaust pipes with a diameter of around 55mm.
I soon found a guy who had a similar setup and the same problem. He had bought a 200 cell metallic catalytic converter from a company in Berlin called Unifit. They offer 200 and 400 cell cats. Basically the lower the number of cells the more throughput you have in terms of exhaust gas flow so less resistance while at the same time having a relatively high degree of conversion AKA less toxic exhaust. It fit perfectly once assembled:
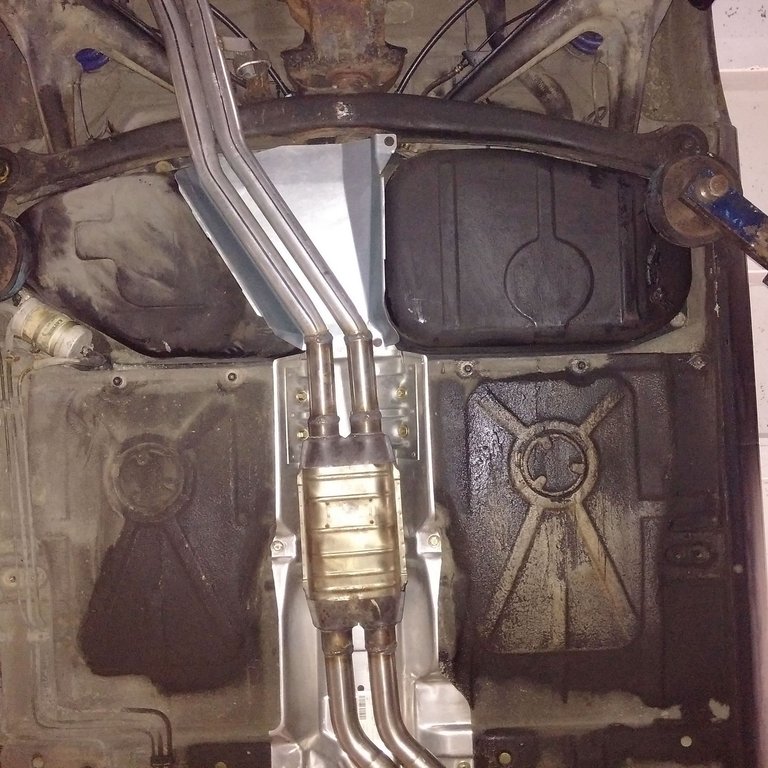
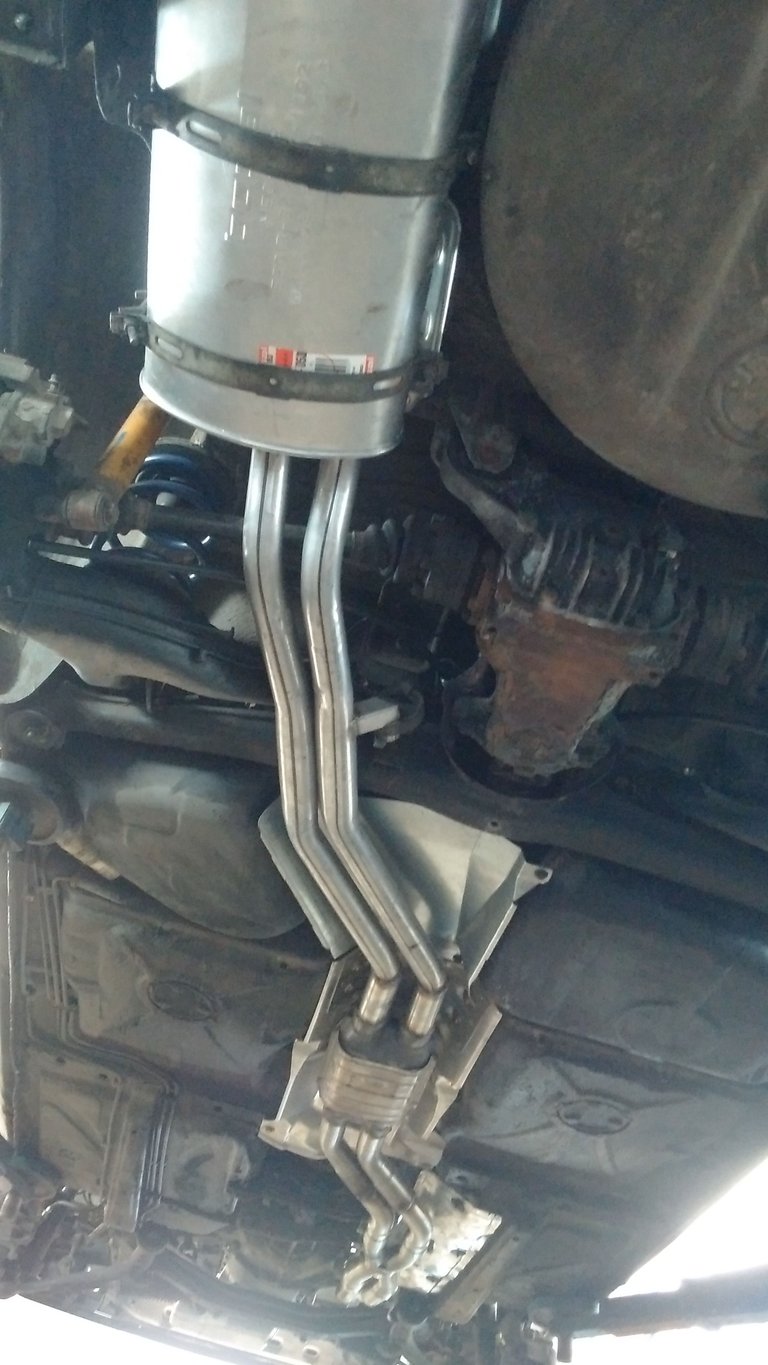
Pretty much all third party 2x50mm 200 cell metal cats come out of the same factory in China which at the time of my order had serious supply issues and the delivery time went from long to 'we don't know when'. So I bought a used one and had it delivered it to my mechanic.
The system is entirely customized and basically goes like this:
cylinder head > headers > 3 to 2 to 1 > dual pipe cat > dual pipe muffler all within around 50mm pipe diameter
The X-pipe had mounting screws so no welding was required. The connecting pipes were welded to the cat and from the cat to the muffler so everything after the X-pipe is one piece. Stainless steel up to the muffler and then stock muffler to the end.
The welder is a specialized guy who welds stainless steel like you wouldn't believe, check out the accuracy:
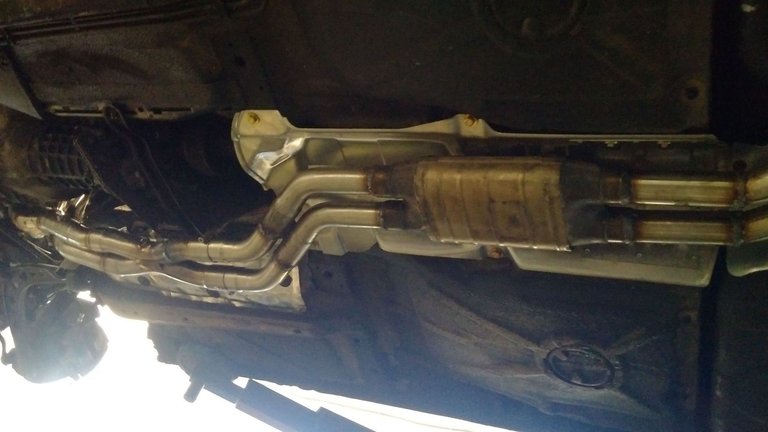
The metal cat had some advantages, first of all it built very low and fit extremely well into the stock exhaust tunnel. Second it delivered exceptional emission values in testing and third it had a beautiful sound and aided the engine's performance. There is little clearance to the engine mounts, transmission mount and rear axle but it all moves freely and there is no contact anywhere:
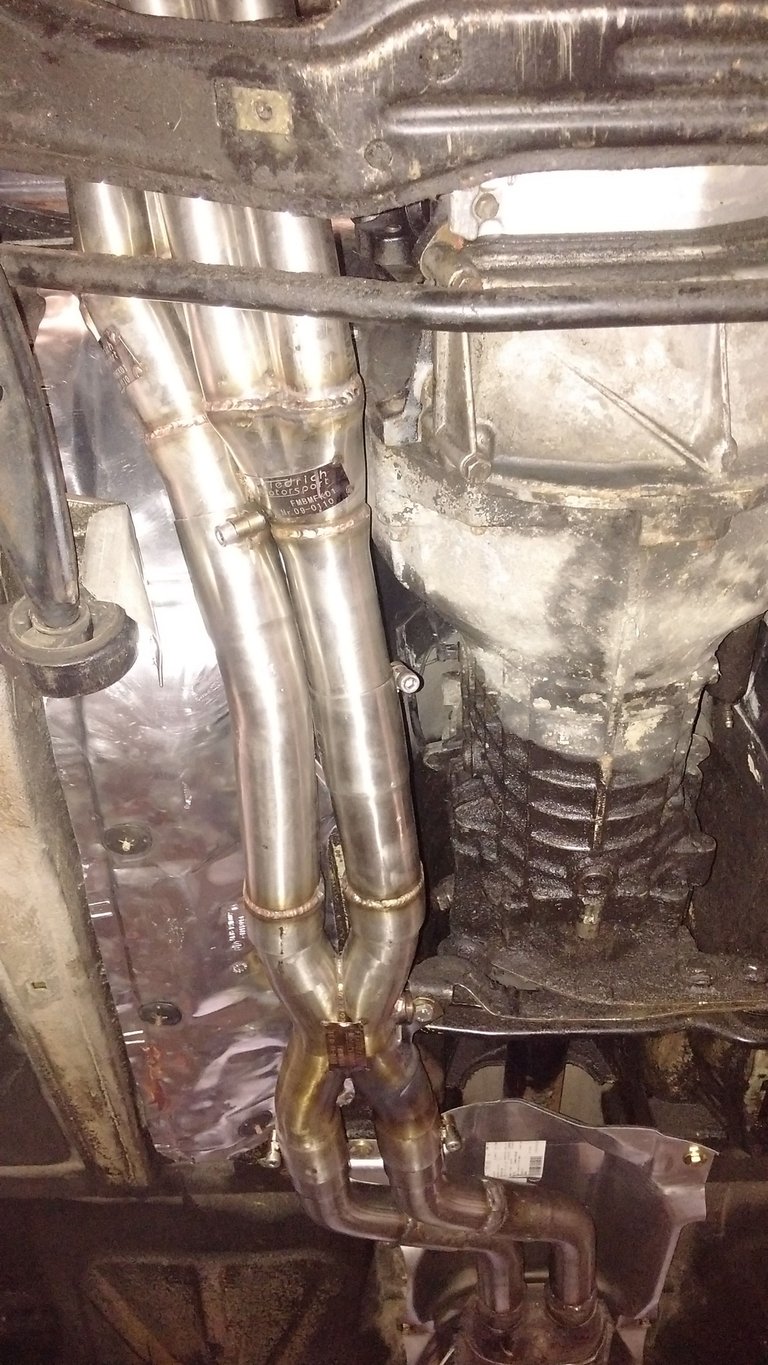
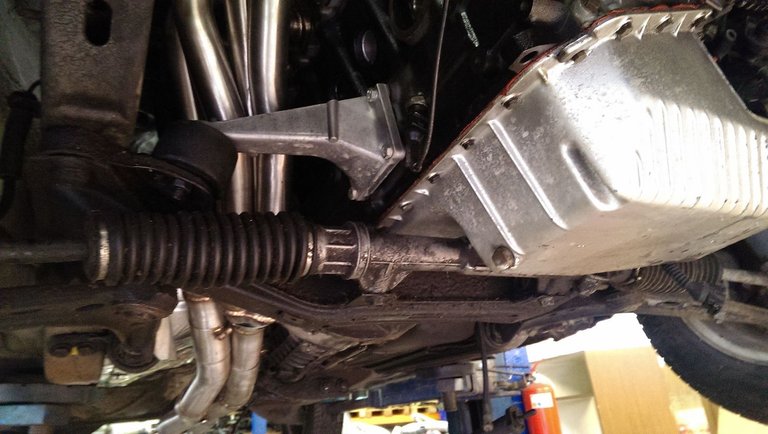
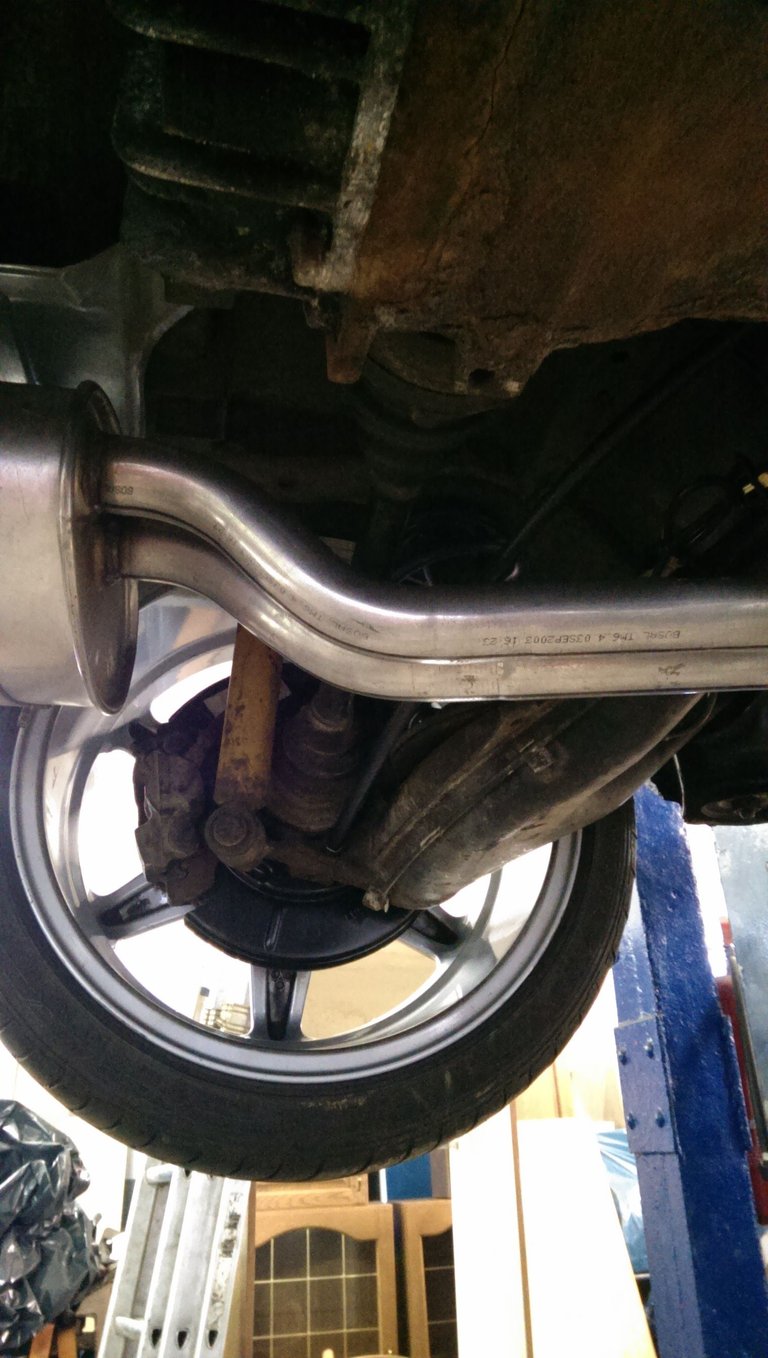
The muffler was adjusted to sit with the pipes in stock position before we aligned it to the cat pipes, in the end the system came out almost 100% straight. The X-pipe actually is screwed onto the transmission mount in the original stock position.
The lambda node cable had to be extended, it is fully functional and the car exceeds the Euro 2 emission standards it's more like Euro 3 which is almost California compatible.
The only 'downside' if you can call it that is that it is quite loud with a metallic, race car type sound when revving above 3000rpms. Basically the engine's valve train in combination with the headers and cat generate a very nice but also very flat and metallic sound which requires a bass heavy and deep note after market muffler to arrive at the classic BMW straight 6 sound. Currently with this setup all you here is the headers and cat and the muffler is basically non existent. I'll have to find a nice stainless steel after market muffler and weld that onto the cat pipes in the future.
Peace
OH MAN that is one pristine work on E30. I admit my preference to OEM stock stuff, but how about stuffing M52B28 and that's it - problem solved :) ETA engines were like a diesel alternatives back in the day though.
Yeah I get that, the point here was really to have a quasi new M20 high performance solution that’s reliable. I have he M52 in my E46 it is a magnificent engine in its core but the M20 is in so many ways more fitting and also more reliable and has unique characteristics...an E30 needs an M20/30. Glad you like it!
Excellent work! The worst mistake I ever made was selling my e30 track car! I moved onto rebuilding a 2002 to replace it which should tick the box I left open!
Never had or drove a 2002 but it seems quite comparable. Isn’t the door like the same part on the E30?
Unfortunately it doesn’t share parts however I have modified some good parts from the e30 to fit such as LSD and rear brakes
Great Click's @ peterschroeter I'd really appreciate if you can take a moment and see my photography also. I'm new here it would be big help.