TABLE OF CONTENTS
- Introduction
- Campaign Map
- Region Abilities: S-Tier
- Region Abilities: Resistance Strength
- Region Abilities: Campaign Map
- Region Abilities: Average Tier
- Region Abilities: Weakest Tier
- Timing & Prioritizing Regions
This article was written under Classified France '44 Game Build: 2321, P4Stream: Patch103, Change: 50005, Built: 14/05/2024 11:50:12
I am happy to make any corrections if more accurate information is discovered. If you have any comments, you can either post here or e-mail me at: [email protected]
All of the screenshots in this post were taken by me.
1. INTRODUCTION
Classified France '44 has a campaign map with regions that you establish, which may be reminiscent of XCOM's system of resistance contacts and continent bonuses. In both cases you build up your network throughout the game and you periodically unlock bonuses (region abilities or continent bonuses) which are randomized at the beginning of the game.
There are some major differences though. Classified France has a simplified system where you add a segment in a region after every successful mission. Over time, enemy pieces appear that try to damage regions. XCOM has a more complicated system where your contacts are limited by your base facilities and you have to build enough facilities to expand. Establishing a contact costs intel initially but it increases the amount of supplies you get each month.
This guide analyzes how the various regions are set up at the start of the game, assesses how useful each of the region abilities are, and offers some suggestions on how you should prioritize which regions to focus on.
2. CAMPAIGN MAP
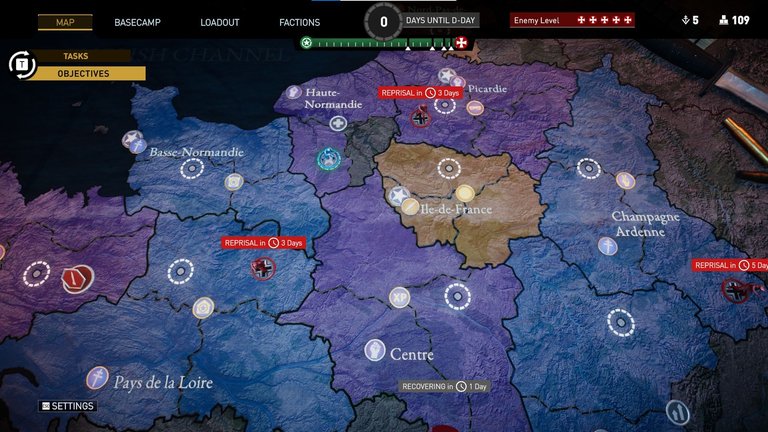
The campaign map is established at the start of the game. The regions and their abilities are then fixed for the remainder of that campaign/playthrough.
There are 10 regions in the game, each with 3 segments. After each successful mission, you can add a segment in any region that is affiliated with the faction where the mission took place (it does not have to be that specific location). Once all three segments in a region are completed, it unlocks that region's ability. Enemy units on the campaign map will try to launch reprisals and damage regions, which will negate the resistance strength contribution of that damaged segment and the associated region ability until it is repaired. You can temporarily disable those enemy units by spending FFI points.
Each region has a faction affiliation which is fixed and an associated ability which is mostly randomized. There are also certain regions which are always designated as Key Regions.
The Gaullists always have 4 regions: Basse-Normandie, Pays de la Loire, Champagne-Ardenne, and Bourgogne.
The Radicals always have 4 regions: Bretagne, Haute-Normandie, Centre, and Picardie.
The Criminals always have 2 regions: Nord-Pas-de-Calais and Ile-de-France.
The special abilities are mostly randomized, except that Bretagne always gets Railroad. There are 12 possible region abilities so besides the fixed Railroad, 9 of the remaining 11 abilities are present in a given campaign.
The three Key Regions are always Basse-Normandie, Picardie, and Ile-de-France. Later in the game, it is also possible to make Bretagne into a Key Region as well.
You can have up to 25 missions in a campaign before the final mission (from Day 53 to Day 7 you can have a mission every 2 days, which yields 23 missions. The third to last mission is variable in duration and takes you to Day 2. The second to last mission takes you to Day 0 and then you have the final mission). It is also possible to get another 2 region strength from random events (for more information, check out: Classified France '44: Random Events Guide). Thus at the end of the game, it is possible to fill up to 28 of the 30 region segments.
3. REGION ABILITIES: S-TIER
I think these are the strongest region abilities. They provide useful benefits throughout most of the game and they are particularly valuable in the early game:
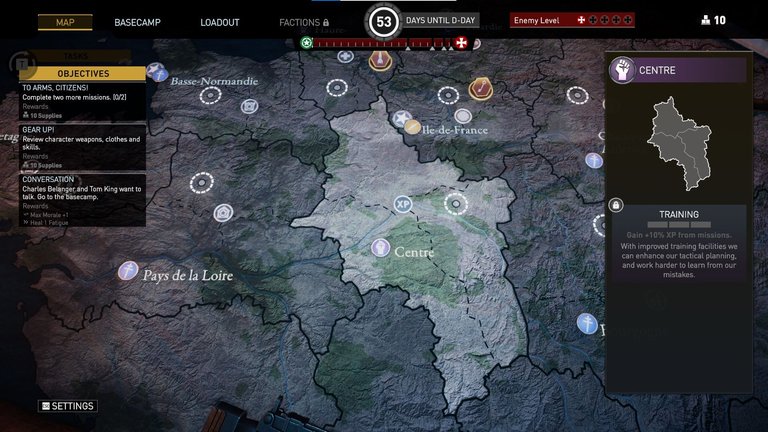
While there is a hard character level cap of 25, you are unlikely to reach it except at the end of the game. I usually prioritize the Training region early on and I am constantly having a character undergo the Training task. Despite all that, my characters typically all reach max level during the last few missions so without the Training region ability or using the Training task a lot, you might not even reach max level! Higher level characters means more skill points that you can spend to unlock new skills.
Most missions will grant 1500 XP - 1700 XP if you complete all of the primary and secondary objectives, though some of the required or paired missions may provide more XP.
The Convoy, Liquidate Agent 15, Lancet, and Operation Lighthouse provide 2000 XP. The final mission (Vengeance) provides 2400 XP. Slay Le Voirloup and The Call provide 2700 XP. And Operation Lamprey provides 3200 XP.
Once you have unlocked the Training region ability, the extra 10% XP will automatically be factored into the mission specs. Thus most missions will grant 1650 XP - 1870 XP and the required or paired missions may provide up to 2200 XP - 3520 XP.
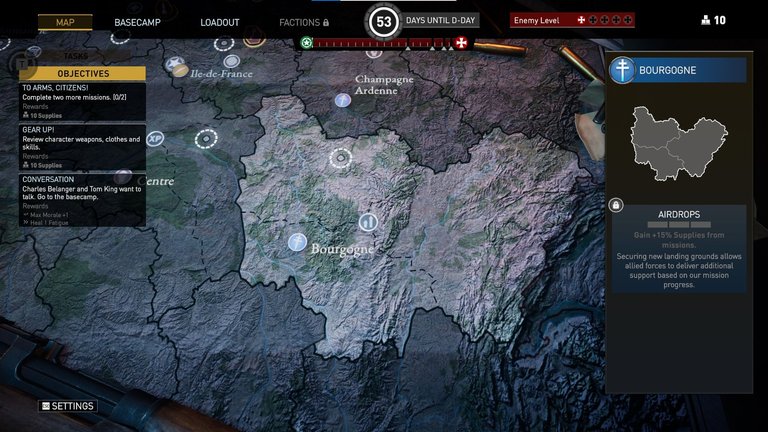
You will continually need supplies throughout the game to buy better equipment, to fund various tasks, and to pay for certain choices from random events. Except at the very end of the game when you have bought the best equipment from each of the faction shops, you can always use more supplies, which is why the Airdrops region ability is very strong.
The average mission will provide you with 40 - 50 supplies if you complete all of the primary and secondary objectives. Certain fixed or paired missions may provide a higher number.
The Convoy, Liquidate Agent 15, Lancet, and Operation Lighthouse provide up to 60 supplies. The final mission (Vengeance) provides 72 supplies. Slay Le Voirloup and Operation Lamprey provide 80 supplies. And Operation Mirage, The Call, and Maquis Mess offer up to 96 supplies.
Once you have unlocked the Airdrops region ability, the extra 15% supplies will automatically be factored into the mission specs.
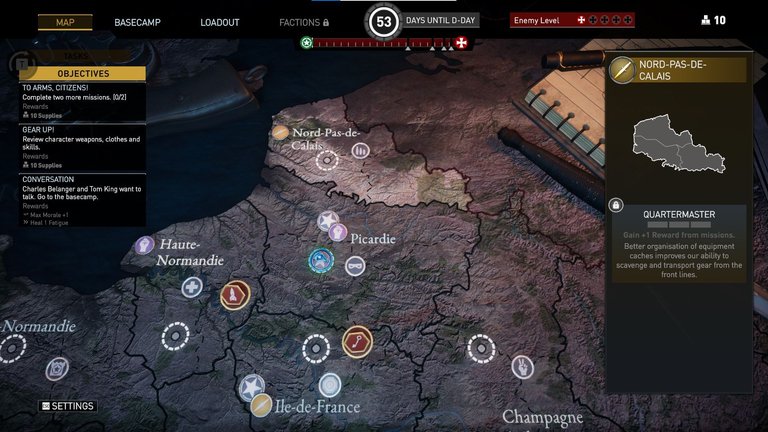
On average, most missions will provide 1 or 2 random items (weapons or clothing) as part of their reward. On rare occasions, a mission will offer 0 items for the reward. This applies to the final mission but I have also seen other missions offer no reward - I do not know if this is a bug or if that possibility was intended.
Quartermaster means that missions will offer an additional random item. In the early game when you have minimal equipment, any item can be helpful. But by mid-to-late game when you have decent equipment, you will find that a lot of the extra items that Quartermaster offers are low quality (white or green-level) that you have no use for. And since you can't sell or scrap unneeded items in Classified France '44, the utility of Quartermaster starts to drop rapidly.
An alternative way to look at it is that Quartermaster improves the chances of finding a high quality (blue or purple-level) item on some mission and can help in cycling through the low level items. If you're a min/maxer who is fine with save scumming, then Quartermaster is less useful because you can save at the end of a mission and then when new missions are randomly generated, you can keep reloading until a mission with good rewards shows up. But if you do not want to save scum, then Quartermaster can significantly improve your chances of finding good equipment.
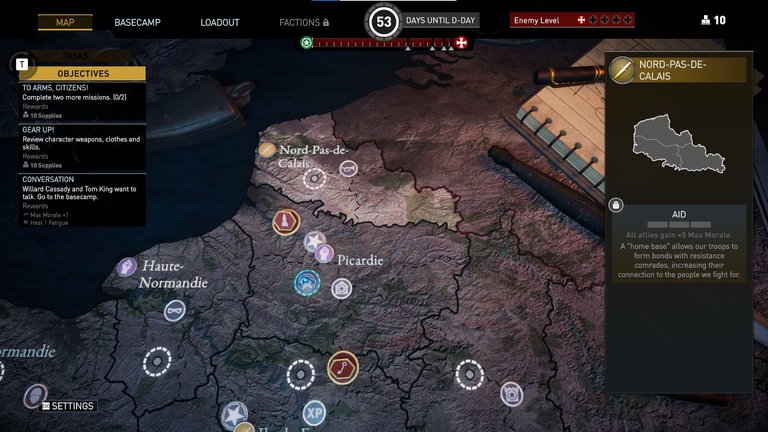
The Aid ability provides a basic advantage which is generally useful. Essentially it gives each of your characters an extra skill point of benefits (since the Morale skill, which gives +5 maximum morale, costs 1 skill point).
Higher morale means your characters are less likely to become suppressed (halved action points, reduced combat effectiveness, increased vulnerability) or broken (no action points, more severe penalties than suppressed, incurring an injury). Remember that in Classified France '44, each time an enemy attacks you, you will lose some morale - even if the attack missed!
Your characters' maximum morale will naturally increase over time. After most missions, two random characters will want to have a conversation. You will learn more about them, their maximum morale will increase by 1, and they will recover from fatigue. As a result, +5 maximum morale will be more important in the early game than in the late game, though it can still be helpful even near the end.
4. REGION ABILITIES: RESISTANCE STRENGTH
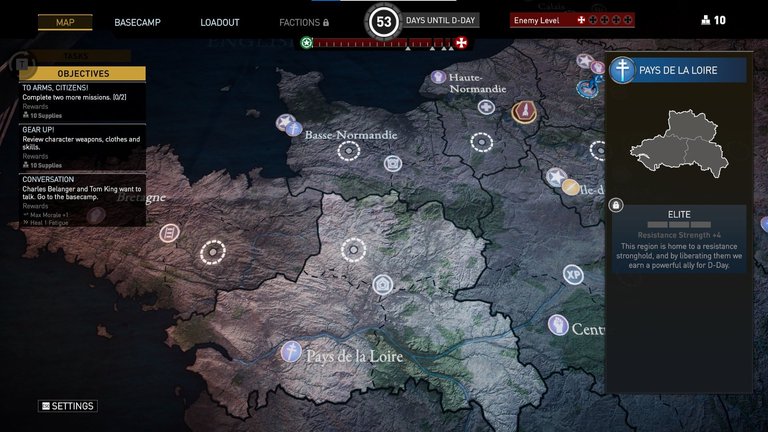
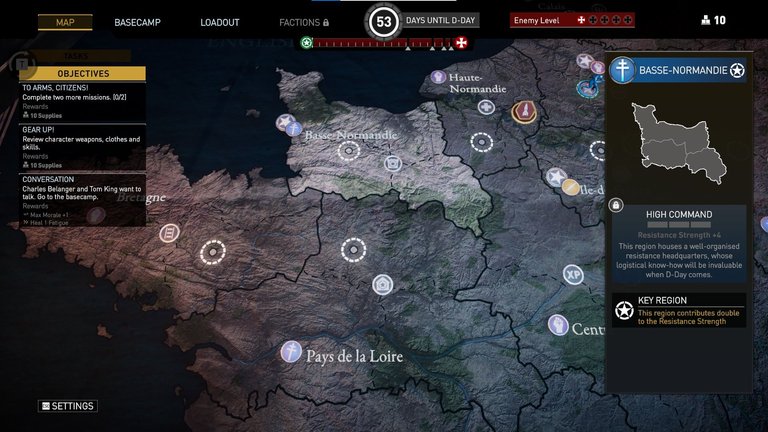
These two region abilities are equivalent and each contributes to your overall Resistance Strength which only matters at the end of the game to determine how successful you are on D-Day. If you want to learn more about how the Resistance Strength mechanic works, then please read my guide on: Classified France '44: Winning with Resistance Strength
If you want the best endings, then you do want to get enough Resistance Strength to achieve a Decisive Victory. If you just like playing combat missions and don't care about overall campaign progress, then you can ignore these regions.
Unlike the other region abilities, Elite and High Command only matter at the end of the game. There is no benefit or advantage to unlocking them early. Thus even if you do want to pay attention to Resistance Strength, you can often wait to unlock these until the mid or late game. Remember you may have up to 25 missions to complete plus the final mission, though sometimes missions will appear in a region with the wrong faction affiliation than you were hoping for.
5. REGION ABILITIES: CAMPAIGN MAP
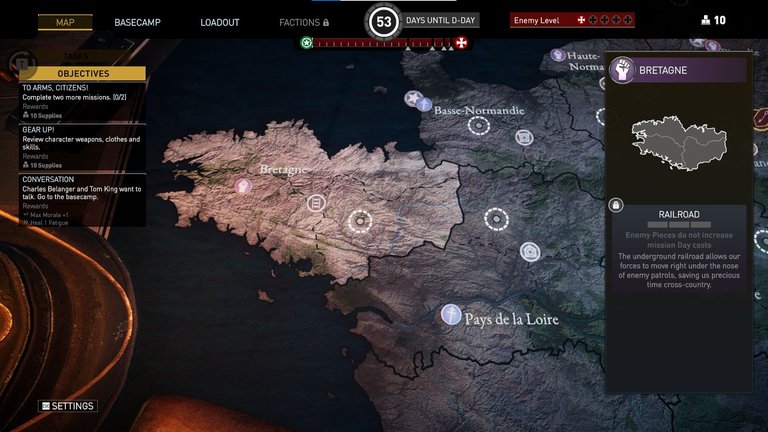
Starting in the mid-game, enemy pieces show up to sabotage your efforts by launching reprisals to damage a region. While an enemy unit is in a region, missions in that region are tougher (enemies are +1 level) and take longer (+1 day).
With the Railroad ability, missions in the same region as an enemy piece do not take longer (though the enemies are still +1 level). This can potentially save you a lot of days depending on where missions are spawned and where the enemy units move to. Thus the Railroad ability is actually quite important if you want to achieve a Decisive Victory at the end of the game.
The Railroad ability is also unique in that it is not randomized. It is present in every campaign and is always tied to Bretagne. During the game, you have the chance to make Bretagne a Key Region. If you plan to do so, then you will likely be filling out the entire region at some point and unlocking the Railroad ability anyway.
If you plan to save scum, then the Railroad ability is less useful because you can keep reloading until new missions are generated in regions unoccupied by enemy units or the enemy units move into different locations. Nonetheless, it can still save you real time by reducing how many times you need to reload.
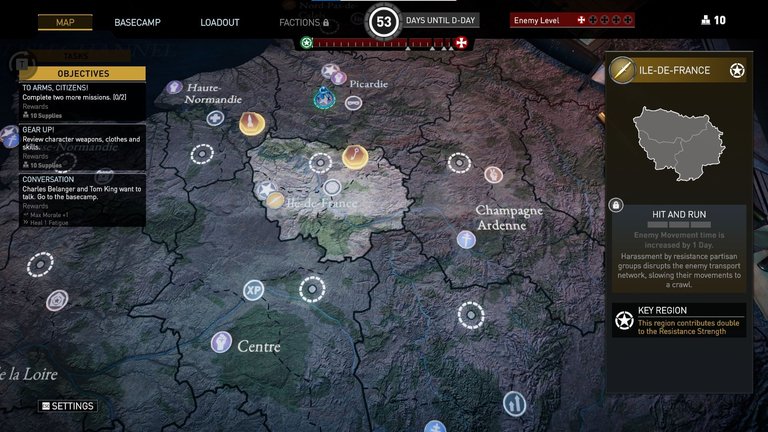
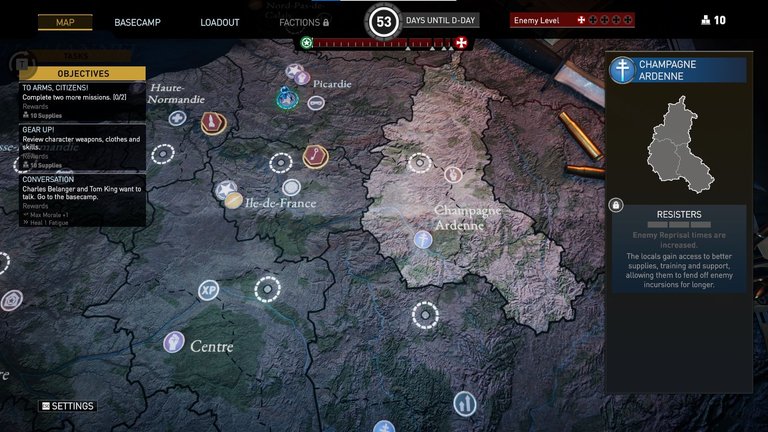
These two abilities slow down the progress of enemy reprisals since enemy units need to spend several turns moving and then several turns completing the reprisal. (And if you disable them with an FFI point they also need to spend several turns recovering).
If you enjoy the metagame that is available from the campaign map or if you want to achieve a Decisive Victory by D-Day, then these abilities can be quite useful. And if you unlock both abilities, then handling even 4 enemy units on the campaign map is quite easy.
But if your main interest is in combat or if you are struggling with missions and need combat advantages, then you might be better off focusing on other region abilities.
6. REGION ABILITIES: AVERAGE TIER
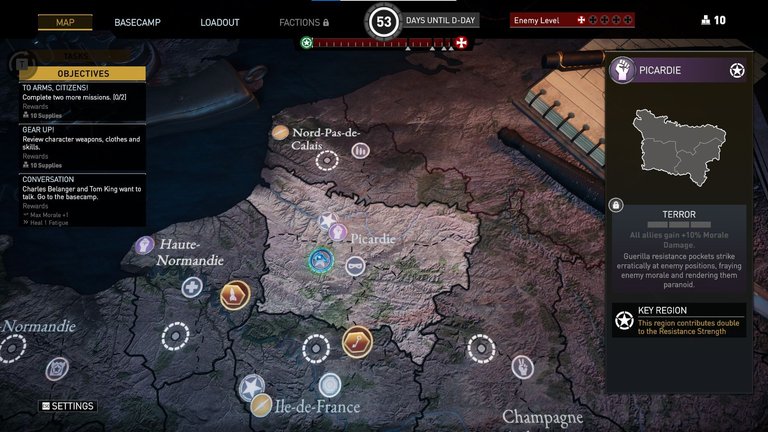
Terror gives a consistent combat advantage but I merely rate it as average because it is only worth half a skill (the Demoralise skill costs one skill point and gives +20% morale damage whereas Terror only gives +10%) and because usually it is far more important to kill enemies with actual damage rather than disable them with morale damage. That is because many missions have a timer and most missions will eventually spawn unlimited reinforcements over time. XP and supplies awarded are based on completing objectives and are not proportionate to killing enemies, so killing extra enemies doesn't actually provide additional benefits other than satisfying your bloodlust....
Increased morale damage can be useful in causing enemies to become suppressed or broken. That means they get fewer action points to attack you with. Also, once enemies reach suppressed, then flanking shots automatically deal critical damage which can make it easier to kill them.
The one situation where the Terror ability actually becomes quite good instead of merely average, is if you really like Heavies and are taking a heavy Heavy strategy (and probably recruited both Ollie "Grog" Johnson and Sami "Olive" Alami). The Heavy character class has several abilities that trigger based on reducing an enemy to broken status so you really want to stack morale damage modifiers on them. With all the other classes, I never waste skill points on the Demoralise skill. But with Heavies, I want to select both Demoralise skills (for +40% morale damage), any equipment that increases morale damage, and then region abilities like Terror are simply an extra cherry on top!
7. REGION ABILITIES: WEAKEST TIER
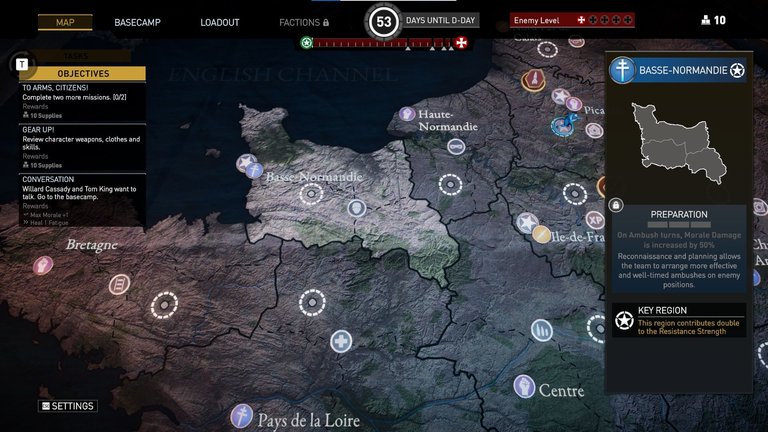
You're not always going to have an ambush round and even if you do, it's only a single turn where you already have a massive advantage.
Unless you are an expert at the game or you save scum a lot, then some of your missions will likely start combat early without an ambush round because the enemy spotted one of your characters. In that case you don't benefit from Preparation. Also some missions start with combat already initiated and thus there is no opportunity to ambush at all.
To increase your likelihood of having an ambush, you could simply kill the first enemies you meet and trigger the ambush early. But that can sometimes be sub-optimal and doesn't necessarily put you in the best position, especially if it means fighting extra enemies that you could have otherwise avoided.
Even if you do optimally plan your stealth kills for an effective ambush, you normally have time to set up. Once an ambush starts, all of your characters get their action points replenished. That means that before you stealth kill the triggering enemy, you can move all of your characters into position and even utilize some of their active skills (Hollow Points, Savage Strike, Mark Target, Spot Weakness, I'm Bulletproof, etc.). Thus the ambush round is normally going to be very devastating and effective anyway and an additional +50% morale damage is extraneous.
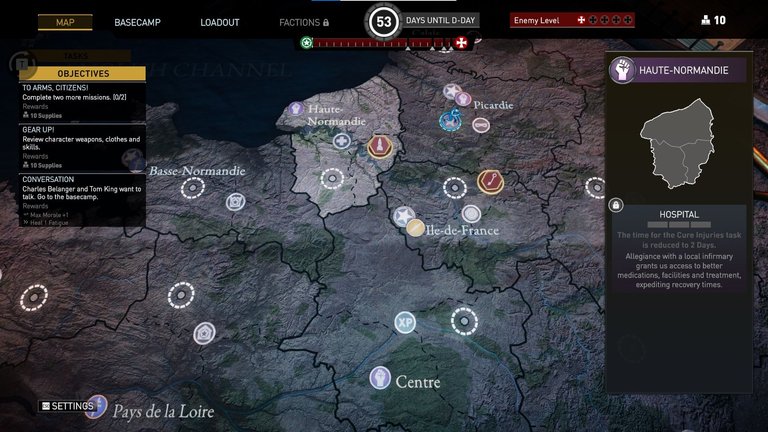
If you're experienced with the game you will hopefully not be taking many injuries in combat. If you see a lot of injuries, it may mean that you aren't taking enough Leaders (who have Rally to increase morale so you don't become broken) or Support (who have Medic and Take Your Meds to heal damage so you don't become downed) or aren't using them effectively enough.
My personal opinion is that if you're receiving enough injuries such that the Hospital ability is helpful, then you're already doing poorly. The Hospital ability is thus addressing the symptoms and not the root cause.
If you're familiar with the XCOM games, do keep in mind that Classified France '44 is far more generous regarding injuries. In XCOM, if you take any damage that gets past armor, then your unit may need a few days to recover even if you heal them back up to full during the mission. In Classified France '44, your units only get injuries if they reach downed or broken status. They can receive a bunch of damage and get healed but as long as they never reach the downed or broken thresholds, they won't receive injuries. As a result, injuries tend to be rarer than you might otherwise think.
8. TIMING & PRIORITIZING REGIONS
Even though you might eventually fill in 28 of the 30 segments and unlock 8 - 9 region abilities, many of these region abilities will only get unlocked near the end of the game when their effectiveness is quite limited.
Thus the order that you unlock the region abilities is important, especially since some abilities have effects which will snowball over time.
For your first few region unlocks, I strongly recommend looking at the S-Tier abilities that I mentioned above.
If you care about Resistance Strength progress, you will eventually want to unlock Elite, High Command, and any Key Regions (regardless of their ability). However, it only matters that you unlock them by the end of the game and if you properly plan ahead, you can unlock them near the end and initially focus on other regions instead.
The Campaign Map abilities are dependent on the presence of enemy units on the game board. In the early game when there are no enemy units then these abilities are completely useless. Even when there are just 1 or 2 units, you may be able to work around them. However, when the board gets filled with 4 units, then they become much more valuable.
I think that + morale damage mainly becomes useful in mid-game once you have a sufficient set-up and your Heavies have managed to level up sufficiently and have taken certain key skills (i.e. Bulletstorm Levels 1 & 2, both Demoralise skills, Kill Zone).
Congratulations @byzantinekitty! You have completed the following achievement on the Hive blockchain And have been rewarded with New badge(s)
Your next target is to reach 30 posts.
You can view your badges on your board and compare yourself to others in the Ranking
If you no longer want to receive notifications, reply to this comment with the word
STOPCheck out our last posts: