Hi!
I have a opensource project where i build a CNC machines called Raw. I have done this since 2008 and the machines has grown to be one of the most strongest DIY machine available in this price range. A friend told me about Steemit and this is a perfect platform to spread the knowledge about CNC machines. English is not my native language but I will do my best.
I’m thinking of writing a whole series on how to build the machine displayed in the image below but before I do we need to go through the basics. If you are new to all this then the text below will help you a lot.
So where to start?
There are several ways to tackle the task. One is to seek out various forums and look for drawings and good advice. I’m the type who dives into projects and cannot be bothered to go slow, but I have found out that errors are very expensive in the CNC world and I wish I had read a text like this when I started, that would have saved me a lot of money.
We who built a couple of machines know that it may take a few machines until you get it right because there is a lot to think about. To build a machine that travels back/forward and up/down is easy, to build a machine that has precision and good speed is harder. A CNC machine can be as complicated as you wish, it’s up to you.

What do you want to do with your machine? Are you going to cut paper, decals, aluminum or wood, three-dimensional or two-dimensional with simple plug holes? Or do you want to build a machine that can handle all of the above?
Sounds pretty difficult? No worries, a homemade CNC machine can handle the above if you construct your machine the right way from the beginning. Everything is really about construction. The electronics are easy since everything is available for purchase. The design however is more difficult.
My first machines were made with MDF and plywood, this is good since it is cheap but the machines aren’t good in comparison with a steel or aluminum machine. Below is a video from 2010 on one of my machines entirely of wood. This video makes me smile, a lot has happened since then. If you look at the background to the left of the wooden machine you can see my first aluminium machine, that was the beginning of the Raw machine.
I myself was inspired by buildyourcnc.com. He who runs the site builds its machines in MDF and plywood. I built my first machine with ideas from this page. But… these machines are good up to a certain point, wood bows and hangs over time as it is a living material.
Materials
I would only recommend aluminum for the person who will build its first machine. Steel Machines are better but much more difficult to build. Everything must be cut in mm precision and this is difficult with steel that needs to be welded. Aluminum is very grateful because it is a straight material and easy to cut and join together with various accessories. The disadvantage of aluminum is that it is light and has more vibrations in the construction.
An ideal machine should be robust and built in a heavy material like steel that “absorbs” vibrations better. But if you need the machine for simpler tasks with about 1 mm precision then aluminum is an excellent choice. You can even get an aluminum machine to engrave jewelry as long as you run it at low speed.

XYZ Axis
A three-axle machine should be able to move three-dimensionally in the direction XYZ sideways, back and forth, up and down. This must be done with as little friction as possible. There are different ways to solve this. That is, how will my axle “roll / glide” on these directions. Because it is expensive to build a CNC machine most of us are looking for inexpensive solutions. My first solution was to use ball bearings that slide on a 90 degree angle like the picture below.
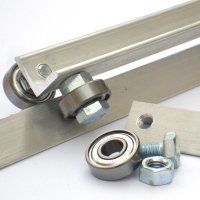
linear bearings
This is extremely cheap but not so good. The problem with this solution is that when you drill the holes in the angle it’s really difficult to get it symmetric, if one hole is a little bit off, then one of the bearings won’t touch the angle and there will be a “gap” in the design. If you get the holes right then it is important to get the tapper right in all holes as well. I like the idea, it’s a simple design but if you are looking for a more professional build you should look at another solutions to.
My second solution was more expensive, I bought the V-grove ball bearings from the US for 12USD each (you need about 16pcs). This is what i have on the wooden machine above.
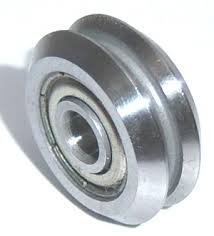
I had these bearings sliding in the same way as the first solution (on the back of a 90 degree profile). This works ok but it will wear the profile down after a while.
I simply had to give up my budget ideas and seek for more professional solutions. I bought Linear ball bearings and shafts like the ones below:

This is very expensive, and the precision shafts are really expensive. This solution looked really good in the beginning. Unlike many others, I used my machines for cutting furniture’s daily so they were exposed to a lot of saw dust. What happened was that the dust found its way in to the bearings and made them useless. This can be solved by having the bearings below the table but I gave up the idea.
I tested a lot of other methods and the last option was to buy similar linear units as above but with block bearings that slide on a flat steel bar. This is the best solution but extremely expensive and I thought that there must be cheaper solutions out there.
So instead I went back to my first solutions to have something rolling on an axle that don’t need to be lubricated since lubrication and saw dust don’t work well together. And I found it…
The concept is to have a quality u wheel of steel (not plastic) rolling on a precision rod and clamp profile. The dust has a very little chance to stay on the thin 6mm shaft and this solution don’t need any lubrication.

If anything can be worn it’s the precision rod/axle but it is very easy and inexpensive to replace in comparison with other solutions that let the bearing slide on the actual profile that is a part of the machine. The beauty of this solution is that the profile also becomes a part of the design. A machine with this system may look like below.

For me this is a cheap and good solution. There are of course better solutions but it’s all about the costs.
Propulsion
Now we need to figure out how to move the axles, there are different solutions.
- Trapezoidal screw
- Ball screw
- Rack and pinion
- Timing belt with pulleys
- Chain
What we’re after is a machine that has High speed (if desired) with much force as well as 0 or very little backlash.
Pros and cons:
Trapezoidal:

has a low speed and the pitch usually does not exceed more than 4 mm per revolution, ie the motor must rotate once for the machine to move 4mm In this way you can get the machine to go in about 1-2 meters per minute faster than this requires a higher pitch of the screw or more powerful motors. I recommend this variant to machines that don’t need to go fast, and to your machine’s Y-axis (up and down) even if you are running with timing belts or other solutions. With this solution you will have a very low backlash and a relatively inexpensive solution.
- Protection against dirt = bad (have the screws on the side or underneath the machine)
- Backlash = Good (until it wears)
Ball screws:
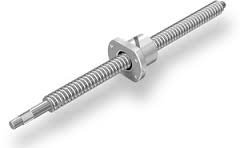
as above, but much more expensive. A screw can go for several hundreds of Euros and you may need 4 pieces. Here you will gain higher speeds maybe 3-4 meters per minute. And up to 0 in backlash. If you are working with wood or larger pieces this solution is painfully slow, it’s more suitable for small objects like aluminum or engraving jobs. So use this if you require precision and decent speed.
- Protection against dirt = Ok (have screws on the side or underneath the machine)
- Backlash = Very good, and probably the best option if you need as low backlash as possible
Rack and pinion:
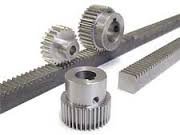
Now we’re talking, a rack has both speed, power and low backlash. My last machine that served as my workhorse were of this type. I also turned the gears downward so that dirt cannot get stuck between the teeth. More disadvantages are that the teeth wear out if you don’t find quality steel racks. And nice racks are hard to find as in real life. With rack and pinions you will come up in ridiculous speeds with enormous forces. This is the perfect option if you are really going to work with your machine. I will bring up a CNC machine with rack and pinion in the near future.
- Protection against dirt = Very good (probably the best solution)
- Backlash = Very good (If you find high quality steel Racks)
Timing belts:
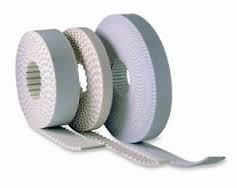
Timing belt can be good or bad depending on how you use them. I have seen many projects that builds CNC machines with a G2 timing belt that is 6mm wide. These are like rubber bands and are only suitable for 3D printers, decal and paper cutting machines. The backlash with a 6mm belt must be brutal. I use timing belts for my machines as well but these are HTD3M belts 15mm wide and with a steel core. These work very well and you can even turn the belt upside down to avoid dirt. I like belts, they are cheap and easy to replace. As with the rack you will get speed and strength and very good accuracy. I recommend you to use belts for your first machine.
- Protection against dirt = Very good
- Backlash = Good (with wide belts)
Chain:
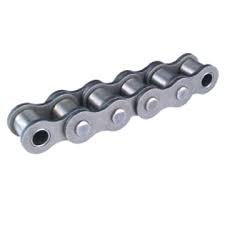
I have had machines with chain drive but they dont work good, I do not recommend chain…
Let’s move on…
Z axis
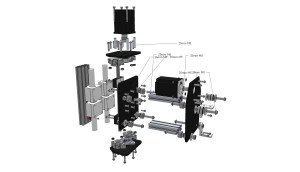
The Z axis is the one that goes up and down. This axis is the hardest to design. It must have both precision and withstand extreme stress, moreover, it must be small in order not to be in the way. Add a lot of effort on the z axis.
Milling spindle
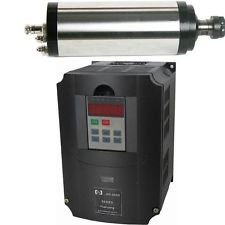
You can use a simple router or an expensive air or water cooled spindle with inverter. I usually go with the best as it is here all the action takes place. A bad router/spindle vibrates and it shows on the piece you are working on.
End mills
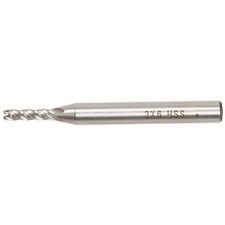
There are many different variations, HSS Cobalt, Carbide, 1 flute 4 flutes etc. Number of flutes depends on what you are cutting. For example, when cutting in aluminum, you want bigger “Chips” because it is a soft metal. A 4-flute end mill tend not to have enough space between the flutes to allow the material to evacuate, so they stick to the end mill and it won’t cut well anymore. In this case a 1-2 flute end mill is better.
A four (or more) flute end mill has more cutting surfaces at each rotation, so it gives a finer finish at the same speed as a 2-flute end mill, if you have a milling spindle with lower speeds with eg max 12000RPM a 4-flutes end mill will be perfect if you are working with wood. A 2 Flutes end mill will also work but it cuts a little rougher but still good. The only way to find out is to try out on the machine you have.
Electronics
There is so many varations that i need to do a separate article about this, but a Raw machine uses a 4 axle electronics kit with 4 normal (around 8cm long) nema 23 motors with at least 1.9Nm or 270oz-in
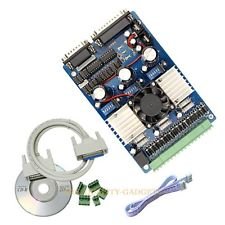
There are many users that hates the tb6560 board but I love them, simple and inexpensive. I have had no trouble at all with these boards. The green Raw Demo machine has the same tb6560 electronics that I bought back in 2011, and they have been working almost daily since then. I bought them from Wantai motors on Ebay. I also bought other electronics with traditional drivers but they have burned up long time ago.
Arduino
The USB version of tb6560 is a Arduino card with CNC shield, this option works very well and there is more information about this solution on my homepage. I will cover this in another article.
Drivers and breakout board
This is the best option, This is more complicated and i will cover this in another article. Untill then you can find more information on my homepage.
What else…
Software,
Its a jungle, but the principle is, To run a CNC machine so you need to write data to the machine as G code. The process may look like this:
- Make your 3D drawing in any CAD program (there are good free programs such as Google Sketchup or A9Tech
- Import your drawing to a program that generates G-code you can use expensive software like Vcarve or free like the Sketchup plugin ScetchUcam
- Import the G-code to Mach3 to cut your piece.
Read my article about software if you need to know more.
Computer / PC
You need a traditional PC to run your machine, a Windows XP system works well. Reason for this is that the circuit boards require a printer port. Printer Ports on a Laptop will not do since they operate in a different way.
USB ports are on its way but it’s still a bit early, but in a few years USB will be the new standard, until then we have to stick to a traditional PC with a printer port.
If you use Arduino you can use any computer you like that has a USB port.
Hobby Machines
There is a reason that an industrial CNC machine can cost more than a car. Such machines has no margin for error, it has to work perfectly around the clock and all year round and that requires expensive electronics and parts. An industrial CNC machine also has many more features that most of us don’t need
A hobby machine is usually made with stepper motors and parts that is easy to find. Even if it’s a “Hobby machine” These machines are not toys, they contain delicate electronics and has an incredible precision which surprises most people who see them, the machines cut into millimeter precision in all directions. A machine with sensitive electronics in a dusty environment requires maintenance and monitoring and that’s probably the big difference between a hobby and industrial machine.
What skills are needed to work with a CNC machine?
As with everything else, it’s a learning process. In the beginning it may seem tricky when you suddenly can bring out things in 3D and you have to think three-dimensionally. But as soon as you understand the concept it will open up a whole new world in production and manufacturing.
Is a CNC machine right for my workshop?
YES!
Next up is a series on how to build the machine...
Hi! I am a robot. I just upvoted you! I found similar content that readers might be interested in:
http://rawcnc.com/building-your-own-machine/building-cnc-machines/
Great post I am looking into making cnc's and this has some great info. I upvoted and will follow.