
Building the PC
Previously in my last post (read this first if you haven't already done so), I detailed why I was choosing to build my own Linux Gaming PC and what the specs of that PC were going to be. All of the parts arrived on Wednesday, May 15, and I can now say that everything has been prepared, built, and tested. Here is how the building process went.
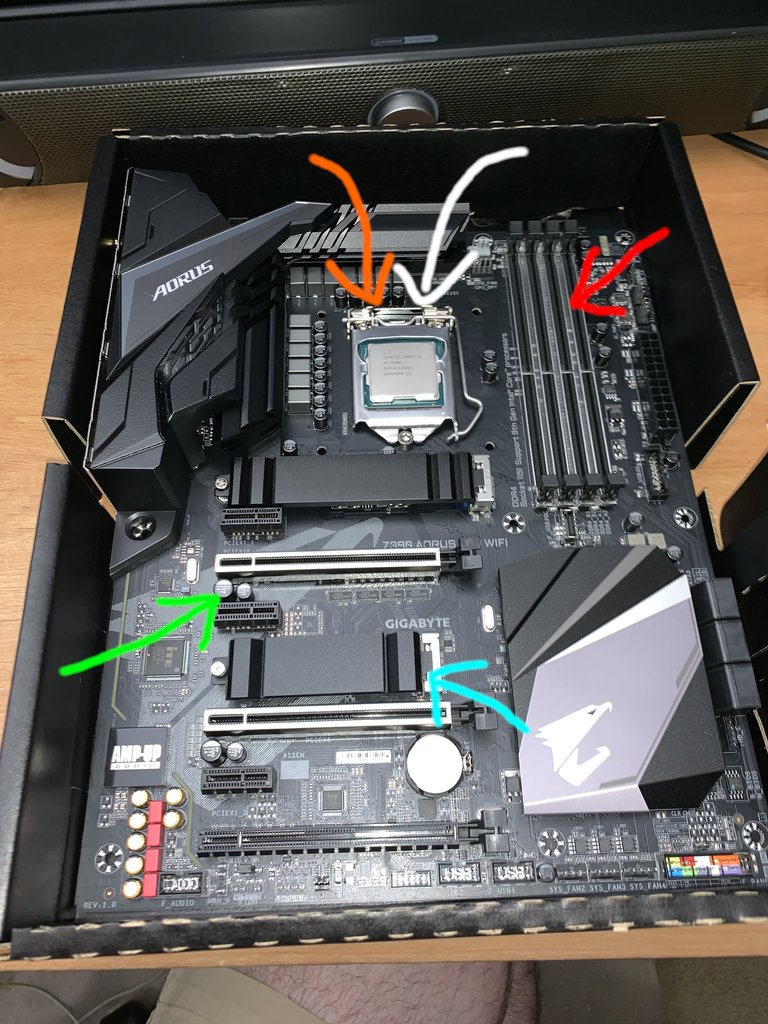
Starting off was installing the i9-9900k into the motherboard. Now, I had heard that it would indeed take some force to close the lever with the cover down over the seated CPU, but I had no idea... I must admit, it physically felt like I was gonna break the thing in two and metaphorically felt like I was crushing a puppy... However, the cover closed and snapped into place just like it was supposed to! You can see the installed CPU on the motherboard (White), as well as where the other main parts of the PC will go, including the Heat Sink (Orange), RAM (Red), GPU (Green), and the 1TB M.2 Drive (Blue):
Next was installing the cooler, at least that's what most guides suggested. This should have been a decently easy task as I have seen heat sinks and cooling systems installed on computers with ease, and I myself have installed them before on a smaller scale for Raspberry Pi's. However, it was exceptionally difficult to get the heat sink to screw into the mounting brackets that come with cooling system. In theory, each screw should be turn a time or two before moving on to the other screw in order to allow it to screw on properly. Instead, this did not work as there was no amount of tightening that didn't either result in one screw popping loose while trying to tighten the other or cause the heat sinks to be ajar and not allow the other screw to be tightened. Eventually, I had to resort to applying a large amount of pressure on the heat sink to get it to where both screws could be tightened to lock down the heat sink. However, this wouldn't be the first time I had to do this, as I discovered a flaw in the guides I was following. The issue, you can't install the RAM sticks while the heat sink is in place, meaning I had to remove the heat sink, prop it up in such a way that prevented thermal paste from getting everywhere, install the RAM, then repeat this process. On the plus side, Noctua comes with some fantastic thermal paste with the cooling system I used, so I didn't have to worry about obtaining my own separately. After this came installing the 1TB M.2 drive into its respective spot. this was easy and painless! It should be noted that the black shield you see in the image where the M.2 Drive is supposed to go is actually a heat sink. This was not known to me and I only learned this important fact via a tutorial I was following, one of several actually... The piece of metal had a sticky pad on the bottom to allow it to stick to the metal shield that came with the drive, as to allow it to dissipate heat.
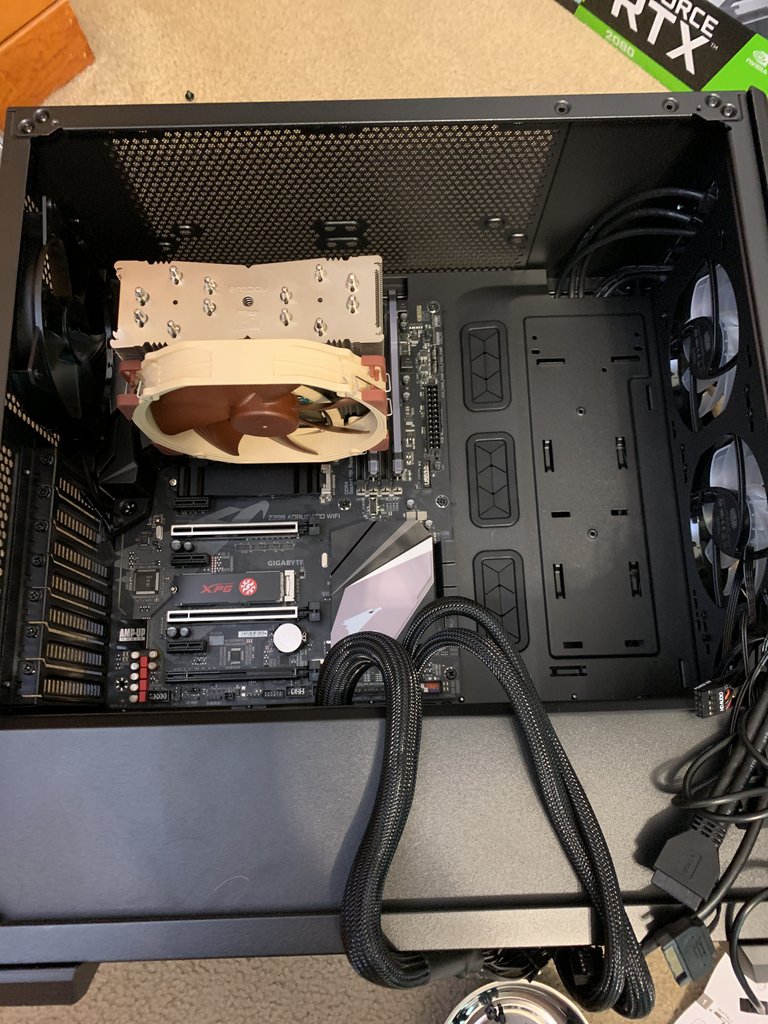
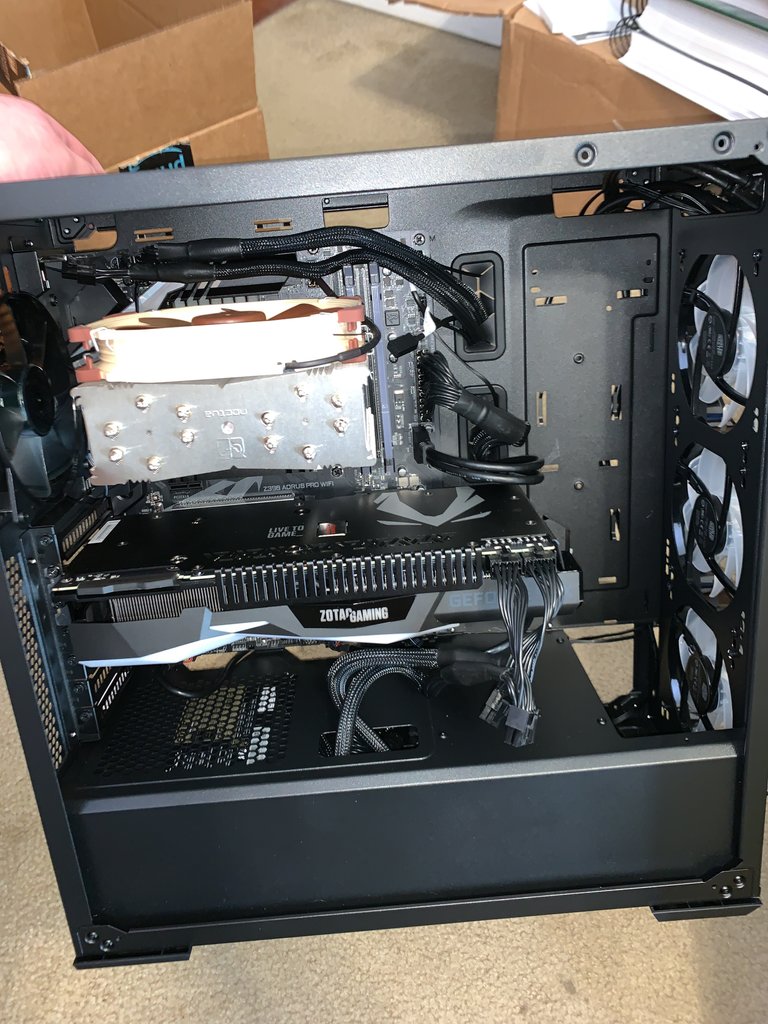
After these parts were installed, it was time to install the motherboard into the CPU case. This was fairly easy as the case came with standard fittings for an ATX board and just required screwing them in, placing the motherboard into the case on the fittings, then screwing in the board. After this was done, the Noctua CPU fan was installed onto the heat sinks and plugged in the fan to the board. After this, I installed the PSU into the bottom of the case and ran the respective wiring up into the case to prepare it to be connected to the motherboard, CPU, and GPU. Note that at this time, i hadn't done any form of cable management and was just trying to get things connected up to test it out. You can see what it looked like at this point in the picture below:
(Please note that the CPU fan is actually installed backwards. This would be fixed later on when I realized the mistake.)
After this, I began hooking up the other system fans to the motherboard. Initially this gave me some difficulty as I could only figure out how to connect the rear cooling fan. The front fans had an odd connector attached to the three wires and this prevented me from understanding how to connect them. I did easily figure out how to connect the RGB lighting to the motherboard, however. After working for a couple of hours to figure out how to connect the front fans to the board, which included much searching online, I gave up and moved on to installing the GPU into the board. Again, this was one of those I felt like I was gonna break the board in two installing it, but it clicked into place and was secure. I installed the brackets on the side to hold it and it was installed and ready.
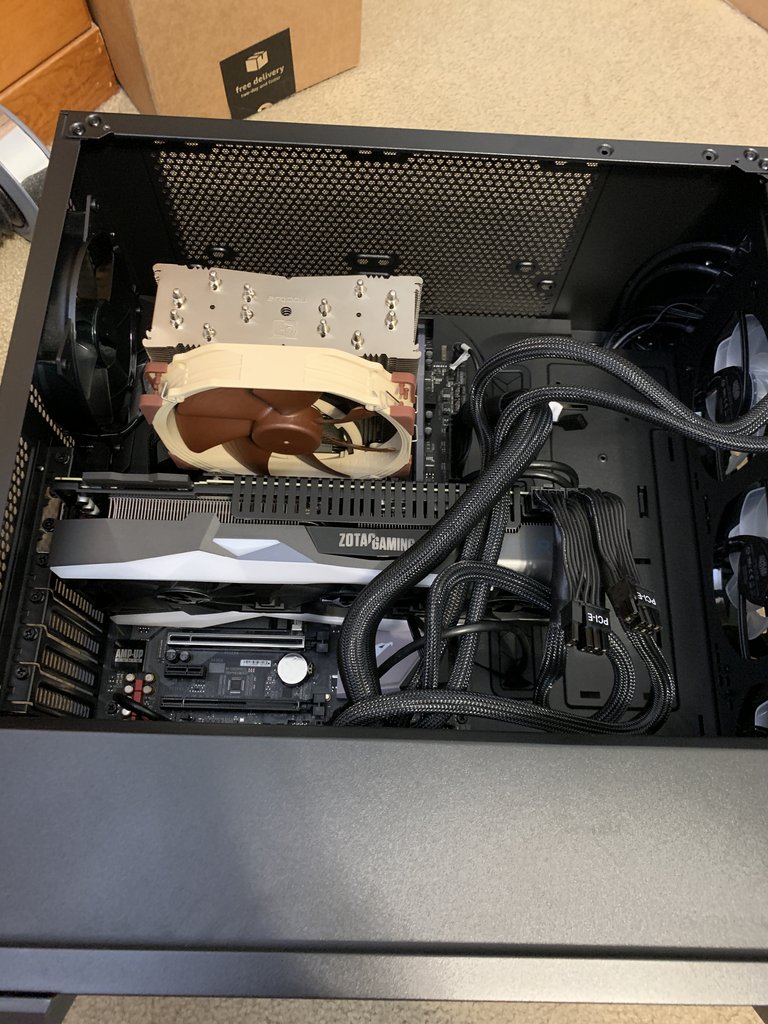
Lastly, I began connecting cables from the PSU up the the motherboard, CPU, and GPU. I had to do this a couple of times to get everything to fit correctly, but eventually I got it to where everything was connected and it was ready for the first test run. Here is a picture of the PC after most everything had been connected, but before I put the sides on to test it:
(Note the CPU fan is still backwards, but would be fixed later on. Also, no cable management had been done at this point, so it was all messy, tangled, and ugly to look at when this was taken.)
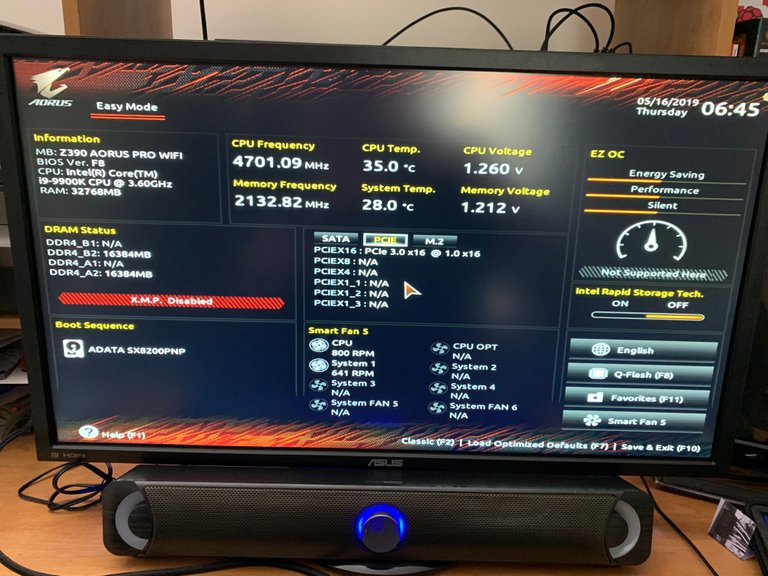
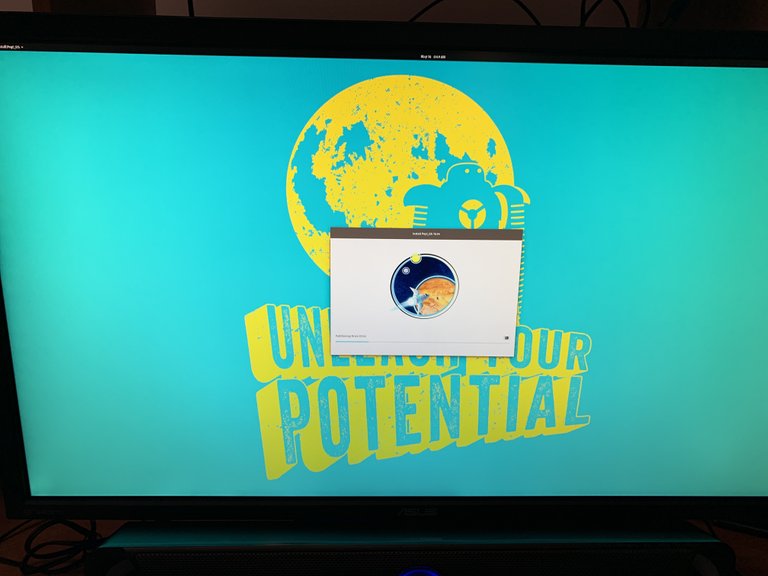
I replaced the sides, got it up on my desk, then I connected the peripherals, the internet, and the power. Then came the moment of truth, the time to push the power button. At first it seemed to click on and off a few times, which was a bit disconcerting initially. Then I was greeted with this screen...
IT WORKED! THE VERY FIRST TIME I TRIED BOOTING AND IT WORKED!
To say I was stunned would, indeed, be an understatement, as I full expected it to fail the first time I booted it. But instead it showed up with the BIOS information screen and was ready to install the OS. The OS I chose was PopOS by System76, a Linux distribution built on Ubuntu but with much better support for drivers and software.
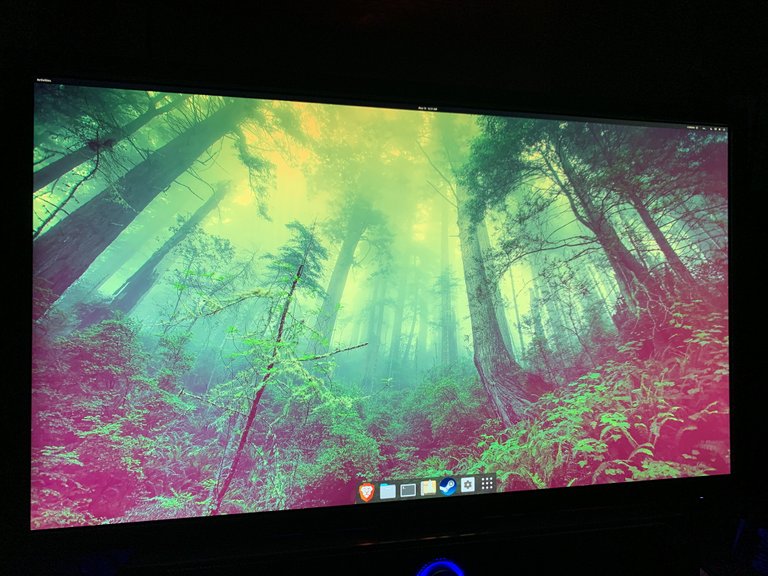
After getting PopOS installed, I set about getting some of my favorite software installed and the drivers updated. I installed the Nvidia CUDA drivers for the GPU, which are natively supplied by System76, and then confirmed those were working. At this point, I had been working on this for over 8 hours and I was ready to give it a break, as being on the floor for 8 hours will really do a number on your knees and back. The next day (Thursday) I started back figuring out how to get the system fans on the front of the case connected. It was when discovered the oddball connector for the front fans could be removed that I discovered easily how to connect up them to the motherboard. It was also at this point that a friend told me I had the CPU fan on backwards, which meant it wasn't going to cool properly, so I flipped that around. I also decided it was worth my time and effort to do some proper cable management to organize everything. This was made easier thanks to the case having pretty decent built-in ways of organizing cables via cubby holes, port holes, and dedicated cable channels in the case. With all of this complete, here is what the final system looks like:
Results
With all of this said and done, I got to enjoy the first moments of just admiring how good the system looked. The RGB lighting in the case, even if not programmable (easily) on Linux, still looks amazing. The 4K display powered by the RTX 2080 looks nothing short of phenomenal. The system is blazingly fast, extremely easy to use, and has quickly become a favorite of mine. The Noctua cooling system, despite being a pain to install, is incredibly efficient. Indeed, I had read online that many people said the Noctua cooling system was better than some low-end liquid cooling systems and I would absolutely have to agree. I do not see any way that a low-end liquid cooling system, which would have cost at least $100 more, could cool any better than the Noctua does. Even under stress testing doing some gaming, the CPU stayed exceptionally cool. I installed a couple of Gnome tweaks to make the interface look a bit better (and more Mac-like), which you can see in the image above.
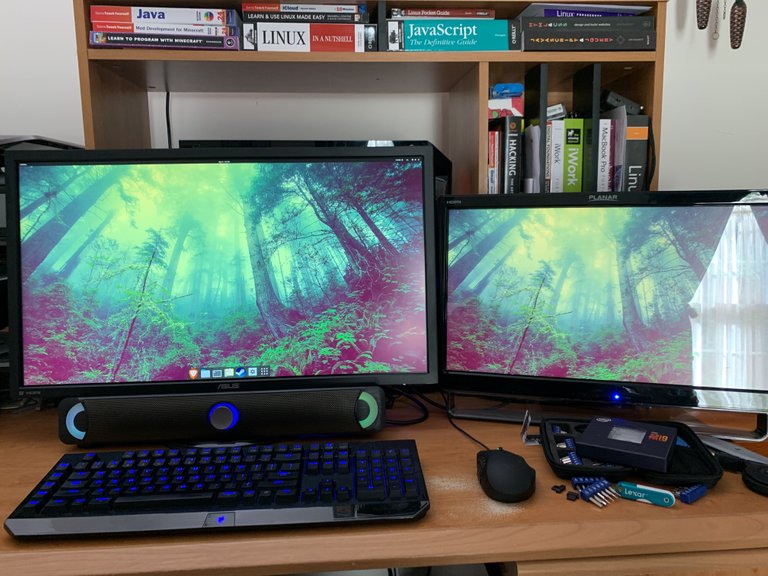
One other goal of this system was to enable me to have a dual-monitor setup. I did try this, and got it to work, with my 4K display being connected via Display Port and my secondary requiring the use of HDMI. There was an issue with this though, the Display Port would only output 30 Hz instead of the 60 Hz I wanted. The only way I could achieve 60 Hz on my 4K display was to use HDMI, which means I am unable to use my secondary display for the time being. I am unsure why this is the case, as it could be a GPU thing (even though my GPU has 3 Display Ports), a monitor issue, or a driver issue. Whatever the cause, I am just mainly concerned with my main display looking good, so if need be I can always use a Display Port to HDMI adapter to connect my secondary display. It will be nice to have this setup though, as this will make programming and web development a lot easier to work with, not to mention just the convenience of having a second monitor to do work on. The secondary monitor is also a touchscreen display, and the nice thing about Ubuntu systems is touchscreen abilities work right out of the box! :)
You can see what this dual display setup looks like below:
Benchmarks
To give some examples of just how powerful this system is, let me give some stats I did from some initial testing. Unfortunately, Cinebench and programs like it don't exactly work on Linux, so informal testing has to be done to judge system power. Here are two examples I came up with:
Blender
Software: Blender 2.79
Scene: Default cube scene
Size: 1920x1080
Samples: 5000
Sample Size: 480x270 (there is a reason for this number)
Rendering Device: RTX 2080 GPU
Rendering Engine: Cycles
- Results: 55 seconds
Minecraft
- Software Version: 1.14.1
- Settings: Default Maximum Quality (meaning, what can be achieved by default in Minecraft without mods)
- VSync: Off
- Test spot: Random new world in creative mode
- Results: 600 Frames Per Second (FPS)
For the Blender test, this was a way I thought of to create a test for the GPU to test its power at computing using CUDA. I'm sure it isn't perfect, but it does provide an easy way to benchmark against other systems. For example, my old iMac with a GTX 780m would have taken a couple of minutes to render that scene, and now only being able to use the CPU would take it at least 5 minutes or more. The reason for the odd sample size is because it's based on a good formula I learned for judging the sample size of a scene to be rendered on GPU. Take the size of the scene (or screen, I have heard this formula too) and divide it by 4, which for a 1920x1080 size scene equals 480x270. The reason for this is because you want as large of a sample size as possible for your GPU to render, without causing lack of efficiency. This size generally works out to being the size of your scene divided by 4, though if you are unsure a sample size of 256 or 512 works quite well too. Please note, if you are trying to test your CPU's rendering power, then the sample size needs to be as small as possible, like 16 or 8 in size, as this allows each of the CPU cores to do as little work as possible so it can move on to another sample in the scene. This is just how rendering works, if you wanna know more, I can provide some links to other resources on how this works for rendering in Blender. :)
For Minecraft, this was sorta a more "real world" example of how powerful the system is. With VSync, which locks the frame rate to that of your monitor in order to achieve the highest quality, turned off, I was able to hit 600 FPS, at 4K resolution, in a natural environment in the game. This is just amazing as before I considered it lucky to maintain a frame rate over 60 FPS at 1440p resolution. Now granted, I recommend you turn on VSync as it makes the game look best, but this is still an incredible performance for the game!
If there are any other ways you would like for me to benchmark my system, please let me know and I'll see what I can do! :)
Conclusion
I could not be happier with the system I built! It was challenging, frustrating at times, difficult, sweat inducing, and nerve racking. But in the end, I feel most accomplished for what I was able to achieve in building this Linux Gaming PC. There are still a few kinks to work out, such as my second display, but I will solve those in time.
I wanted to thank everyone that voted, commented, and mentioned my previous post on the specs for the PC. The response was truly overwhelming! I didn't expect so many people on here to be interested in those aspects of computer building. From @OCD nominating me and featuring my post in their curation, to the vote from @blocktrades (my first vote ever from them :) ) and everyone else that liked the content, I am truly grateful and proud to be a part of such a wonderful community here on Steem!
If anyone has any questions, comments, or suggestions, please feel free to leave them down in the comments! Thanks so much y'all! :)

Please read this blog you onboarded Adam so you may apply for the onboarding price that’s up see @coruscate and @onboarding maybe it’s a great win
https://steemit.com/steemonboarding/@steemonboarding/the-operation-mass-adoption-has-begun-more-prizes-added-to-the-pool
Don’t forget me when you are a whale
Congratulations @southernwolf! You have completed the following achievement on the Steem blockchain and have been rewarded with new badge(s) :
You can view your badges on your Steem Board and compare to others on the Steem Ranking
If you no longer want to receive notifications, reply to this comment with the word
STOP