Heya !
Finally, almost one year after i've started this costumes, i'll publish the last WIP of this costume ! Yes, this is the final post about this costume, I can't believe it myself too as this is the last one i could finish of all my costumes. I'm sad a bit that i couldn't make more costumes this year but maybe next year will be less stressful ^^
On to the topic ! Today i'll cover the last things about this costume, this include :
- the process of the black side bows (i didn't explained this too, mostly because i have no picture of this step ^^)
- The final touch on the flower crown
- the big bow on the back
- the 2 parts of the train
- and the high knee sock
What a schedule !
Let's start with the crown, i'll explain how i've made the black bows with the big one in the back as I've used the same process.
As a reminder, last time I posted, I only had my base done (the white thing on which i'm going to add the flowers). For the flowers, I couldn't find pink flowers so I bought white one and painted them with a thin layer of pink paint (in fact, a mix of white & red as i couldn't find pink paint too hahaha). And by looking at the design, i found out that there is tiny purple flowers on this piece in between the big flowers and this time I found them already made !
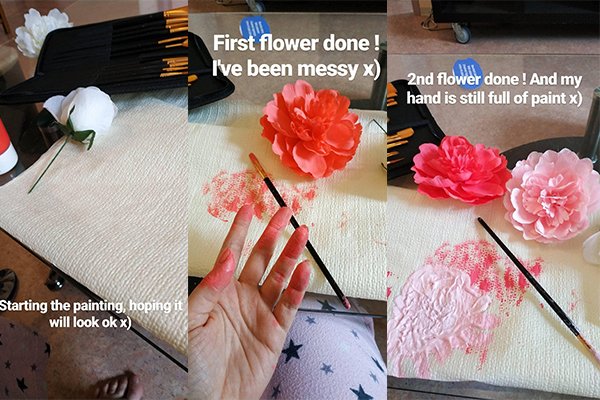
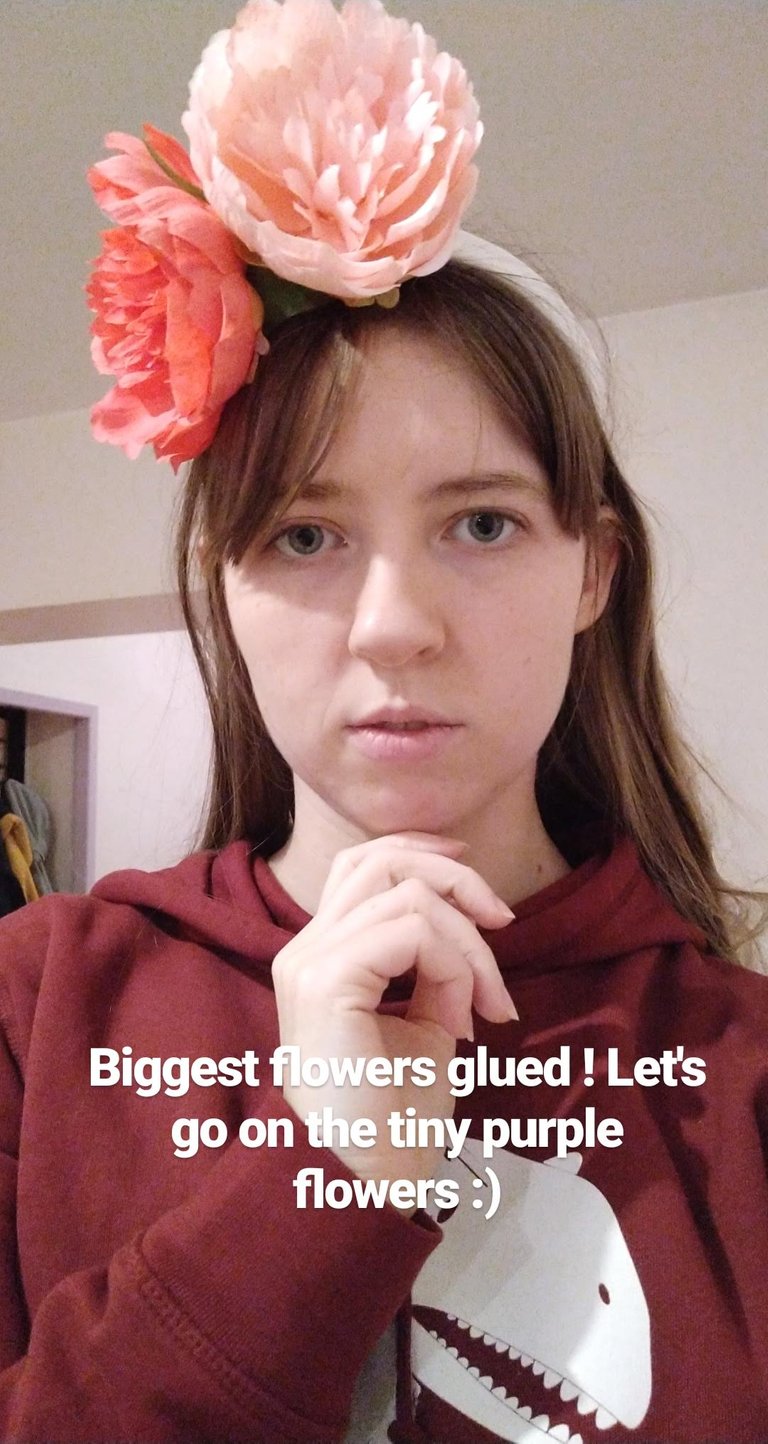
Once the flowers were dry, I started by trying to sew them on the headband. Spoiler : it didn't want to stay in place so i simply glued them on.
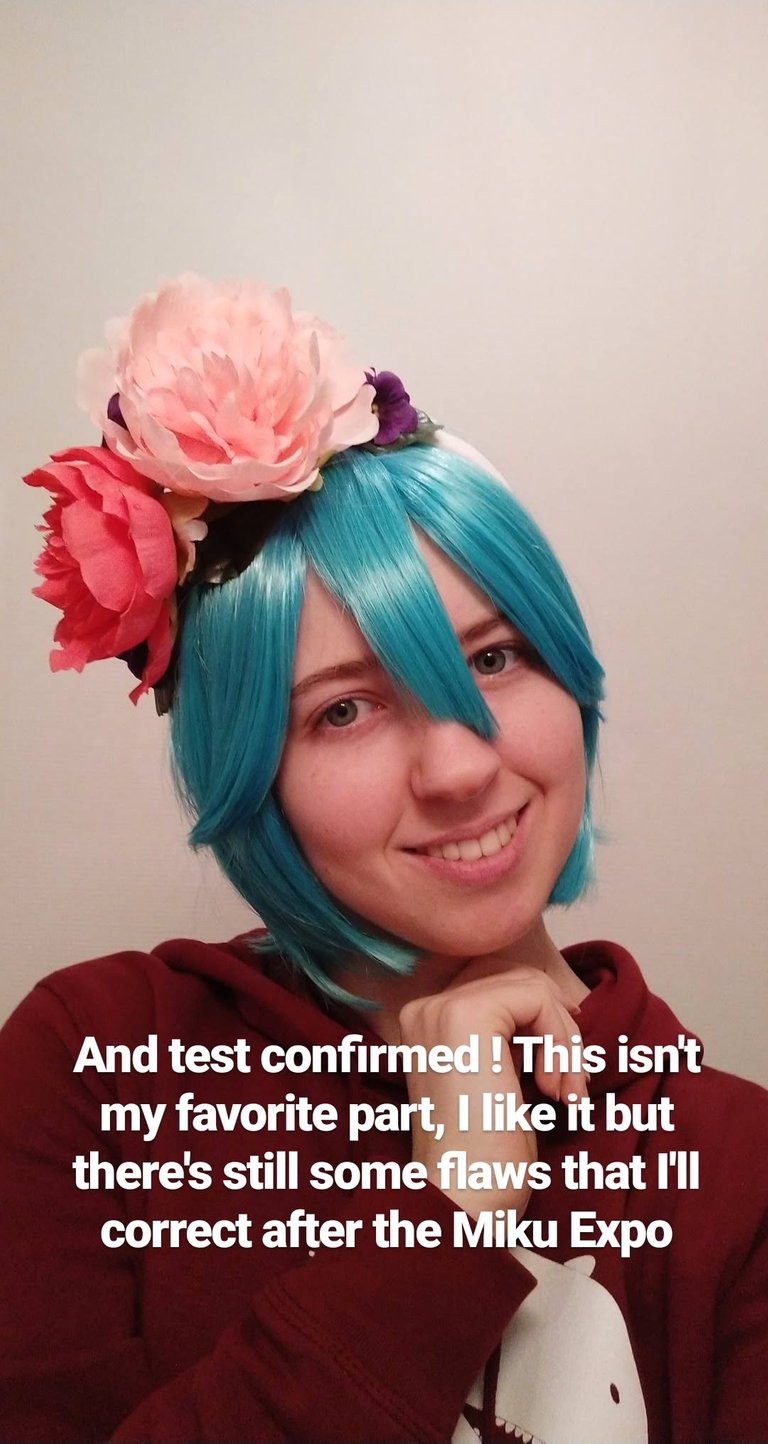
You can notice that I also added leaves to look like the image, I also used them as a base to glue my purple flowers. Here's the final result of the headband after glueing by hand all the tiny flowers i wanted to add.
After that, I started the big bow, I was sure at this point that I wouldn't have the big train for the Miku expo but i still wanted to try to make the bow. Fun fact, I finally didn't add the big bow for the concert even if it was possible to fix it on the dress !
The main issue I had to deal with the bow was that I wanted it removable for the masquerade as in my scene for the CFC I would add it at the end for the climax. So I had to find a way to attach it quickly to the dress. I I had more time (and this thing is still planed to make on my to do list on 8/11/2020 x) ) I would have used magnets, strong magnets. It's easy, if choosen perfectly, they can stay in place all day long and for this kind of use, this would have been the perfect solution ! But I didn't have time to search for this so I tried snap button.
Wrong choice, I had to push a lot on it to actually have a chance of fixing the bow and sometimes, the snap would say no and expulse the bow on the ground. So I used hooks instead.
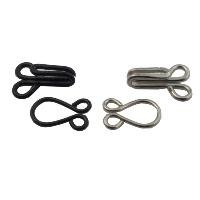
The main deal with those and that why I didn't wanted to go for this solution on first place was that I needed to make sure to place the second part of the hook correctly to not show the hook on the dress and secondly, I knew that the bow wouldn't hold on place as much as a snap or a magnet. This second issue was important as I would move on stage a bit with the bow on so I had to make sure that the bow wouldn't fly of my to go on stage. After some tests, and mostly thank to the weight of the train, I saw that it wouldn't happened.
This is where the sewing part for the bow begins ! On the reference I got to see, I noticed that she have 2 bows in her back that look like one. You can see that one bow is bigger than the second one by looking at some reference so let's go. I wanted something sturdy so I used blue satin with a thick interfacing, normally used for bags and belts.
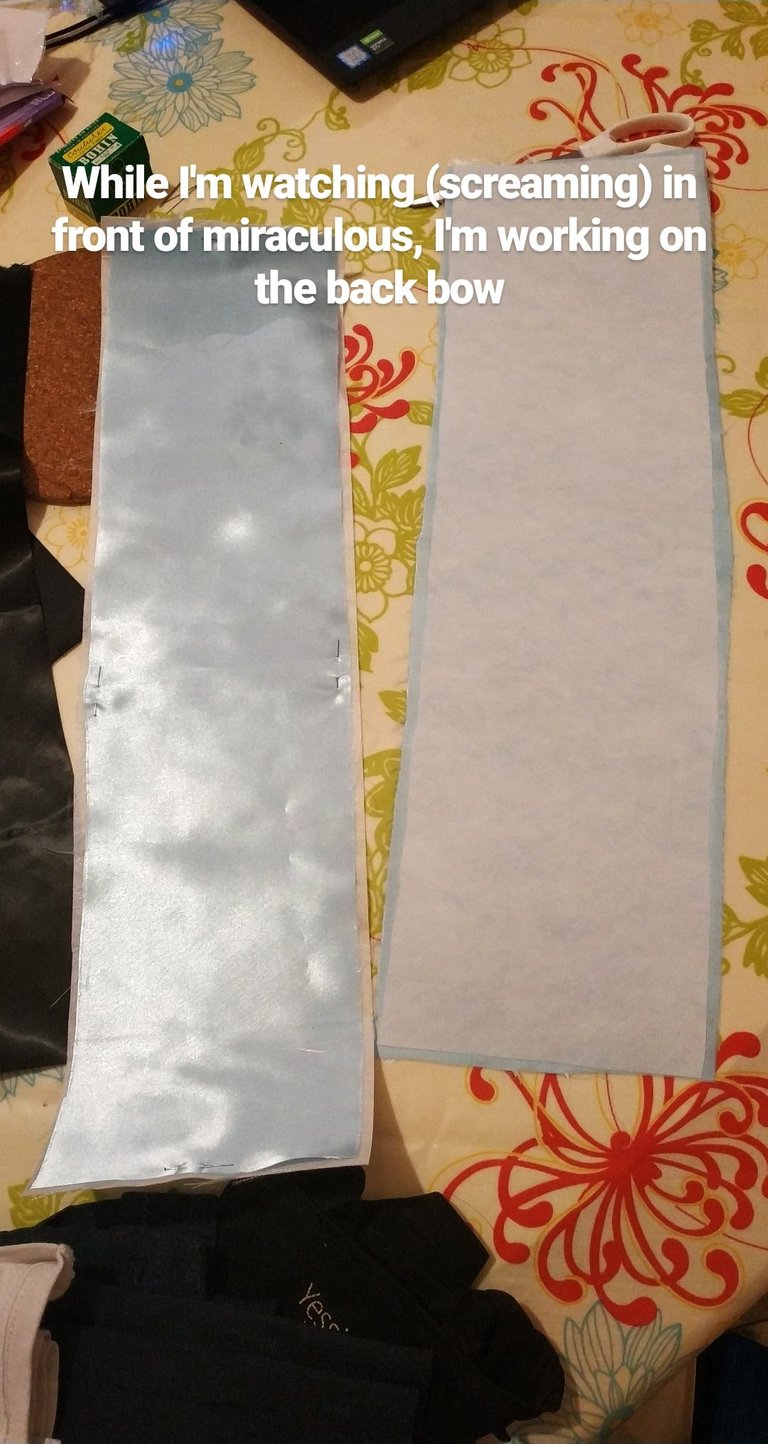
I hemed the longest sides of each bow before sewing the side toghether, interfacing facing me. Then, I turned everything upside down and tada ! I got my base for the bows !
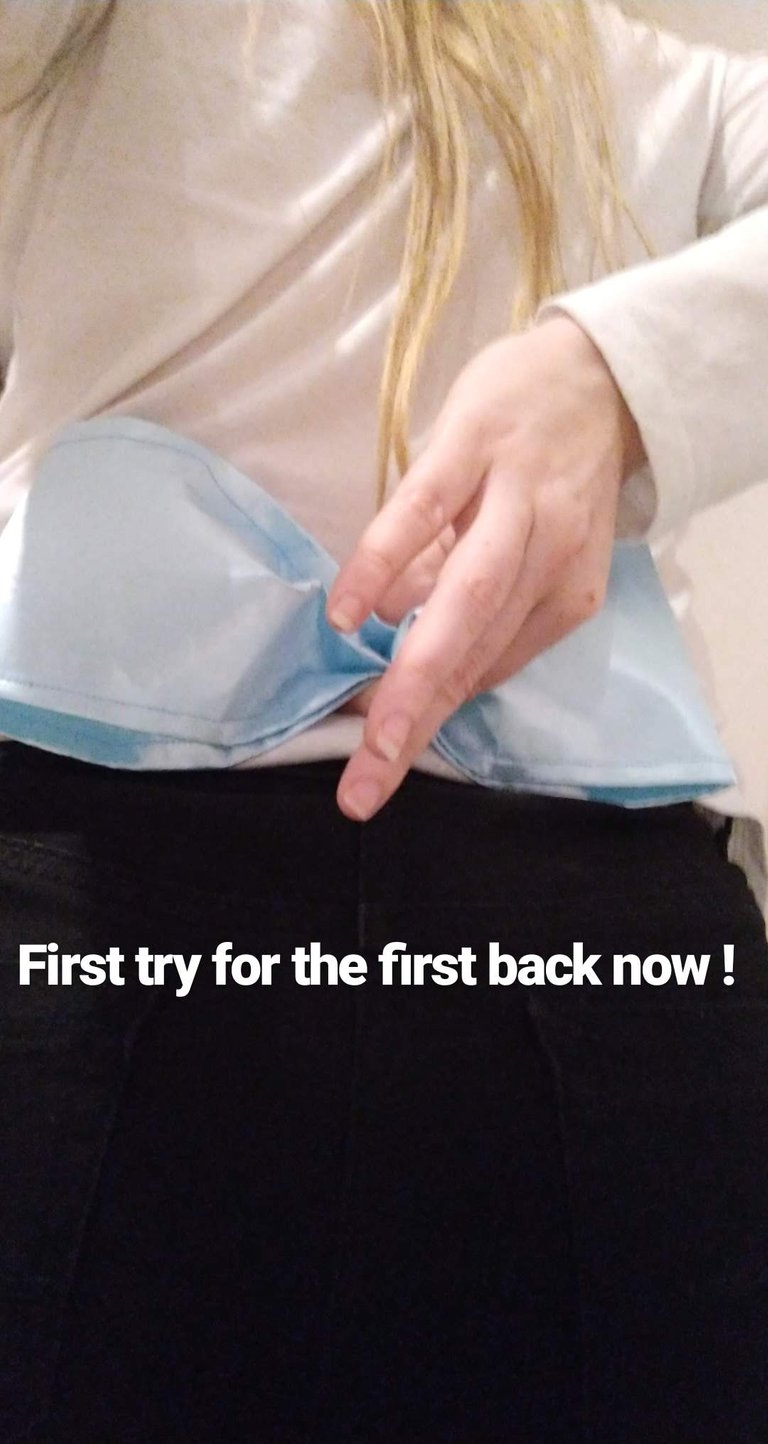
After this, I simply used a needle and a thread to maintain the bow in place by making circles around the center and once I got my 2 bows ready, I've attached them together by making the same thing I did for each bow but this time with both of them getting circled by thread.
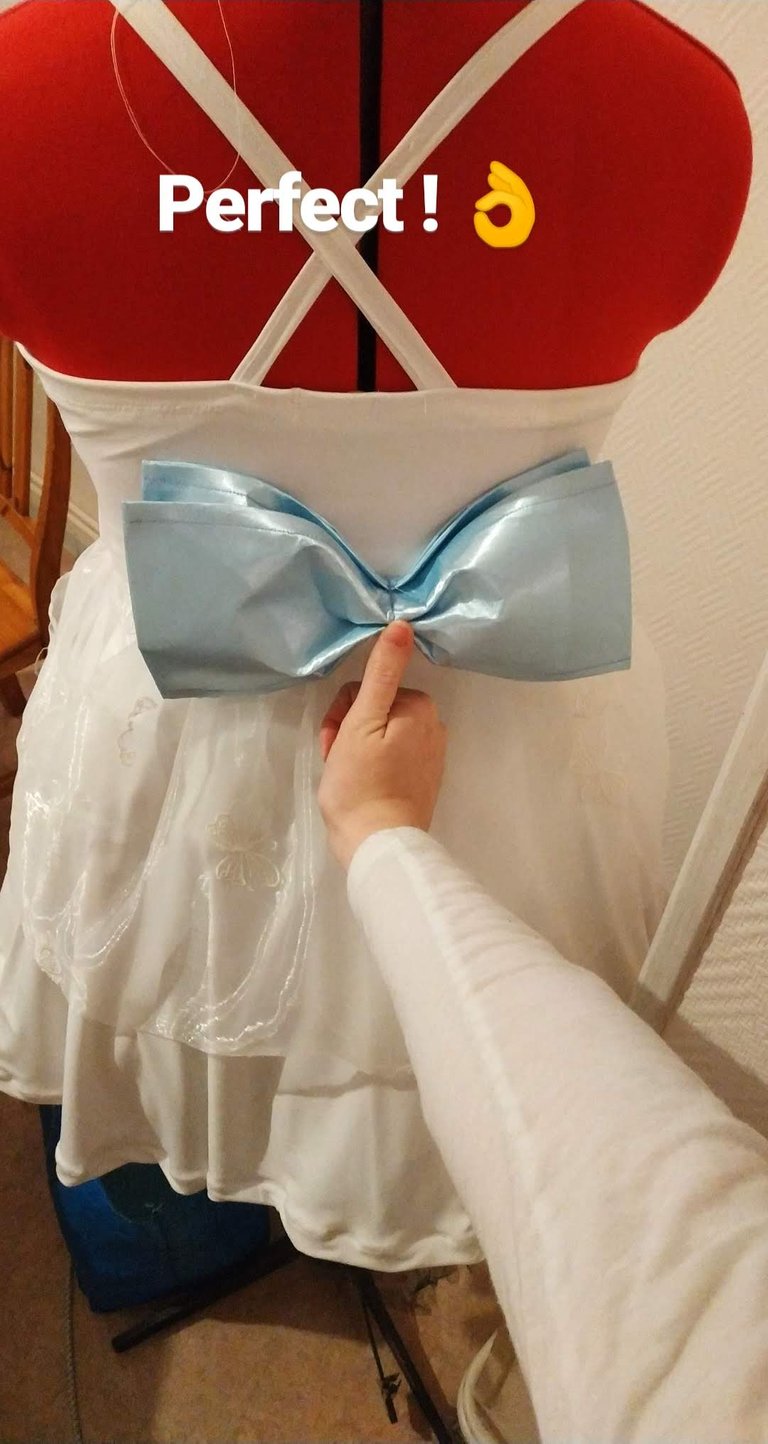
I just added a small strap of fabric to cover the thread and finish this piece properly and it was done. I made the center strap a bit longer than it should be to be able to place the hook on it.
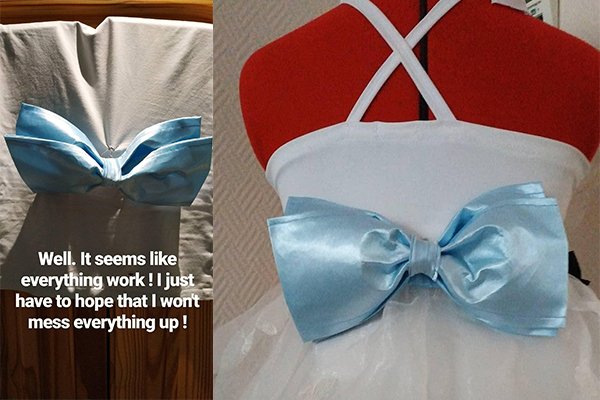
The little black bows were done with the same method, I just added some little decorative straps and used snaps (it was a mistake, I lost one of the bow on stage and one at the Miku Expo).
At this point, it was the first great time with this costume : the Miku Expo ! So I was missing the bow on the back, the train and the high knee sock ! Unfortunately, I don't have any picture of me with the full costume at this event but be patient, I'll show you a full picture of the whole costume at the end !
So after the concert, I came back to Angoulême. There were only two weeks left before the presentation for the CFC. I restarted to work on this costume by making the high knee socks. And I was really fearful for this part as in my whole cosplayer life at this point, I tried 4 times to make socks for my cosplay and it was 4 massive failure : either too big or i couldn't get my leg in/out of the sock (for real, on time I had to cut fabric on my leg as i couldn't leave the sock x) ).
So this time, I was prepared to remake this as much as needed. I followed a tuto found on internet that litterally say : "take your fabric, roll your leg into it and pin in place before removing the fabric and sew following the pin". After multiple adjustement (and pain when a needle pierced through my skin), I obtained this.
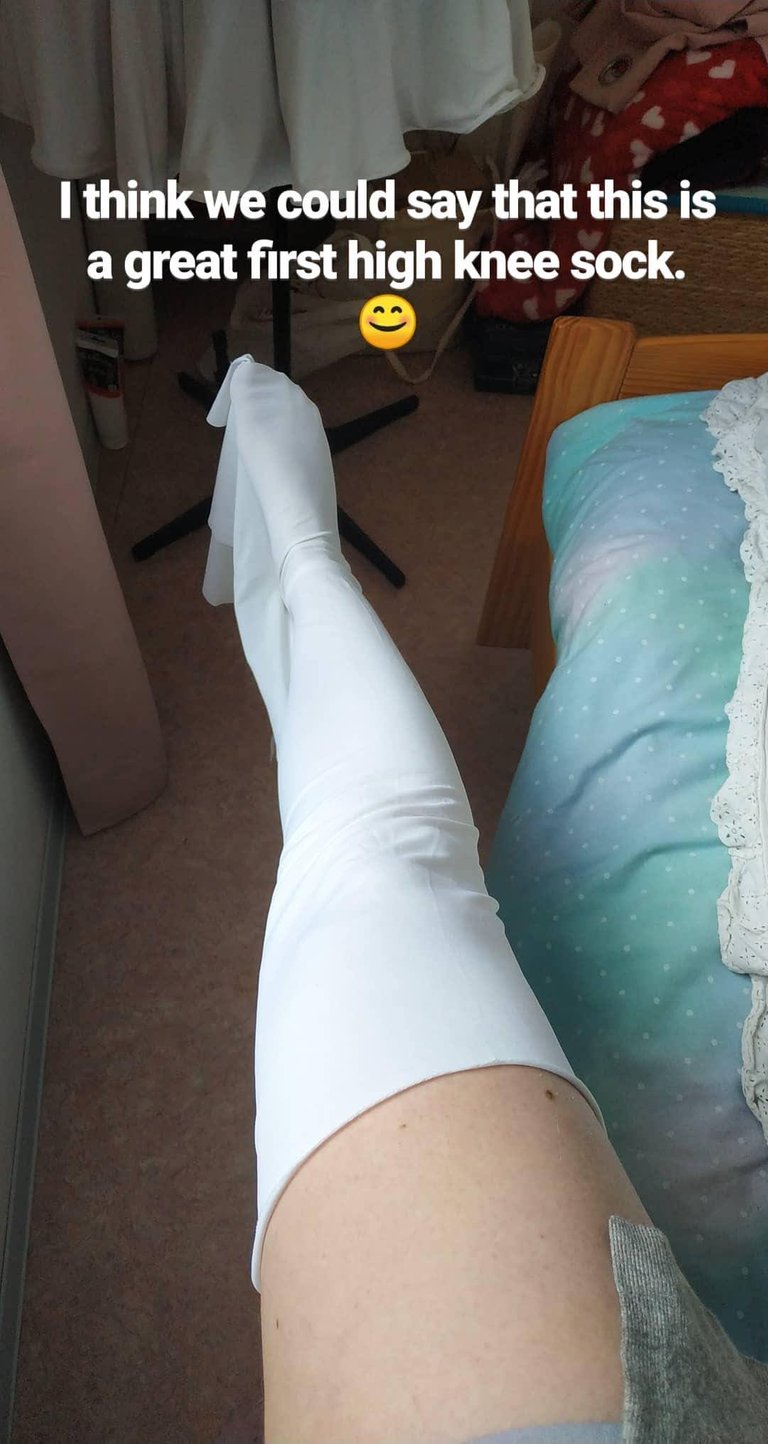
I decided to test something I saw a lot in the cosplay community so I didn't have add any rubber band at the top of the sock. The thing I've tested is called Satien glue, this is a glue used to maintain compression stocking in place. You roll the glue on you leg then you apply the fabric of the sock on and it's supposed to not fall off your leg. This was a great solution and it worked almost perfectly ! Almost because I discovered that I'm a little allergic to one of the ingredient in the glue and as the glue have to be removed with water and soap, the glue didn't stick as much as intended, especially for the second part of the leg decoration.
On the reference, on the second leg, Miku have a ribbon that go on her leg and stay magically up on her leg. I tired to use my glue for this but it didn't wanted to stay in place ^^'
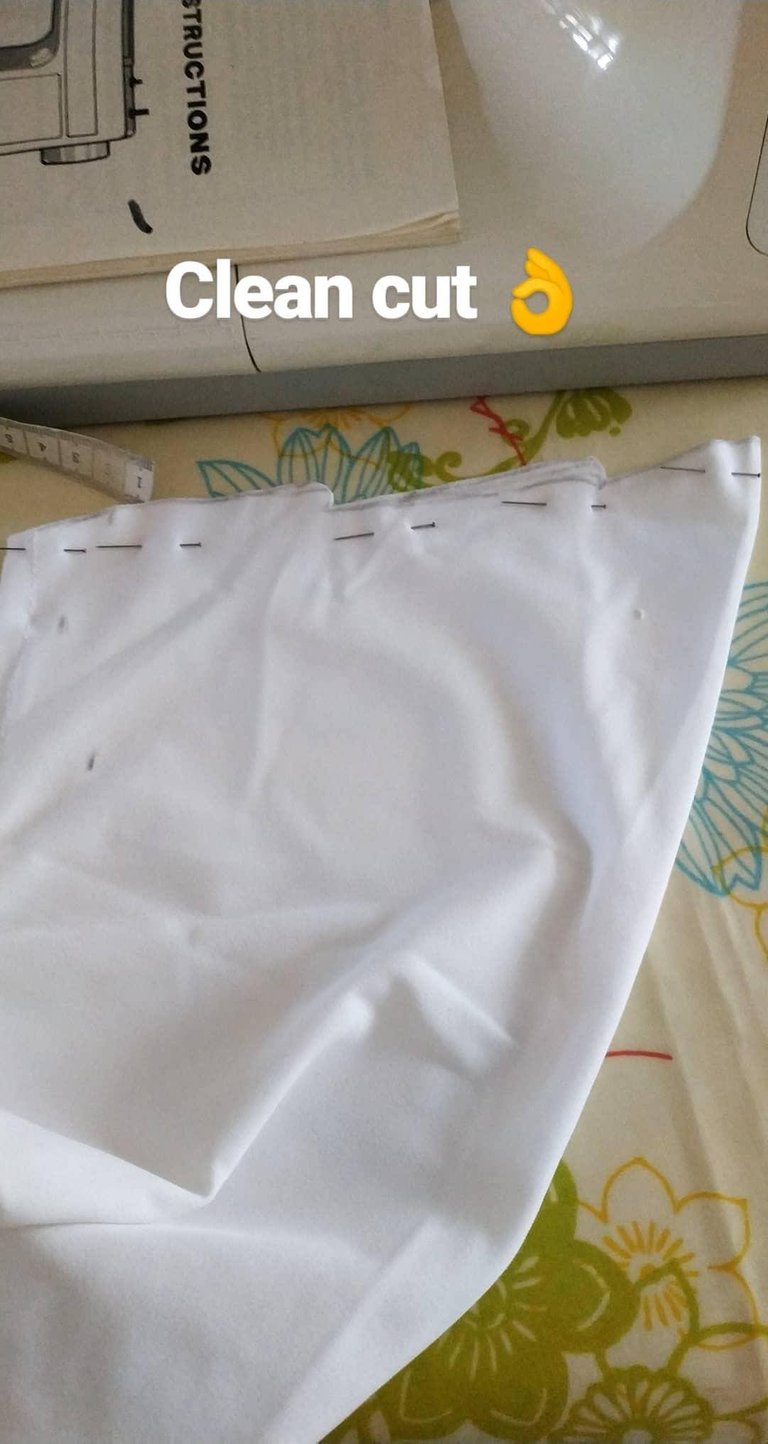
But back to this covered leg ! It's still unfinished as I needed to cut the top to make it look like the model. I took me multiple tries but I finally achieve something like this.
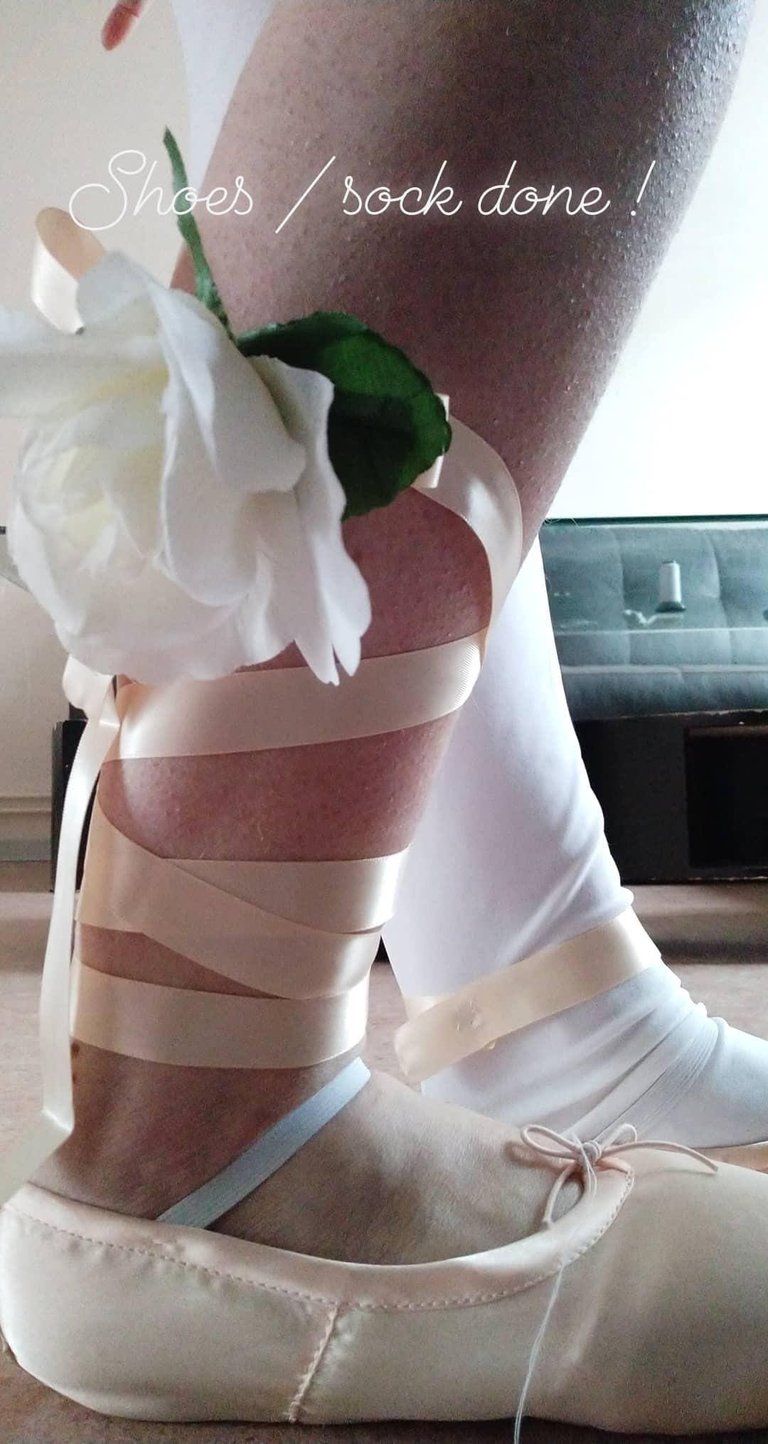
After this, I make the little strap of ribbon around the ankle and fixed a white flower on a bobby pin to attach it to the other leg and we were done !
It was time for a big check so I put everything on and tried the costume ! Sorry for the bad quality, it's a screen shot from a video I posted on my instagram ^^'
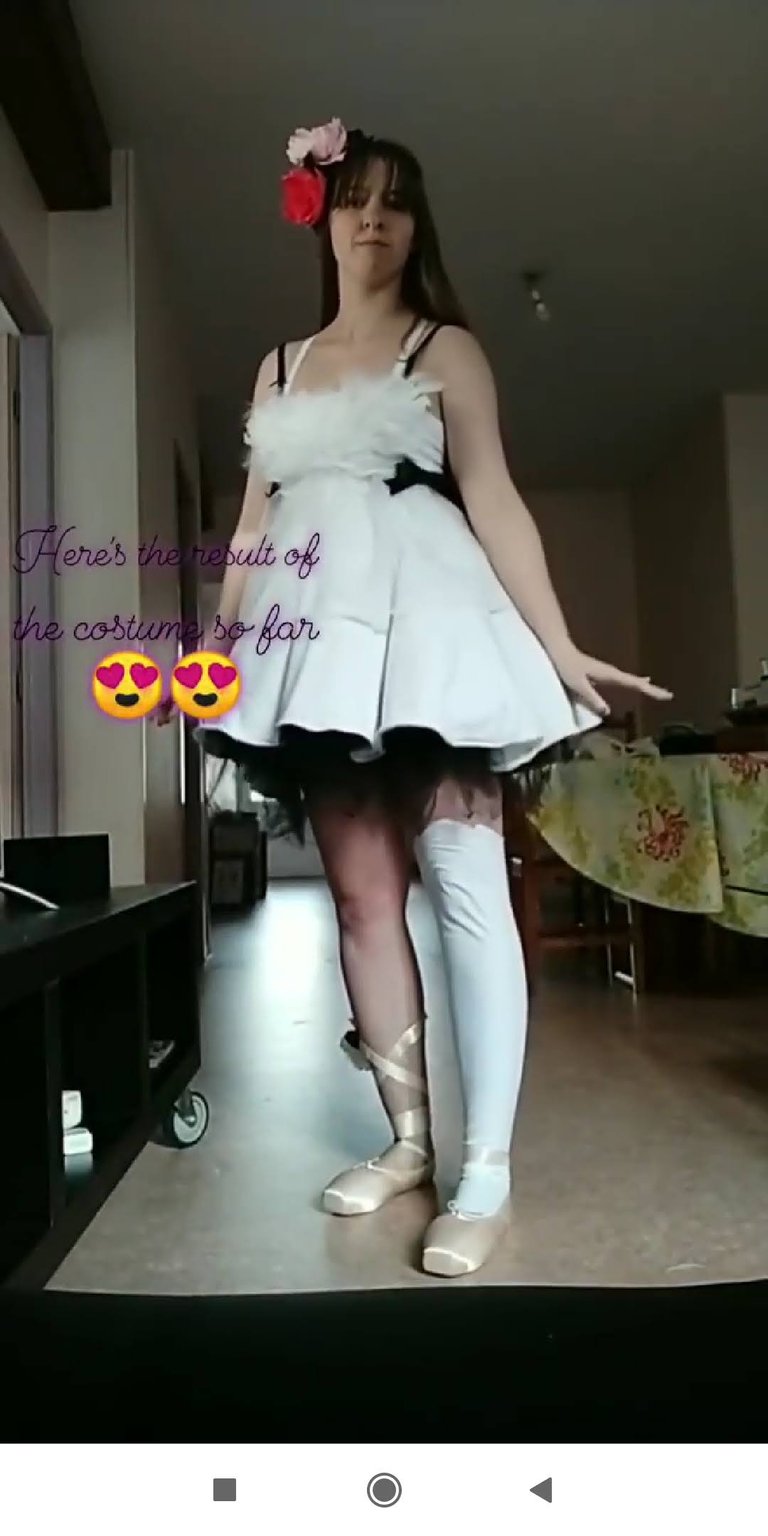
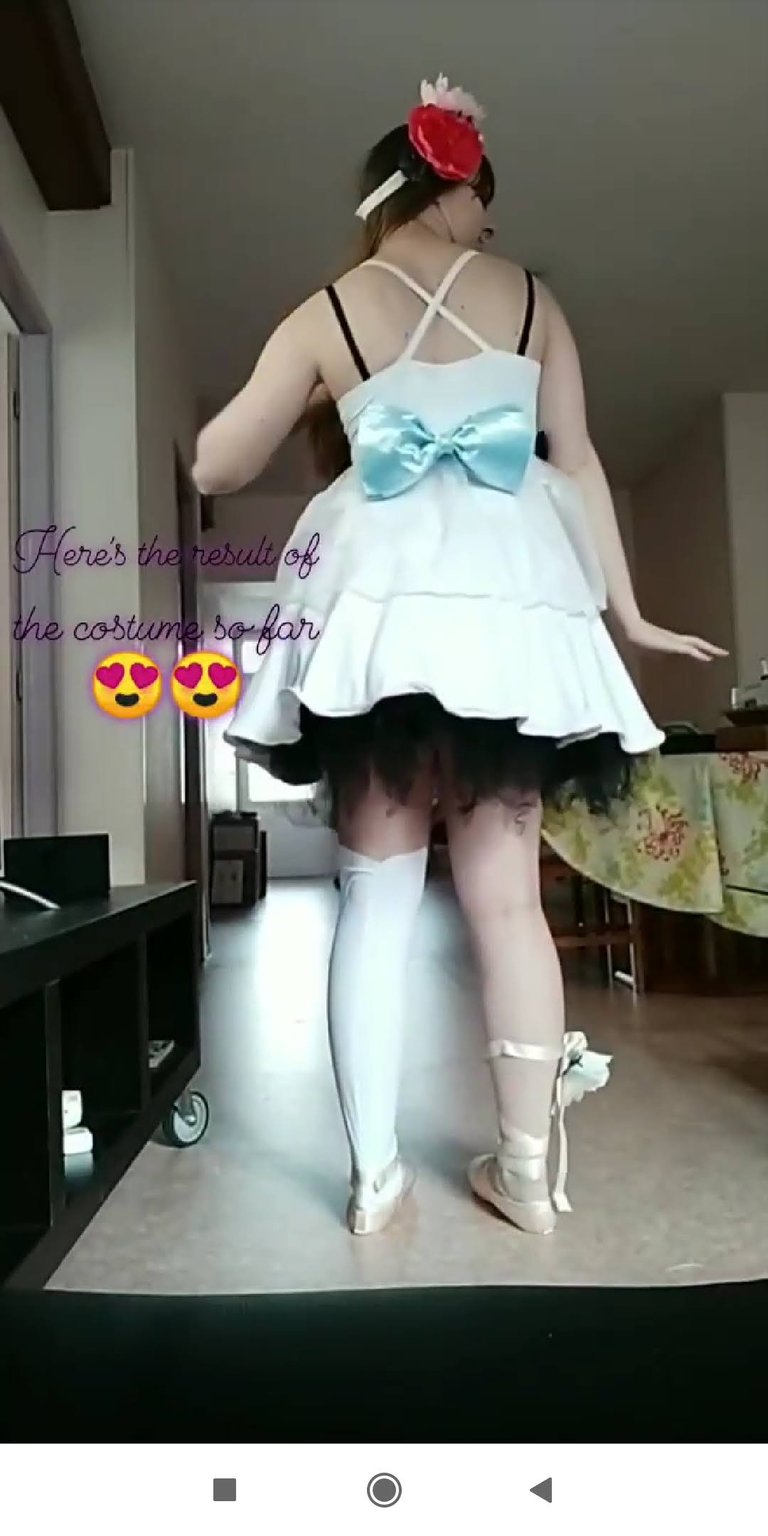
This gave me a great motivation boost for the last piece that really make me tired : the train.
At the beginning of this project, I already knew how I would do it and I knew that it took me some time to do it properly. I used my sister to help me make the pattern for the train. I applied a big piece of paper on her and traced the shape I wished and I simply positioned the pattern on my white & my blue fabric before cutting. I burned the edges of the blue fabric and started the flounce pattern. I made a calcul to get only 3 big flounce on each train part and added a bit more to be able to frown the fabric to add extra volume. Each train is so composed of :
- 1 white base
- 1 blue base
- 3 blue flounce
- 3 white flounce
Spoiler : this is the heaviest part of the whole costume. Even the dress with the feather with cardboard & metal is lighter that this.
Here's a small sketch of what I wanted to do (appreciate my beautiful sketch skill hahahaha).
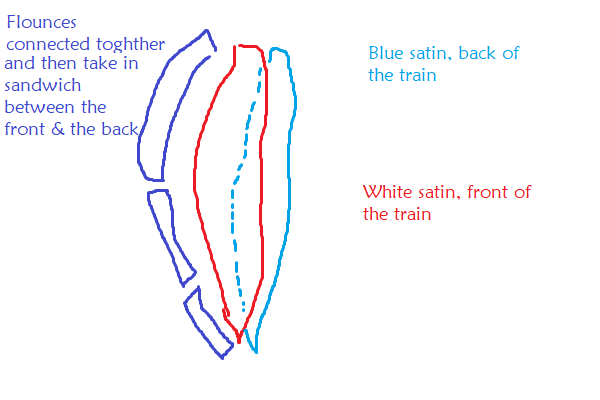
Here's the look of my patterns (you can see that I've already cut satin, the perspective make the pieces look diffent but they're the same).
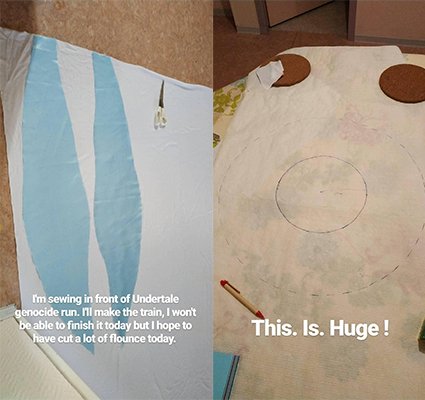
After the cut, it was very repetitve steps, finished in rush (literally 30 minutes before the contest i was sewing in the backstage). For each flounce, I burned the edge of the blue part (should have, done after the contest), sewed with white part 3 sides of it, frowned it and sewed the frown, assembly with it's neighbor(s) (sewing line in the inside of the train) and finally sewed with the back and front before reverting the whole thing upside down. There were 4 fabric at least under the foot of my sewing machine and up to 6 ! But the result is here and even if this was a pain in the ass to make, this is really my favorite part of all the costume !
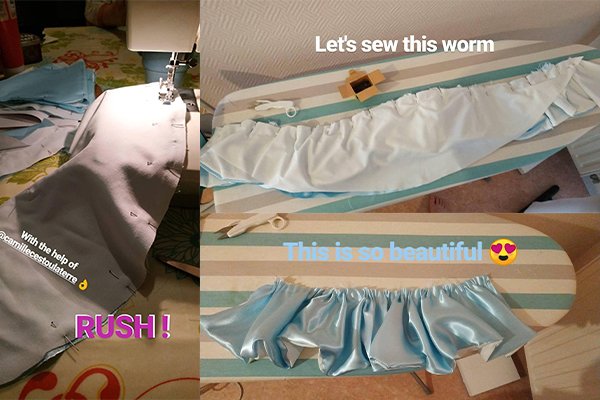
Oh and I fixed those two train on the bow !
Here's the result of this part, as I've started to remake a bit this costume, I can't show you a full photo of it at the moment but i'll try to get it ready for spring 2021 to make photos with flowers !
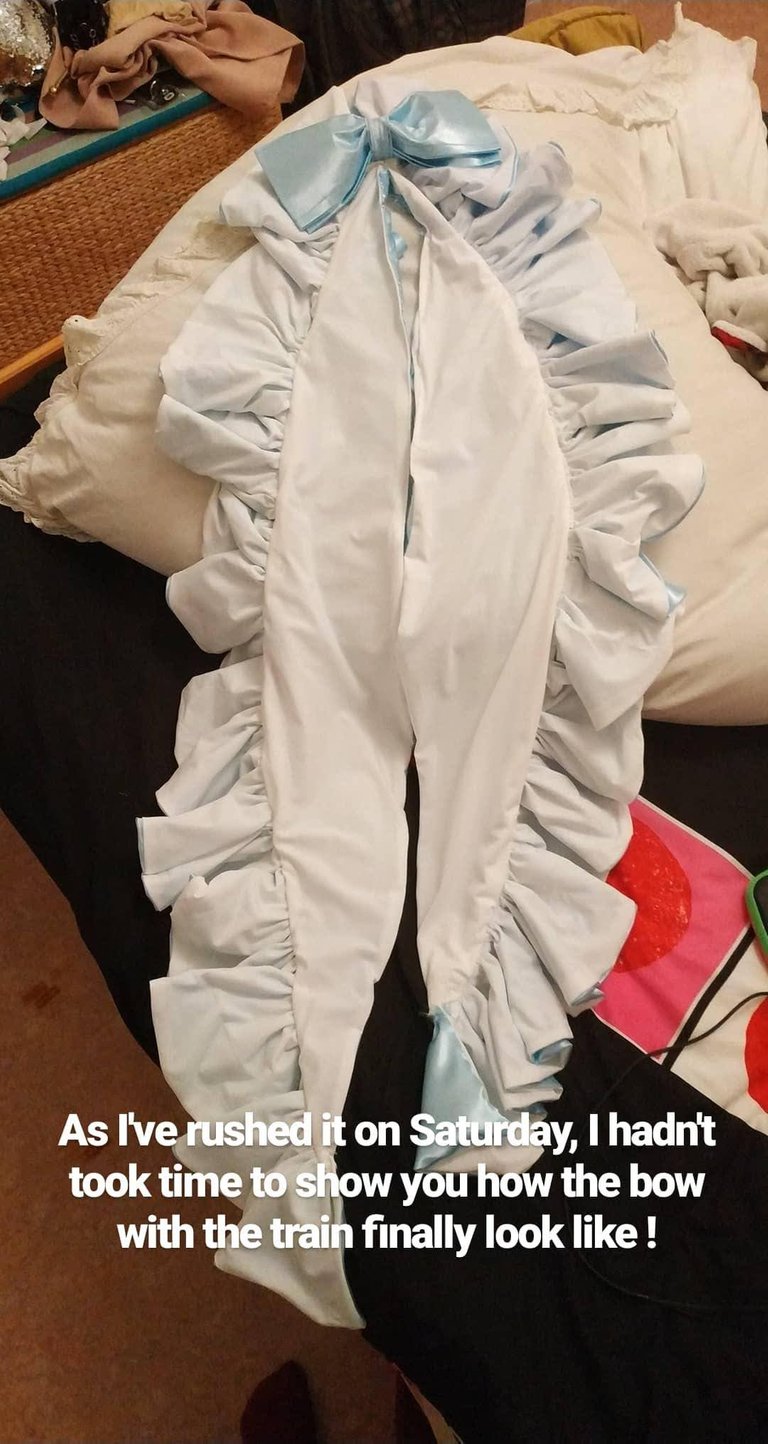
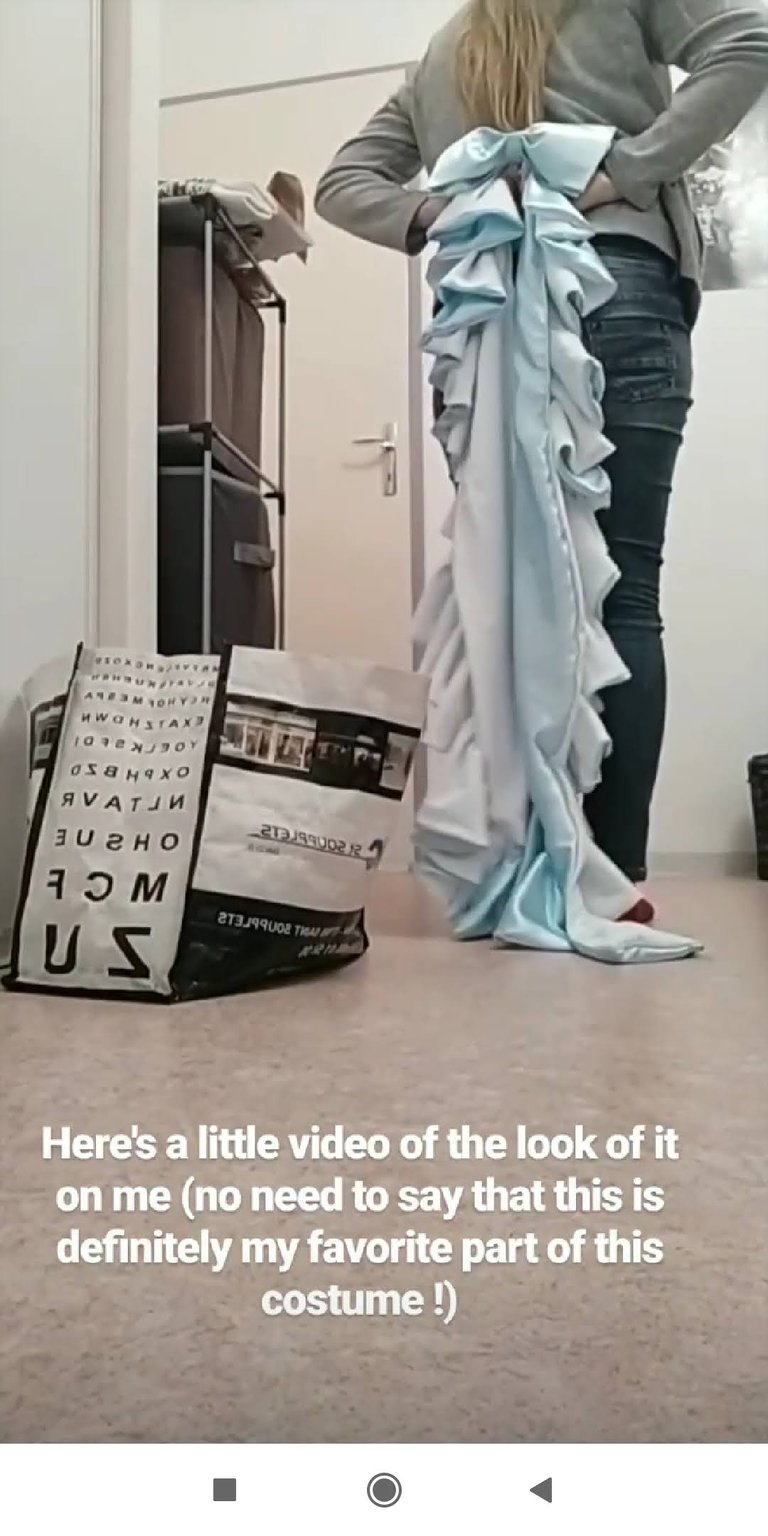
And this conclude my WIP on this costume, the first WIP serie I complete here. I'm both happy and sad, happy to finally finish this, to finally show you a result but sad because this really conclude this costume for me.
I hope you enjoyed this serie, I hope to be able to finish Chara this year or the next one, this big monster, immensely huge compared to this costume and to jump on Jhin after that !
Thank you and have a nice day !