Mining Guide for tweaking Windows 10 to disable windows update, bitdefender and many more tips. There is a lot of things you need to configure to get Windows 10 to a point where you can set and forget it. I will provide you with a .bat file that you just run and it will do most of it for you, you can choose yes or no to each option. These tweaks should mostly work for windows 7 and 8 also. I created this guide also for my friends so they stop bugging me :).
I was going to blog about multi GPU rigs but I have had more feedback about configuration and tweaking and I have a few tools that make life easier for GPU mining in windows and specifically windows 10. This will be a pre multi GPU blog that will get your ready for building your first multi GPU rig.
If you are mining on Nvidia hardware you almost certainly want to be using windows as it has so much more support and is easy to tweak with MSI afterburner. You can use ETHOS too as it now has support for Nvidia but I don't recommend starting out on this especially if you are not technical.
To build a rig from scratch you can use pretty much any old motherboard as long as it supports i3, i5 or i7 or similar CPU's. If you have an old CPU such as a core 2 duo it might be ok for two cards but beyond that it may degrade the performance.
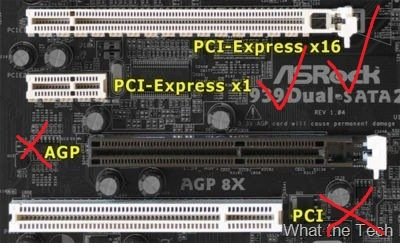
You want the motherboard to have at least 1-2 PCI-e x16 slots the large full size slots. The second slot can be any speed it doesn't matter. And if it also has the smaller PCI-e x1 slots you want at least a total of 3-5. These small slots can be used for mining with an adapter.
Different types of slots.

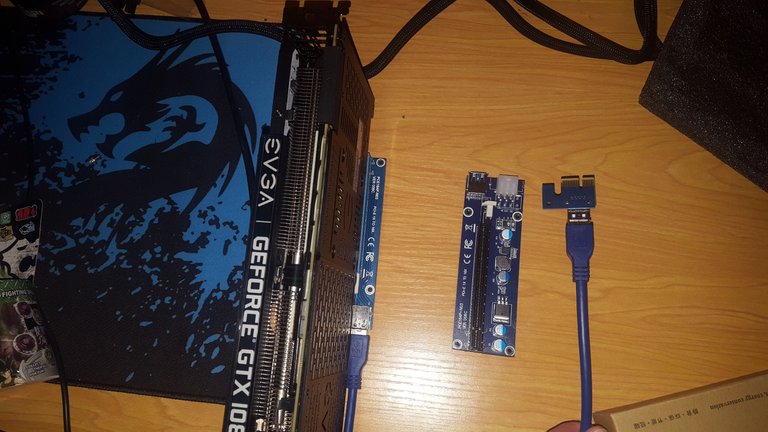
Riser card that convert the small slot to the large slot.

What you need to build a rig
- Case (optional)
- PSU (power supply) gold or platinum quality 750W to 1000W. These will pay for themselves over a year vs lesser version. (Ensure you get a PSU with at least 8 PCI-e Power connectors but more is better you will likely need 8-10)
- 4gig Ram (2x 2 gig in dual channel ideally).
- i5 CPU 6400t (this are cheap and use very little power. Also decent for CPU mining, but you can use any CPU you have already)
- 60 gig SSD hdd minimum (some people install on 60 gig USB but again that is more advanced)
- USB key with windows 10 installer on (key optional as you don't really need to activate it).
- 1-4 GPU's
- 1-3 PCI-e Riser boards (turns mini PCI-e slots to large slots)
Installation
(assumes the PC is already built)- Use a single card in the main PCI-e slot to install. Configure add extra cards later.
- Install Windows x64bit version not 32bit! During install process any options it asks you to turn on disable all of them.
- Load windows updates. ALL updates until you are up-to-date (may also do anniversary update if you want but not required, later this will be disabled)
- Drivers - All drivers from motherboard mafuacturers webpage or at least the basics.
- Nvidia Cuda Latest version - https://developer.nvidia.com/cuda-downloads
- Microsoft Visual C++ 2015 Redistributable https://www.microsoft.com/en-us/download/details.aspx?id=53840
- Microsoft Visual C++ 2012 (optional you may get an error like MSVCR100.dll, install this if you ever get that error).
- MSI afterburner - https://www.msi.com/page/afterburner
- Automatic bat file that configures 20 or more settings and removes unwanted software see below to download.
- Tweak windows power settings so things are sleeping when you want them 2.
- Mining software and preconfigured bat files store theses untouched somewhere.
- Teamviewer for remotely accessing the rig so you don't have have keyboard, mouse and monitor connected.
- HW Monitor (optional most for checking CPU doesn't get hot)- http://www.cpuid.com/softwares/hwmonitor.html
- There more details guide on installing some of these in my previous guides if you get stuck.
Once everything is installed and running create an image of the windows install with for example acronis or other image creating software. Now for every rig you setup you can just install this image and be up and running in minutes. You will likely need to use similar motherboards for this to work but it can work on any. If your rig ever dies you have a full backup you can restore in minutes. Will usually be around 16 GB.
The whole process probably only takes an hour or longer and I recommend a fresh install every time if hardware changes drastically it is up to you.
Other tweaks and optional settings
- Bios settings so computer turns on after power cut - http://www.wintips.org/setup-computer-to-auto-power-on-after-power-outage/
- Power point power reader - Similar to this https://www.aliexpress.com/item/US-Plug-Power-Energy-Watt-Voltage-Amps-Meter-Analyzer-With-Power-Electricity-Usage-Monitor-Blue-Backlight/32804463518.html but really all you need is total Watt at the power point.
- other windows settings
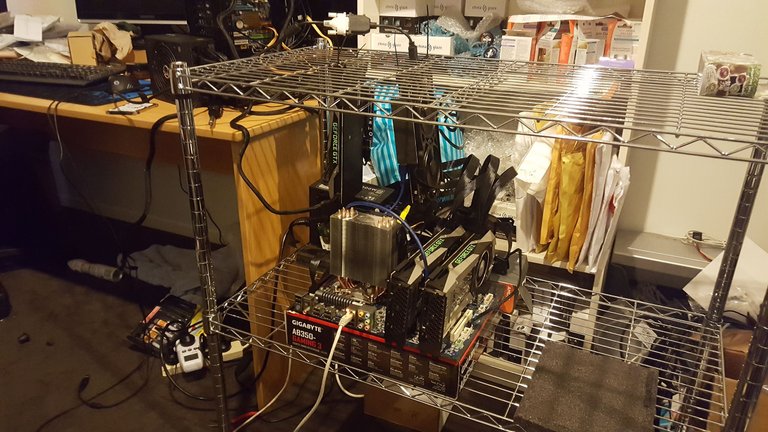
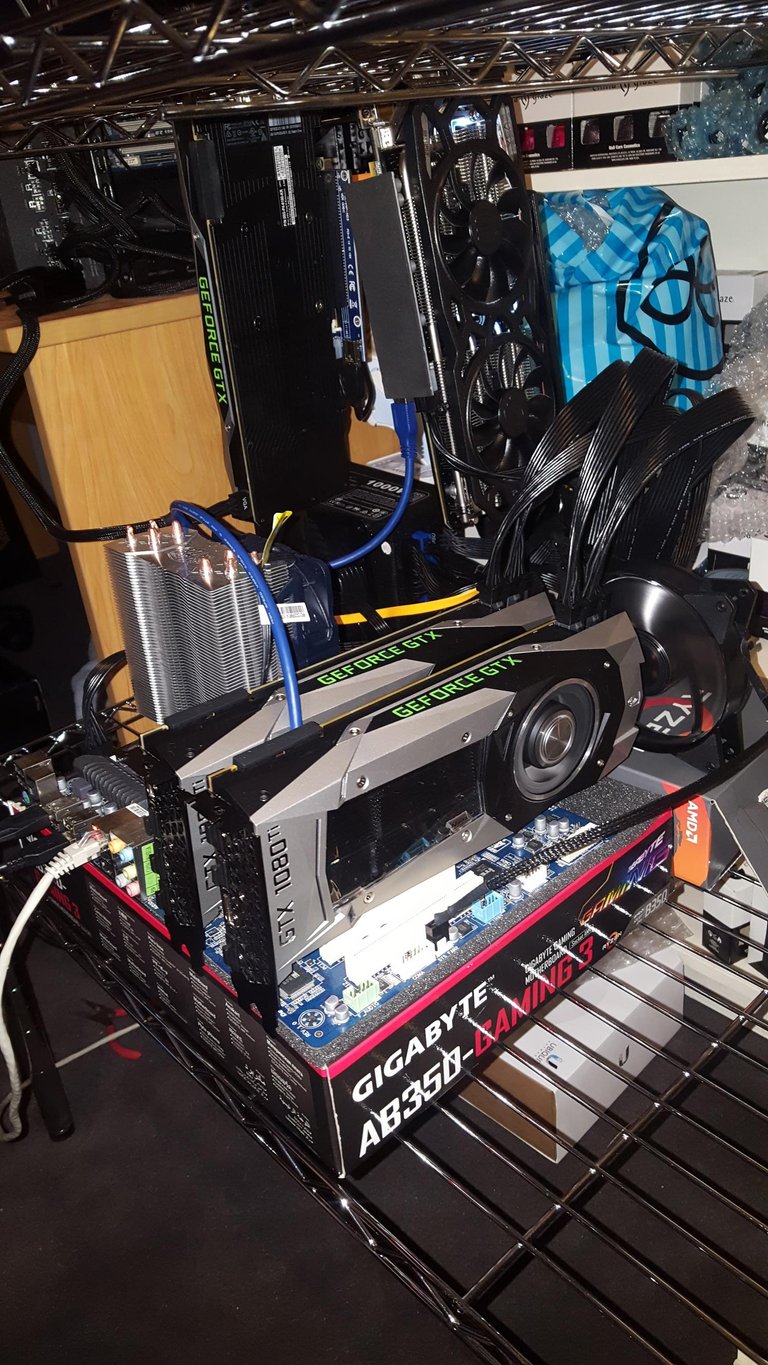
- Custom Racking or just use the motherboard box. You can buy or build custom racking. Just do a google search. This is what I use for good air flow and easy access and cheap(can get with wheels also)
4x GPU rig 95% complete.

Lets configure
- If you are u adding extra cards on risers install them now (see my next guide #4 for how to build mutli card rigs). Sometimes you will get a blank screen because the new riser cards take over as the main screen so just shift the VGA cable over or use teamview for no monitor configuration.
-Disable UAC (user account control) Press windows key and type user account control. You can turn it back on after you have finished configuring but this will stop all those annoying messages.
This is a MUST it auto configures about 30 things for you. Download and run this batch file from here. http://1stminingrig.com/best-windows-setup-configuration-tweaks-for-mining/ I had my own bat file configured but this one covers everything off with a nice yes no script which is perfect for beginners. I personally don't disable everything he does and I have extras but this is a great starting point and you can see how to modify it for your own purposes. You will need to RIGHT CLICK and choose RUN AS ADMINISTRATOR or most of them will not work.**
Manually set power scheme to high performance.
Select “High Performance” plan
Then still on “High Performance” plan, click “Change plan settings“
Select “Never” on all four selections for “Turn off the display” and “Put the computer to sleep“
Click “Change advanced power settings” and look for “PCI Express” -> “Link State Power Management“, make sure it is set to “OFF“, usually it is but better to check on that
Restart the rigI also run this bat file. (create your own bat or copy another one and rename then edit it, again run as ADMIN). You can remove the words REM if you want it to disable standby and stop disks sleeping. You may not want to stop this as you might have a second HDD in your computer you want to sleep.
@ECHO OFF
REM powercfg -change -monitor-timeout-ac 0
powercfg -change -standby-timeout-ac 0
REM powercfg -change -disk-timeout-ac 0
powercfg -change -hibernate-timeout-ac 0
pause
- Set Virtual Memory to 16000 (again run as Admin file)
start /wait /b powershell -command "Set-ItemProperty -Path 'registry::HKEY_LOCAL_MACHINE\SYSTEM\CurrentControlSet\Control\Session Manager\Memory Management' -Name 'PagingFiles' -Value 'c:\pagefile.sys 16000 16000'"
pause
- Auto start programs you want to auto start. Press Windows Key+R and type > shell:startup and create a shortcut to this folder. Any shortcut you copy in there will start with windows.
-Security/Antivirus - no anti virus required as long as you run all files through your main computer that does have anti virus installed. You wont be putting anything else on this PC so you should be fine, totally up to you though. (I take no responsibility).
-Leave the firewall on but if any of the programs you install ask make sure you let them through.
-Windows Defender. So the bat file would have disable windows defender but it is still running. To disable right click on task bar and select task manager then click start-up tab.
-Windows 10 is more annoying and requires more more fiddling than windows 7. But once you run the .bat file they are pretty much the same. I havn't yet automated everything but I use all similar hardware so I only had to do this once then create an image file I use for all my rigs.
Tweaking with MSI afterburner
This needs its own dedication section because it can be tricky.
-TPD or power settings. 60-85% depending on heat and how much the coin you are mining is worth. This is universal for pretty much every card. Anything over 85% starts to really burn power for not much performance increase. To work out the absolute sweet spot for you card you will need a power meter on your plug. Start your miner and record the Watts. Take four or 5 readings at different levels to get an idea where the sweet spot is for your card. Otherwise just sit between 65-75%. Some miners will give you the efficiency rating as you are mining which is another way you can do it.
-Temp Limit. Set this to 65 or 70C. If something every happens like a fan dies or whatever this setting will automatically under power the card to keep the temp down.
-Core Clock. This setting will generally always increase mining hash. most cards will safely do +50 safely other cards that are not already overclocked can sometimes go upto 200 or more. Google your card to find what other people are using.
-Memory clock. most cards will be ok with 100-200 increase a lot will do upto 700. Again google to find the setting. But some miners will not benefit from increasing this setting others will. ETH mining benefits greatly Zec mining doesn't.
For example Eth.
-Fan speed. You can leave this on auto if you like but this will generally run your cards pretty hot as by default these cards run pretty hot when gaming (around 75C). For mining and if you have several cards in one room you want to keep the temp under 70C max and ideally under 60C. Manually set the fan speed to around 60-80% or whatever you need it on to keep the temp down. Some run their fans at 100% during summer.
-Use skin MSI Cyborg Red By Drerex. Enable settings in the settings menu. You need this skin for multi GPU's. You can link the settings together if the cards are identical but I prefer to manually set for each card and save the profile.
-You can set the settings to automatically apply at startup by clicking the windows logo by the words startup (bottom left on afterburner)
- Find your clock and mem optimum settings. Google for others settings or read over clocking guides. They will tell you how to step your settings up little by little and then to run a stress test to test it. Starting minging is generally also a good stress test. I recommend not pushing it too much. If your miner freezes or PC crashes you went to far. Go back 2-3 steps.
Final words
I have put loads of work into this guide so I appreciate any upvotes, and I hope you enjoy the layout as I made an effort to make this guide alot cleaner and clearer than my previous ones.
I can help in the comments section is needed. The only work that is not my own is the bat file which I linked as his scripting was better than mine for newbies so I went with his instead.
All content was created by me and are my own personal instructions I wrote for myself and my own use. I have linked any outside creators work so they get visitors to their page.
Sneak Peak of next guide #4 How to build your own multi GPU rig.
If you have the above setup and running. Adding more GPU's is pretty simple but there is a bunch of gotchas and some serious mistakes some newbies make which could end up frying their gear. I should have it up 3-5 days.

Nice post, followed.
Thanks I will follow you also :D
How safe is that on top of a box? even so great post!
Good question. Incredibly safe. As long as it doesn't touch any metal you are fine. The GPU's can touch metal with their backplate no problem.
I will go over it in more detail in my next blog coming in a few days.
really good !! proper rig
Very well written and comprehensive post. Followed.
Side note: Beware of the Asrock anniversary z97 motherboard. I've seen a few posts recommend that for a 6 gpu build but it has 2 AGP ports that are unusable. I know because when I first got into mining that's one of the cards I bought lol. Always make sure you're getting the right number of slots!
I just use any old motherboards. I don't like to build rigs with more than 4 or 5 cards. The z97 motherboards are pretty popular in mining rigs but I think they are overkill really. The cut down cheaper versions are good if you absolutely have to buy new.
Thanks for posting and the work you put in.
thank you for this valuable post @evilmonkey
@aravindgre
Me too!
buen post bro!
Thanks I need all the encouragement I can get to do more of them :) they take alot of effort