A mockup is a way to visualize end result before we actually produce it. In this case we’re going to make Bitcoin enamel pin mockup.
For this tutorial I’m using using my own Soft Enamel Pin PSD Mockup template which you can purchase through my website at www.signalsupply.co
I’ll show you how to prepare the design on Illustrator that will perfectly fit on PSD Mockup and then how to apply it inside the psd mockup on Photoshop.
That’s why there will be 2 parts in this tutorial: Illustrator part and Photoshop part. Notes that you can also make your design in any app that you prefer, but to create the mockup, you going to specifically need Photoshop.
This is what we will achieve at the end of this tutorial.

#1 Illustrator Part: Designing & prepare your design
Ok, let’s do this. First of all you need to create the design. Let’s make Bitcoin’s icon with its famous round orange frame. Give it a colors. Just give it flat white and orange colors. All the gradient, shadow and highlight will automatically applied on psd mockup.
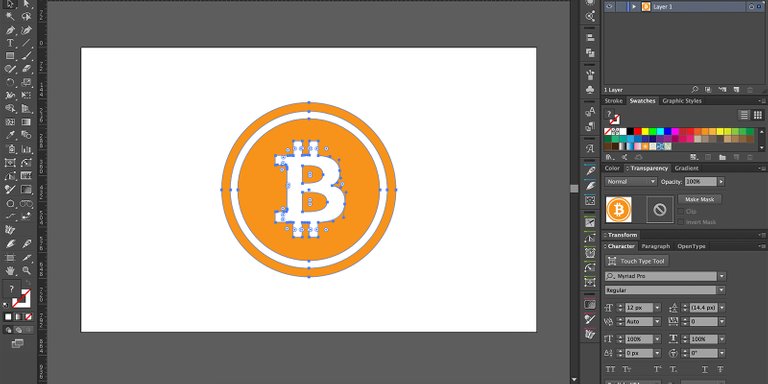
One thing you must aware when you make enamel pin is that every colors that attached to each other must be separated with stroke. This stroke will be whatever the pin’s base metal color is.
Right now, don't worry about the stroke color. You can give it any color you want, psd mockup will automatically turn it to pin’s metal color.
Colors and strokes must totally separated so you must intersect all the objects and make sure no object is overlaying each other. So we will have 2 separated object: one is fill-in object and another one is stroke object.
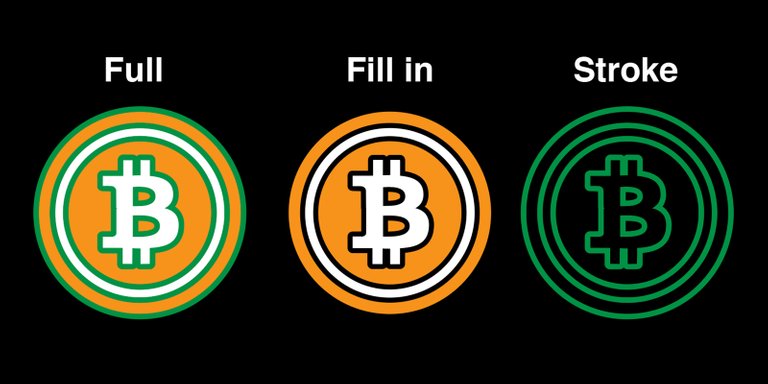
Right now we are ready to move to Photoshop. Nice!
Photoshop Part: Using Soft Enamel Pin PSD Mockup by SignalSupply
At this point you can purchase my Soft Enamel Pin PSD Mockup if you haven’t got one. It will make this so easy with its predefined smart objects! It come with 2 angle, front and perspective.
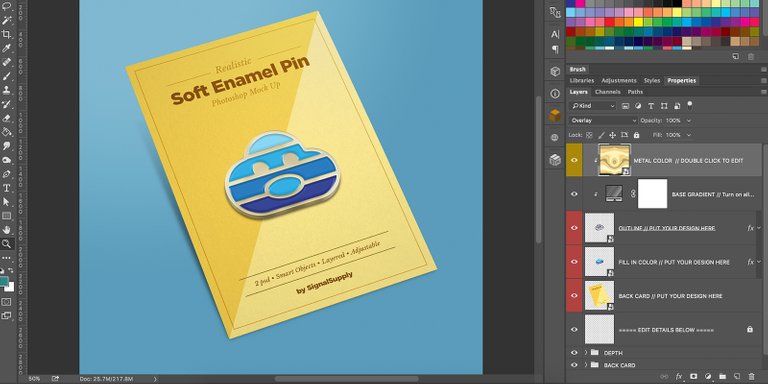
Let’s make a perspective one. When you open the file, this what you’ll see. All layers are arranged and dependend to each other. The layers you need to focus is these 4 smart object layers.
First, copy the fill-in object from Illustrator. Select it and press cmd+c on Mac or ctrl+c on PC.
We will work on fill-in object first. Open fill-in layer by double clicking on it. Another .psb file will now open.

Unview any layers in it and paste (cmd+v or ctrl+v) the color object you previously copy. It will create a new smart layer.
Save it by pressing cmd+s or ctrl+s. Now you can safely close this .psb, and you can see it automatically updates the main psd. Not finished but it start to look awesome!
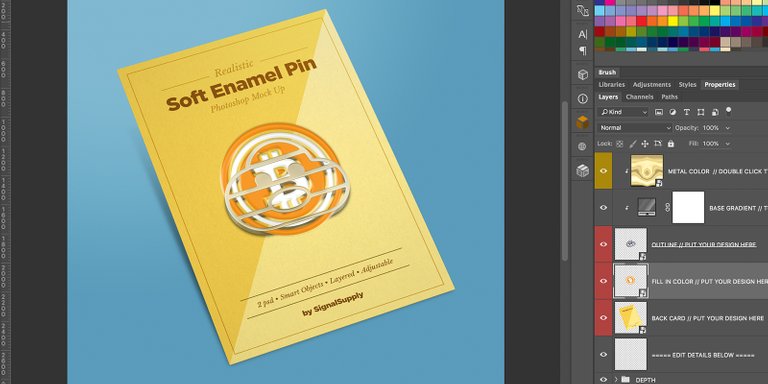
Now let’s move on, but before that, go back to Illustrator and copy the stroke object.
Double click on stroke smart layer to work on stroke object. Another .psb will open. Paste your stroke object that you previously copied. Save it and close the .psb.
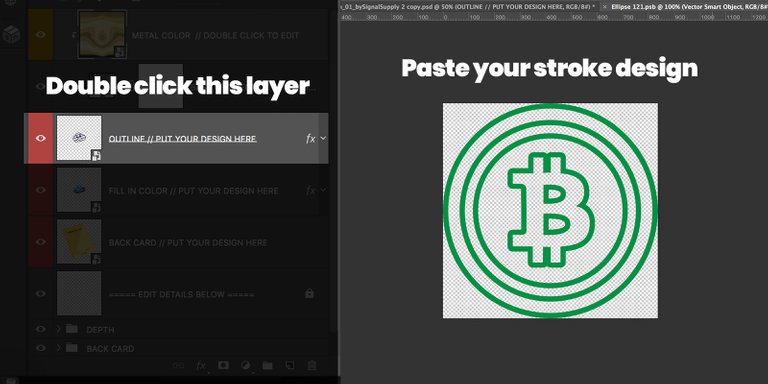
Voila! your pin is now taking some real shape!
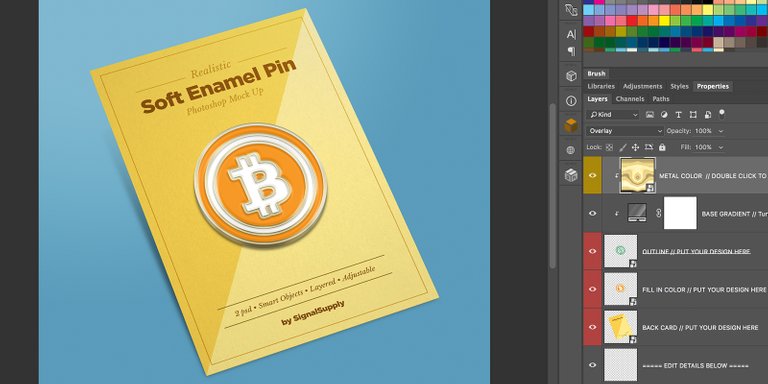
But we’re not finished yet, you can also change to pin metal color and back card design! 3 base metal color that you can choose: silver, gold and black, which you can see on SignalSuply blog post here.
Also, you can apply any of your design to Soft Enamel Pin PSD mockup, but just remember to prepare you design first by separate all the colors to make it ready to pasted to Photoshop.
Cheers! :)
- HelloSignal
---
This tutorial was also posted on SignalSupply's blog