Do you ever get tired of waiting in line to get your vehicles oil changed? Making appointments ahead of time, then getting there and having to sit in the waiting area as the hours tick by. As you look impatiently out at your car, you notice they are finally backing your car out of the shop. After their 1 million point inspection and a decent deduction from your wallet, your vehicle is back in your hands...or rather...your strapped back inside with one thought on your mind...”Drive it like you stole it” You have lost time to make up for.
Alright, I probably exaggerated just a little there but it sure did paint a good mental picture didn’t it??
This post isn’t about stolen vehicles and how to drive them, or what really goes on at the mechanics shop. Sorry to disappoint.
Your DIY-Money saving guy, Splatts, is back with another great way to save some time and keep some extra dollar bills in that pocket of yours.
DIY Oil Change
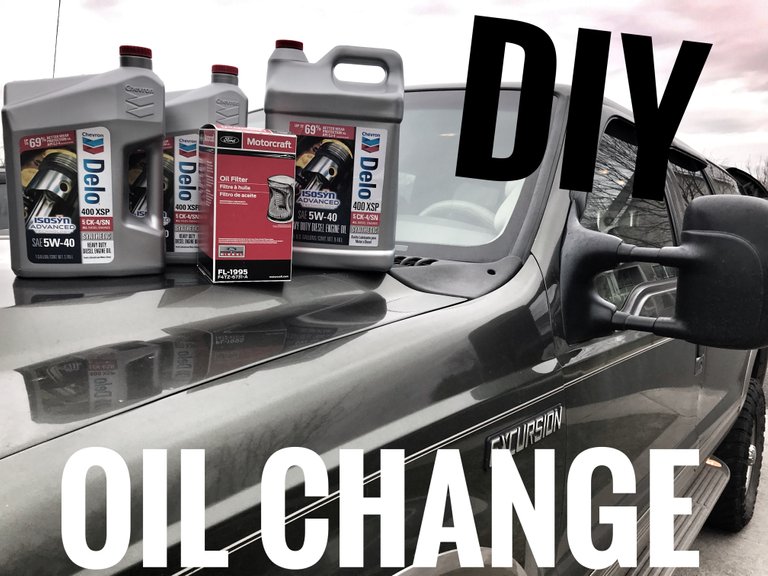
Do It Yourself and Save Money
Just for this DIY post decided I would call a local oil and lube shop and ask them how much it would cost for a Full-synthetic oil change in my 2001 Ford Excursion equipped with a 7.3 litre Diesel. Mind you this is a big engine and it takes 3-4 times the amount of oil as a little car. The Man at the shop said it was $89.99 for up to 5 quarts of oil.
After getting that out of the way he proceeded to tell me it would cost around $150 to change the oil and replace the oil filter. I have a feeling this was a low-ball price for sure but I will go with it.
One of the few things I go to Walmart for is engine oil, they just have great prices on it, plus if you go through the automotive doors in the back of the store it’s all right there. Then use the automotive checkout, there is never anyone in line.
Alright, let’s gather up all the stuff we need to perform an oil change. From gloves to keep your hands clean, to the funnel used to fill your engine with good clean oil, we are going to buy everything and do a price comparison.

Tools and Supplies
Remember these items can be used over and over again accept for the oil of course. Let’s see what it is going to cost for the tools to keep changing our own oil in the future.
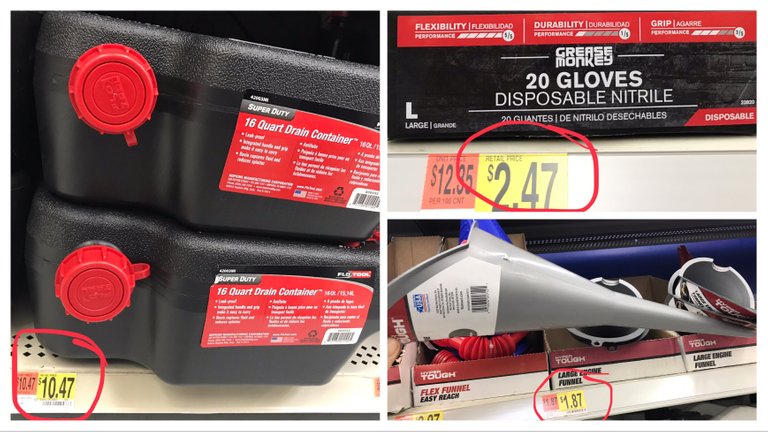
- Drain Container - $10.47
- Disposable Nitrile Gloves - $2.47
- Funnel - $1.87
Let’s just round everything up to the nearest dollar to make things easy. That should also cover any taxes that get applied.
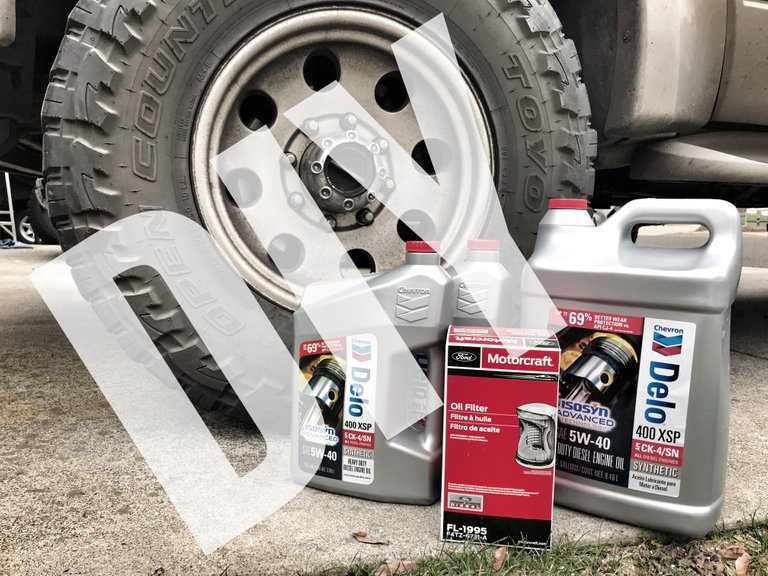
Let’s get the oil we need. This is a big engine and it takes 17 quarts of oil. I’m going with a Full Synthetic Engine oil that is formulated for Diesel Engines. If you don’t know what kind of oil or how much refer to your owner’s manual. The information can be found in the Fluids section. If you don’t have a manual, this search engine called Google can find the info you need.
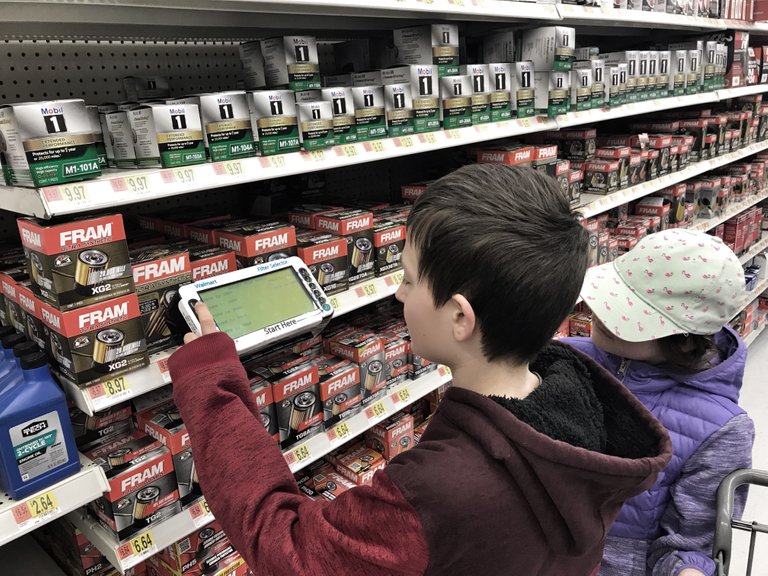
After letting the kids have a little fun figuring out which oil filter we need. Then actually finding it on the shelf, we had all the items needed to change the oil.
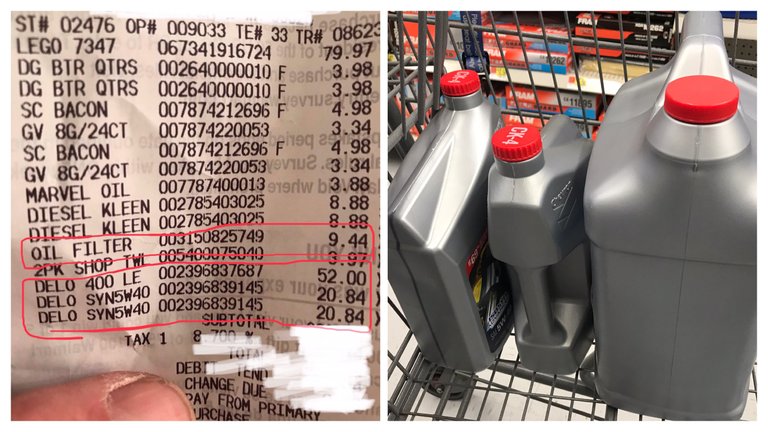
Again, we are going to round everything up to the nearest dollar to keep things simple.
- 2.5 gallons of 5w-40 engine oil - $52
- 2 x 1 Gallon of 5w-40 engine oil - $42
- Oil filter - $10
The total cost to gather the tools and supplies to change my vehicles engine oil for the first time is....
That might not seem like a huge savings but remember, that price of $150 was definitely a low-ball price. Also keep in mind, I bought tools that can be used over and over again. So without buying the tools I saved roughly $50.

Can You Change Your Vehicles Engine Oil?
I tell you what, after you get done with the Splatts School of Oil Changing, you will be a pro :wink:wink There really isn’t too much involved in an oil change...
- Drain the Oil
- Replace the Oil Filter
- Refill the Engine with Oil
Done and Done
Simple right??? Yet, there are a few things you need to know before taking on this task and I will show you the process I use when changing the oil in my vehicles.

Let’s Do This
lightbulb turned on and he got right to work.It comes in handy to have your very own Oil-Changer-Outter-Guy on standby. @lil-splatts tried his hardest to play dumb and act like he had never done this before. So I just asked him some questions to get the gears turning, the
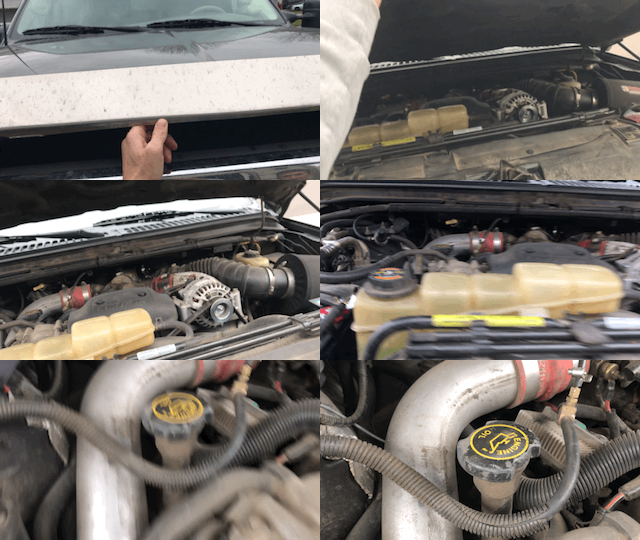
Go ahead and remove the cap and set it in a place where it won’t allow you to close the hood. By removing the cap it will allow the oil to drain quicker and using it to block the hood from closing ensures you won’t forget to put it back on.
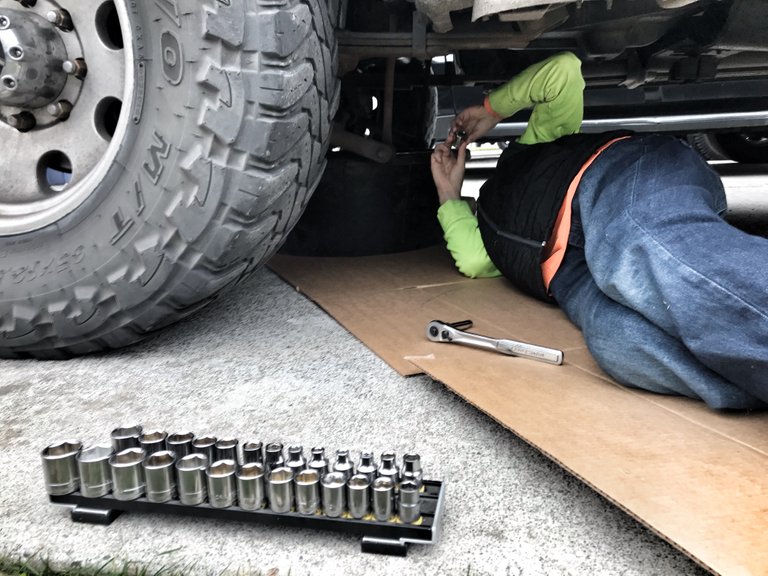
A little benefit of having a lifted vehicle is, it’s easy to slide under it and do some maintenance. Most of you are probably going to need to Jack your vehicle up a little bit in order to get under there and find the oil pan/plug.
Place blocks behind the rear tires and set your emergency brake before lifting the front of the vehicle. You don’t need to lift the tires off the ground, just enough to get your Drain container under the oil pan and so you can reach the plug.
I really wish I had a smaller car to demonstrate how to lift the vehicle properly but the smallest car I have is a Lincoln Navigator. Sorry I failed. Lol.
Every car should have a jack included with it somewhere. Most likely in the trunk by the spare tire.
Always...I repeat...Always
Use some sort of jack stands or blocks under the vehicle and NEVER solely depend on the Jack to support the vehicle while you are working under it.
After getting the vehicle positioned safely where you can reach under it, we need to find the oil drain plug. Typically you will see a bowl shaped, metal pan with a bolt at the lowest point.
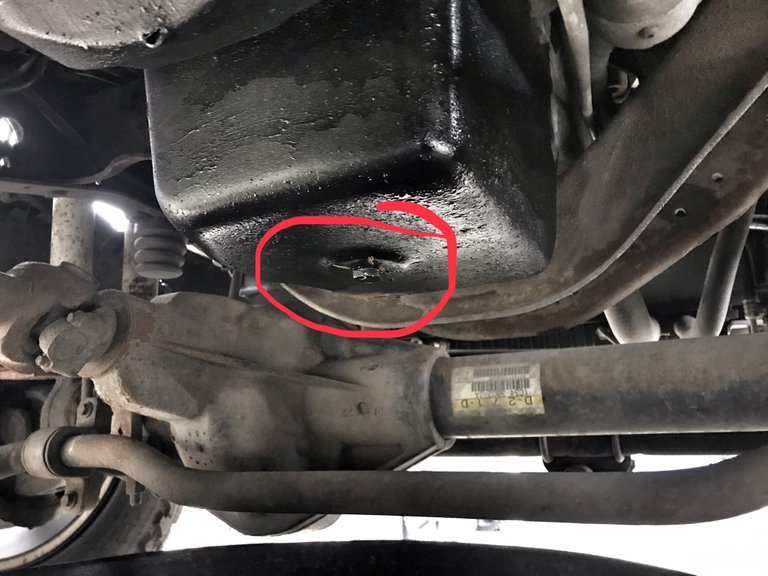
Place your drain pan or container under the oil pan/plug. Then this is where things can get a little messy and those gloves I bought come in handy. Using a ratchet, loosen the oil plug/bolt, then finish up removing it by hand.
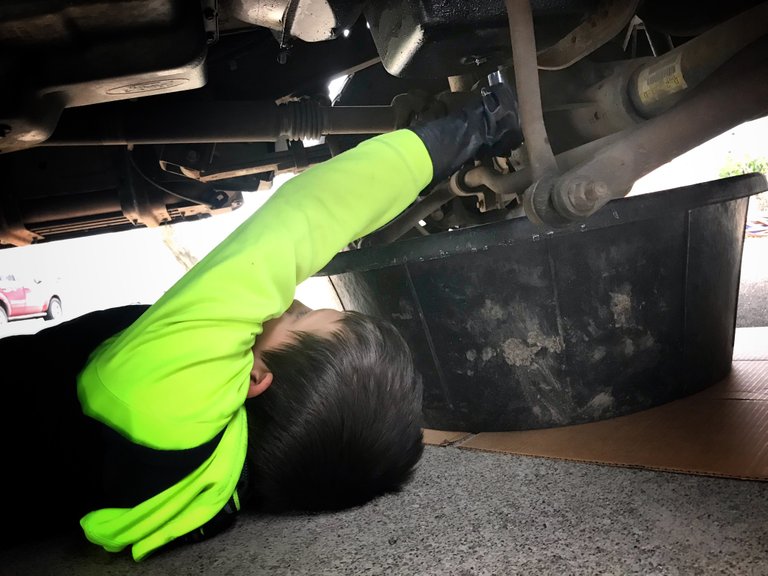
When you feel like the bolt is almost ready to fall out, keep pressure on it, pushing it back into the hole. Trust me if you don’t, you could end up with a nice river of oil running into your armpit. Don’t ask how I know this... it’s not like it has happened to me or anything. Then quickly pull the bolt out and away and let it drain.
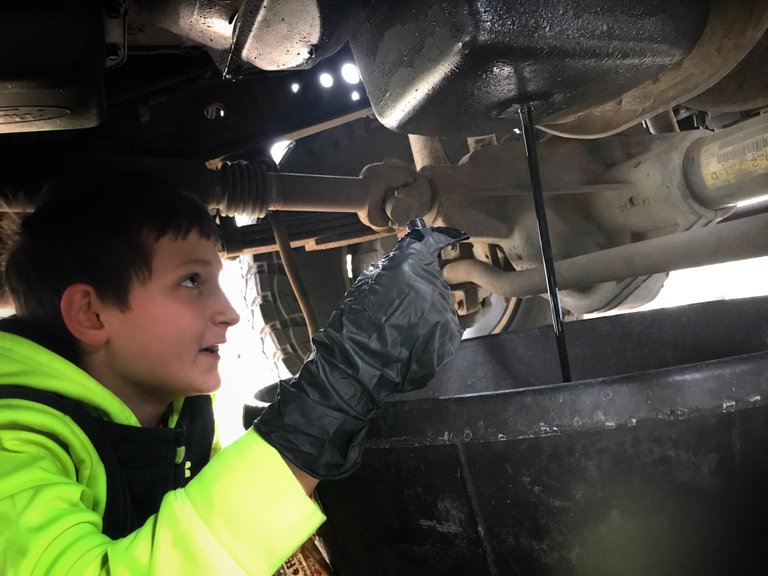
That boy is good, barely got a drip on his gloves other than the oil from the bolt. Nice work @lil-splatts someone has taught you well :wink:wink.
Now keep an eye out and don’t lose this little gasket/washer. I have dropped a few in the bucket in my time, and they are not fun to fish out.
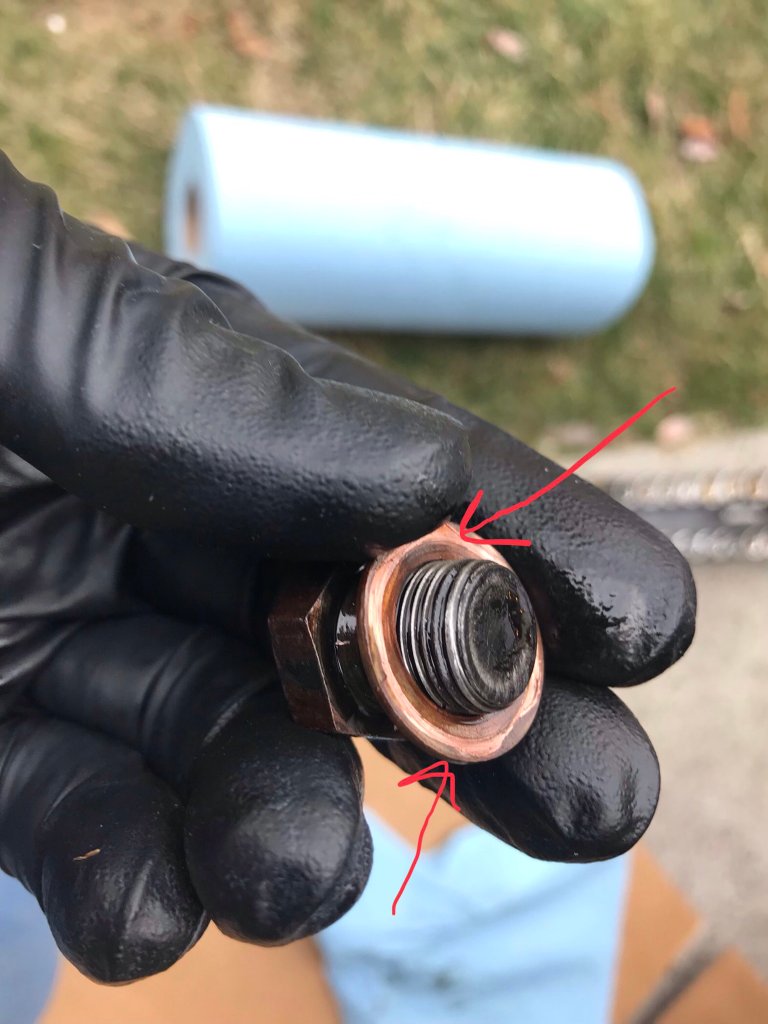
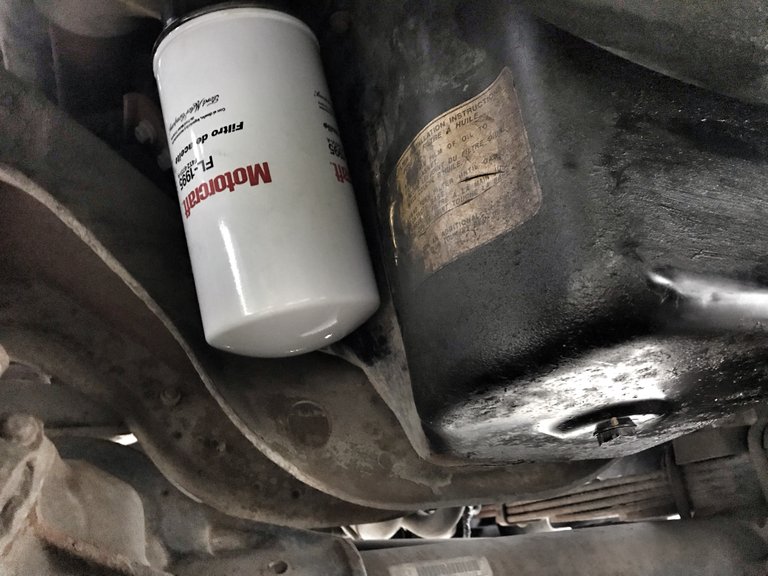
After the oil is done draining, re-install the plug. Now we need to locate the oil filter. It is a canister that is located on the bottom portion of the engine somewhere. Mine is conviently located next to the oil pan. I have seen on newer cars, the oil filter on top of the engine, which is really weird to me. If you have trouble finding yours, turn to your favorite internet search engine and you are bound to find it. Again with this big Diesel engine the oil filter is big too.
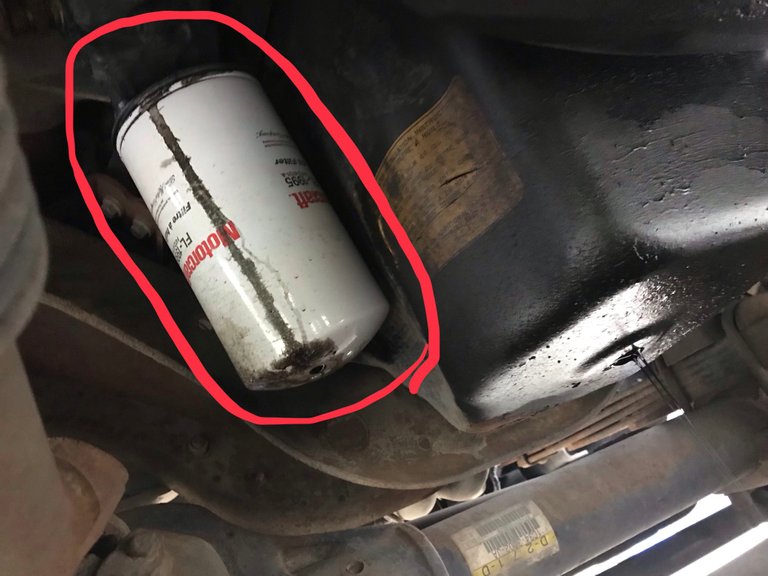
Okay, now twisting this filter off can be a struggle sometimes. Getting both hands around it can be a chore in itself. I always wonder who puts these things on so tight....wait...that’s me. Oops. I forgot to mention before about and oil filter wrench. They cost around $15 and most of the time you don’t need one. The one pictured is too small for my monster oil filter and my other one broke. So I have to figure out another way to loosen this filter up.
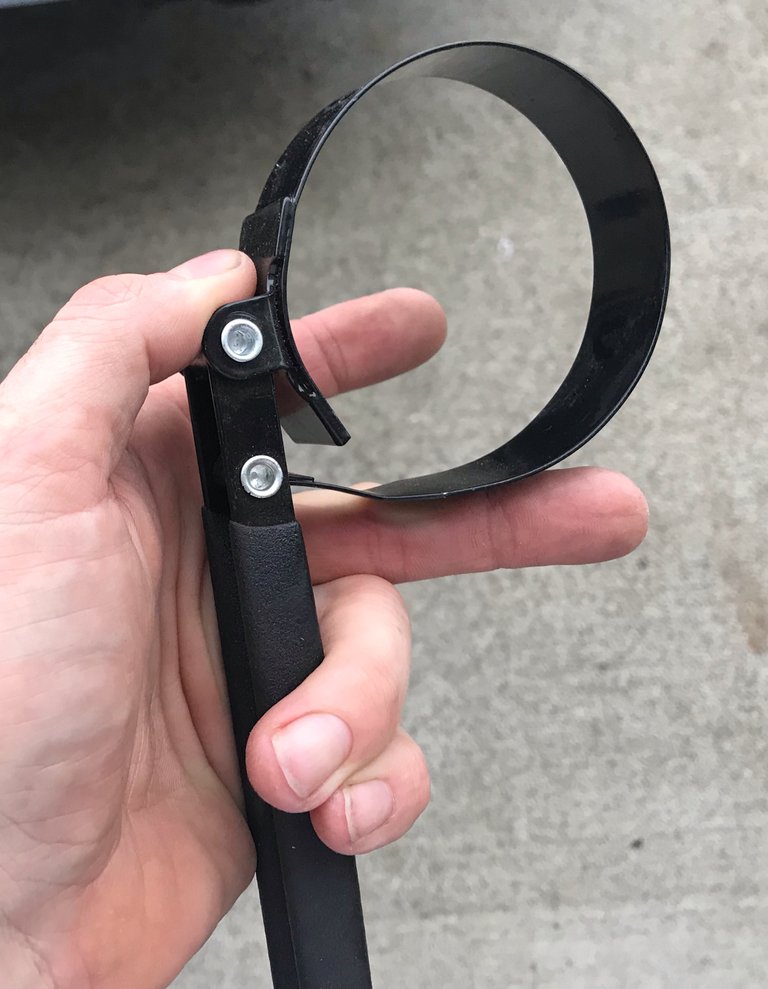

Fancy Trick Time
If you don’t have the fancy oil filter wrench and you just can’t get that oil filter loose. I have a little trick for you.
Using a small piece of rope or shoot even a shoe lace would probably work. Tie a loop in one end
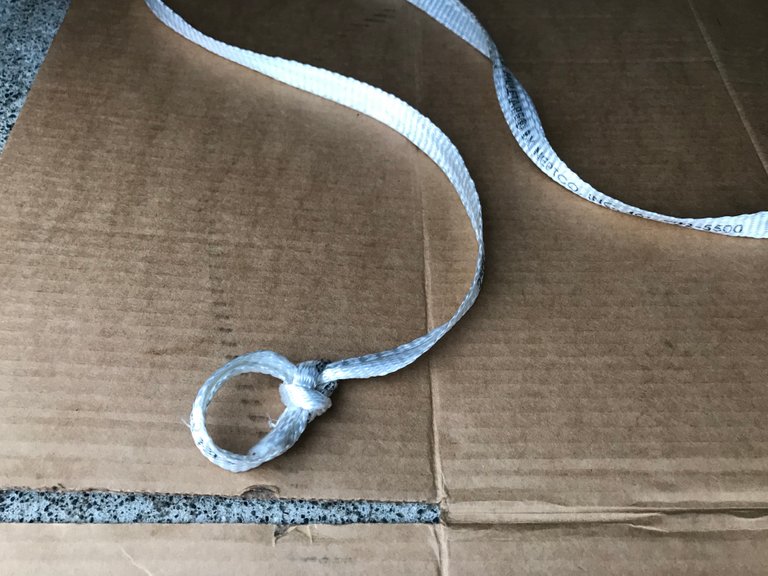
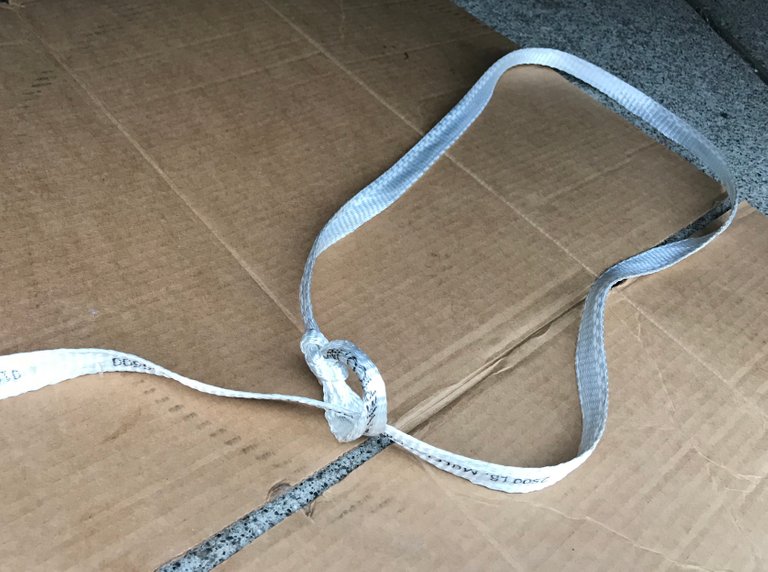
Then loop it around the filter in a fashion where, when you pull the end of the rope in a counterclockwise direction it doesn’t slide like so...

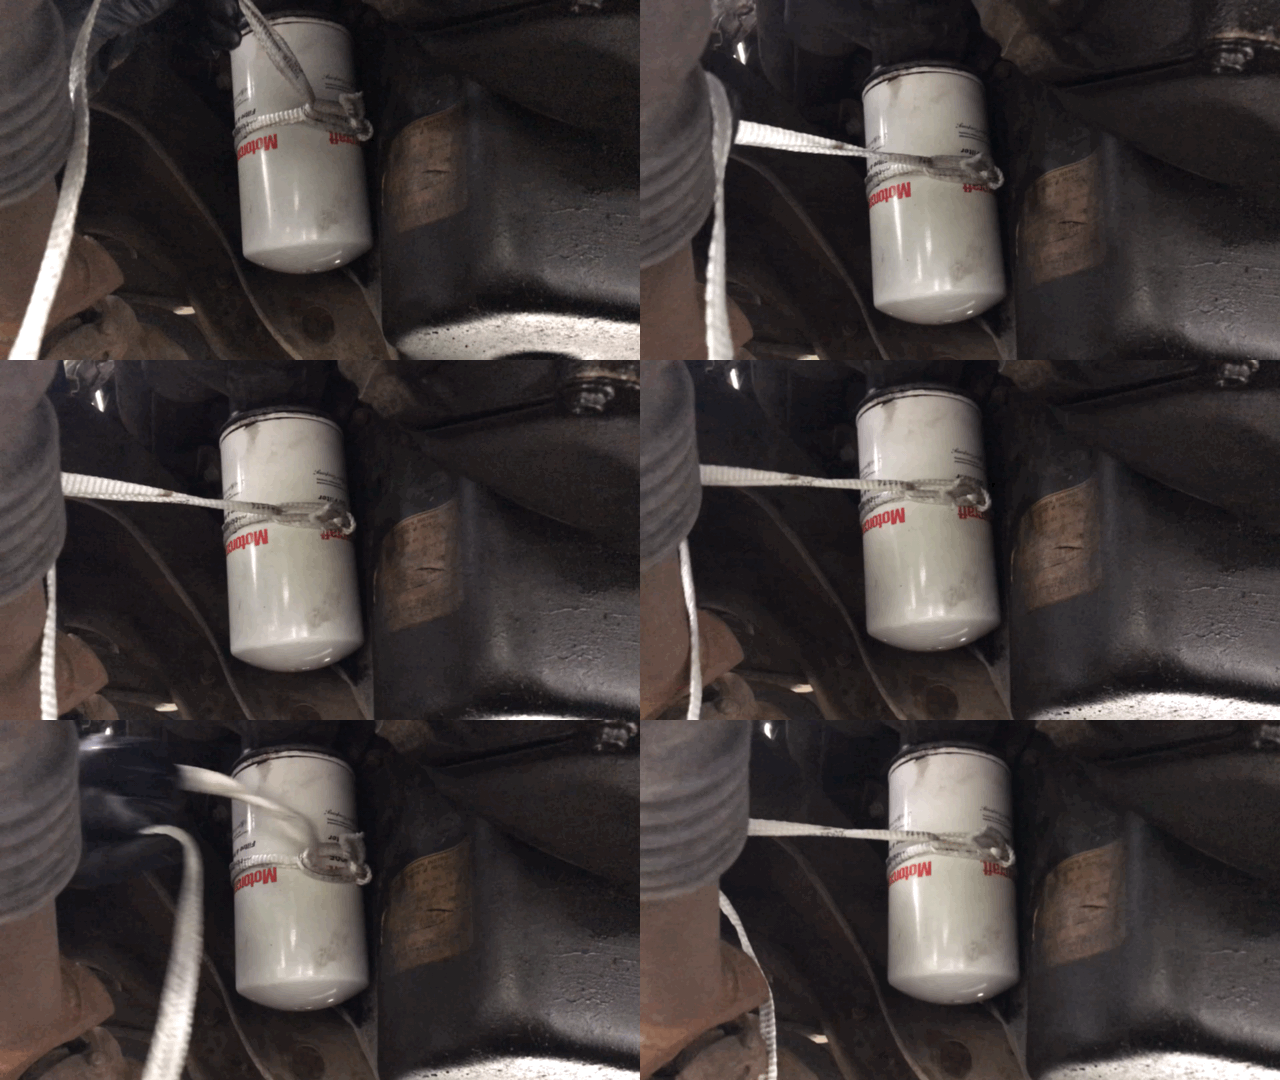
Then take a couple wraps around the filter and tie another loop in the free end. Next, place a screwdriver through the loop, just a couple inches up the shaft. Then rotate the screwdriver counterclockwise until the tip contacts the side of the filter. Then continue to rotate

This will give you just enough leverage to crack this filter loose and you will be able to finish removing it by hand. The filter is still full of oil so place your drain bucket/container underneath the filter because things can get a little messy

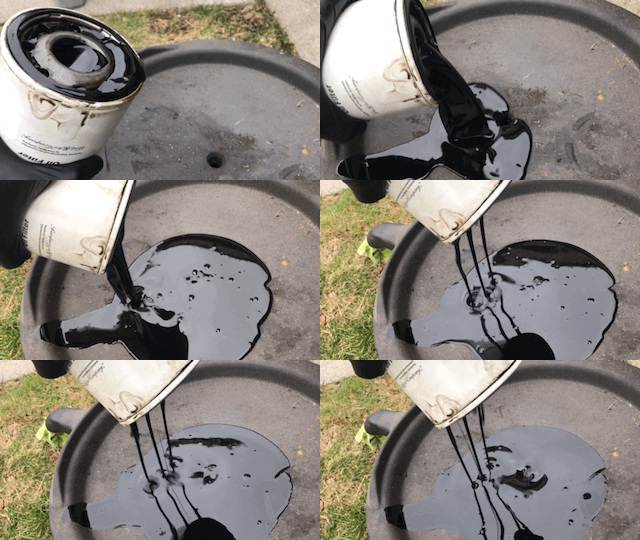
Now after the filter gets done puking everywhere remove it completely, but do your best to keep it straight up. This filter has about 1 and 1/2 quarts of oil on it and you don’t want it all over your driveway. Once out from under the vehicle, use your drain container and tip the filter upside down and let it drain out into the container.

The Refill
Let’s get the new filter prepped and installed first. Taking your new engine oil, fill up the filter and let it soak in. This may take a couple fill-ups because the filter paper inside is soaking up the oil.
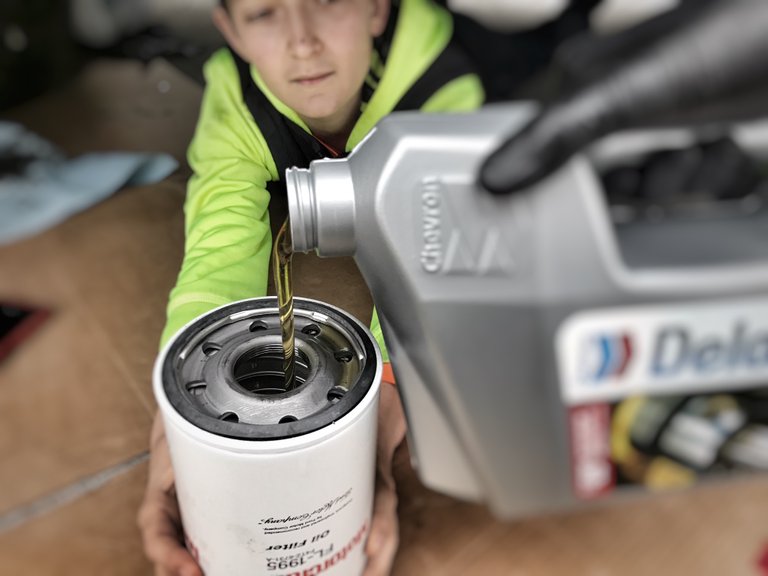
After you have filled up the filter, use a gloved hand and dip your finger inside the filter. Getting a little oil on your finger, lube up the rubber gasket on the top of the filter.
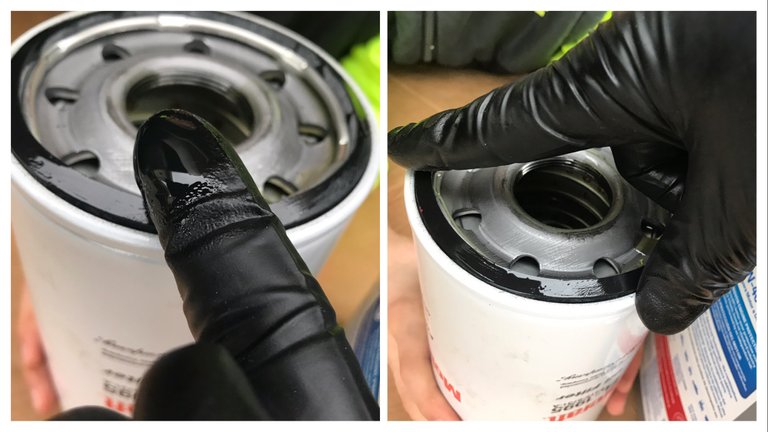
Now install the new filter. No need to really crank it down and get it super tight. It just needs to be snugged up and not over tightened or else you can have some issues the next time you change your oil.
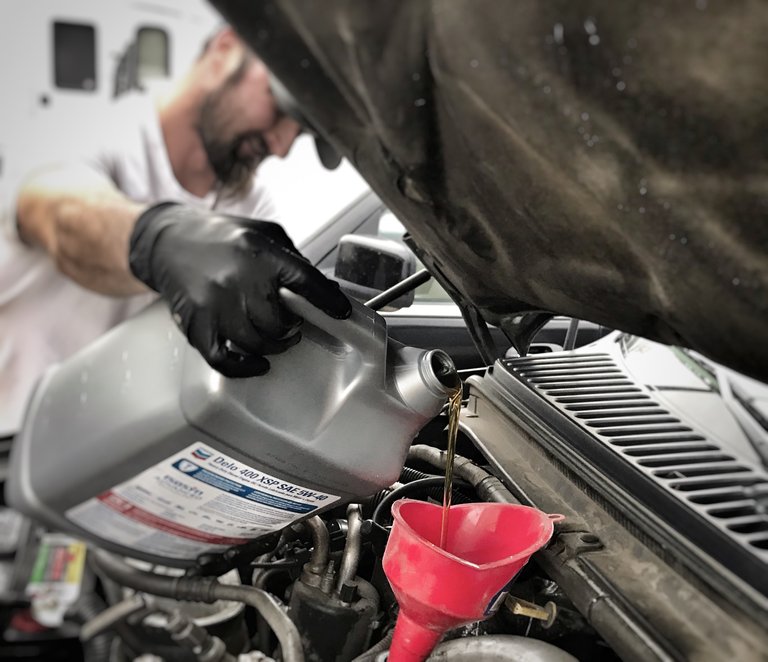
Now all that is left of to add that nice, new, golden engine oil back into the motor. Using the funnel you purchased, pour in the correct amount of oil taking into consideration how much you poured into the filter.
By the time it takes to clean up your mess and put things away, should be enough to let the oil settle down into the oil pan.
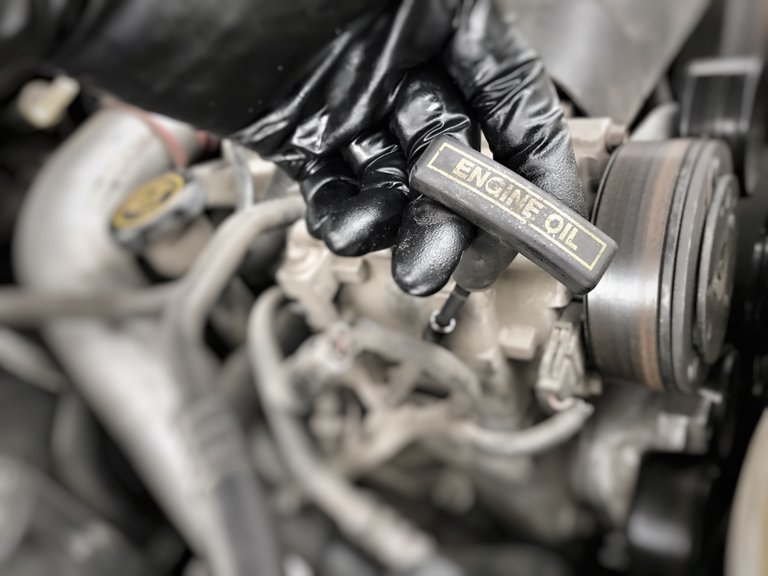
Remove it and wipe it off with a paper towel or rag. Re-install it completely and pull it back out. Take a look at the reading on the top of the dip stick, is it in the operating range??
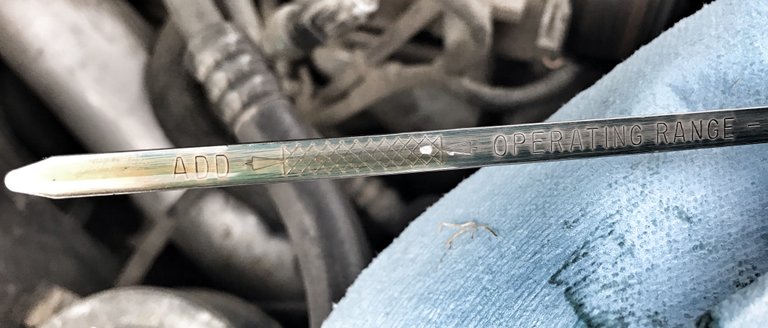
If so, go ahead and start that beast up and let it run for just a few minutes while you finish putting things away and cleaning that oil out of your armpit. It is always a good idea to check the oil level after a day or after driving and letting the engine cool. This ensures that you have the correct amount in your engine.
But What About the Old Oil?
You know those leftover containers from the oil you purchased? Ya, the ones you threw in the garbage, go ahead and do a bit of dumpster diving and get them back out. They still have a use, pour the old oil into those containers.
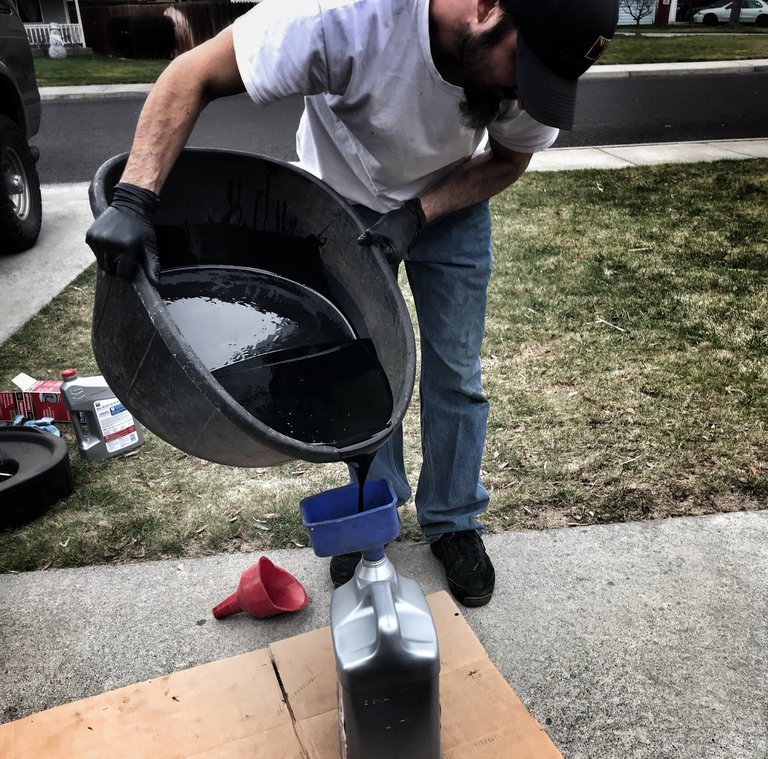
Then you can take those containers to almost any automotive parts store or oil and lube place for it to be recycled. Me, I just take it back to Walmart where I bought the oil from.
See that wasn’t too difficult now was it?? Even with taking all the photos and videos and having trouble with the filter, it took a little over 1/2 hour to change the oil. So not only did we save some money by doing it ourselves, we saved a good amount of time too. With a smaller engine I bet I could change the oil in about 15 minutes. Basically the time it would take to contact an automotive garage, make an appointment and get your vehicle there.

Thanks for stopping by and checking out another one of my DIY Projects and Money Saving Ideas. I hope this gives you a little confidence and knowledge to change the oil in your vehicle by yourself.
If you have any questions at all feel free to ask and I will provide you with the best answer possible.
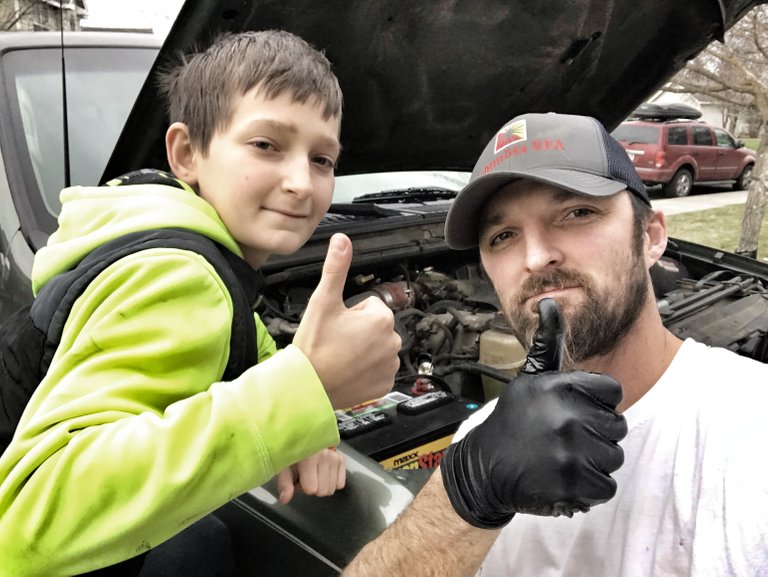
Oil Change...Complete

And
Save Yourself a Little
Time
And Money
And
Do it Yourself
Weku Post
Dude, phenomenal write up on this topic. Sadly it has been underrated/unappreciated vote worth wise. Resteemed to hopefully change that! :)
I am very humbled by your words. Hopefully my hard work can payoff over the next 7 days. Lol. I guess I could always buy a bunch of bidbots....Kidding Kidding.
Thanks for the Resteem
Cheers and Steem on
You're welcome. So far so good I'd say. And no bid bots, even better ;)
Steem on!
source
Rewarding Your Original Work
With an Upvote
And
ResteemHey @jlsplatts, Your post has been determined to be Splat-Worthy!! Therefore You’ve been Splatted by the Splatz Curation Trail
Awesome tutorial with lots of detail and a lot of effort put in.
Changing oil is not a real challenge, if you know what to do.
With that tutorial, it´s almost a "no-brainer".
What I recommend is to drive the car for a while to let the oil warm up. As warm oil is much thinner and flows better than cold oil. So you get a lot more dirt and used oil out of the higher parts of the engine.
Best regards,
Hasenmann
PS: upvoted & resteemed & I follow you
I totally forgot to add that!! Great now I am goin to have to add that in, because that is what I do everytime. Lol
Thanks for stopping by and thank you for the kind words and friendly reminder.
also, you're supposed to replace that copper crush washer every time. most places don't. badly installed oil plugs is the main reason I do my own oil, and it gives you a chance to inspect the engine, transmission, steering rack & suspension. and with a little more gear, you can do diff & trans fluids too.
I normally get away with reusing the crush washer by turning it over. If I notice a little leakage then I change it. Definitely a cross threaded drain plug can become a serious nightmare. I just did the rear diff about 6 months ago and I just noticed what looks like the rear seal of my transfer case is leaking a little bit so that might be next on the list. At 215k miles it could be time to do so.
I had a place forget to put my oil cap back on a long time ago. Let’s just say it was a huge mess. My little Geo Prism puked oil everywhere. Lol
Amazing post. It goes straight to my FOREVER GREAT bookmark. So useful and so well written.
Thank you for sharing your know-hows !!!
This post was shared in the Curation Collective Discord community
community witness. Please consider using one of your witness votes on us here for curators, and upvoted and resteemed by the @c-squared community account after manual review.@c-squared runs a