Today at my local dollar store I noticed decent-looking wireless keyboards for sale for $2 each. This is, I assume, because they come in pink cases and due to the weird stigma around this arbitrary color, they didn't sell as well and ended up here. These keyboards are very useful for single board computers like Raspberry Pi's that have few ports, so I bought three of them and decided to take one apart to see inside.
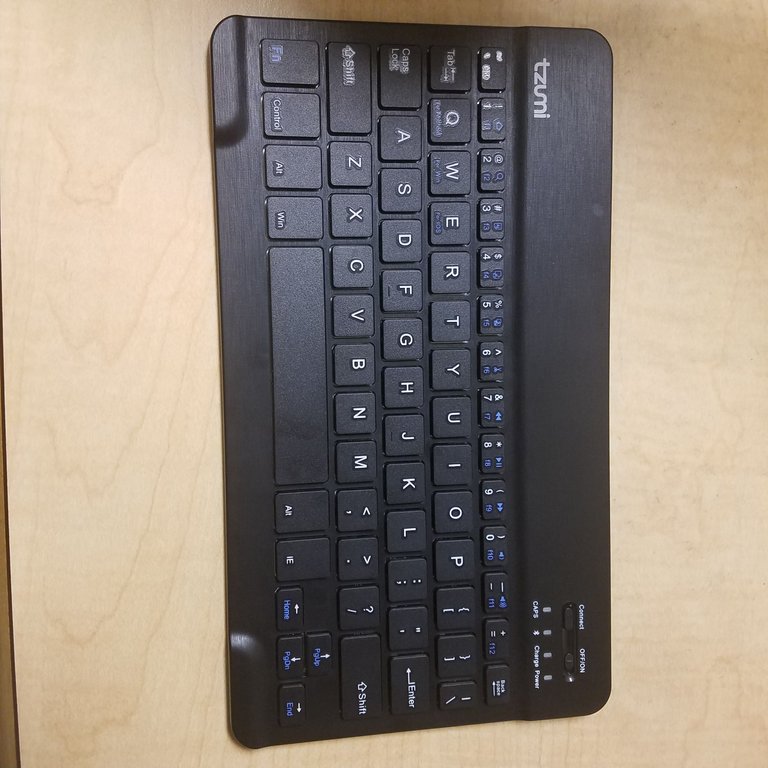
Hilariously the keyboards aren't even pink, they are just inside an actually rather nice pink case, that can hold an iPad or other tablet. The keyboard is only attached to the case via magnets so I pulled it out to see inside.
Opening the keyboard
Surprisingly it wasn't that bad. There were no screws hidden under stickers or glued-down panels, just ten tiny screws holding the back plate down. These were kind of difficult to remove because of their size, but that's my fault for not having the right tools. With that open, we can see the small circuit:
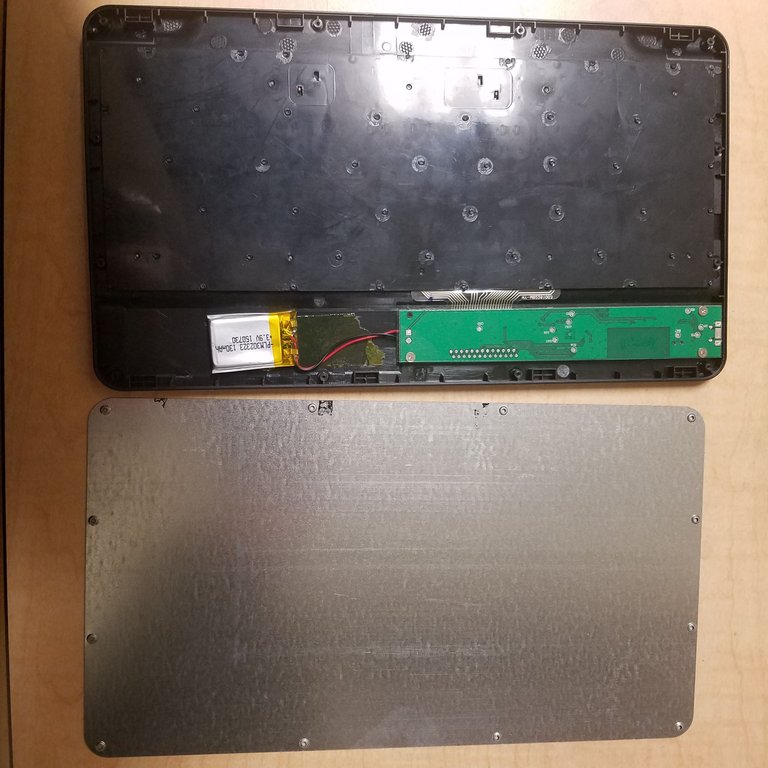
You can see that the entire back plate is made of some metal. This is actually there for a reason, since this metal is magnetizable and as such the keyboard will stick to the magnets inside the soft (pink) case. It's nice to see that the manufacturer didn't waste everyone's time by adding in pointless metal weights to make their product seem higher quality.
The silver-and-orange device on the left is a small lithium-polymer battery that powers the keyboard. This cell is really small (130 mAhr, between 10 and 20 times less than a cell phone battery), but it can be recharged via microUSB and will then power the keyboard for what is hopefully a long time.
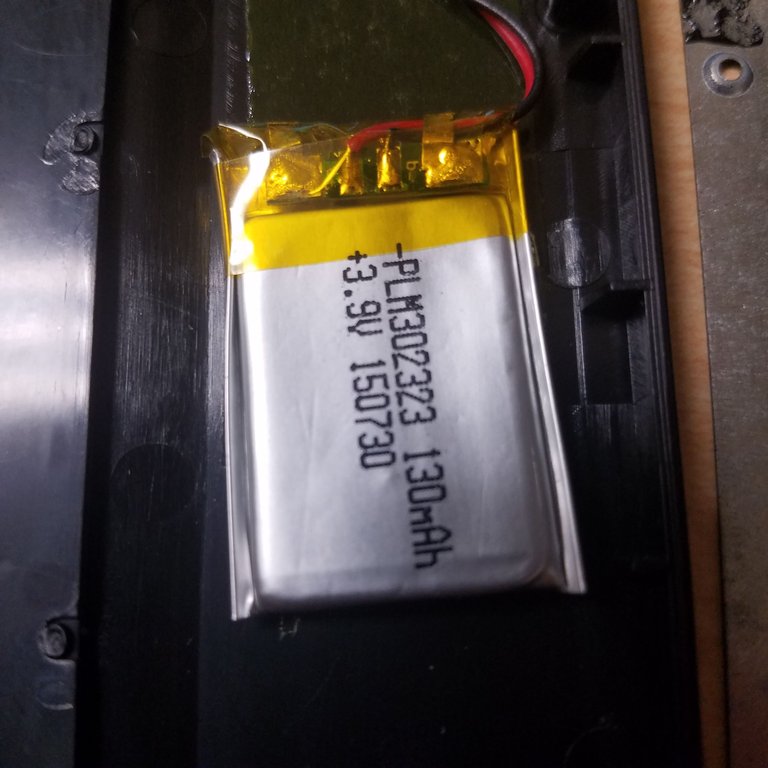
You can see the circuitry that protects the battery stuck to the top of the cell. These are pretty flammable, so they need additional circuitry to protect them from overcharging or overcurrent.
The main PCB with all of the Bluetooth parts is held down by three even smaller screws, along with a plastic clear sticker that prevents the circuit from shorting to the metal back plate. The actual keys for the keyboard lies underneath the big plastic panel. I won't be removing the keys because there isn't much interesting in there, and it would probably cause permanent damage to the keyboard.
The keyboard itself connects to the controller circuitry via a flat ribbon cable. You can remove this harmlessly by pulling open the connector and sliding the cable out. This frees the circuit board and we can see the devices on it:
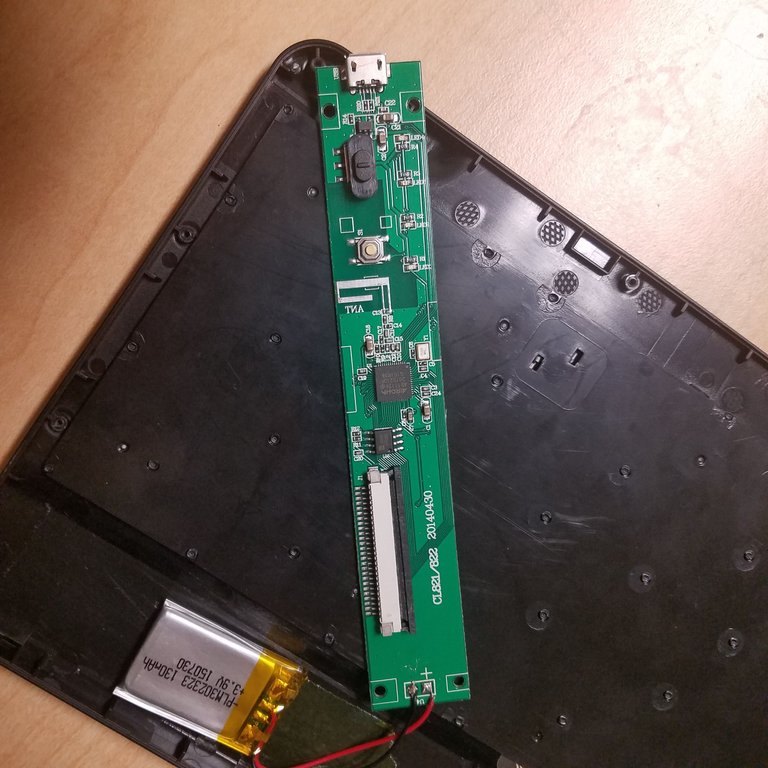
What's on the circuit?
Let's start by taking a closer look at the area near the microUSB charging port.
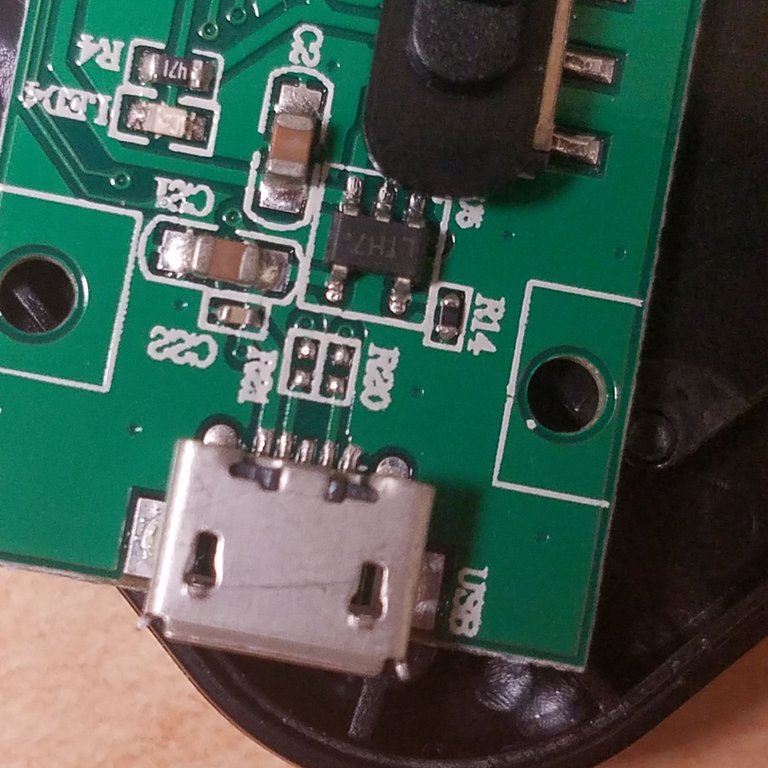
The two brown boxes are capacitors and the black rectangle is a small resistor. The white, transparent box is a red power LED, which lights up when you plug in a power source. The little black semiconductor device is a LTC4054. This device regulates current to the battery, and serves as a charge controlling chip to safely charge up the lithium cell. Without this device, the circuit couldn't charge the battery. The fact that they used a LT part rather than a cheap no-name chip indicates that this keyboard wasn't originally supposed to cost $2.
Most if not all of the circuitry that actually deals with charging the battery is on the above image. That LTC4054 seems to make it pretty simple based on the datasheet. The Bluetooth controlling devices are further up the board:
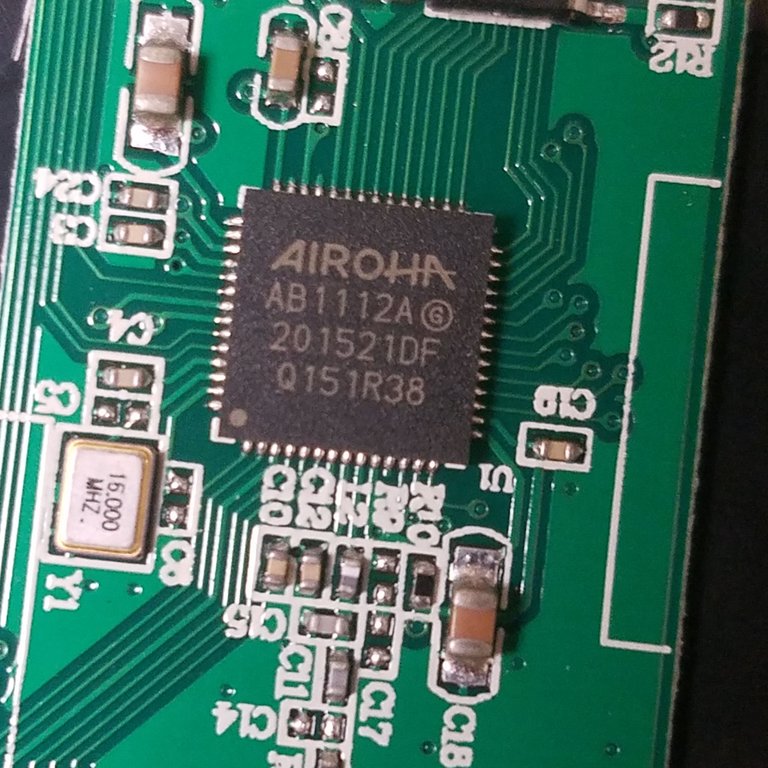
That square Airoha chip is the core of this device. It provides input processing, the actual Bluetooth 3.0 transmitter, and some voltage regulators. Almost all of the functions of the keyboard are handled by that one device. Weirdly, this chip seems to contain its own battery charging circuitry according to the product page, so I'm not sure why this keyboard has a separate dedicated charger.
On the left of the above image you can see a tiny 16 MHz crystal resonator. This crystal vibrates at a very particular frequency (~16 MHz) via the Piezoelectric Effect (vibration from electricity or vice versa), and is probably used to provide timing for the chip. Whatever it does, the Airoha device needs it to operate according to its product page.
Remember that Bluetooth is a way of transmitting data via microwaves. In this case, it uses microwaves with a frequency of 2.4 GHz (same as Wifi, microwave ovens, and cordless phones). This is a pretty high frequency, and as such it's quite difficult to generate with a simple circuit. Thankfully, the Airoha chip handles generates this signal with the supporting electronics around it. This is fed into a PCB antenna, which is a geometric shape drawn into the board which lets these microwaves radiate out into the environment, hopefully to be picked up by another Bluetooth receiver in a computer or tablet.
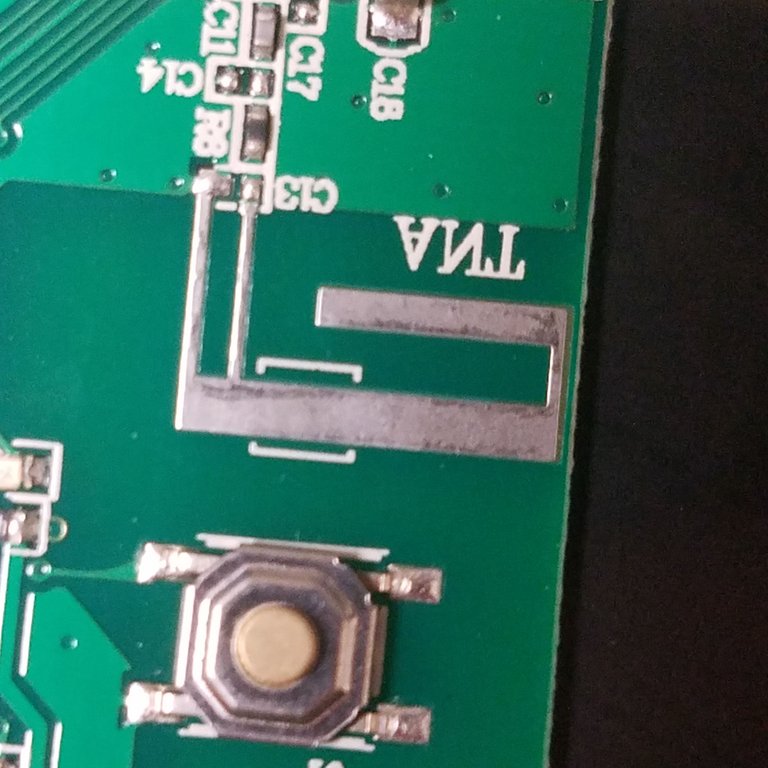
The strip labelled "TNA" is our 2.4 GHz transmitting antenna.
I also found something interesting above the Airoha chip: Programmable memory:
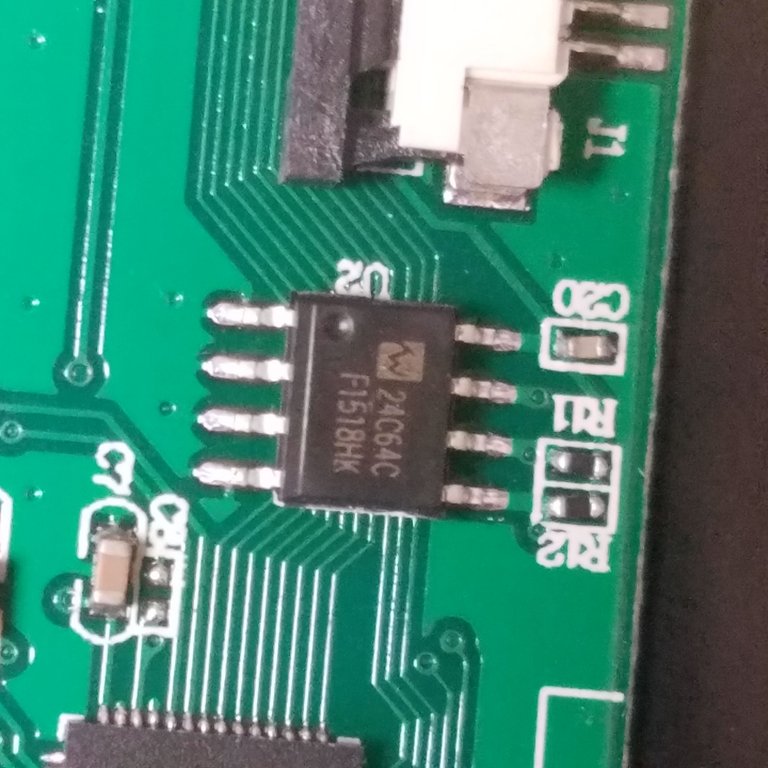
This semiconductor device, the 24C64C, is what is known as EEPROM. This is a type of memory, and allows a circuit to store data using a bunch of transistors. This particular device can store 64 kilobits of data. Unfortunately I can't say exactly how it is used (because I don't know), but the Airoha product sheet lists an EEPROM module as an essential component. I honestly didn't expect this keyboard to have a built-in memory chip.
Conclusion
That's about it for this keyboard - the remaining components are just basic surface mount stuff like resistors and indicator LEDs, along with a power switch and pairing button. Wireless Bluetooth devices are, as I hope you've seen, pretty complicated, since they not only need to generate a difficult to make high frequency microwave signal, but also to send the correct kind of data using that signal. Thankfully, ready-made integrated circuits like the main Bluetooth chip makes things easier for the designers.
I usually only teardown really cheap crap, so it was nice to have a device where all of the complex parts were actually labelled and I could look up what they do if it wasn't obvious. Overall, I'm pretty happy with this purchase, and was even able to re-assemble this keyboard with no damage whatsoever (save for a few scratches on the back).
Let me know if you have any questions, comments, or corrections.
Thanks for reading!
All images in this post are my own. You are welcome to use them with credit.
I didn't expect this keyboard to be this bare inside, but I've seen worse.
LI-PO batteries are generally safe and they won't explode if they are handled properly, sometimes battery could be faulty like in Samsung's case and then be a fire hazard.
Thank you for this teardown, it was quite interesting. Cheers!