This post is all about how I'm updating the current control of the ETS that we installed last November.
When it was installed we had the contractor do the least control they could to get going, with the plan that I would upgrade it in the winter. Well COVID happened and that sucked up all my time, so now is the time.
What is an ETS
But first, what is an ETS? I wrote a short post about ETS devices here.
The coles notes version, is that an Electric Thermal Storage unit is a device that you can convert electricity into heat and then store it to be released later. This allows us to load shift to the night when our electricity prices are lower.
What's Installed Now
We have a Dimplex VFMQ 40 installed in the studio, this heats the entire studio in the winter. In the shoulder months it will heat the main floor too allowing us to minimize the heating in the rest of the house.
The contractor installed a programable thermostat that serves as a charge controller. To ensure that we charge the heater every night, regardless of the temperature of the room at 11pm when the rates decrease, we have it set for 28C starting at 11pm, 15C during the high rate time and 18C at the mid range time. This ensures that if it is extra cold out the heat will come on in the middle of the day when the rate is at the "normal" level.
The heat is released with a dial thermostat on the side of the unit that isn't exactly accurate.
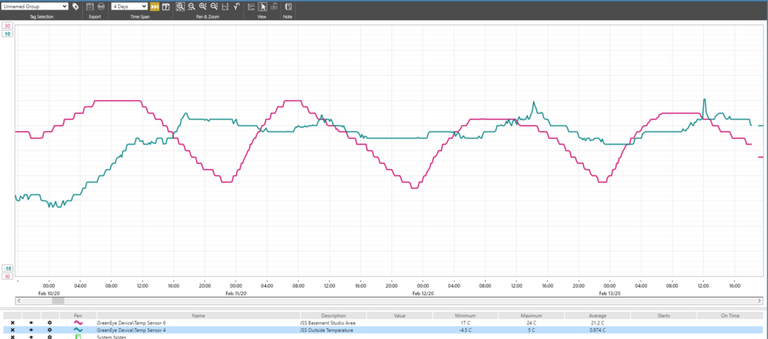
A "typical" February
Currently we heat the space to 24C during the evening and it "holds" for most of the day, and it will drop to around 19 and 20C by 6pm when I am leaving the office. This room temperature is based on the "dial" on the side of the heater. Its hard to dial in a specific, comfortable temperature.
Overlaying the power for the storage heater you can see how the current charge controller "charges" the bricks b/w 11pm and 7am.
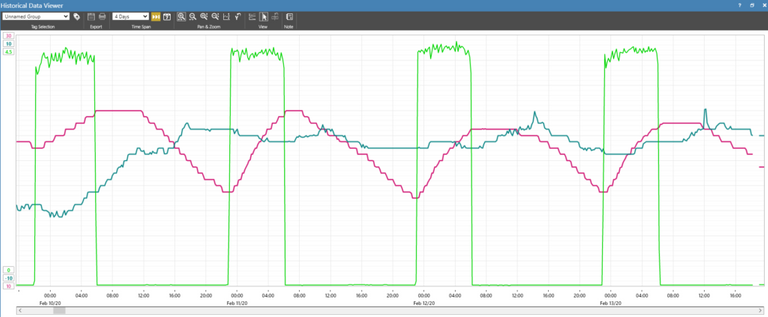
There are a few things that I should be able to dial in with the new design, including limiting the swings. Ideally I would like to keep it b/w 22C and 18C, the snapshot above is b/w 24C and 17C.
What I want to have
The goal of this little project is to control the heater more efficiently and be able to modify the schedule from the Home Energy Management System.
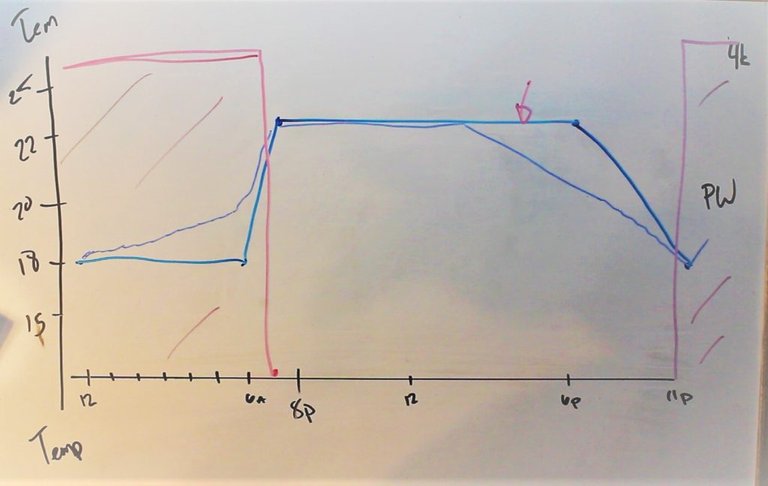
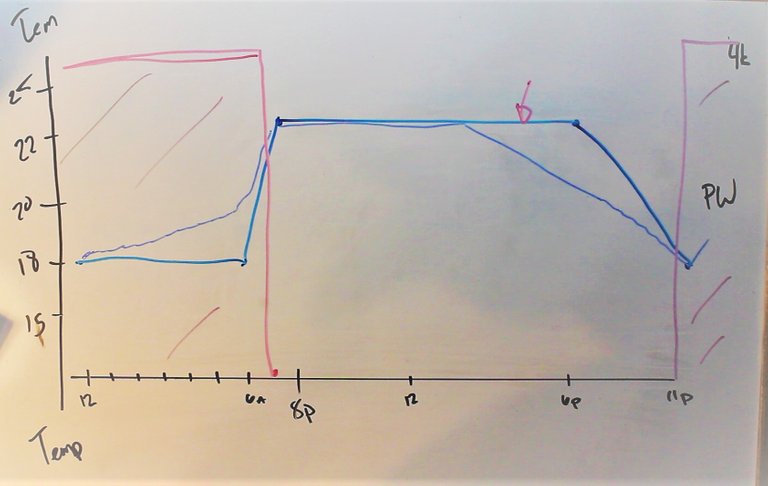
As a starting point, I want to control the room temperature at 18C overnight, starting at 6pm in the evening, and then warm up to 21C during the day. The image above is from the members only video that will accompany this post.
I don't have temperature sensors that I can plug directly into the controller, so, I'm going to re-use the programmable thermostat to control the room temperature and the controller will ONLY control the charging cycle for this version of the controller.
The goal is to limit the saw toothing and conserve as much energy as possible.
Added benefit in the shoulder season
In the shoulder season there isn't as large of a heating requirement, and as such there isn't as much of a need to "store" more heat energy than is needed.
So, if I keep track of how long the heater charges for, I will know how much energy was needed the previous day. Couple that with an understanding of the deviation from the programmed temperature, for example, if the goal temp at 5pm is 20C, and it dropped to 18C, or if at 10:50pm the temp is more than 1C from the goal temp, we can assume that the "tank is empty".
But if the previous day didn't use all the charge time AND the temperature at 10:50pm is above or at the goal temperature, then we can "just" charge the difference rather than over charge.
This is for the programming side, which I haven't finished yet. First the hardware control.
The Control Circuit Now
The control circuit looks like this :
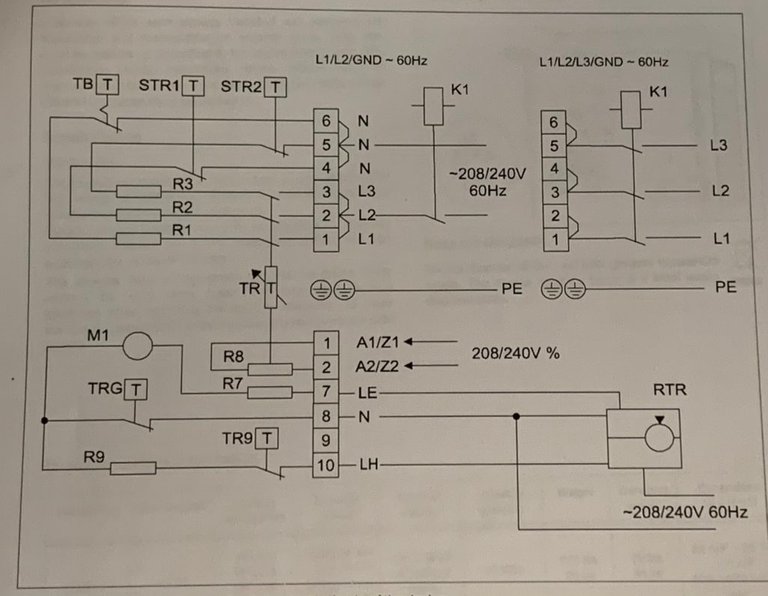
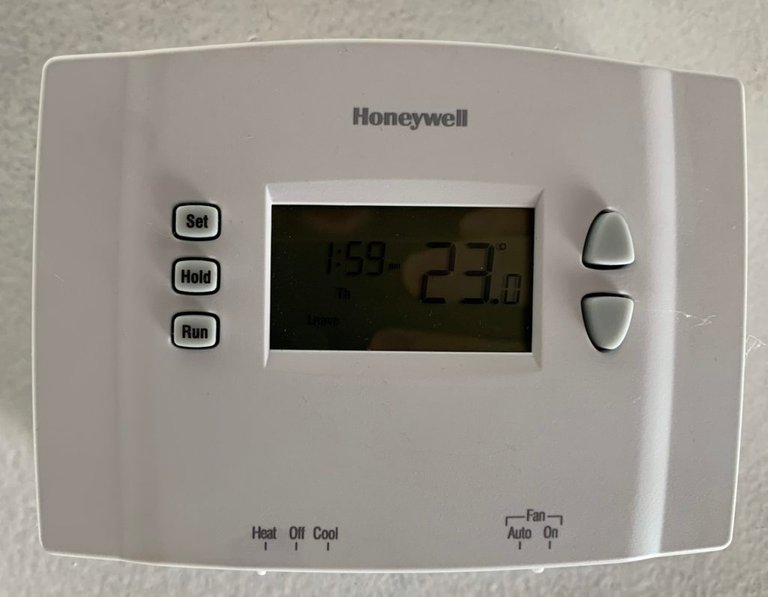
K1 is the charge controller, this is a programmable thermostat today. I will be re-using the thermostat for room temperature control, replacing the dial.
It is mounted next to the heater itself, so I will have to move it closer to the desks to have the desirable affect.
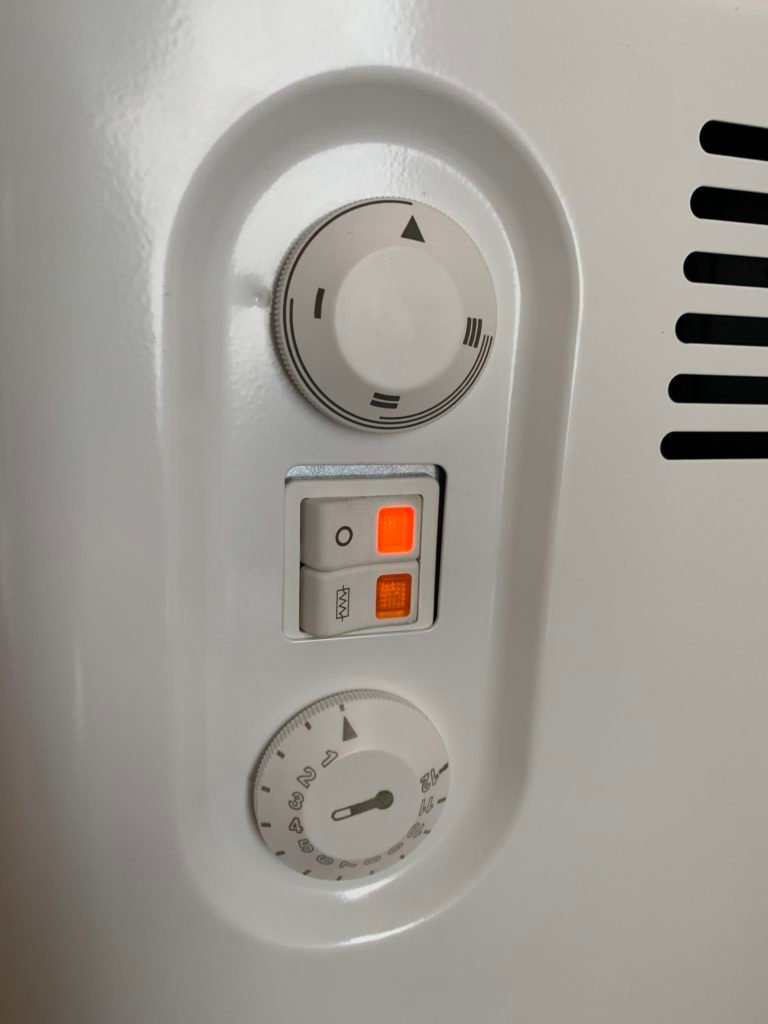
RTR is the room temperature controller. This is a dial on the heater today. This will be replaced with the thermostat when I replace the charge controller.
First Step: Hardware Design
I'm planning to use the ClickPLC as the controller for this part of the project, and will be adding everything to the VTScada application that I have monitoring the energy use at the house and studio.
The new additions to the control circuit as it stands today include:
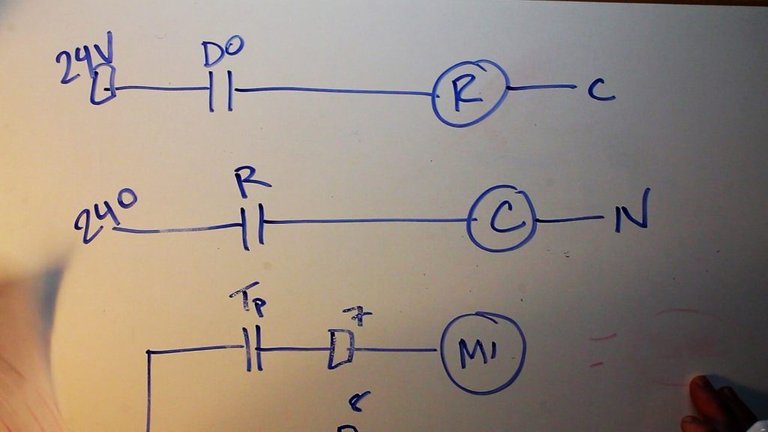
Replacing the thermostat with a relay that will be energized from an output on the PLC. I was initially hoping that the PLC would be able to drive the contactor in the heater directly, it is 24Vdc rated, but looking at the thermostat I don't think so.
The thermostat has a rating of 1A, where the PLC has a rating of 0.1A.

Click PLC output rating
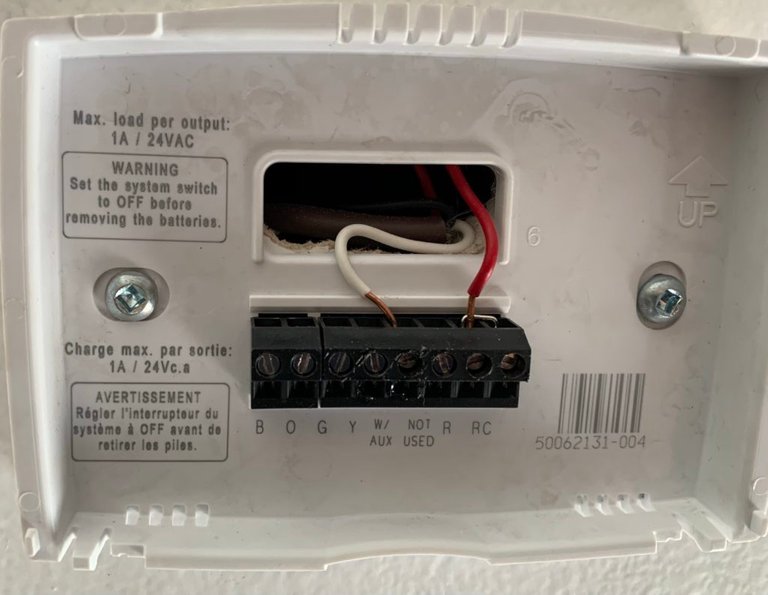
Programmable Thermostat
Oh yeah, and one is AC and the other is DC. So a relay is definitely going to be needed, but it doesn't have to be a big one like I assumed in the video.
I won't be buying the new relay until I have the software started, and that is what I will be writing about next.
Also I have finally added the CTs to the generator panel and that means I can start sizing my emergency storage solution.
The load appears too small for what I was expecting, so I will have to do some investigating before I start planning how big the battery needs to be.
Looking for your help
And on that subject, if you know a company like BigBattery (but in Canada) who puts together systems like this one, let me know. This may be just what I need for my battery generator project as part of the home microgrid.
If you know of a supplier in Canada, let me know in the comments (if you're a member) or email at [email protected]
If you like this article and want to hear more sign up for our newsletter at jmkengineering.com/newsletter
Congratulations @jmkengineering! You have completed the following achievement on the Hive blockchain and have been rewarded with new badge(s) :
You can view your badges on your board and compare yourself to others in the Ranking
If you no longer want to receive notifications, reply to this comment with the word
STOPDo not miss the last post from @hivebuzz: