
Well, I have made it to the bread making stage, I hope you have too?
Ciabatta, otherwise known as 'slipper bread', has always been a great favourite of mine.
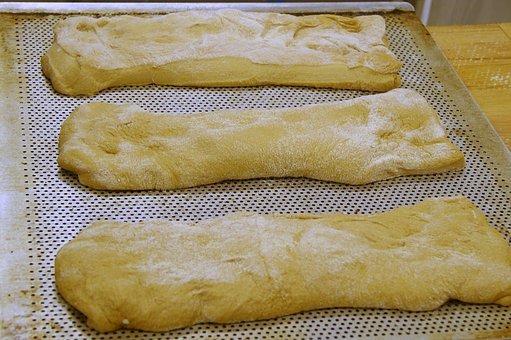
It is not the easiest bread to make but the texture is wonderful. Chewy and 'riven' with great big holes; well it is if made properly.
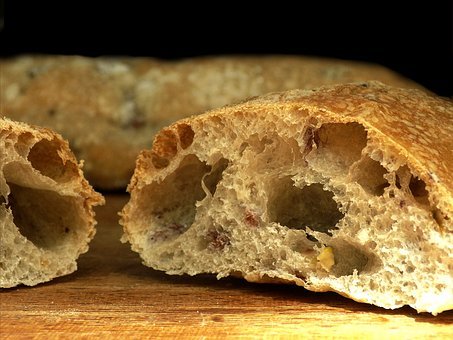
It gets its name from looking like a slipper; I wont bore you with the history now as I have too much to do in this post.
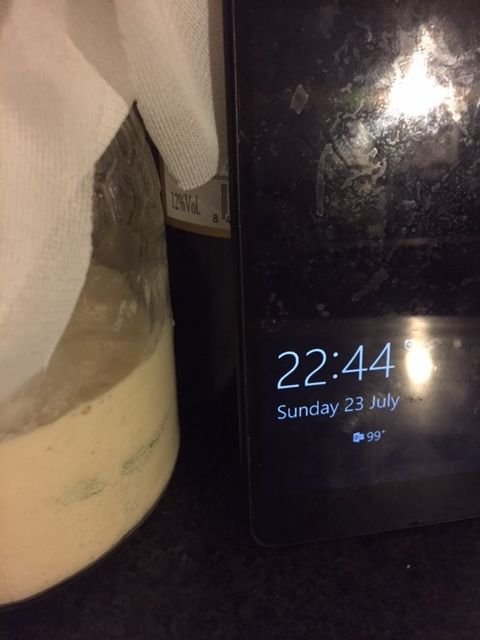
Firstly, let's review how vigorous my starter now is. When I last posted images, it was very vigorous but the aroma was incredibly intoxicating. I would not want to go out with that starter in my car, if stopped, I would definitely be thought of as a heavy drinker!
In four hours it had gone from this:
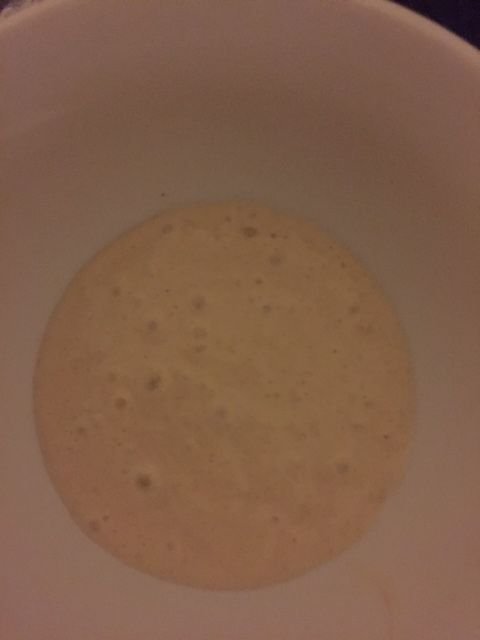
To this:
This was with the thickened refresh so the starter is very active indeed.
I have now twice carried out the 'improving regime:
Take out 2 tablespoons of the starter, into a small bowl. Discard the rest.
Add 2 heaped tablespoons of fresh flour.
A little extra water.
Mix to a very thick batter - the yeast must have plenty of food and some structure to push up against.....well the carbon dioxide given off by the yeast, ie the bubbles you see. ( I wont bore you with the science behind it at the moment. I will leave that for another time).
Put the starter back in its jar and cover as usual; mark the fill line.
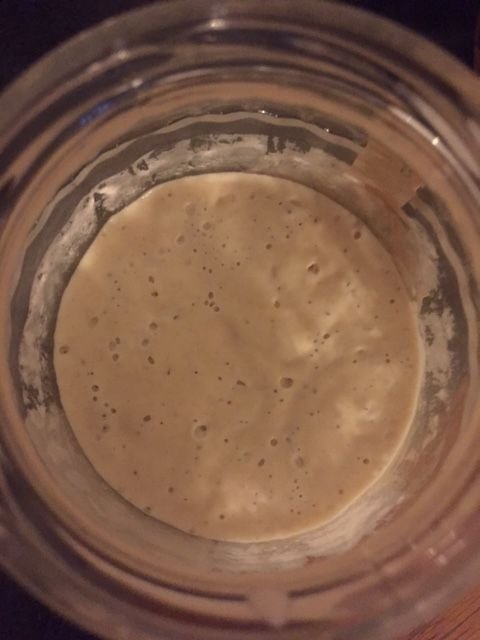
This 'birds eye' view of the 'spent' starter, shows how much better the colour is and there is no separation. The aroma is the best part, it smells just like newly baked bread, delicious. The starter is ready to go and I can now use it to make bread.
I will give you the Recipe here so that you have some idea of the process . I must warn you though, that ciabatta is not the easiest bread to handle as the dough is very wet and sticky. Just be aware of this, I do have a trick which will improve the handling but more of that later.
Ciabatta Bread Recipe
Ingredients Required:
Part 1 (The biga)
125g flour
125g water
40g starter
Method:
- Put everything into a bowl.
- Mix this together until everything is combined.
- Cover the bowl with cling wrap.
- Leave for 12 hours.
(Ciabatta requires this 'biga' as it is known in Italy, to develop the flavour of the bread. Normally, a tiny bit of yeast would be used instead of the starter so this step was necessary to develop flavour. We have the flavour but do require a strong starter to aid lift later; this step will enhance this).
Part 2
Ingredients Required:
160g water
290g biga (All of the Biga adds up to 290g so don't worry about not having enough).
125g sourdough starter (As well as the Biga above. I will refresh my starter again 2hours before I need it, so that my starter is vigorous).
300g flour
1 tablespoon olive oil (plus extra for oiling bowls, etc)
15g salt (This is really important! Do not add the salt until the whole dough has been mixed together and allowed to rest for one hour. Salt will inhibit the action of yeast, so you have to give the yeast time to begin working and get strong).
Method: (By Hand)
- Put all of the ingredients into your bowl (except the salt) and mix well.
- When combined thoroughly, transfer to a second bowl which has been really well covered with olive oil. Scrape out as much as you can so that none is wasted. The oil will help you work the dough in the bowl.
- This is a very wet dough and will stick to your hands. In fact, it is more like a batter! Do not add any extra flour as it is meant to be this way. Rub olive oil on your hands and it will stop the dough from sticking to them. Have a small dish handy with extra oil in for re-oiling your hands as necessary.
- Pull the outer edge to the middle and press down, turn the bowl a little. Repeat, outer to centre, press down, turn the bowl, repeat this action 30 times in total.
- Cover the bowl with cling wrap and leave for one hour.
- Sprinkle the salt over the dough and start the outer edge to centre action again for 30 times. The salt will mix in while you carry out this procedure. Rest again covered for one hour.
- For the third and last time repeat the action 30 times. By now the dough will be feeling like a dough and have elasticity.
Method: (using Stand Mixer and Dough Hook)
- Put everything bar the salt into the mixer's bowl.
- With the dough hook, mix on medium speed until the dough comes away from the sides of the bowl, and is elastic.
- Put the dough into a well oiled bowl, cover with cling wrap and leave for an hour.
- Put the dough back in the mixer's bowl, sprinkle over the salt and mix again for a further 5 minutes on medium speed.
Next Method: (for both hand/mixer)
- Spread a generous amount of olive oil on a tray. The tray must be large enough to take the dough spread out to a depth of 1/2" (1 cm).
- Put the dough into the tray and press it out to the required thickness. Make sure the dough is reasonably even and pressed out into the corners.
- Cover with cling wrap and leave until the dough has doubled in size.
- Upturn the try onto your well oiled work surface, releasing the sheet of dough, carefully. (You do not want to loose all of your precious air holes).
- Carefully cut through the dough into rectangles. (I use a well oiled metal scraper in a downward stamping action, but a large knife will do just as well. Do not try sawing through the dough it will not work).
- Gently lift each rectangle and place on a baking sheet.
- Leave to rest for a further half hour.
- Pre heat your oven to its highest setting. Place a baking sheet on the wrack upside down so that the bottom of the tray is uppermost. (This will help boost the heat to the bottom of the bread and crisp it nicely. If you have a baking stone, all the better, put that in to get hot).
- Just before you put your Ciabatta in the oven, place a tray of hot water on the oven bottom, the steam will help give the bread a crispy outer.
- When you put the Ciabatta in the oven turn it down to 425F (220C/ Gas Mark 7).
- It should take 20 minutes for the bread to cook. The bread will sound hollow when tapped underneath.
- When ready remove from the trays to a wire wrack to cool.
This procedure might sound complicated but it really isn't. Once you have made them you will be much more confident next time. The ideal is to have a stand mixer, not everyone has. That is why I have gone into considerable detail with the hand method.
The dough has to be so soft to enable the air pockets to develop. The drier the dough the less pronounced the air pockets will be. Surely that is the charm of ciabatta? Do not add extra flour to make life easier, just get used to using olive oil which will add considerably to the taste and texture of the bread.
Put olives in it next time you make Ciabatta......delicious!
My next post will have images of my making the Ciabatta - wont that be fun.....not! I will also put the Granita Recipe on that post. It should have been here but I am conscious of the length of this post.
Now....
More Interesting Posts:
Click on the blue highlighted name to be taken straight to the Post.
@daza1994 . How appropriate - bread budin recipe! Looks really good.
@koturinn has some wonderful apple and cinnamon blondies to share with us all. They look great.
@simplerecipies gives us chicken shawerma wraps. I love wraps, just like crepes, so versatile.
and finally...
@cake-lady-jenn gives more information about using courgettes in a cake. Very useful.
Please take part in my Community Project. Place a link to your post in the comments box below if you would like your recipe to be included.
In the meantime keep 'Posting' interesting content, as all I want to do is:

and:

as well as:

As often as I can!



Thanks for posting such a detailed recipe, I might try it out when I get back home!!
Please do but be warned...have that oil ready, very, very sticky. LOL. :)X
Oh I shall! Thank you for the tips, I'm usually pretty good about following new recipes I try and try to not improvise much to not create something horrible haha
You can't improvise with this one if you want Ciabatta. You can add a little more flour and turn it into Focaccia though. :)X
Good to know! I've never made either haha. To be honest I don't think I've made anything bread like other than pizza.
Bread is easy it just takes a little time. Start with something simpler to handle than Ciabatta. I will post on simpler bread after the Ciabatta. :)X
Wow..I never knew it was that tedious to yield a good ciabatta! Can't imagine what those Italian chefs went through daily without a stand mixer!! hehe
Did you get the big gaping holes in your bread? I'm guessing you did!! :))
Yes I did get holes in England but will have to wait and see here. Too late posting last night and tired so didn't start the bread. Need 12 hours for the biga to develop so will begin tonight and bake tomorrow. It is not really that hard just sticky, very very sticky! Plus don't know where I have put my dough hook so I might have to do it by hand! Ugh. :)X
sticky dough is one of my biggest nightmares argggh..did you find your dough hook in the end?
No, did it by hand with some olive oil on my fingers to stop the dough sticking. Not that bad though I put too much salt in the recipe by not being careful with typing up my recipe - 10 g of salt, not 15g....I am a clux! :)X
hehe I saw your latest post..don't worry, typos happen :) at least the bread turned out looking great still! :)
I need to get some starter!
No you don't Doll. Use Dried yeast instead. Scant 1/4 tsp of yeast in the biga and 1 tsp of dried yeast in the main dough when you add your biga and other ingredients to it; this instead of the starter. Works just as well. In fact, the Italians usually do this bread with yeast. I made a starter so I am using that. Good bread making. :)X
Thank you for the awesome tip! Very much appreciated!
You are very welcome. Just made the Ciabatta. Tastes wonderful but is not really Ciabatta. Would have made better focaccia! Bit too much olive oil added. Will post tomorrow. :)X
Sounds delightful either way haha enjoy and looking forward to your post! Following you :)
Wont it just. I have a rubbish oven in my rented cortijo and I have to take images of the process. The one saving grace is I have a stand mixer...yeh! Thank you for your interest. :)X