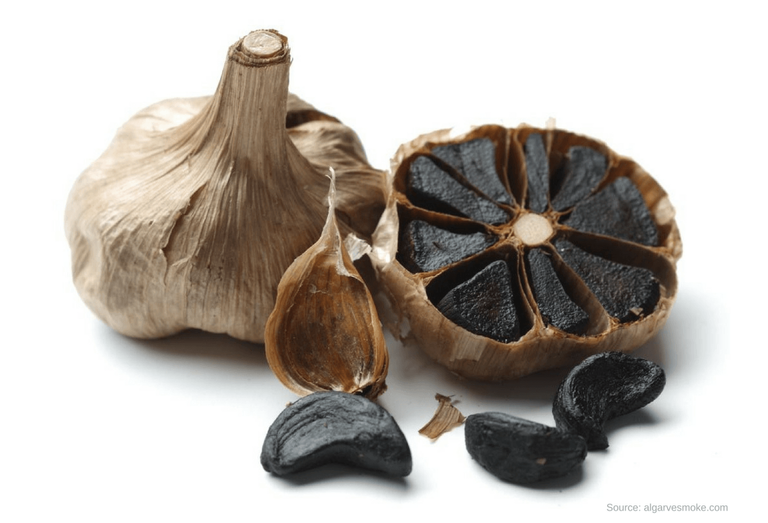
In the past, if you had asked someone if they had heard of Black Garlic, they would have thought you were talking about some emo band or so. However, in the past couple years, it has become an ingredient, which rivals some of the most exotic and exclusive ingredients that chefs around the world have begun experimenting with.
At the same time, the “superfood” status that black garlic enjoys is only helping its popularity and curiosity. Several studies have shown the health benefits of black garlic far exceed the benefits of already healthy and nutritious garlic, the regular.
So, how does one make black garlic? Making your own black garlic is super easy and very cheap. Although it is a time-consuming process, but if you’re patient – slow food alert! – then you’ll be rewarded with this black gold with very little effort.
So here’s how you make black garlic —
INGREDIENTS
- 6-10 whole, regular garlic bulbs
DIRECTIONS
- Inspect your whole garlic bulbs for rotten spots, germinating sprouts or dents. Make sure only the most intact and fresh garlic are chosen for this job. The reason for this is that once the garlic undergoes the aging process, all its properties are amplified. So rotten tastes more rotten and delicious tastes more delicious. You get the point.
- Wash your garlic of any soil debris or excess skin. Wipe them dry and store them in a dry place for a few hours until completely dried.
- In a clean rice cooker, put the base plate that comes with the cooker to make sure the garlic isn’t in direct contact with the coil. If you do not have a base plate, you can put a sushi mat or a silicon mat. Do not skip this step otherwise, the rice cooker will cook and burn the garlic.
- Now place the garlic one-by-one in the rice cooker. It does not matter if you layer the garlic on top of each other.
- Once ready, place the lid and turn the “keep warm” button on the rice cooker on. If your rice cooker does not come with the keep warm function, then adjust the temperature to 140 degrees Fahrenheit or 60 degrees celsius.
- You are done with the work! Now the real test of patience begins. Leave the rice cooker in an undisturbed place for 25 to 30 days. It is important that you do not disconnect or remove the lid of the rice cooker during this entire time. Helpful Hint: Overall this process should not cost you more than $3.00-4.00 in electricity, total.
- TIP: It is advisable to place your rice cooker in a garage or somewhere outside your main living area as after the few days the smell of garlic can be overwhelming. A well-ventilated room is best.
- After 25 days, gently remove one garlic bulb from the cooker and inspect it carefully. Using a knife or your fingers, peel a clove and you should see the color change from white to dark black (or dark brown).
- If the garlic doesn’t seem black enough, put it back in the cooker and leave it for another 5 days.
As simple as that! At the end of this process, you should have delicious, black garlic to use in your recipes to your heart’s desire.
How to Store Black Garlic: Black garlic after the aging process has a very long shelf life. You can (optional) separate the individual cloves from the bulbs with their skin intact in a plastic bag or Tupperware for months. You can even store it in the freezer for a year at least without any spoilage.
Enjoy! Tried black garlic? Loved it? Hated it? Let me know in comments.
This is a really cool tip for making black garlic. Great post!
Thanks! Glad you enjoyed it :)
Well written