Making Prototypes
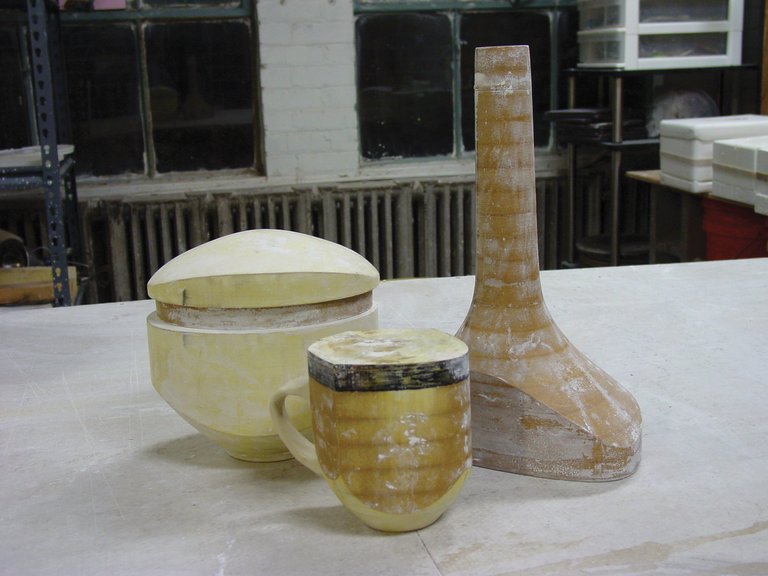
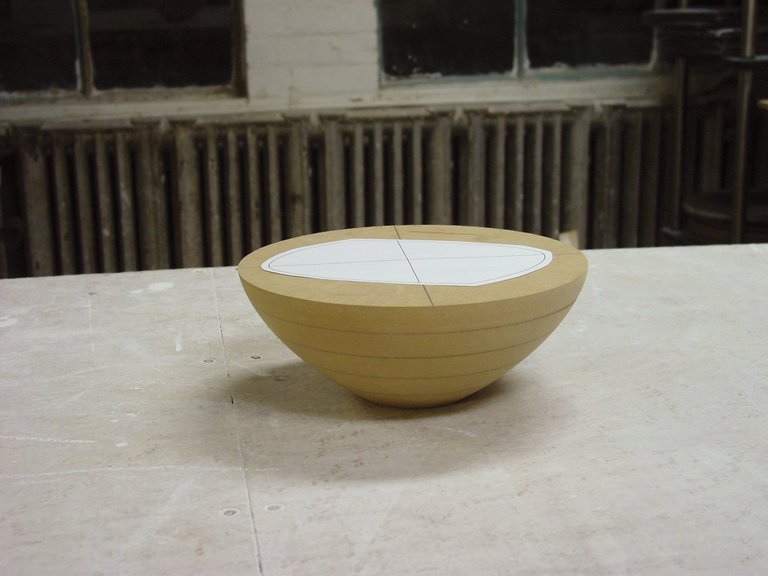
Each new piece begins with a prototype, generally made of wood or MDF, from which I create a plaster mold. The prototypes can be made from clay, but I prefer using wood for its durability. I’m not the savviest mold maker, so if at some point I have an accident during the mold-making process, the prototype is safe and intact. I’ve also found that making prototypes from wood is great for achieving sharp, transitional lines and edges (figure 1). Once I’ve settled on a design, I produce two scale drawings—one illustrating the side view or profile, which includes the number of stacked pieces of MDF I will need to make the model, and one illustrating the top view. Using the first drawing as a blueprint, disks of MDF are cut, glued together, stacked, and turned on a lathe to make a solid round form whose shape is close to the side profile of the finished piece (figure 2). Tip: You can use a Surform tool to shape the MDF if you do not have a lathe. The second drawing works as a cutting template that is glued to the top of the form (see figure 2).
Using a band saw, I cut into the shape of the form, carefully following the outside edges of the glued-on template. The sides of the form are then sanded smooth to erase any irregularities from sawing. Finally, the prototype is sealed with one coat of Minwax Sanding Sealer and two coats of polyurethane.
The casting slip I use has a 16% shrinkage rate so the prototype must be made appropriately larger to accommodate the final size of the pot (see the reverse shrinkage equation for help with the math). Always test the shrinkage rate of your casting slip before making the prototype.
Making the Mold
When making molds, it’s important to remember that casting, like any other building method, is strictly a means to a desired end. It doesn’t have to be an overly technical venture and, depending on the form, can be quite easy. I’ve learned to make molds simply by reading books on the subject, and by asking for help from others.
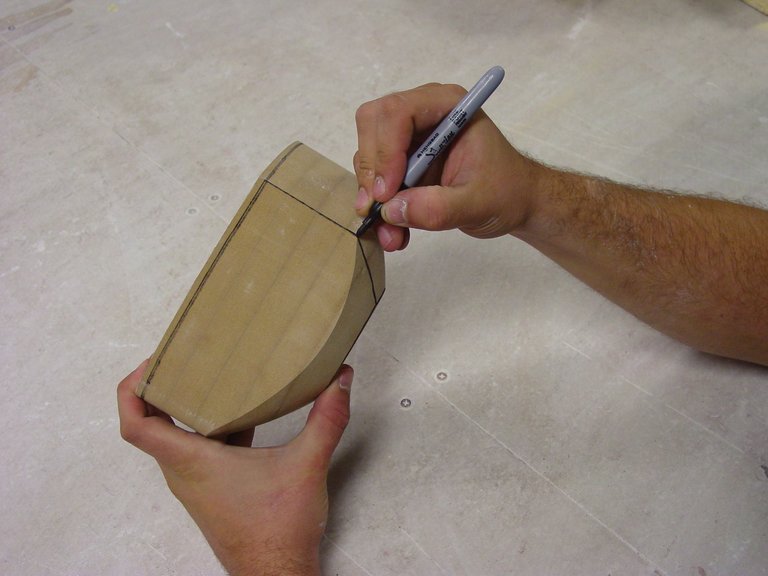
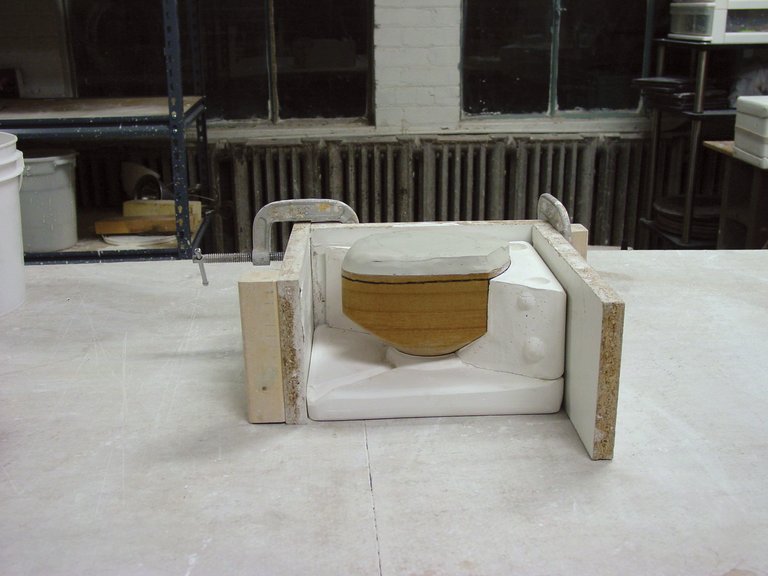
The biggest trick to making molds is figuring out the number of parts to cast. Most of my molds are made with four parts—a bottom, two sides, and a top piece used as a pouring gate or slip reservoir. Before I make a mold, I take my prototype and draw seam lines on it with a black marker so that I know how many parts I will need for the mold (figure 3). Then I add a clay slab to the top of the prototype for a pouring gate (see figure 4). By making my pouring gate just a little taller than need be, I can control the quality of the rim after the piece has been cast.
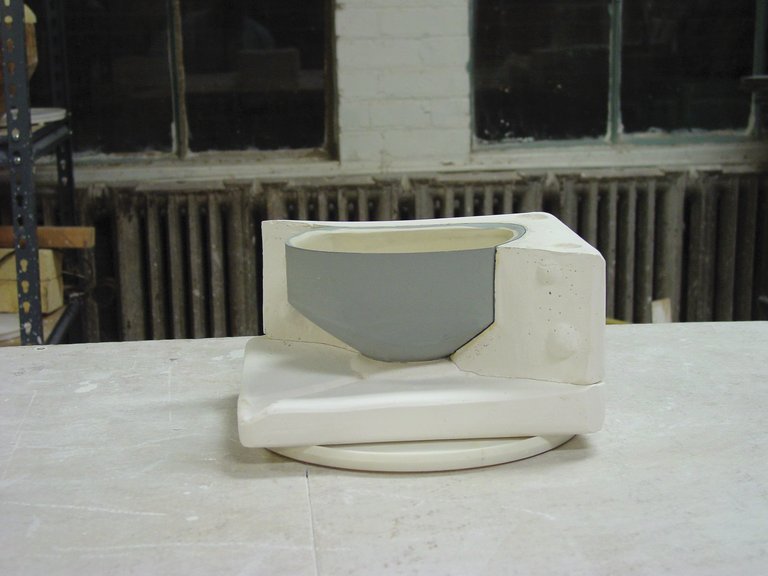
Next, I embed the form into a block of clay up to the seam lines marking off the first section of the mold, set up cottle boards, seal the seams between the blocking clay and the cottles, and pour the plaster. Parts of the blocking clay are removed as I’m ready to cast successive sections. The image shows the mold halfway through the casting process, with the bottom and first side cast, and the second side and slip reservoir or pouring gate still to be cast (figure 4). Note that the location of the seams has been planned so that they correspond to edges or places where planes and curves shift, rather than flat faces of the form. This makes them easier to clean up, and makes them less noticeable in the finished form.
Mixing the Casting Slip
Most of my pots are cast using two different slips—a colored casting slip for the exterior of the piece, and a white casting slip for the interior. Both are made from the same base recipe. The colored casting slips are tinted using Mason stains. Using only colored slip would be more expensive, and, lining the colored slip with a white slip allows me to get different color effects on the interior and exterior of a form using only one glaze.
The colored slip is essentially a decorative coating, much like an engobe applied to a thrown or handbuilt form, but in this case, the coating is laid down first.
To make the colored slip, ball mill 100 grams of stain per gallon of white casting slip and let them mix for two hours (14 lbs. of casting slip is roughly equivalent to one gallon). Ball milling gives a more consistent color saturation than blunging and the stain mixes in with the wet slip more easily. If you do not have a ball mill, use a kitchen blender and mix in small batches before combining.
Test shrinkage rates when using more than one slip in the same cast, even if they are made from the same base recipes. If the different slips have different rates of shrinkage, they will crack.
Casting the Pieces
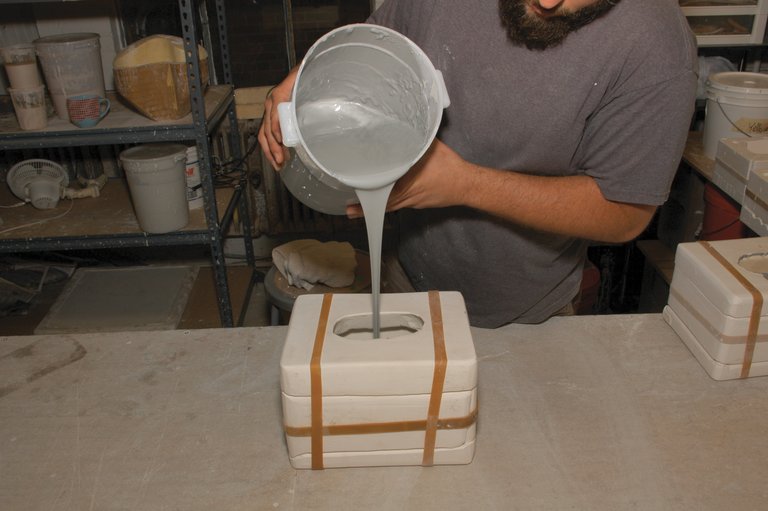
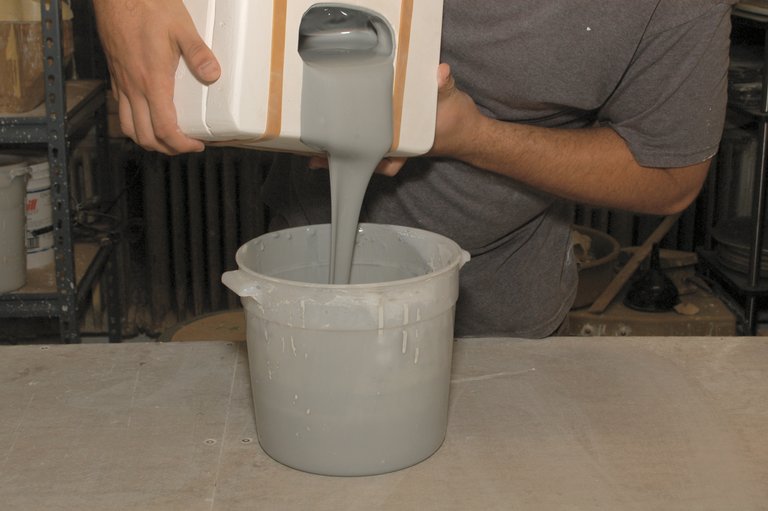
Wet the mold with a sponge. Pour the colored casting slip into the mold and let it set up for approximately ten minutes (figure 5). Then pour the colored slip out of the mold and let it drain (figure 6). Once the slip has stopped dripping from the mold, immediately pour in the white casting slip. Leave the white slip in the mold for about 30 minutes before draining. The longer you leave the slip in the mold the thicker the piece will be. I prefer to make my pots just a little on the thicker side.
Finishing the Cast
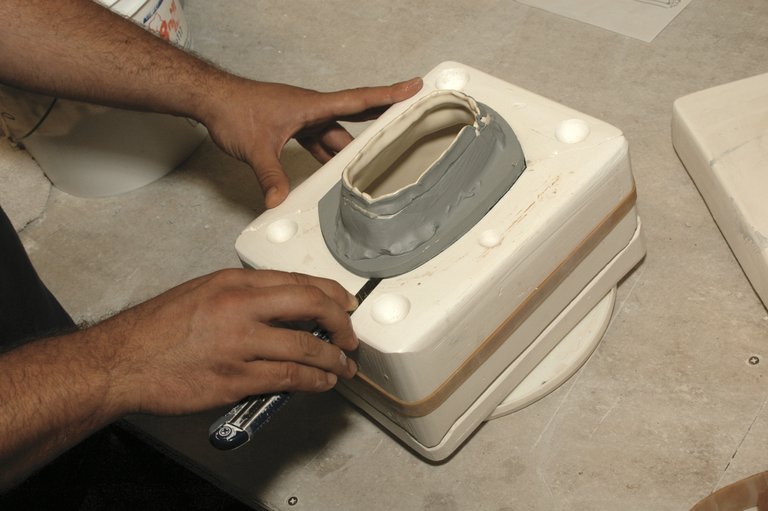
Remove the top piece of the mold (here the pouring gate section is removed first) when the slip is no longer glossy or tacky. Using an X-Acto knife, cut away the excess clay. Hold the blade flush with the top of the mold as a guide, After piercing the form in one spot, angle the blade in the same direction of your cut so that you’re always cutting the interior wall first, then moving through to the exterior. By doing so, you press the form back into the mold walls as you cut, and avoid warping the form by pulling the walls away from the mold (figure 7).
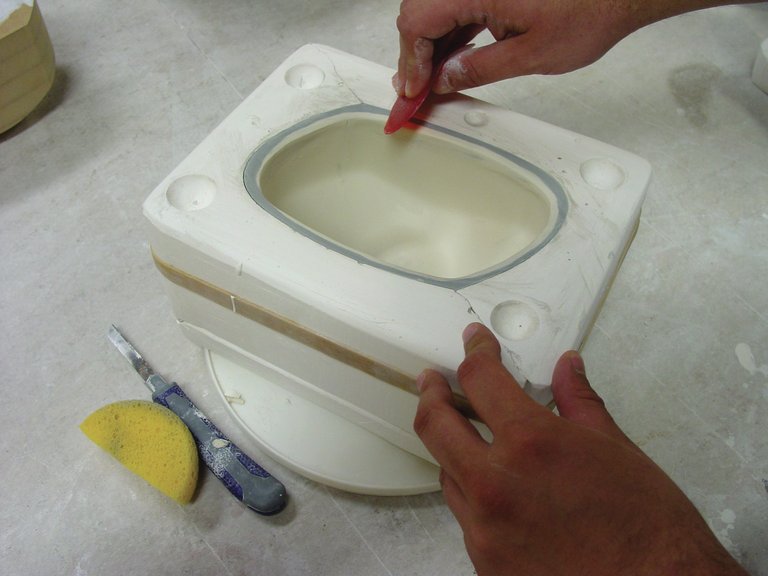
Smooth the rim with a damp sponge and a soft, flexible rib (figure 8). Let the piece dry sufficiently before removing it from the mold (figure 9). Once the piece is bone-dry, remove any seam lines with an X-Acto blade, fettling knife, or metal rib. Smooth away any inconsistencies using drywall sanding mesh and a sponge. Caution: Always wear a respirator when sanding pots.
Glazing and Firing
I leave patterned areas on the outside of my vessels unglazed to expose the colored clay underneath. Stickers and masking tape work great as a glaze resist and give a far crisper and better line quality than anything I can achieve using wax and a brush.
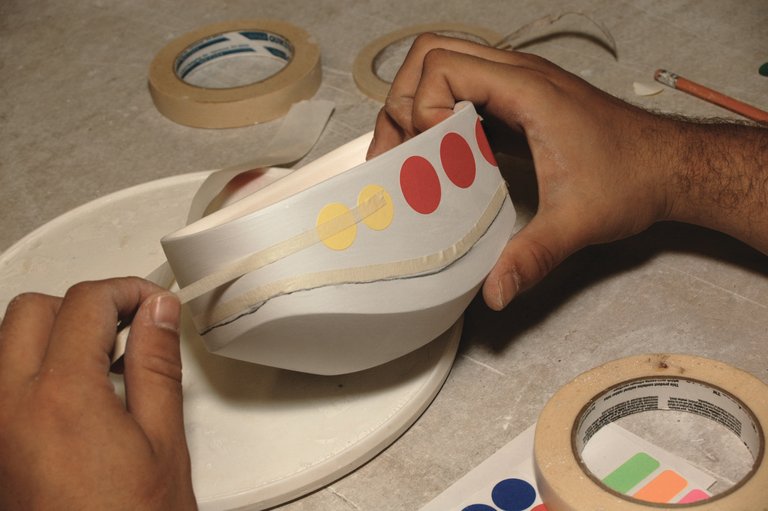
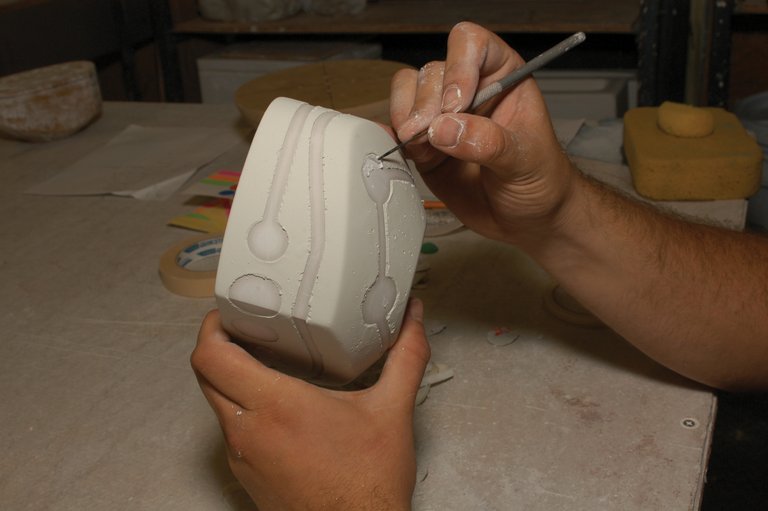
Clean the bisqued ware with a damp sponge. Using a pencil, outline the areas you want to leave bare. Follow the lines with masking tape (I use quarter-inch masking tape because it is more flexible than the wider tapes). For curved lines, focus on laying down just the outer edge of the tape rather than trying to lay down the whole width of the tape all at once (figure 10). With the resist pattern complete, dip or spray to apply the glaze. Peel away the tape and stickers as soon as the glaze is dry enough to handle (figure 11). Make sure to peel away the stickers entirely. Any remaining residue will leave a noticeable blemish even after firing.
One upside to using different colored casting slips is that the glazes you use will have a different color quality on glazed and unglazed areas, depending on the color of the clay underneath, and the translucency of the glaze.
Laser Printer Decals
I make my own decals using a laser printer. I generate the images on a computer and then simply print onto water slide decal paper. HP laser printers work well and some types of copiers also make these decals. I use decal paper from www.papilio.com. You can also make handmade drawings to scale or use found images and then scan them into a computer or have them photocopied, just as long as they are printed on water slide decal paper. (For more information, you can also refer to the article on laser transfer decals by Frank Gayados on p. 7 in the Sept/Oct 2006 issue of PMI, or the July 23, 2008 Ceramic Arts Daily feature “The Details on Decal Paper for Ceramics” by Paul Andrew Wandless.)
The iron oxide contained in the toner of laser printers is what makes this method work as a ceramic process. (This method will not work with ink jet printers!)
Laser printer decals work just like traditional water slide decals but with a few exceptions. For starters, the only color they fire to is a sepia or red ochre. Depending on what color clay or glaze you fire them on and depending on the opacity/transparency you select to print them, a broad range in tonality can be achieved. Secondly, these decals have no flux in them so they must be fired hotter than cone 018 (which is generally suitable for lusters, china paints, enamels, and overglazes) so that they melt to the glaze. I have found that cone 04–2 works best for high-fired ware.
For most glazed surfaces, you must fire the decals to at least cone 04. However, if your glazes are cone 04 the decals will dissolve away, so testing at a lower temperature is in order. For all of my cone 10 clay and glazes, I do a second decal firing to cone 2. At cone 2, the decals will fuse to both the glazed and unglazed areas. Any lower, the decals will melt only to the glazed surfaces.
Applying the Decals
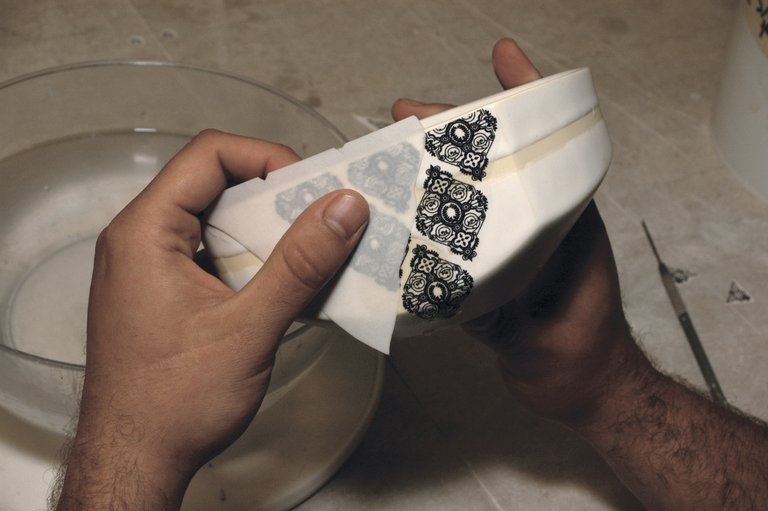
After the glaze firing, sand any exposed areas of bare clay with 400-grit sandpaper for a smooth finish. Cut out the decal you wish to use. Don’t worry about cutting away negative spaces, any excess material will burn away and this will make for easier application. Place the decal in room temperature water and wait for it to become fully saturated. Hold the decal onto the piece, ink side down, and slide away the paper (figure 12). The decals will still work if you don’t place them ink side down, but the image may not be as clear.
With the decal placed on the ware, use a sponge or rubber rib to remove any excess water and to remove any air bubbles that might be trapped under the decal. Trapped air pockets may cause the image to bubble or become distorted. Be careful not to work the decals too hard; they are thin plastic and can tear easily. Make sure there is adequate lubrication when smoothing away air pockets. For large decals, or for decals that need to curve, use a hair dryer to lightly heat the decal to make it more pliable. Always let decals dry overnight before firing.
Hi! I am a robot. I just upvoted you! I found similar content that readers might be interested in:
https://ceramicartsnetwork.org/freebies/free-guides/ceramic-mold-making-techniques/
I upvoted your post.
Mabuhay, keep steeming.
@Filipino
Posted using https://Steeming.com condenser site.