Who doesn’t want to grow their own herbs and some greens?!

To have some fresh basil for you pasta sauce, or some peppermint and lemongrass for your herbal teas.
Although very easy to do, not many of us actually try to...there are many reasons for that, the lack of land or time, knowledge or the dedication required for conventional gardening...hydroponics can solve most of those issues, by automating the watering process, by allowing you to follow soft of a “recipe” and take out most of the guessing.
With automated feeding and watering it can even offer you extended periods of time away from your garden by implementing water reservoirs and pumps.
But as much as investing in an advance hydroponic growing setup might be a great idea for some, but for those that still do not fully understand hydroponic gardening and whether it fits their character and way of life, investing in some high end equipment might a big turn off.
So in this Tutorial I want to try to show you a way how you can also start growing your herbs at home (perhaps even right on your kitchen top) quickly and inexpensively.

Before we dive in, allow me to give a brief explanation of what is “hydroponics”.
So it is basically a method of cultivation, where the whole idea is feeding the plants using water enriched with nutrition solution, instead with conventional soil.
In fact, the water that we mix with highly soluble hydroponic nutritions, combined with specific conditions such as acidity and temperature, give the plants all the minerals and micro elements they need, and are a wonderful source for faster and healthier growth.
The specific hydroponic method I’ll be showing here is called DWC, it is very easy to build and quite practical in use.
DWC - Deep Water Culture.
In this method, the plants sit in a net cup with an inert growing medium which function is only to balance and stabilize the plant in the net cup, while the roots of the plant grow deep into the water, enriched with oxygen and fertilizer.
The nutritious solution provided is an ideal environment for plants that enjoy a rapid and healthy growth.
For example, plants in the DWC system are most sensitive to temperature changes because their roots are constantly sitting in the water (as opposed to other methods) so maintaining a proper water temperature is something you need to pay some attention to.
Another risk is a power failure that might cause the air pump to stop supplying oxygen to the roots.
You will be fine for a few hours, but after a while you plats fill start “suffocaing” and slowly wilt.
A possible solution for that is to empty the water in the tank to the bottom third to provide the roots with enough oxygen to survive until the power comes back on.
Some steps for regular maintenance of the system:
Checking water PH twice a week and balance it as needed
Fill the water every time it reaches the bottom third of your reservoir and adding the fertilizer accordingly
Regular monitoring of the water temperature
Cleaning after every growing cycle
So lets dive in
All the parts you going to need
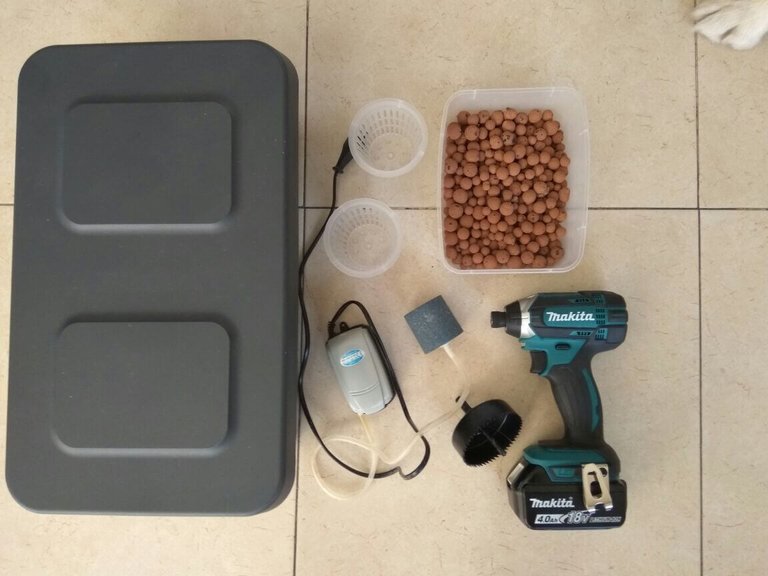
A Box with a lid (preferably white color if it is intended for growing outdoors)
2 3” net cups (You can use plastic drinking cups instead, just make sure to do enough holes to allow the roots to grow through them.)
A little growing substrate like expanded clay or rocks
An air pump attached to an air stone.
A drill with a 3-inch and ½ inch drilling cups
Utility Knife
2 young seedlings
Now the "hard work" Begins
1) Drill Two 3-inch holes in the lid of the box
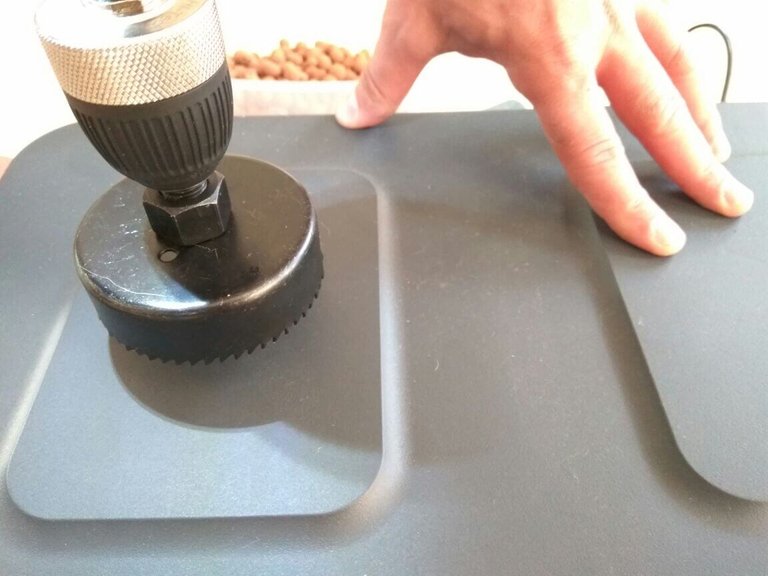
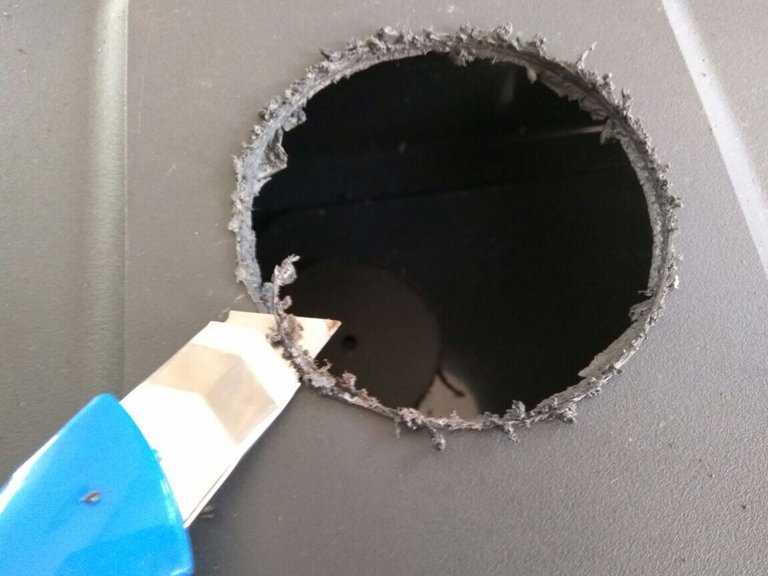
2)Remove the rough plastic around the cutting area with a utility knife to avoid spacing between the net cup and the reservoir.
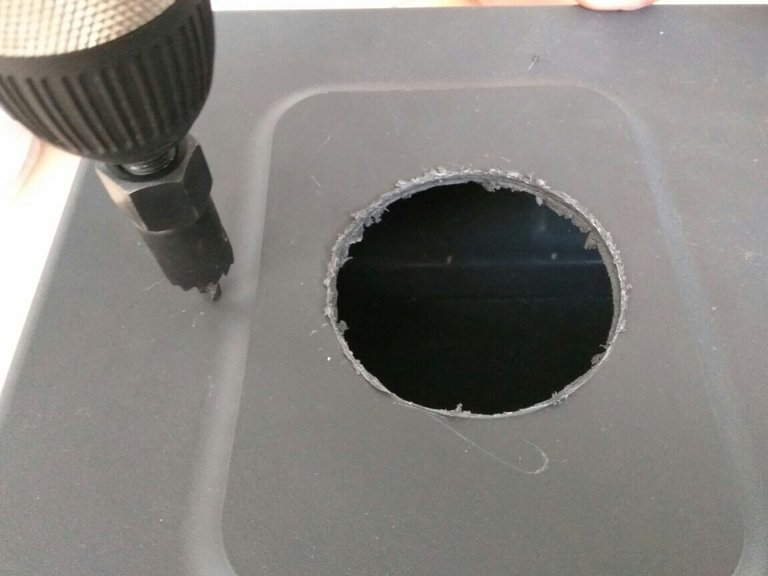
3)Drill a small hole for the tube of the air pump
4)Place the air stone inside the box and connect the tube through the small hole
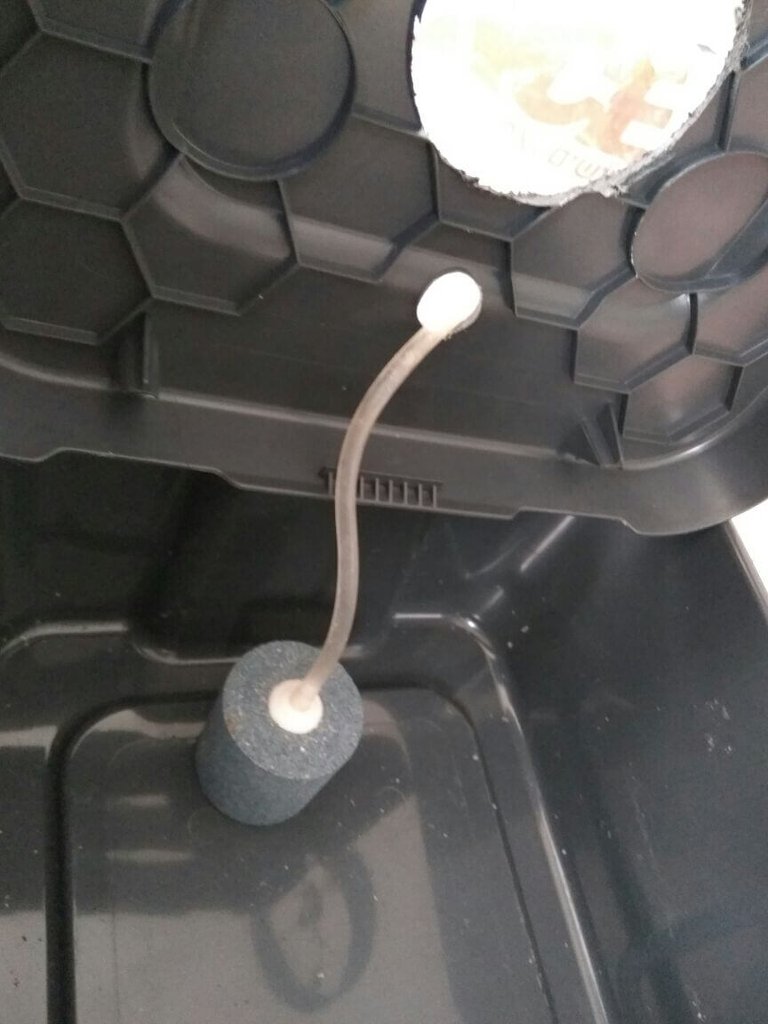
5)Fill the water until it full enough to barely touch the bottom part of the net cups
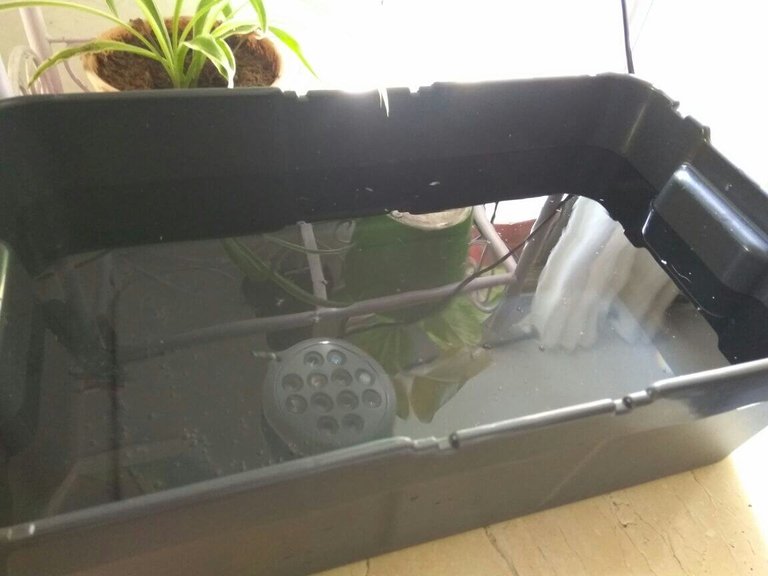
6)Now its time for the planting
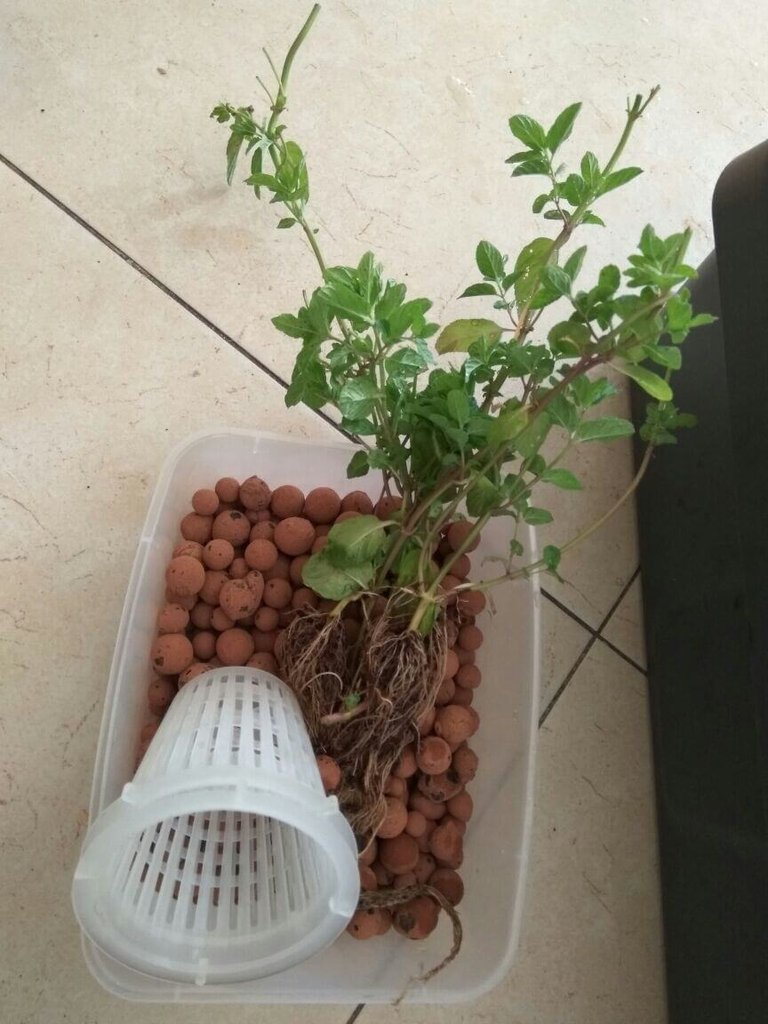
In the unit in my home I used a Peppermint seedling , as we use it almost daily for our evening cup of tea :)
It was initially growing in soil, so in order to keep the water clean of solids that will wash away form the soil, we decided to wash its roots with water prior to moving them to the net cups with the roots slightly picking out of them.
Despite this trauma, they will soon begin to grow new roots and develop new leaves and branches.
However, it is possible (and even recommended) to use younger seedlings, and just place them in the center of the net cup and spread the chosen growing substrate around them.
The little soil will do no harm, but the plant will suffer less traumas and will be happier and less confused right from the start.
So either make your own seedlings or try to purchase them as young as possible.
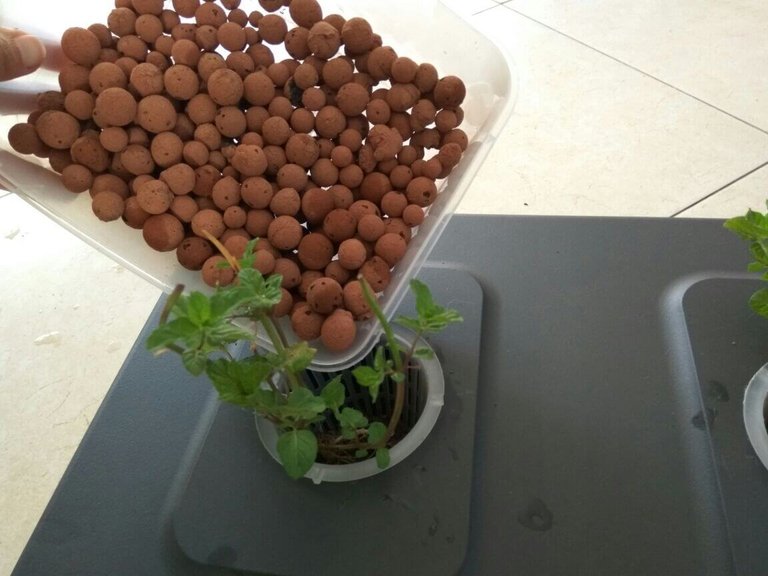
7)Turn ON the air pump
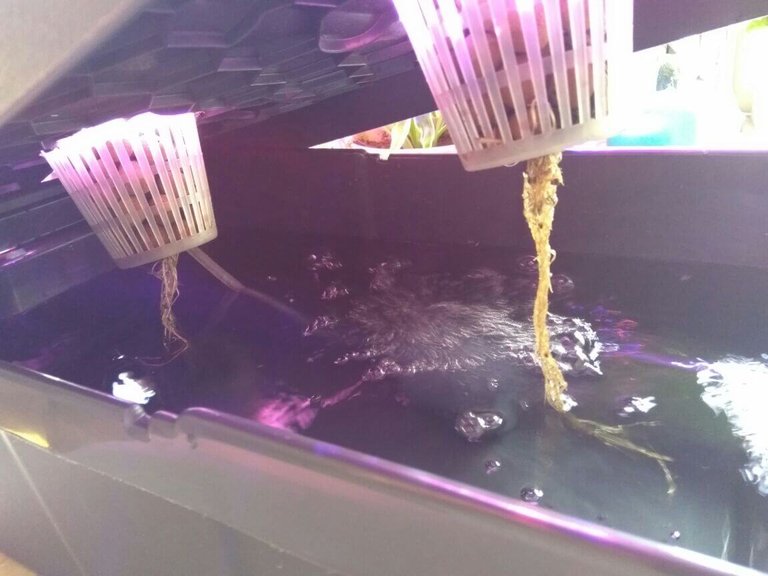
8)Place your new hydroponic system in a suitable place

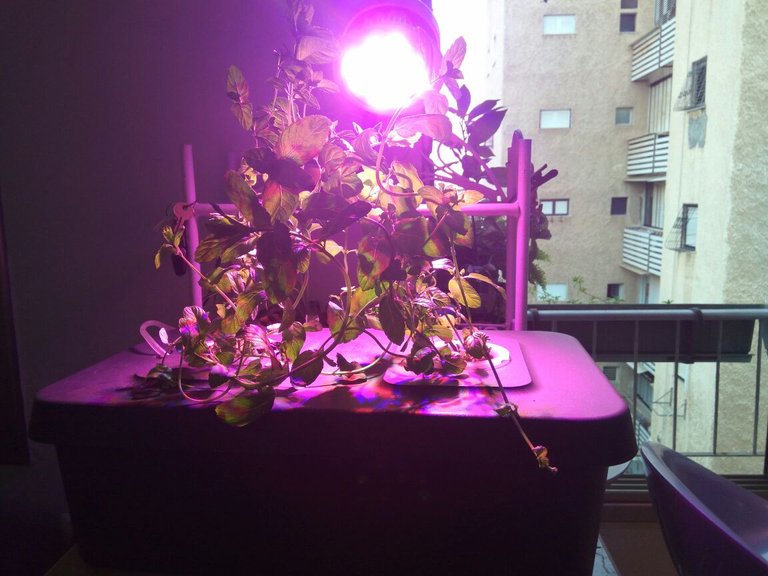
9)Add some fertilizer and adjust the water PH levels
I will not go into the fertilizers here, as there are many kinds, but make sure it is properly soluble in water and that it has everything the plant needs for the whole growing cycle.
The PH adjusting might not be a concern for you as usually adding the fertilizer bring the water to a properly acidic conditions (water is usually quite alkaline coming out of our taps, but the nutrition solutions are usually very acidic, so mixing the two together in a proper ration usually brings the water to a proper condition for plants. ).
Though if you want to go on the safe side you can always get a cheap Ph testing kit like the one in the picture bellow, you can get them as little paper stips, liquid or even digital form.
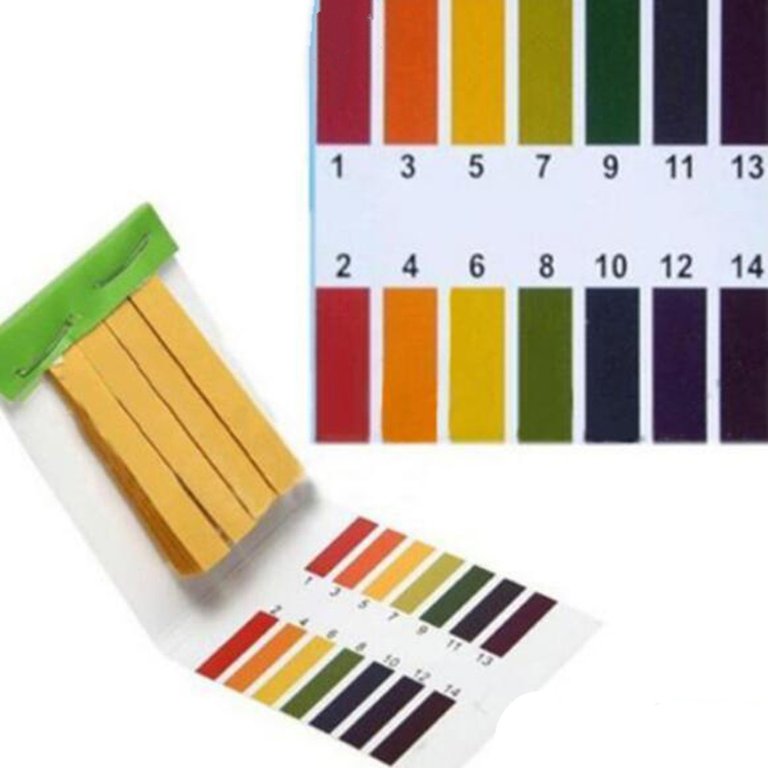
You can upgrade the whole thing with an LED growing light
As I personally wanted to have this growing system right in my kitchen, where i prepare my tea.
And although I have a window close by, my plants still weren't getting enough sunlight to grow as fast as I wanted them to, so I decided to add a 36W LED Grow light.

There are quite cheap and you can find them all over the internet for 20-35$.
The reason for them being of a pinkish color, is that plants require only a certain spectrum to have efficient photosynthesis, so those bulbs are designed to provide the plants only with what they need, therefore being more efficient at growing plants.
But you can always use a regular "white" colored light as well - fluorescent and CFL lights work well with herbs and micro greens.
To Sum up
Growing food is not a complicated thing to do once you get some basics, but with hydroponics it can be even easier, as it will allow you to grow your food with relatively no hassle, prolonged maintenance periods (the water and feeding is basically automatic)...its essentially like following a recipe, but most of all it will allow you to grow herbs and microgreens right there in your kitchen, even without a window.
Thats it for today, I hope you enjoyed this post and I hope I succeeded in my attempt to convince you to try growing some stuff on your own.
If so please consider upvoting, resteeming, following, and commenting!
Thank you very much for reading, see you in the next post.
If you liked this post, you can take a look at my previous post on the subject, where I show how to build a slightly bigger hydroponic system based on NFT technique.
So make sure to check it out : Grow Your Own Food! 🌱🌿🍓 - Easy to build DIY hydroponic system - LOW BUDGET

If you like such topics make sure to stay tuned for my weekly Sustainability Curation Digest as part of my new "job" as a Curator for Minnow Support Project.

If you would like to know me a bit more, make sure to read my #introduceyourself post.
Wow amazing! I'll save for later i want to do any hydro system with led in my place
Looks very good guide thanks so much!
Sorry for the late reply :)
I am happy you liked that, if you get to building one yourself make sure to send some photos, will be great to see :)
sure! i hope to remember to send you when its ready
thanks
Congratulations @carpedimus! You have completed some achievement on Steemit and have been rewarded with new badge(s) :
Click on any badge to view your own Board of Honor on SteemitBoard.
To support your work, I also upvoted your post!
For more information about SteemitBoard, click here
If you no longer want to receive notifications, reply to this comment with the word
STOPCongratulations! This post has been upvoted from the communal account, @minnowsupport, by carpedimus from the Minnow Support Project. It's a witness project run by aggroed, ausbitbank, teamsteem, theprophet0, someguy123, neoxian, followbtcnews, and netuoso. The goal is to help Steemit grow by supporting Minnows. Please find us at the Peace, Abundance, and Liberty Network (PALnet) Discord Channel. It's a completely public and open space to all members of the Steemit community who voluntarily choose to be there.
If you would like to delegate to the Minnow Support Project you can do so by clicking on the following links: 50SP, 100SP, 250SP, 500SP, 1000SP, 5000SP.
Be sure to leave at least 50SP undelegated on your account.
I like the way you put this system together. I have to wonder if you could grow more than 2 plants in a container this size.
sorry for the late reply...
yeah you can absolutely do that, the only thing is that you will need to add water more frequently and you need to consider the plants size...but other then that you can put as many as you like.
Your post has been featured in this week's earth-centered curation @the-hearth.
Thanks for writing such fantastic and inspiring content!
Awesome!! thanks @the-hearth
Congratulations - You were selected to receive a 100% up-vote from @fivefreeupvotes. Enter once a day
This really makes me want to grow my own plants and learn properly. I did try when I moved into my apartment, but I didn't feed it well and the basil died off.
I will get back to it one day.
Thank you for this post!
Hydroponics can save you the hassle of worrying about watering that much...as long as the box is full with water your plants should be ok,...and that can take up to a week or two.
So just go ahead, get your self a box and plant some basil :)it absolutely loves hydroponics!