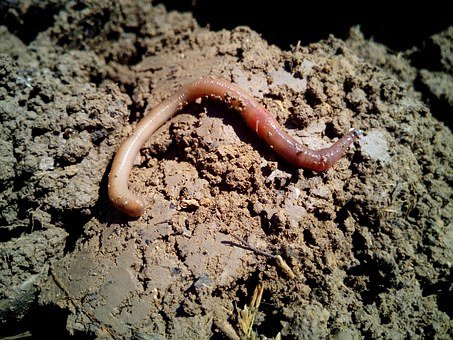
Composting with worms allows for smaller composting systems since the activity isn't related to the mass of the pile.
For apartment dwellers and those with small yards, composting can be a difficult if not impossible proposition. Standard guidelines are that a compost pile needs to be 3 ft by 3 ft by 3 ft in order to heat up and decompose quickly. Plastic backyard compost bins may be a little smaller, but the process usually is slow.
What's the solution? Composting worms allow for a compost bin of any size and can even be kept in the house. Composting worms eat fungi and bacteria produced by rotting vegetative matter and produce lovely, nutrient rich compost. In fact vermicompost, compost made by worms, is higher in nutrients than compost produced by bacteria and fungi.
Small Size
Composting worms work quickly and can turn a 18 gallon bin of kitchen waste into compost in about 3 months, depending on the number of worms at work. What's more, worm bins stay active, thanks to the worm's activity level. The traditional compost pile will slow way down in decomposition activity due to the amounts of material available, outdoor temperature, and moisture in the pile.The aforementioned 18 gallon bin is a good size for the average family to recycle kitchen wastes. More bins can be added if desired and stacked one upon the other to save space.

Worm Composting Advantages
- Worm bins do not smell. Worm bins are full of aerobic bacteria which decompose organic matter without releasing a foul smell.
- Feeding a worm bin will reduce the amount of garbage taken to the curb. Extra kitchen scraps can be frozen for future use.
- Worms eat newspaper, cardboard, and office paper. Cellulose fiber products such as newspaper and cardboard are excellent sources of worm bedding.
- Worms constantly reproduce, enabling more and more household waste to be composted.
- Worm composting can easily continue year round.
Building a Small Worm Bin
A small worm composting bin can be created from a plastic, stackable bin with a lid. Be sure to use an opaque plastic bin, because worms cannot tolerate light.
- Drill 6-10 one eighth inch holes in the bottom of the bin. These holes allow for air flow, but are small enough that worms cannot escape.
- Drill another 8 -10 of the same size holes in the sides of the bin.
- Drill 6 - 10 more holes in the lid.
- Place bin inside another bin propped up with old milk cartons to allow excess moisture to drain out.
Add several inches of shredded newspaper, paper, cardboard, or cardboard egg cartons. Add about a once inch layer of kitchen scraps. If possible, cover the bin for a week before adding worms. Add red wiggler worms. Cover with another several inches of newspaper. Close the bin. The worm bin is now started.
Peace, Abundance, and Liberty Network (PALnet) Discord Channel. It's a completely public and open space to all members of the Steemit community who voluntarily choose to be there.Congratulations! This post has been upvoted from the communal account, @minnowsupport, by pullen from the Minnow Support Project. It's a witness project run by aggroed, ausbitbank, teamsteem, theprophet0, and someguy123. The goal is to help Steemit grow by supporting Minnows and creating a social network. Please find us in the
If you like what we're doing please upvote this comment so we can continue to build the community account that's supporting all members.