Welcome gardening enthusiasts to another home hydroponics gardening post. Here I will show you my garden systems and how I go about growing the majority of our produce-type foods right at home, even with NO farmable land.
I have learned over the last four years working with hydroponics, that many times success comes by trail and error, especially when you're not following traditional methods of doing something. As I mentioned in my previous post, the designer in me pushes to create something that "looks good" while still trying to find the logical balance with functionality and performance. This internal battle has pushed me to try new ideas and designs with my gardens using my available space. I was able to find that balance about 2 years ago, now all the hydrogardens I build for other people follow that blueprint. However, when it comes to my personal systems, I still try new concepts along the way and end up rebuilding back to my tired and true designs as you saw with my Lettuce Wall Garden.
Point being, even as I give advice on how I do hydroponics, that doesn't necessarily mean they are the standard way of doing it or that you can't modify things to meet your own needs. While there are some basic principles that need to be followed, the rest is open for debate. You can build simple, bare-bones systems, or complex, multi-purpose systems - it's up to you.

Starting Seeds Indoors
I like to start my seeds indoors to give me an extra level of control. Even though I now use an enclosed Bio Dome to start most of my seeds that I could place outside and use the sun's light to sprout my seeds, I would still have to deal with Florida's unpredictable weather and hot summer temperatures. For me, it's just best to do this indoors where I have stable and controlled temperatures, and a controlled daylight cycle with my LEDs lights.
About 12 months ago, I built a small table-top unit for starting my seeds with three 24" LED light bars in the hood. I designed it to fit a standard 10x20 grow tray, so I could swap to growing microgreens when I'm not using it to start seeds. Before this I was starting seeds directly in my full-size holding system in the garage, this wasn't ideal because it took too long for the roots to get down to the water level and not all the seedlings survived each cycle.
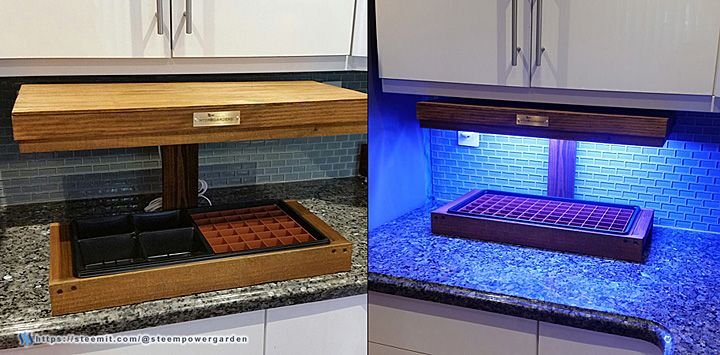
My counter-top seed starting unit.
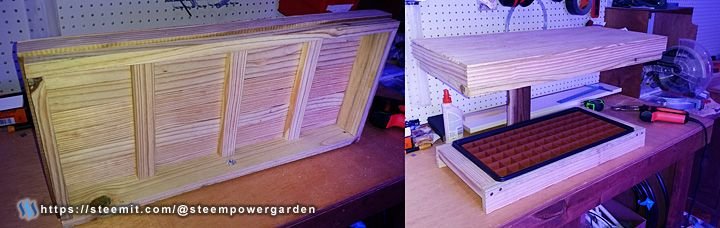
Building the first prototype unit in my garage workshop.
About 9 months ago I purchased a seed starting Bio Dome from Park Seeds to see if there were any advantages over the way I was doing it. Ehhh. The plus side is having control over the humidity levels in the dome by opening and closing the top vents, I used clear cooking wrap before. The downside is it only fits 2/3 the number of cells for starting seeds. When things are going good and I stick to my rotation schedule that is not a problem. However, when I decide to clean out all my systems at the same time like I just did and start everything fresh, it will take longer to get everything filled in with new plants.
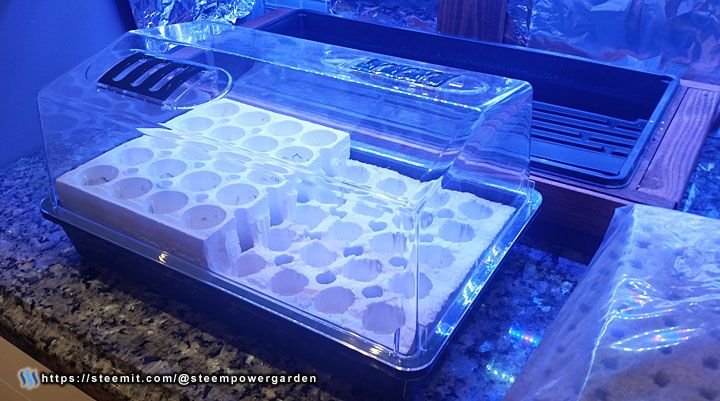
Park Seed's Bio Dome - Thankfully it fit inside my counter-top unit.
As with most things, I had to make some modifications to the Bio Dome unit. Since it is primarily designed to start seeds in their special sponge plugs for plants destined for in-ground/soil gardens, the plug channels are a bit too deep for starting lettuces intended for hydroponic net cups. We want the roots of the seedlings to get down to the nutrient water at the bottom as quickly as they can. So, I took an X-acto knife and cut half of the plug holes to be shorter by about 1.5". I then used a lighter to "carefully" melt the top surface to smooth it out and prevent pieces from breaking away over time. Now half of he tray is used for smaller lettuce type plants, and the deeper side for larger plants like tomatoes, cucumber, and peppers. It's not pretty - but it does the job.

My modified Bio Dome base.
I generally use rock wool cubes as my preferred growing medium in hydroponics. It allows me to easy transplant the seedlings into net cups and move them from the seed starting system to the main hydrogardens. I gently open the holes in the rock wool with a small screwdriver before dropping in the seeds. To help me remember which is which, I use a strip of white take and write the variety name along the side of the rows.
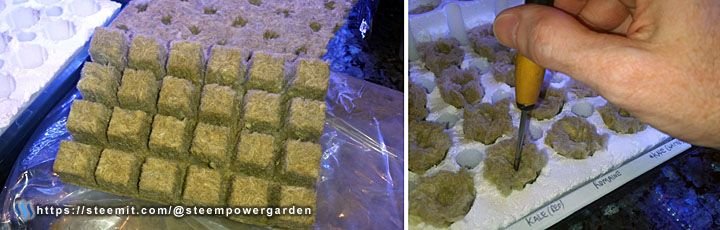
Gently opening the holes in the Rockwool
I do have a large selection of seeds that I collect and try over time to see which varieties work best in our climate. The vast majority of my seeds come from Johnny's Seeds and Park Seed. Over the past 4 years, seeds from those two suppliers have had the highest germination rate and most successful plants. I will try seeds from other places from time to time if I see a variety that looks good, but most times I just stick with my regulars.
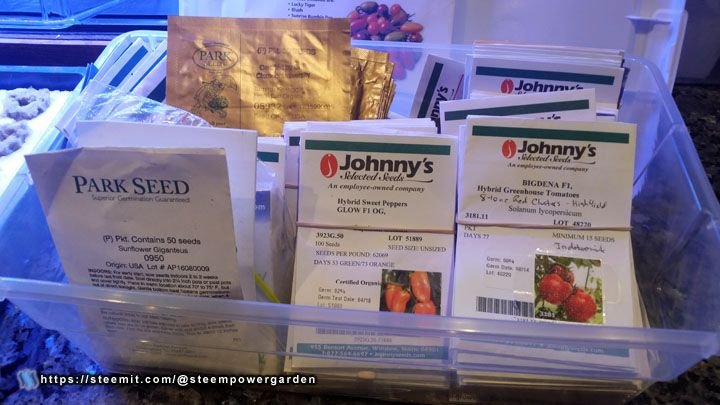
My big box of seeds.
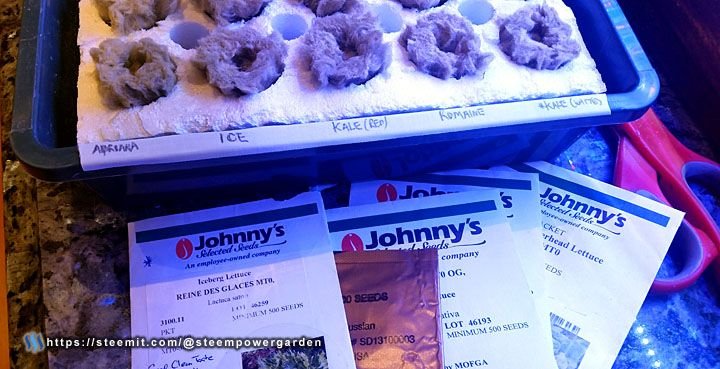
Labeling each row before I drop in the seeds.
For lettuce and herbs I usually put 2-3 seeds per hole, 1 or 2 per hole for tomatoes and peppers, and just 1 per hole for cucumbers. As the seeds sprout, I let the strongest and fastest plant to grow its first true leaves in each hole stay and pull out the others. After the seeds are all in I gentle pour a water/nutrient solution mix over each of the rockwool cubes to get them wet, and fill the base unit until the water level just touches the styrofoam base.
Becasue of the full restart, I really need to get more things started, so I used a small 4x4 tray to get my pepper plants started at the same time. Having to wait 15-20 days for an open spot to start them would push the harvest time back by 40-50 days.
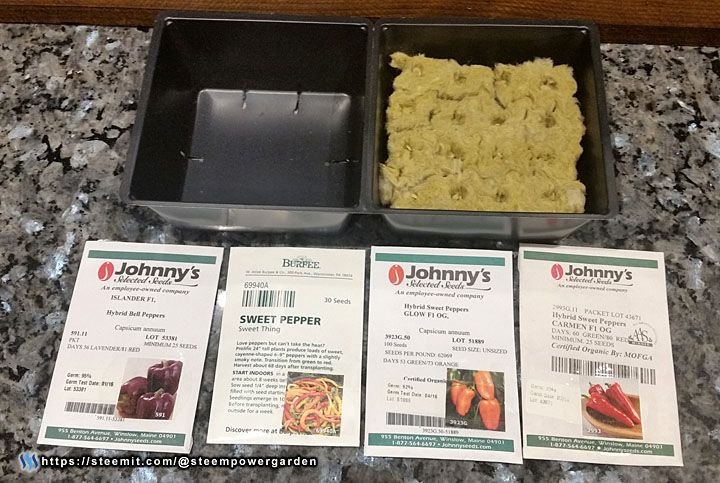
Starting Pepper seeds in a side tray.
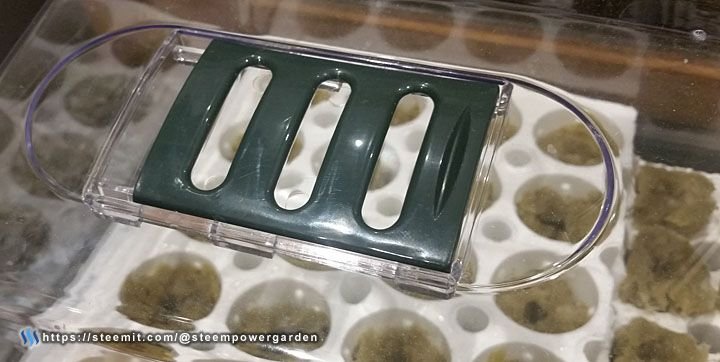
Close the vents on the Bio Dome.
For the first 24-36 hours I leave the lights unplugged from the timer, there's no need to waste electricity while the seeds are germinating. Once the first seeds sprout up, I put the lights on the timer with a 14 hour per day "on" cycle giving a 15 minute "off" time 7 hours in. Having the lights on longer per day helps keep the stems of the young plants short and stocky. If there is not enough light in the early days, they will be long and thin which tends to result in a weaker plant with a shorter life and less yield.

Everything in place and ready to go.
In about 15-20 days the new lettuce starter plants will be ready to move to my wall garden, and the tomato, cucumber, and pepper plants will move to the garage system for around 20 more days to mature a bit more before moving to the outside garden.
In the meantime, while the seeds do there thing, I will continue to post on my garage setup and main outdoor systems. I will also give updates on the progress of the new plants so you can follow along.
I hope you enjoyed learning about my home seed starting process.
If you have any questions or comments, just drop a reply below.
As always, please upvote this post and follow me if you like my work and want to see more.
If you think others will enjoy this Please ReSteem it!
Thanks for reading, now get out there and get GROWING!
Cool to see a working hydroponics system in the wild. How much does electricity cost for you in this setup? Also curious about how much of your veggies you produce on a monthly basis.
Hi @hartsuff1,
The LED lights in my counter-top unit only use 35w. When all my hydroponic systems, including my big garage system, are at full capacity - the total addition to our electrical bill for all the pumps/lights is around $22/m. I will have a post about that system later, when that one is not in use, it's around $10/m for all the others.
We save on average between $125 and $250 per month based on the type/volume of food our gardens produce - compared to if we had to buy the same items at the store. When everything of at peak, we usually have more than we can eat and give the extra to family and friends.
Thank you, I've built a small Aquaponics system in the past. It's so much better to grow your own. :)
This is really great! I'm definitely trying it