Helloworld. This is @a1-shroom-spores.
Formatting is relatively easy on the hive blogging sites.
It requires no coding to add text and images and upload them. But did you know you can post extra tall images and shrink down the size of an image. Did you know you can add links to images? The sky is the limit when it comes to formatting.
We are going to start at the most basic concepts and work our way forward.
We are going to practice formatting on the hive chain front end called https://peakd.com/ so make sure you login there. Also a keychain will make this easier so go ahead and download that if you haven't already. https://chrome.google.com/webstore/detail/hive-keychain/jcacnejopjdphbnjgfaaobbfafkihpep?hl=en It's open source and totally safe.
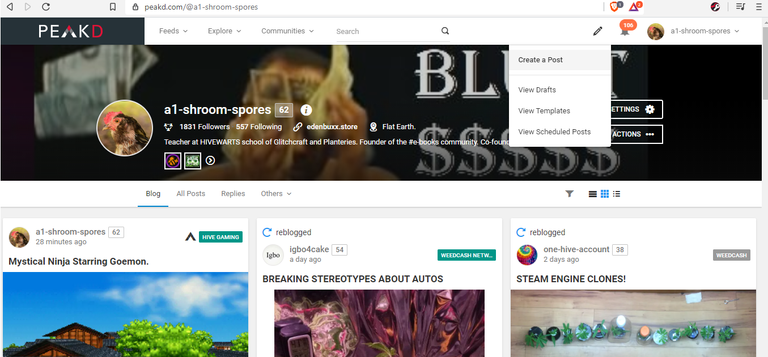
Start by finding the builder. On your homepage you can click the pencil icon followed by: Create a post. If you get lost you can simply click this link while logged in: https://peakd.com/publish.

Now we are in the builder!
Go ahead and type some text into the builder {underneath all the icons/buttons.}

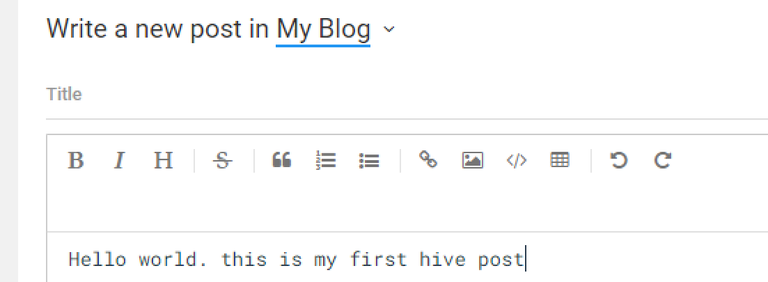
Notice how there are two different versions of your text:
The left side is the builder.
This is where you type text, upload pictures, type in code etc.
The right side is the preview.
This is where you will see what the actual post will look like.

Now let's upload an image!
Right click on the hive logo above and press copy. Then right click {or ctrl +V} on the builder {where you enter text} and press paste!

You uploaded an image!
Take a look at how there is a IMAGE ON THE RIGHT and on the LEFT IS THE CODE. Remember the RIGHT side is what it will look like when you post.
What if you want to change the size of the image?

Wait?! ... you can change the size of images on hive? YES but you need to edit the image before you upload it.
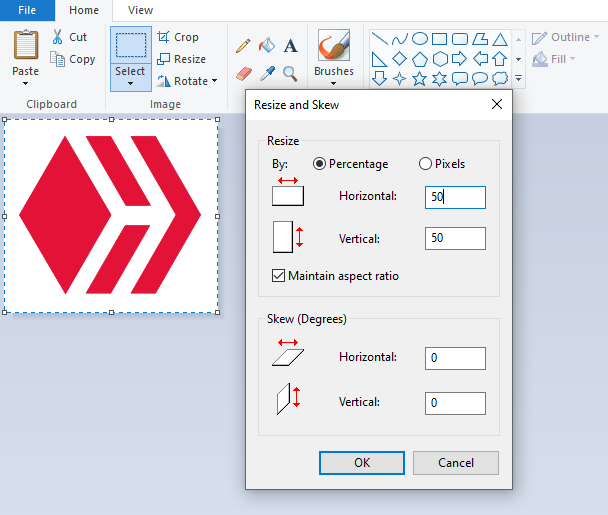
An easy way to change the size of an image {to upload to hive} is to simply paste the image into paint. Then press select all {ctrl + A} and then press Resize. Change the horizontal and vertical to 50 to shrink it by 50%!

Here is the image at 200%.

Here is the image doubled and stacked horizontally.
You can stack images {VERTICALLY ONLY} in paint and upload it it hive without losing size. You could make a whole scroll through gallery without spaces.

^^^^ This is what HORIZONTAL spacing looks like. The image gets smaller the more you stack. Let's stack twice the amount of images.

Twice the amount of images HORIZONTALLY means half the size.
If you are confused at this point just think about how horizontally there is limited space. Vertically there is infinite space. You can just scroll vertically forever. There is limited space horizontally so the images get smaller the farther you push it.

Now let's talk about text. I've used several sized text in this blog, as well as bold text.
This is the standard sized and style text that is used to blog on hive.
This is bold text. To initiate bold text: simply use this formula:

This is italics. To initiate italics: simply use this formula.


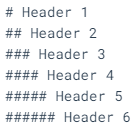
There are 6 types of headers. Here is what they look like and how to initiate them.
Header 1
Header 2
Header 3
Header 4
Header 5
Header 6
Now we are going to cover spacing. You are only allowed 1 line of spacing in the builder. but of course you can just upload a blank {white} image and create spacing! Lets make a small space.

The space above is a blank {white} image I made in paint and uploaded. you can copy and paste it into your blog if you want!

The longer {VERTICALLY} you make the blank image: The bigger the spacing will be.
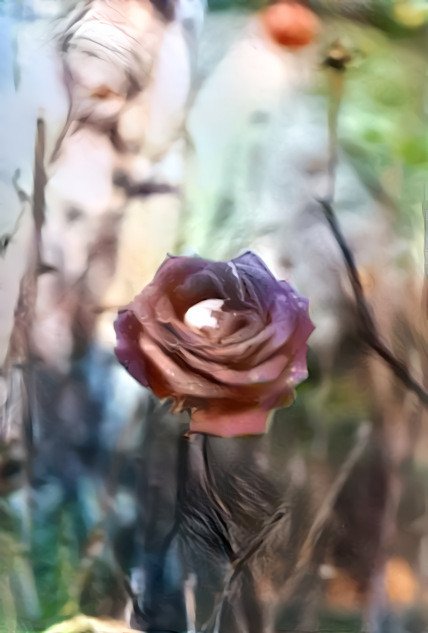
Now we are going to learn how to add a link to an image!

Use the code above to embed a link into an image. Under "DESTINATION URL" paste the link you want to attach to the image. Under "IMAGE URL" out the url of the image. To find the url of an image: Right click on the image and click "open image in new tab". Then copy the page URL.

^ Click on the picture above to go to my blog!
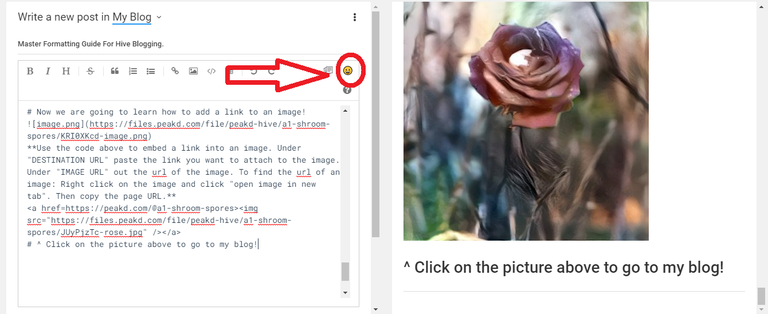
In closing: Let's add some emojis to your blog.
Click the smile emoji {above} to open the emoji menu.
😀😍🤡😎🤑 👻👻💀☠️ 👍✊🖐 👔
End Of Guide.
P.S. please remember to use your new formatting powers responsibly. If you upload text/images make sure you arent plagiarizing and you properly cite any sources or quotes etc. This is NOT a guide on WHAT to post so use your brain on that one and you will be okay. Otherwise you risk getting flagged by bots that look for plagiarism.
This is incorrect, the answer is "NO". You have to change the size of the image you are using on your own machine using paint and re-upload it.. that's what the instructions say I think. Maybe I am missing something though?