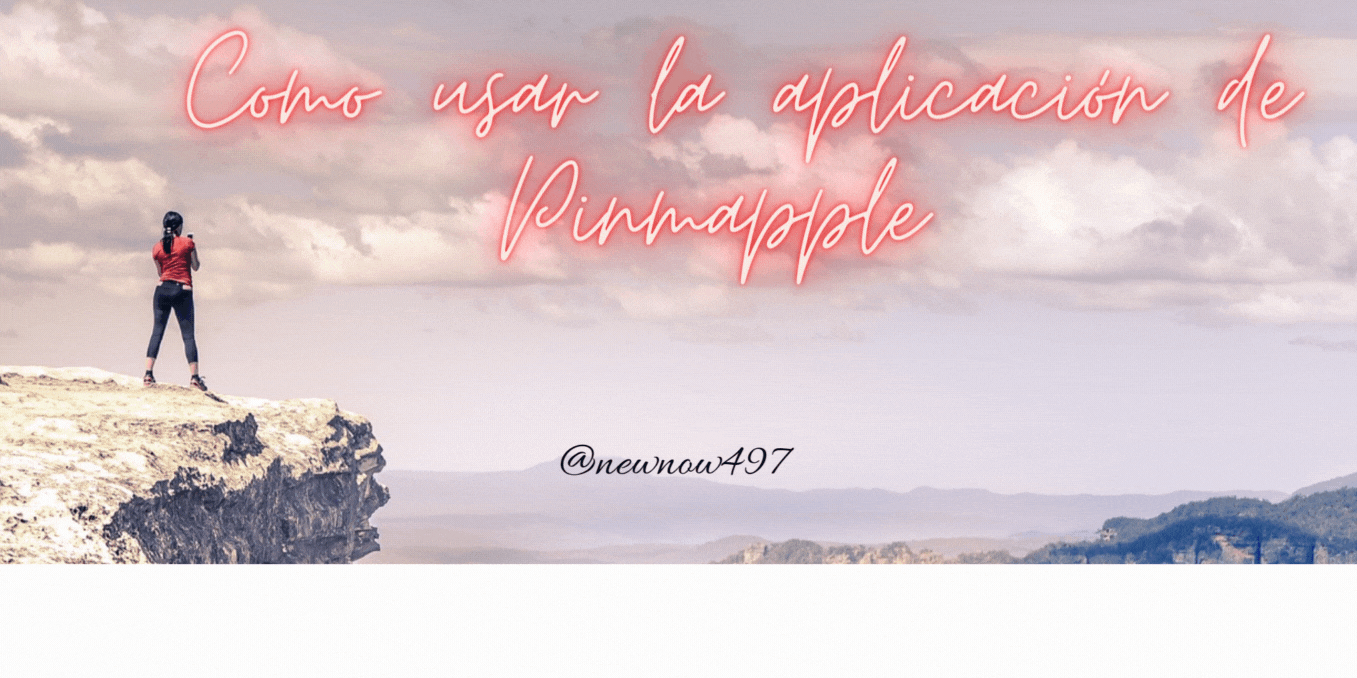
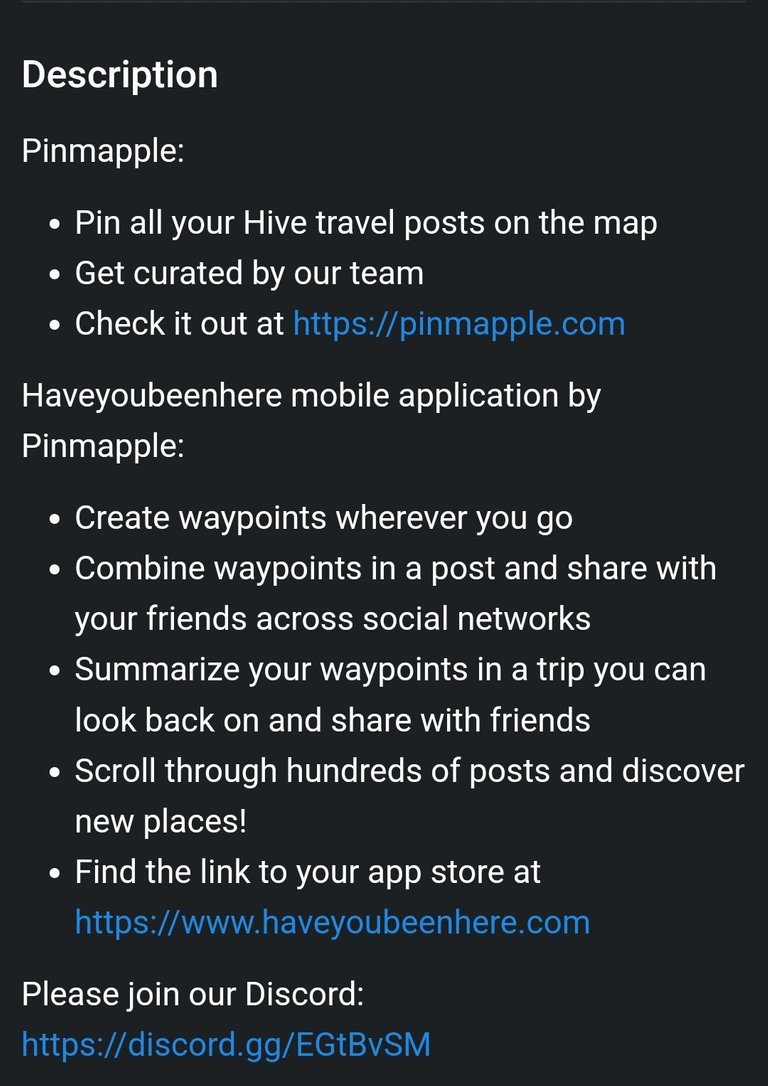
Buen día hermosa comunidad, hace rato no les traigo un tutorial, así que hoy decidí hacerles uno sobre una comunidad que más me gusta en Hive. Sí, de las que más me gusta, se trata de pinmapple. Cuando somos nuevos, no sabemos como usar las aplicaciones de las comunidades y pe somos que son muy difíciles, pero no verás que fácil es. Lo primero que haremos será descargar la aplicación desde su misma comunidad para no tener ningún problema y entrar a su discord puesto ahí mismo. Pinmapple.
Good morning beautiful community, it's been a while since I brought you a tutorial, so today I decided to make you one about a community that I like the most in Hive. Yes, one of the ones I like the most, it is pinmapple. When we are new, we don't know how to use the community applications and we think they are very difficult, but you won't see how easy it is. The first thing we will do is to download the application from the same community to not have any problem and enter your discord put right there. Pinmapple.
Una vez descargada la aplicación la abrimos, nos registramos y nos deja escoger varias opciones, yo recomiendo que lo hagan con hivesigner ya que automáticamente cuando hagamos el post se nos publicará en nuestro perfil de Hive.
Once the application is downloaded, we open it, we register and it allows us to choose several options, I recommend that you do it with hivesigner because automatically when we make the post it will be published in our Hive profile.
 |  |
|---|
Usando la aplicación.
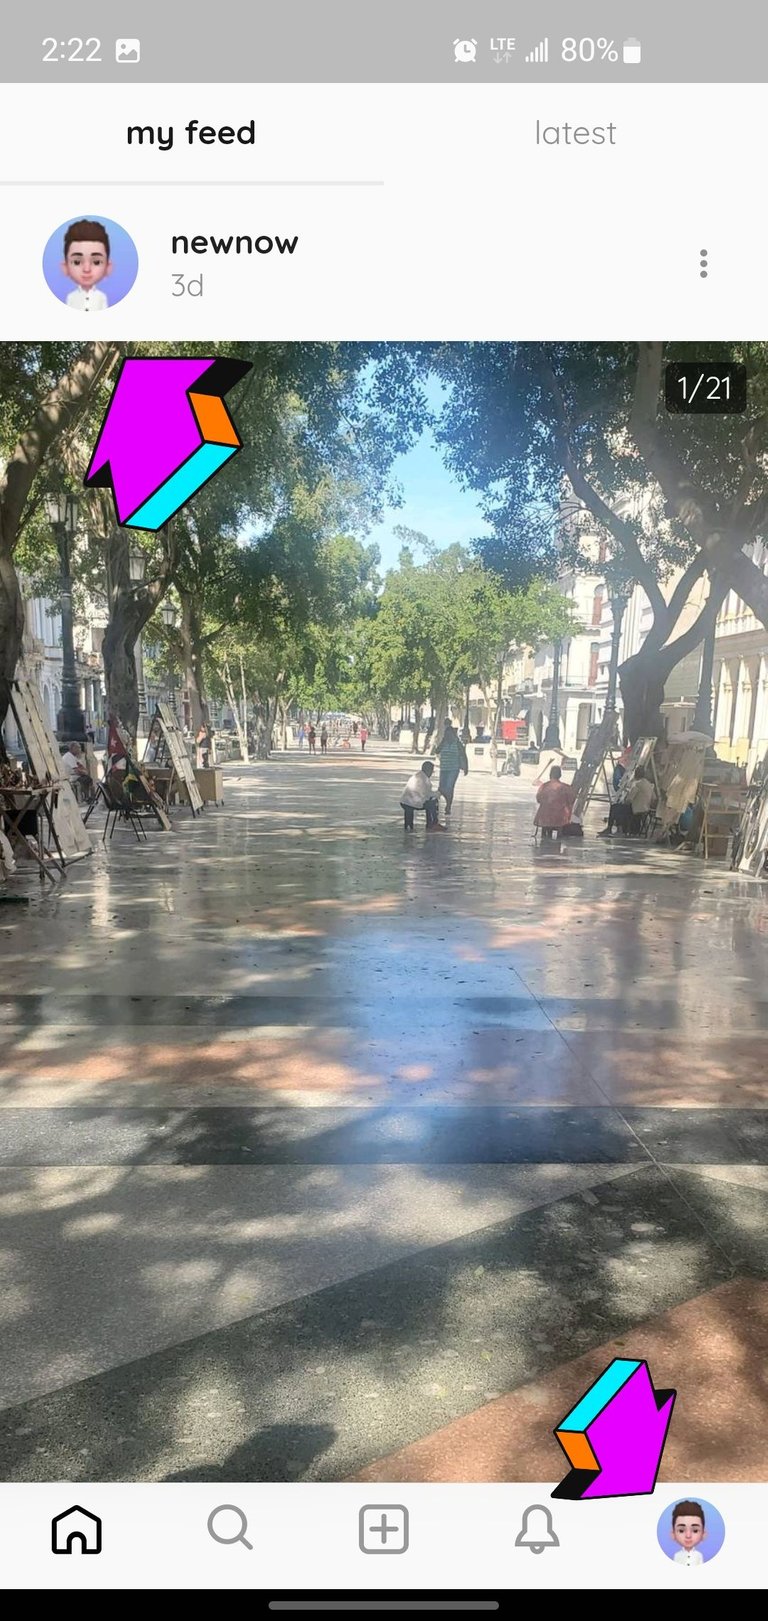
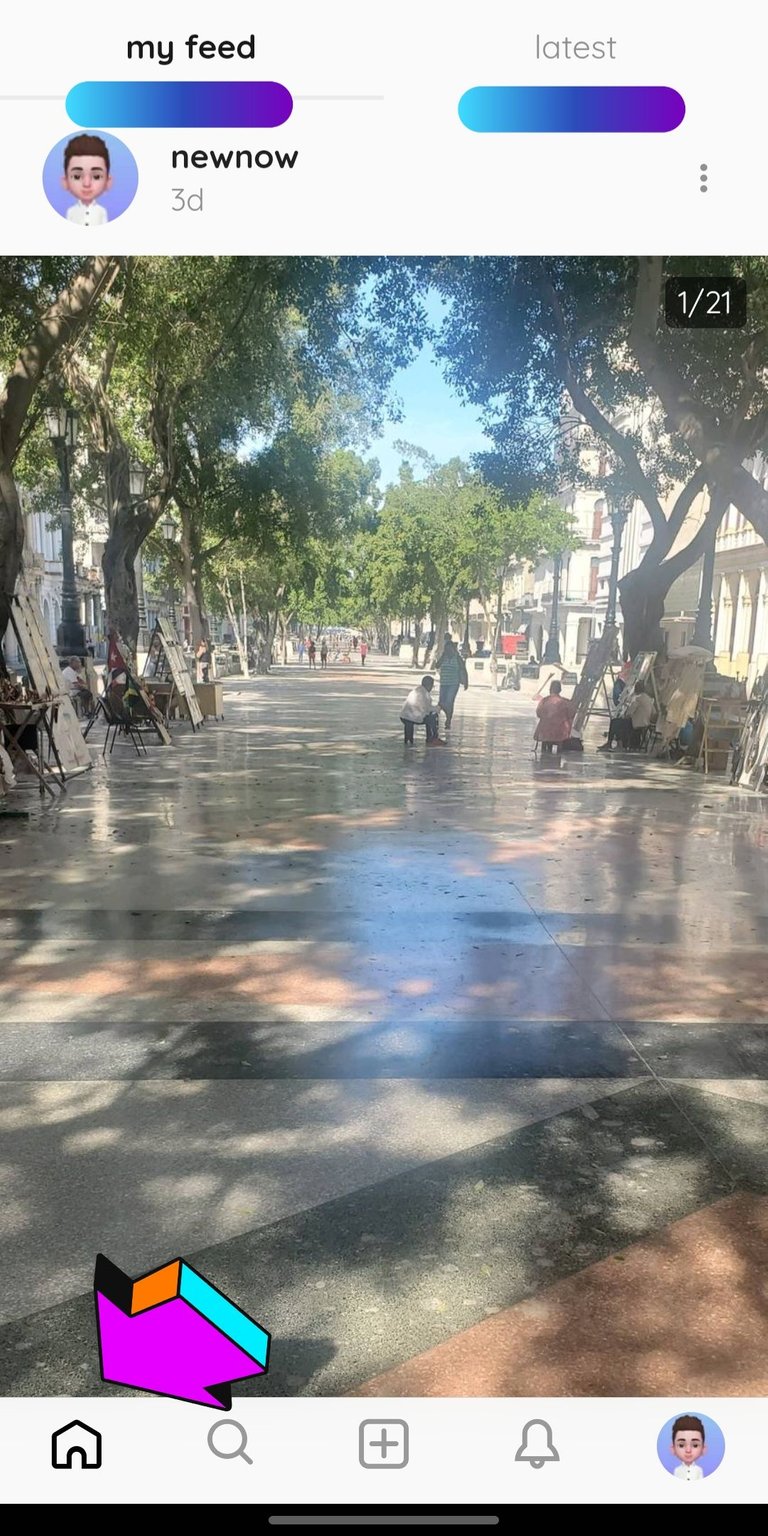
En la primera pestaña que vemos, la casita tendremos dos opciones, my feed que es donde veremos nuestras publicaciones y lasted que veremos las publicaciones de los otros usuarios que hayan usado la aplicación para publicar.
Using the application.
In the first tab we see, the little house, we will have two options, my feed which is where we will see our publications and lasted where we will see the publications of other users who have used the application to publish.
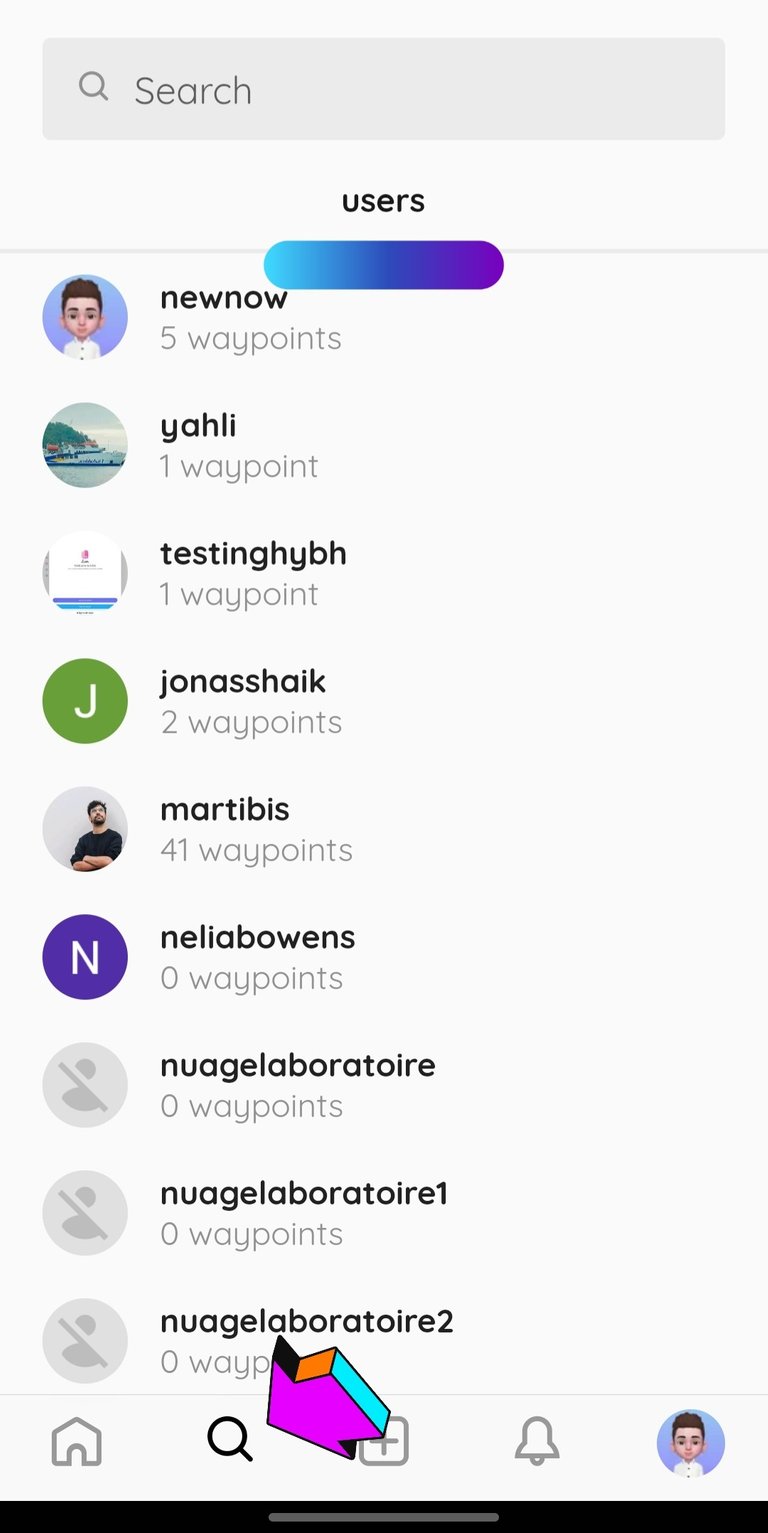
Tendremos además un buscador, pero será solo para buscar por nombre de usuario.
We will also have a search engine, but it will be only for searching by user name.
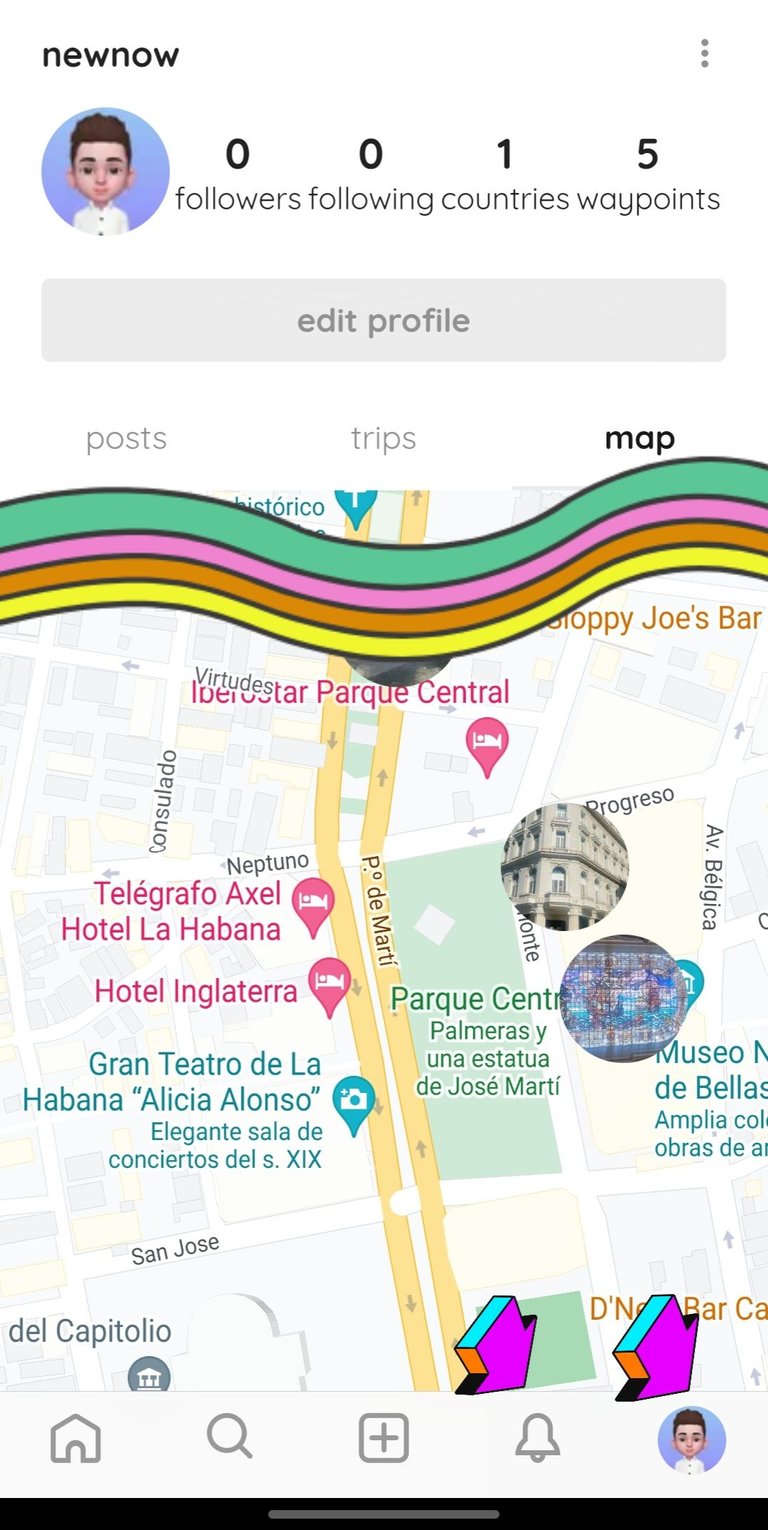
Tendremos además la pestaña de notificaciones para estar al tanto de lo que pasa y la de nuestro perfil, la cuál contará con 3 opciones. Los post que hacemos. Los viajes y un mapa donde se reflejarán nuestro waypoints o marcadores.
We will also have the notifications tab to be aware of what is happening and our profile, which will have 3 options. The posts we make. The trips and a map where our waypoints or markers will be reflected.
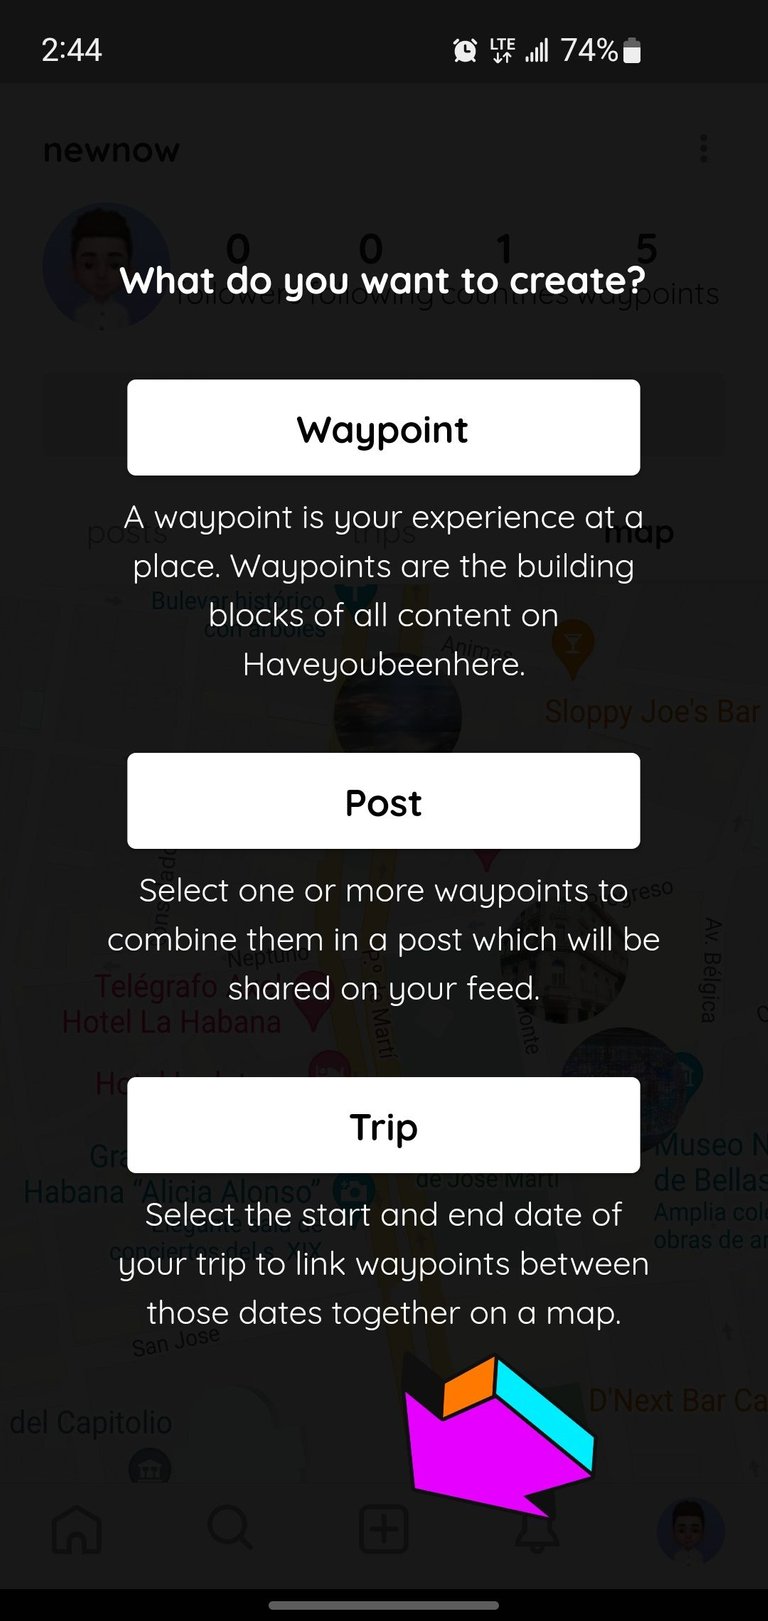
En el símbolo del más crearemos nuestro contenido, aquí nos dará tres opciones, waypoints que vienen siendo marcadores de los lugares que estemos, post que es para una vez echo nuestros waypoints poder unirlos y que se nos cree el post automáticamente y tryp que marcaremos una fecha de inicio y de final para crear el post. Este último no lo he usado así que no puedo darles información, trabajaremos con los waypoints y el post.
In the plus symbol we will create our content, here it will give us three options, waypoints that are markers of the places that we are, post that is for once we have made our waypoints we can join them and the post is created automatically and tryp that we will mark a start and end date to create the post. This last one I have not used so I can not give you information, we will work with the waypoints and the post.
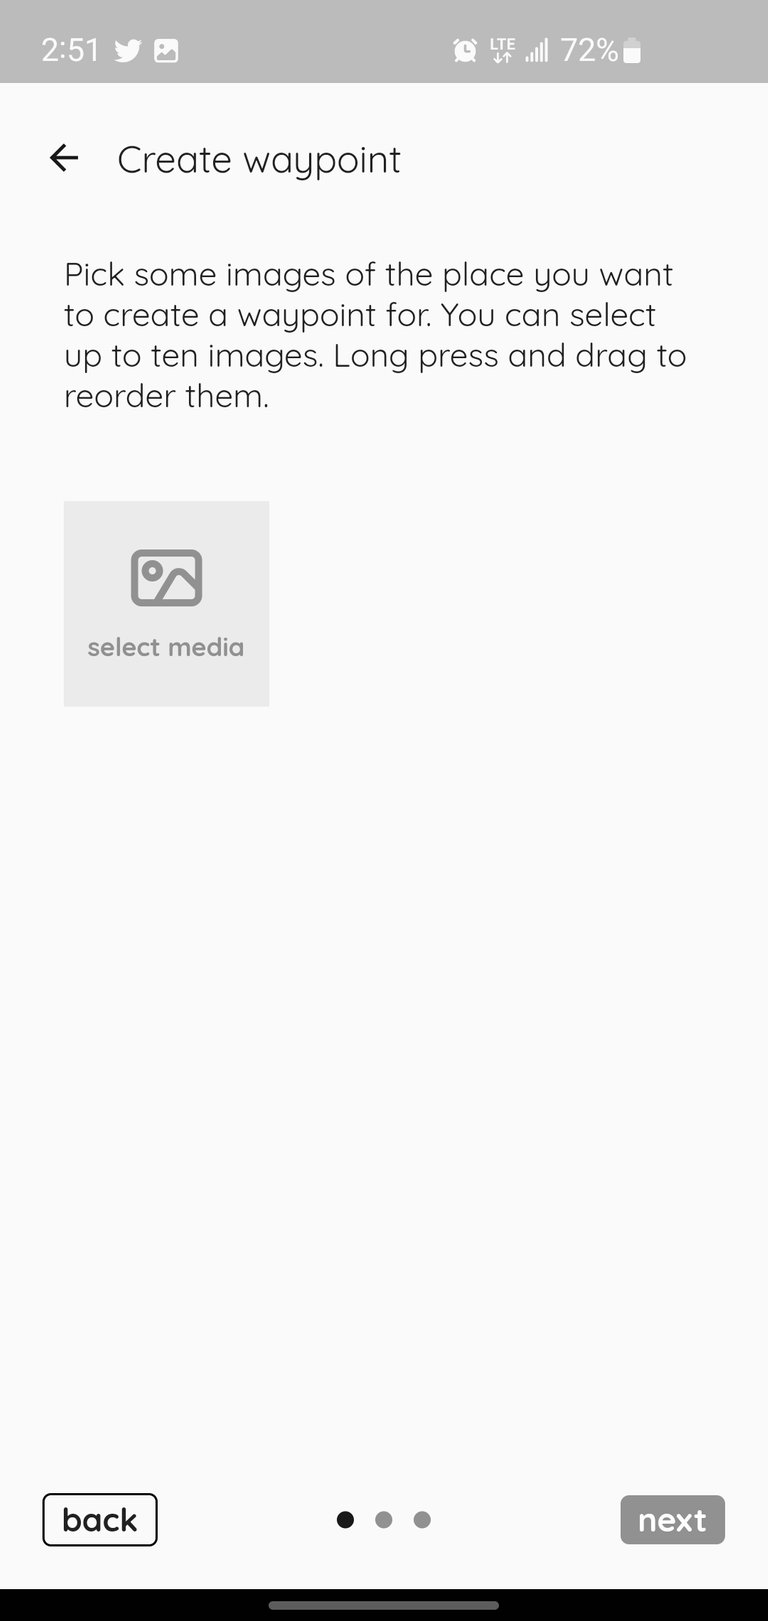
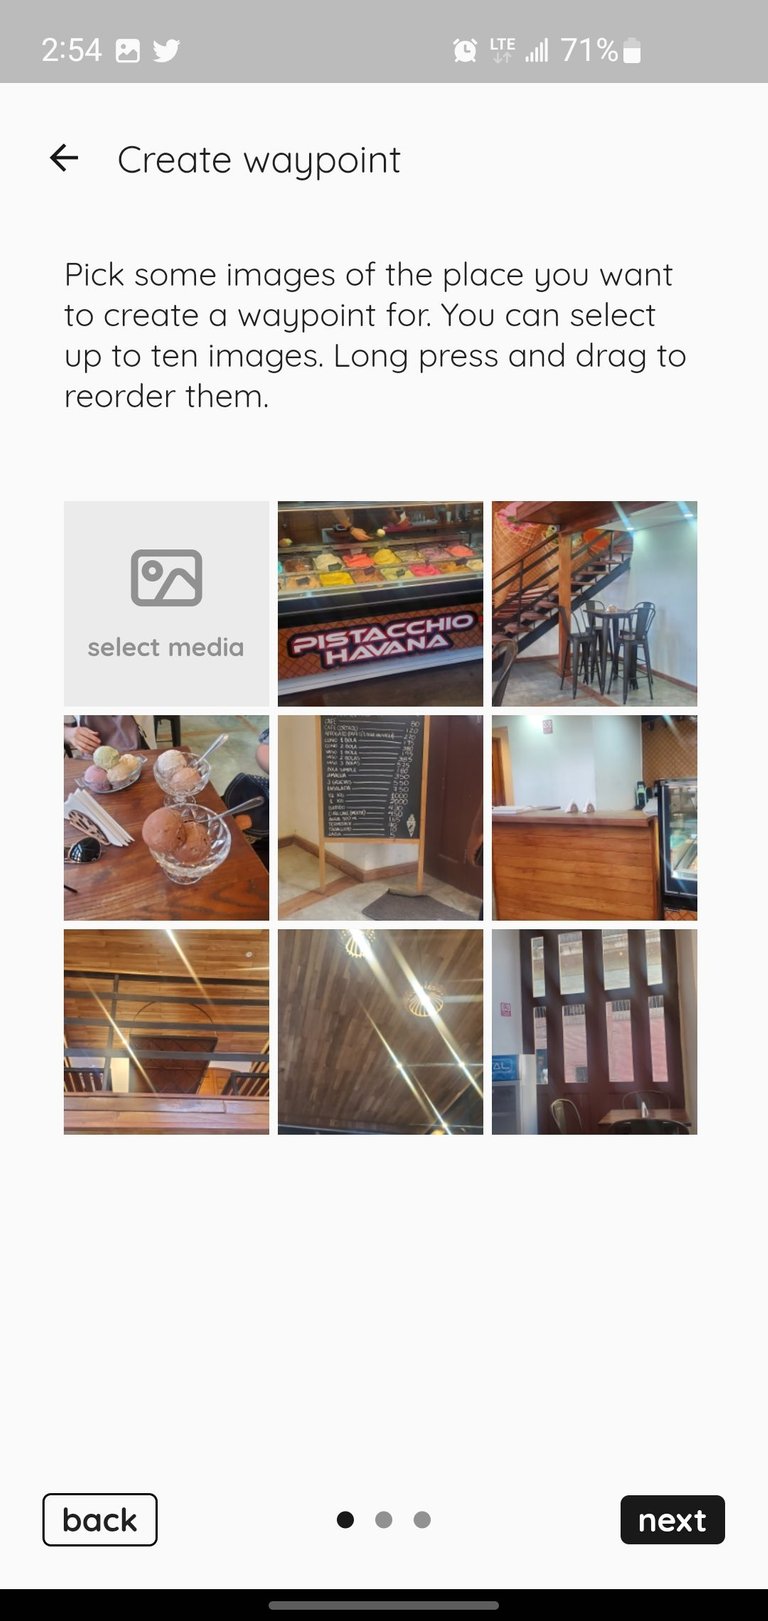
Waypoint
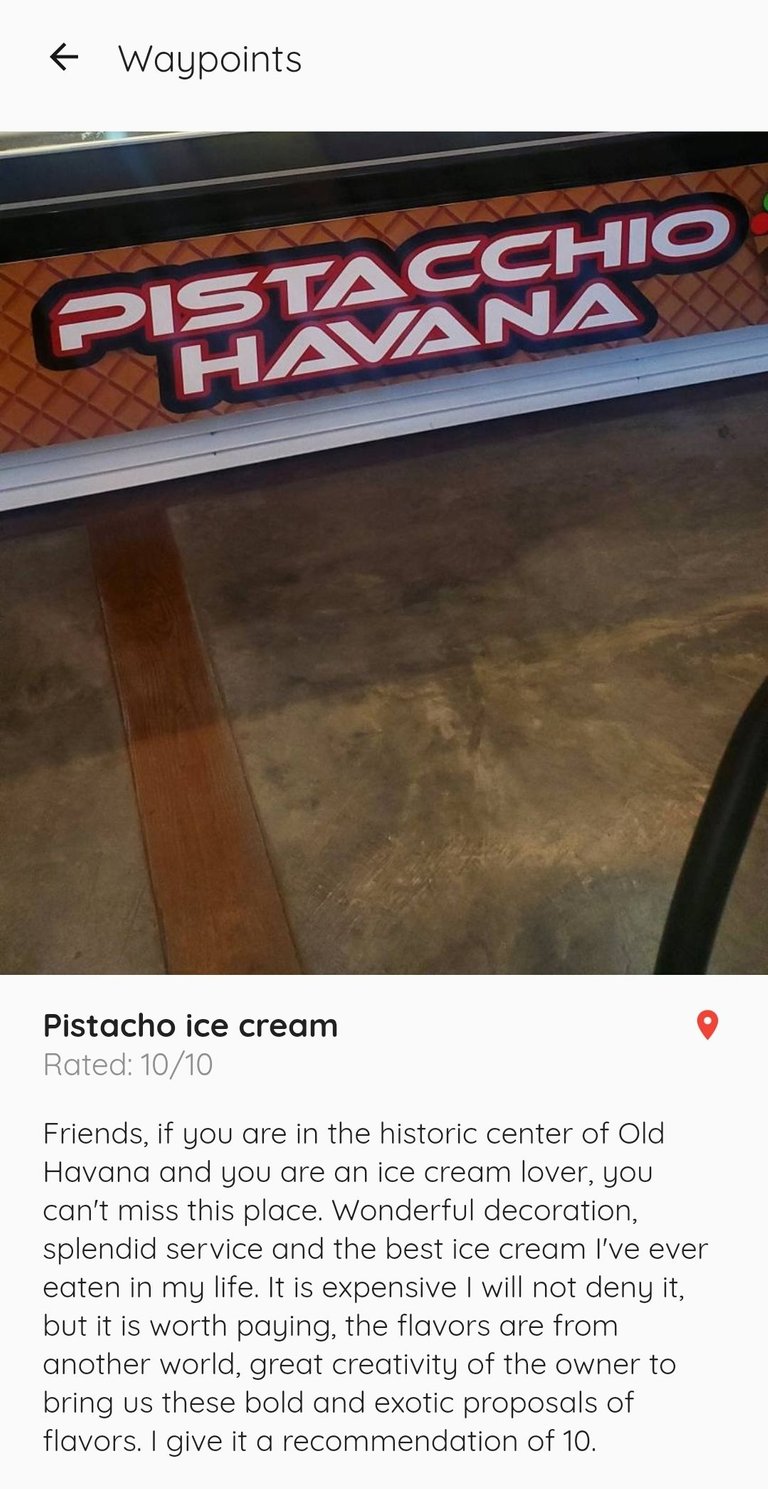
Aquí sencillamente nos pedirá seleccionar fotos, tiene un máximo de 8 fotos por waypoints así que elijan bien, no les pase como a mí que me extendí tirando fotos en un museo y no pude usarlas todas. Les dejo una muestra para que vean.
Waypoint
Here it will simply ask us to select photos, it has a maximum of 8 photos per waypoint so choose well, don't let it happen to you like me that I was extended throwing photos in a museum and I couldn't use them all. I leave a sample for you to see.
 |  |
|---|
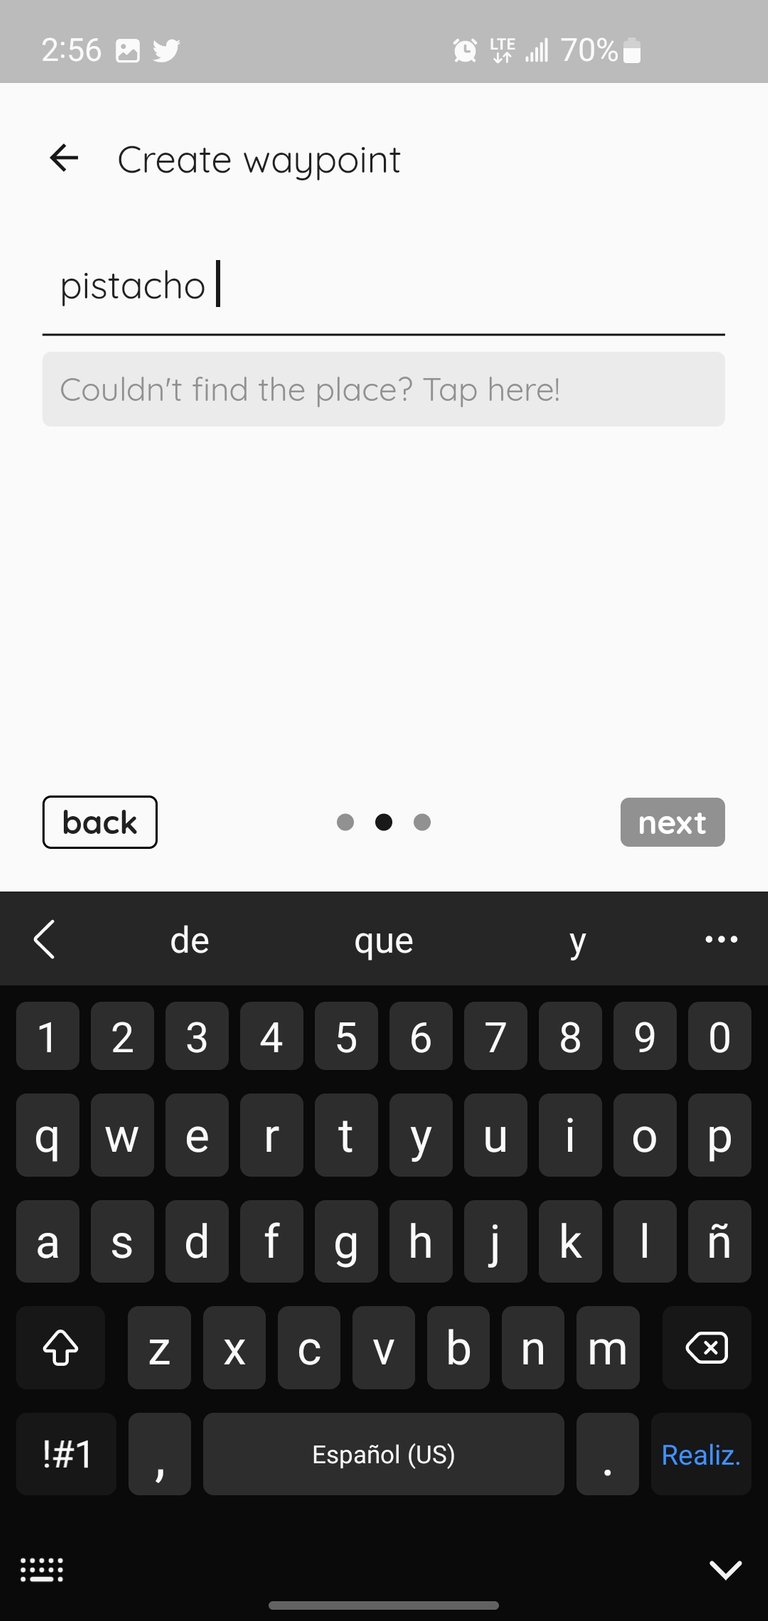
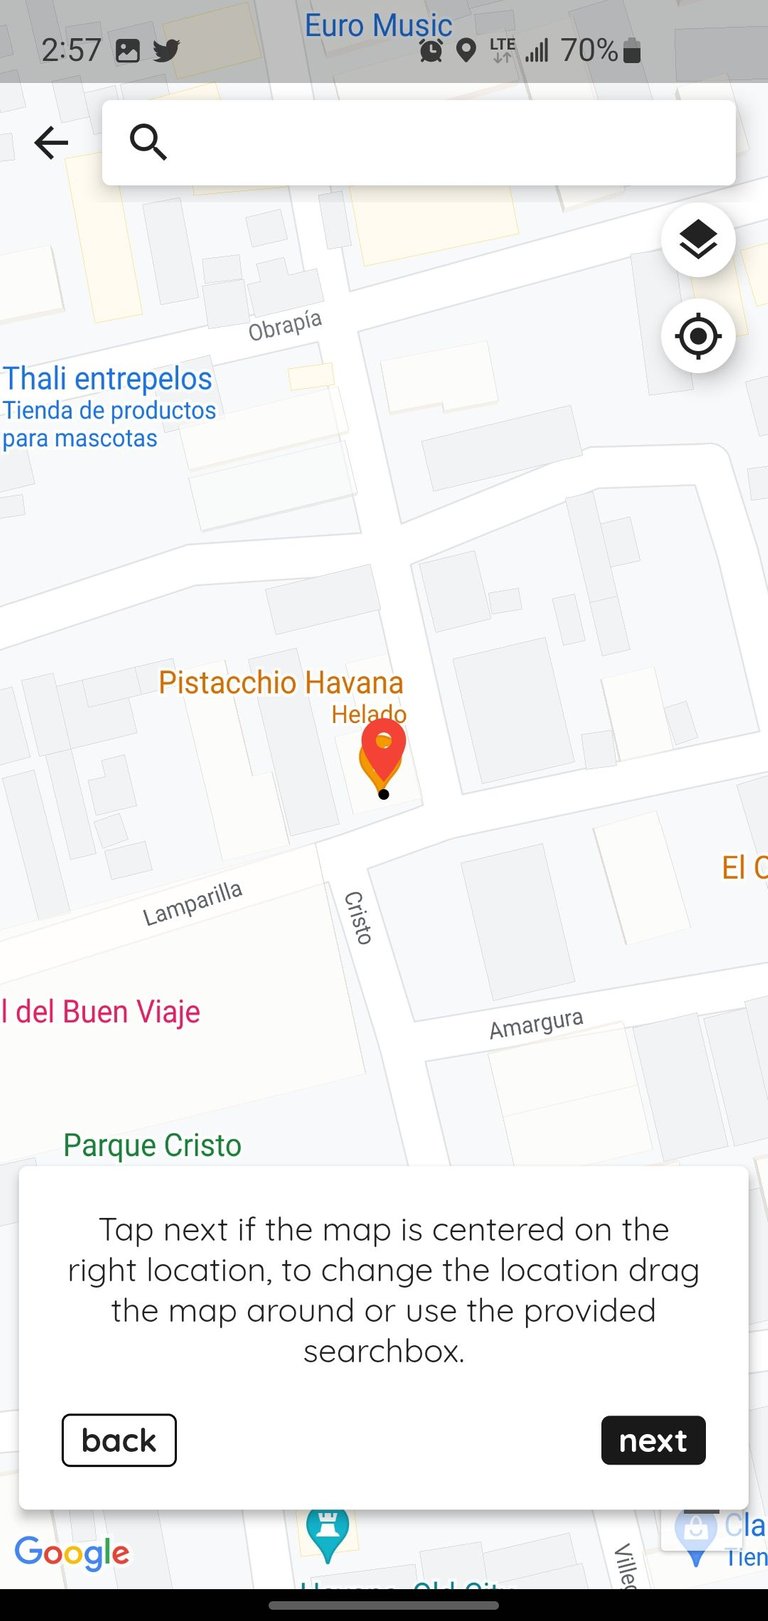
Al tener seleccionada las fotos nos pedirá una ubicación que si no aparece en el mapa podremos buscarla, el nombre del lugar, una descripción de que nos pareció y una valoración. Al rellenarlo ya tendremos echo nuestro waypoint. Así podremos ir haciendo tantos como queramos que se quedarán guardados para un uso posterior.
When we have selected the photos it will ask us for a location that if it does not appear on the map we will be able to look for it, the name of the place, a description of what we thought and a valuation. When filling it we will have our waypoint. This way we will be able to make as many as we want that will be saved for later use.
 |  |
|---|
Como crear el post.
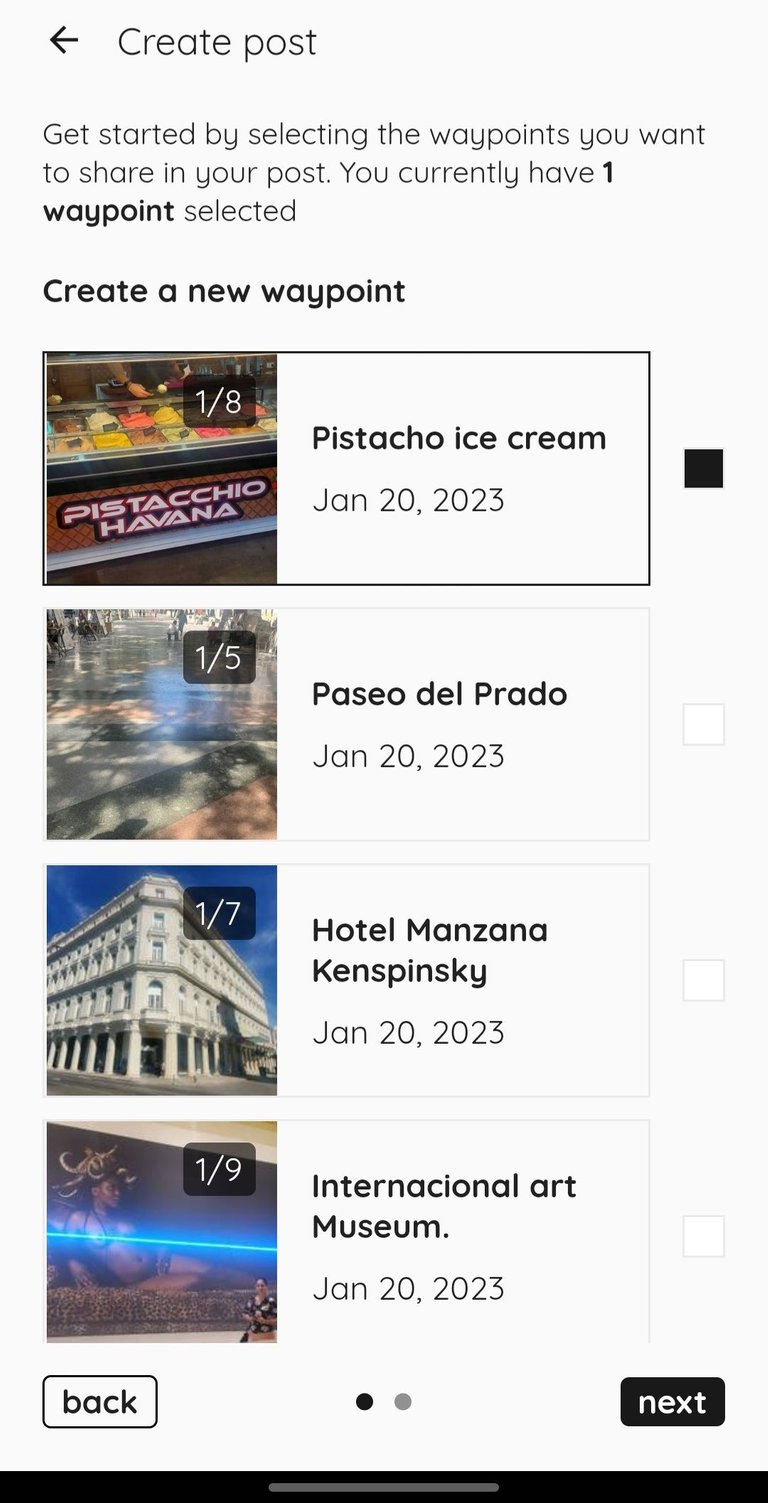
Al seleccionar el ➕️ en donde mismo hicimos lo del waypoint, pinchamos post, nos cargará todos nuestros waypoints y nos dará la opción de crear uno nuevo. Aquí utilizaré el que acabamos de crear de Pistacho, nos pedirá un título y una descripción si queremos para la publicación y tendrá una pestaña permitiéndonos que se publique en Hive. Yo no le voy a dar post porque no me gusta hacer un post con un solo waypoint y esto es para el tutorial, pero nada más le demos la opción post, podremos ir a la cuenta de hive y revisar.
How to create the post.
When selecting the ➕️ where we did the waypoint, click on post, it will load all our waypoints and will give us the option to create a new one. Here I will use the one we just created from Pistachio, it will ask us for a title and a description if we want to publish it and it will have a tab allowing us to publish it in Hive. I am not going to give it post because I don't like to make a post with a single waypoint and this is for the tutorial, but as soon as we give it the post option, we will be able to go to the hive account and review.
 | |
|---|
Contras de usar la aplicación.
Cuando postemos en la app debemos ir al perfil de hive y editarlo para agregar un banner si queremos o algún dato estra que queramos dar, también necesitamos editar las etiquetas porque solo nos ponen 3 etiquetas.
Cons of using the app.
When we post in the app we must go to the hive profile and edit it to add a banner if we want or some estra data we want to give, we also need to edit the tags because they only put us 3 tags.
Espero que les haya servido este tutorial para seguir conociendo Hive un poquito más. Hasta un próximo encuentro.
I hope this tutorial has helped you to get to know Hive a little bit better. See you next time.

Photos: My authorship and screenshots.
Banner: Click in the one photo. Photo in pixabay
Separador
Traducción/translate
Twitter: @newnow497
Facebook: @newnow497
Community support @Hivecuba

The rewards earned on this comment will go directly to the people( @newnow497 ) sharing the post on Twitter as long as they are registered with @poshtoken. Sign up at https://hiveposh.com.
Congratulations @newnow497! You have completed the following achievement on the Hive blockchain And have been rewarded with New badge(s)
Your next target is to reach 90 posts.
You can view your badges on your board and compare yourself to others in the Ranking
If you no longer want to receive notifications, reply to this comment with the word
STOPTo support your work, I also upvoted your post!
Check out our last posts:
Support the HiveBuzz project. Vote for our proposal!
La voy a probar a ver que tal. Gracias.