What started as a project to keep me busy during the winter while it was too cold to work on the bike has taken on a life of it's own. It's becoming a summer project as well !
The last couple of months have seen the project being a bit stop/start due to pressures of work and real life. In addition, there have been a few technical challenges that have taken time to overcome.
In my last post I described how I took the pistons out of the engine after finally being able to dislodge the barrels.
I came to the conclusion that the barrels were better as a future project, as they'll need a full rebore and over-sized pistons if they are to be useful again.
Luckily I found someone one eBay selling this set;
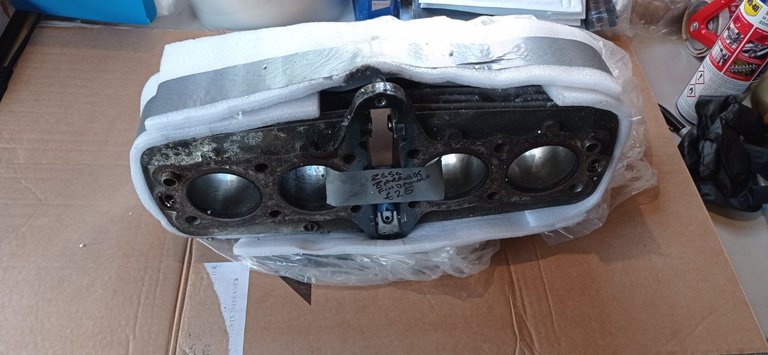
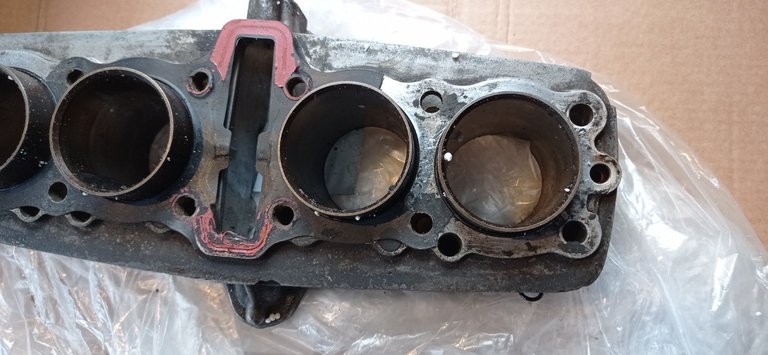
They were described as having fin damage, but luckily it's actually very minimal and in places that aren't too obvious. They were filthy, however, and would need considerable time and effort to clean up. As I started to clean them, it was clear they'd been recently and professionally honed, which was really excellent news.
While I was doing that, I was simultaneously working on cleaning up the pistons. My ultrasonic cleaner is only a little jewellery-type one, but it's perfect for this kind of job.
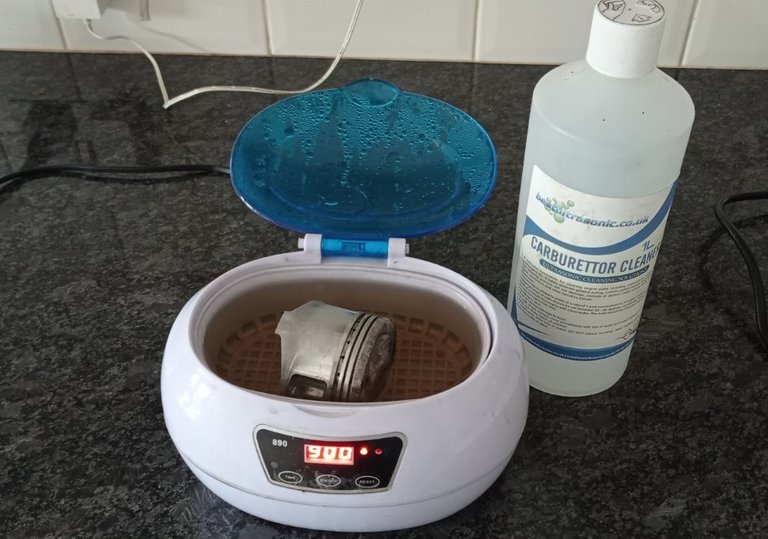
After one 9-minute cycle, the water is already the colour of weak tea ! But not as tasty, because I added carb cleaner to it. It's more of a detergent than a solvent, but it still great at removing gunge from engine bits.
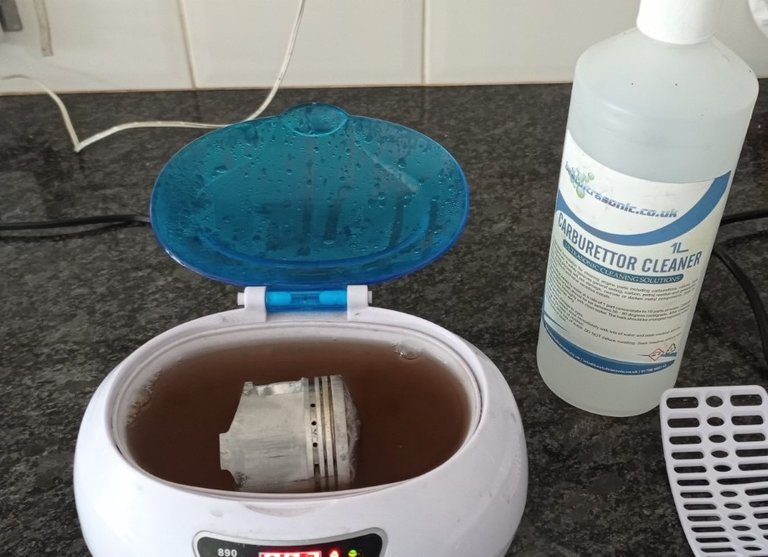
After a couple of hours of ultrasonic cleaning, the piston is a lot nicer, and the cleaning fluid is a much darker brown !
During this process, I discovered that although the piston rings were easy to remove from pistons 1,2 and 4, number 3 was being a complete pig. The oil control ring (the wiggly one, with a very thin ring each side of it) came off easily after an hour of ultrasonic cleaning. The lower piston ring took half a dozen goes with the heat gun before it came out.
The top ring, however, is totally stuck. This was the piston that was stuck firm to the barrels and had made them so hard to remove, and the one where water had got in and sat. I am guessing it is firmly welded in there by galvanic corrosion.
New rings are around £125 a set, and I'm trying to do this as a low-budget project. I don't mind spending money on extra tools that will come in useful for years to come, but I am trying to keep the spending on parts to a minimum. But after 2 weeks of ultrasonic cleaning, heat gun and gentle prying at the end gap, it was clear the top piston ring wasn't going to budge. Not only was there no chance of getting it out, but I was starting to doubt whether the piston itself could be saved.
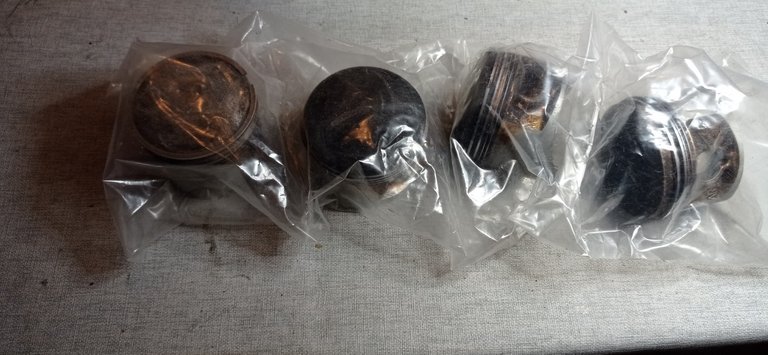
Luckily i had a spare set of pistons ! Grubby, but all the rings moved freely. It helps that a few months back I went through all the parts, catalogued them and heat-sealed them into labelled bags to keep them in good condition.
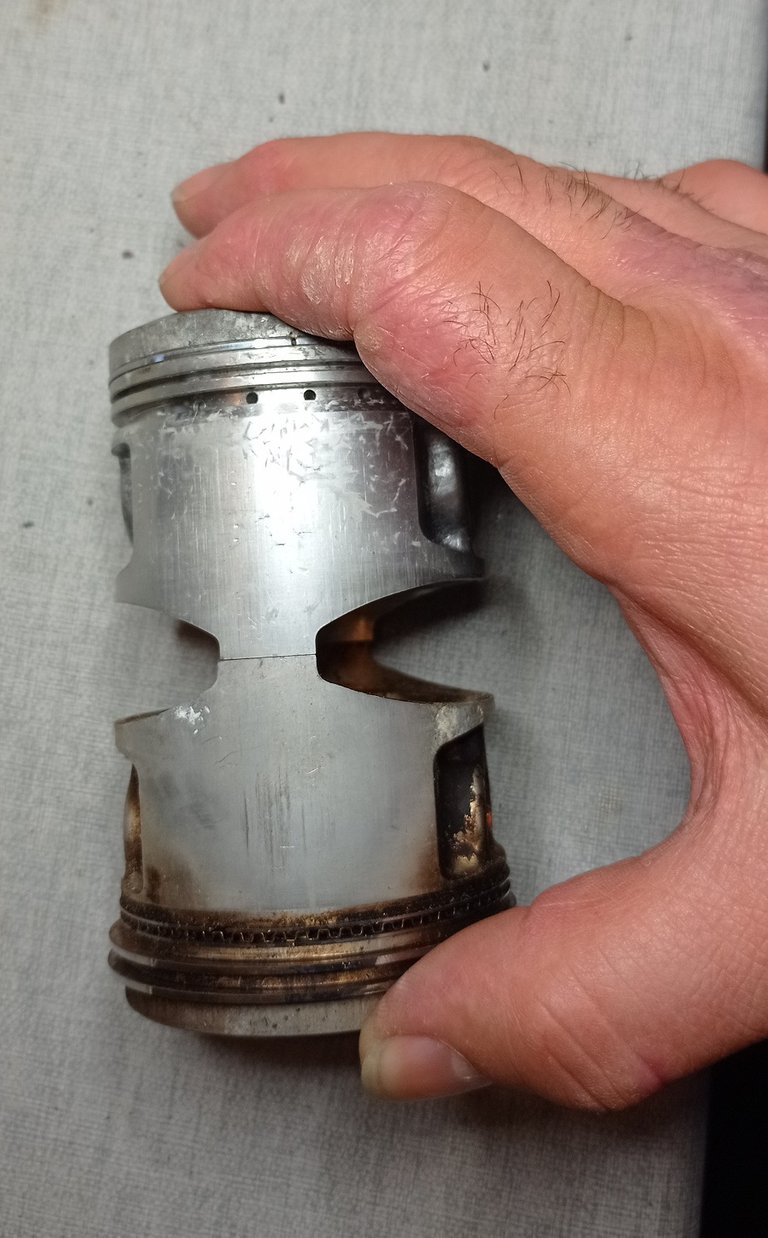
So I took the best of them, checked it for size against the problem piston. This was just in case one set or other had had a sneaky rebore that I didn't know about. Running a finger across the gap was enough to tell me they are both the same - fingertips are incredibly sensitive, and I still think they are the best way to tell if two things that should be the same size really are !
The top piston is the problem one, by this time thoroughly over-cooked with heat gun and ultrasonic cleaner. The bottom one is the replacement, grubby but serviceable.
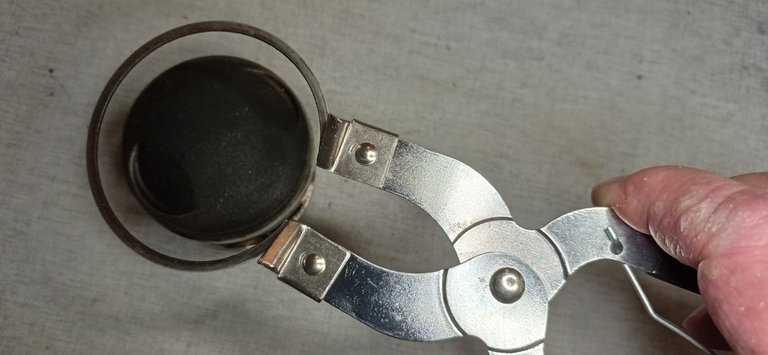
Removing rings from pistons can be done by hand, but it's easy to break them because they are designed to be compressed but not twisted. It's better to use piston ring pliers - they're a simple, dirt cheap tool that makes a finger-nail breaking job so much easier !
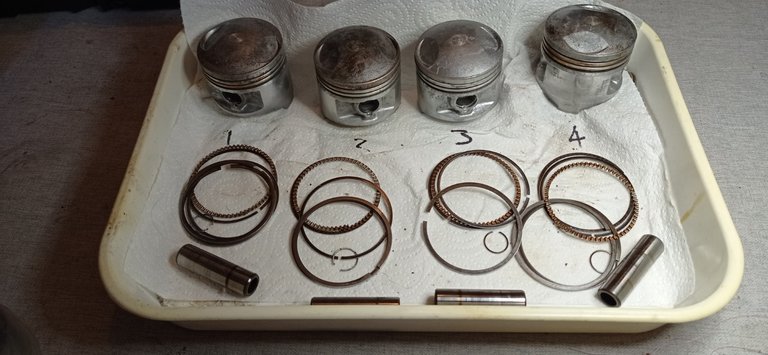
This last photo is the pistons cleaned up (except the new one, which was still in the ultrasonic when I took this picture). Note the kitchen towel with the piston numbers written on it. I was really careful to keep them in the right order, and to lay the rings out so they were the correct way up and in the same order they'd come off the piston.
Unfortunately, I didn't take any photos of putting the pistons and new (cleaned) barrels back on the engine - it was a bit of a rush for time because I only had an hour after finishing work before it got dark.
Key things about re-assembly were that I used new gudgeon pin circlips to replace the ones I had removed, and used piston ring clamps to ensure the rings were compressed as I lowered the barrels. As a sealant on the base gasket I used a thin coat of Wellbond on each side. I oiled the bores inside the barrels before fitting them, and once they were on, I put a small amount of engine oil onto each piston just to keep water from getting at the rings again.
Next time I'll talk cylinder heads......
Hi @alonicus, Thank you for participating in the #teamuk curated tag. We have upvoted your quality content. For more information visit our discord https://discord.gg/8CVx2Am
Congratulations @alonicus! You have completed the following achievement on the Hive blockchain And have been rewarded with New badge(s)
Your next target is to reach 6000 upvotes.
You can view your badges on your board and compare yourself to others in the Ranking
If you no longer want to receive notifications, reply to this comment with the word
STOPTo support your work, I also upvoted your post!
Check out our last posts:
It is true! when checking pistons and cylinders of an engine we do not know how we will find them. Good thing you found a new set.
At home I have seen pistons with super glued rings, but they are left in a bucket with diesel oil for several days until they loosen and are easy to remove, this is if you do not have ultrasound.
I congratulate you for finishing the job. I look forward to seeing the next job. Greetings and success 👋👋👋👋👋.
Good tip about the diesel - thank you ! The ultrasound didn't loosen the top ring, so I'll give the diesel a try, and it should tell me whether the problem is burned on oil or galvanic corrosion.
That ultrasonic did make a huge difference though!
Are you going to send the block in for honing or not?
You've come along way with this build, I missed a few posts but progress is certainly being made.
!BEER
I think I'm in love with my ultrasonic cleaner 😁 It's full of carburettor parts right now.
When I checked the block over, although it was really dirty on the outside, the inside had clearly been very recently honed.
This is going to be a spare engine which I'll keep wrapped up until I need it - I'm bound to blow up the engine that's in the bike at the moment sooner or later ! I've got a hone, but I'm reluctant to re-hone it and remove more material because that brings the day when it'll need a rebore and new pistons closer. So when I need to put the engine in, I think it'll be okay, but if compression is low or it smokes, I'll get the barrels off and hone it then. Hopefully that makes sense !