In my previous post about having a deep look at E4 Error in my Gplus I talked about the Seven Step Diagnostic Procedure, Seven Step Diagnostic Procedure: E4 Error in my GPlus Air Conditioner First Part
of which I only had accomplished, upto that moment, the first 4 steps, i.e,
I.- First Step: Verify the problem.
II.- Second Step: Visual Inspection.
III.- Third Step: Gather Data & Study it.
IV.- Forth Step: Develop a Diagnostic Plan.
En mi post anterior sobre la revisión en profundidad del Error E4 en mi Gplus hablé del Procedimiento de Diagnóstico en Siete Pasos, Procedimiento de Diagnóstico en Siete Pasos: Error E4 en mi Aire Acondicionado GPlus Primera Parte, del cual sólo había realizado, hasta ese momento, los primeros 4 pasos, es decir:
I.- Primer paso: Verificar el problema.
II.- Segundo Paso: Inspección visual.
III.- Tercer Paso: Recoger la data y estudiarla.
IV.- Cuarto Paso: Desarrollar un Plan de Diagnóstico
The three steps left, i.e.
V.- Fifth Step: Carry out some Testing.
VI.- Sixth Step: Determine the Root Cause & Repair.
VII.- Seventh Step: Verify the Repair.
were to follow:
Los tres pasos siguientes, es decir
V.- Quinto paso: Realizar algunas pruebas.
VI.- Sexto Paso: Determinar la causa raíz y reparar.
VII.- Séptimo Paso: Verificar la reparación.
eran a seguir:
Fifth Step: Carry out some Testing.
According to the information found and suggested in webpages such as www.yoreparo.com in its link /es/refrigeracion/aire-acondicionado/preguntas/1163585/general-plus-error-e4 as well as https://www.reviewhomewarranties.com in its link /home-maintenance/hvac/fixing-e4-error-on-air-conditioner/, mentioned in my previous post regarding E4 error, already referred to, in the introduction of this post, I went on to test:
Quinto paso: Realizar algunas pruebas.
De acuerdo con la información encontrada y sugerida en páginas web como www.yoreparo.com en su enlace /es/refrigeracion/aire-acondicionado/preguntas/1163585/general-plus-error-e4 así como https://www.reviewhomewarranties.com en su enlace /home-maintenance/hvac/fixing-e4-error-on-air-conditioner/, mencionadas en mi anterior post sobre el error E4, ya referido en la introducción de este post, pasé a realizar pruebas:
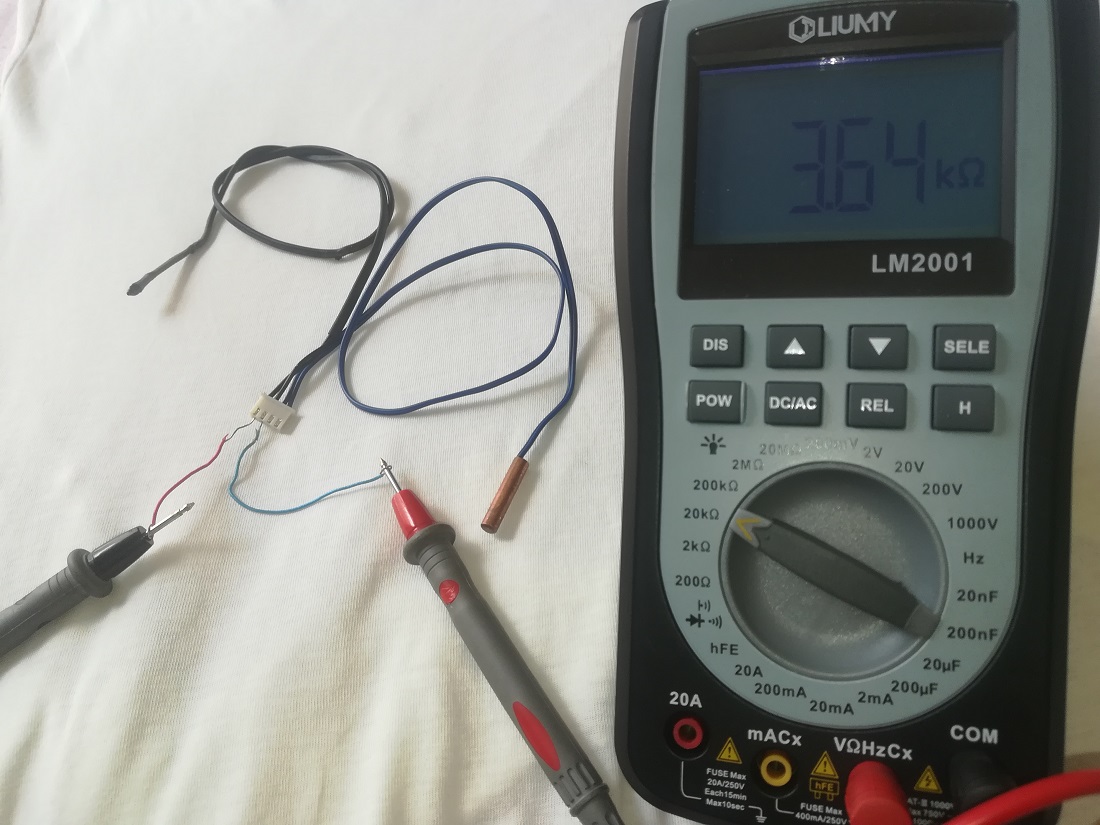
.- The resistance of the Room Temp Sensor and the Tubing Temp Sensor as well.
.- La resistencia del Sensor de Temperatura de la Habitación y del Sensor de Temperatura del Tubo también.
.- Vacuum the system.
.- Realizando vacio al sistema

.- Load or charge R22 coolant gas into the system, by steps, keeping an eye on the pressure gauge to see if it dropped or the indicator needle or pointer had a kick, suggesting a possible leak. Not being an expert on the subject, I called upon a friend of mine who came along with all his equipment to give me a hand on this matter.
Cargar o recargar gas refrigerante R22 en el sistema, por pasos, vigilando el manómetro para ver si bajaba o la aguja o puntero del indicador tenía una señal de movimiento brusco, sugiriendo una posible fuga. Al no ser un experto en el tema, recurrí a un amigo que vino con todo su equipo para echarme una mano en este asunto.

Sixth & Seventh Steps: Determine the Root Cause & Repair – Verify the Repair
Upto to this point all that had been carried was nothing more than maintenance, more than anything else. At this moment I could not point out yet what the cause for E4 error to set was. Since nothing appear to be wrong, there was no other choice but to start up the air conditioner and watch its performance. To begin with, it did not start by the remote controller. So, I had to do it by the dip-switch or push button located on the electronic card. Once done it, the display showed 25 °C as a set temperature.
Sexto y Séptimo Paso: Determinar la Causa Raíz y Reparar - Verificar la Reparación
Hasta este momento todo lo que se había llevado a cabo no era más que mantenimiento, más que nada. En este momento no podía señalar todavía cuál era la causa de que se estableciera el error E4. Como no parecía haber nada malo, no había más remedio que poner en marcha el aire acondicionado y observar su funcionamiento. Para empezar, no arrancó con el control remoto. Así que tuve que hacerlo mediante el dip-switch o pulsador situado en la tarjeta electrónica. Una vez hecho esto, la pantalla mostraba 25 °C como temperatura de referencia

Once the compressor started running, I was able to measure the current it was consuming, which, by the way, was fairly close to the specs on the plate, 9 amp.
Una vez que el compresor empezó a funcionar, pude medir la corriente que consumía, que por cierto, estaba bastante cerca de las especificaciones de la placa, 9 amperios.
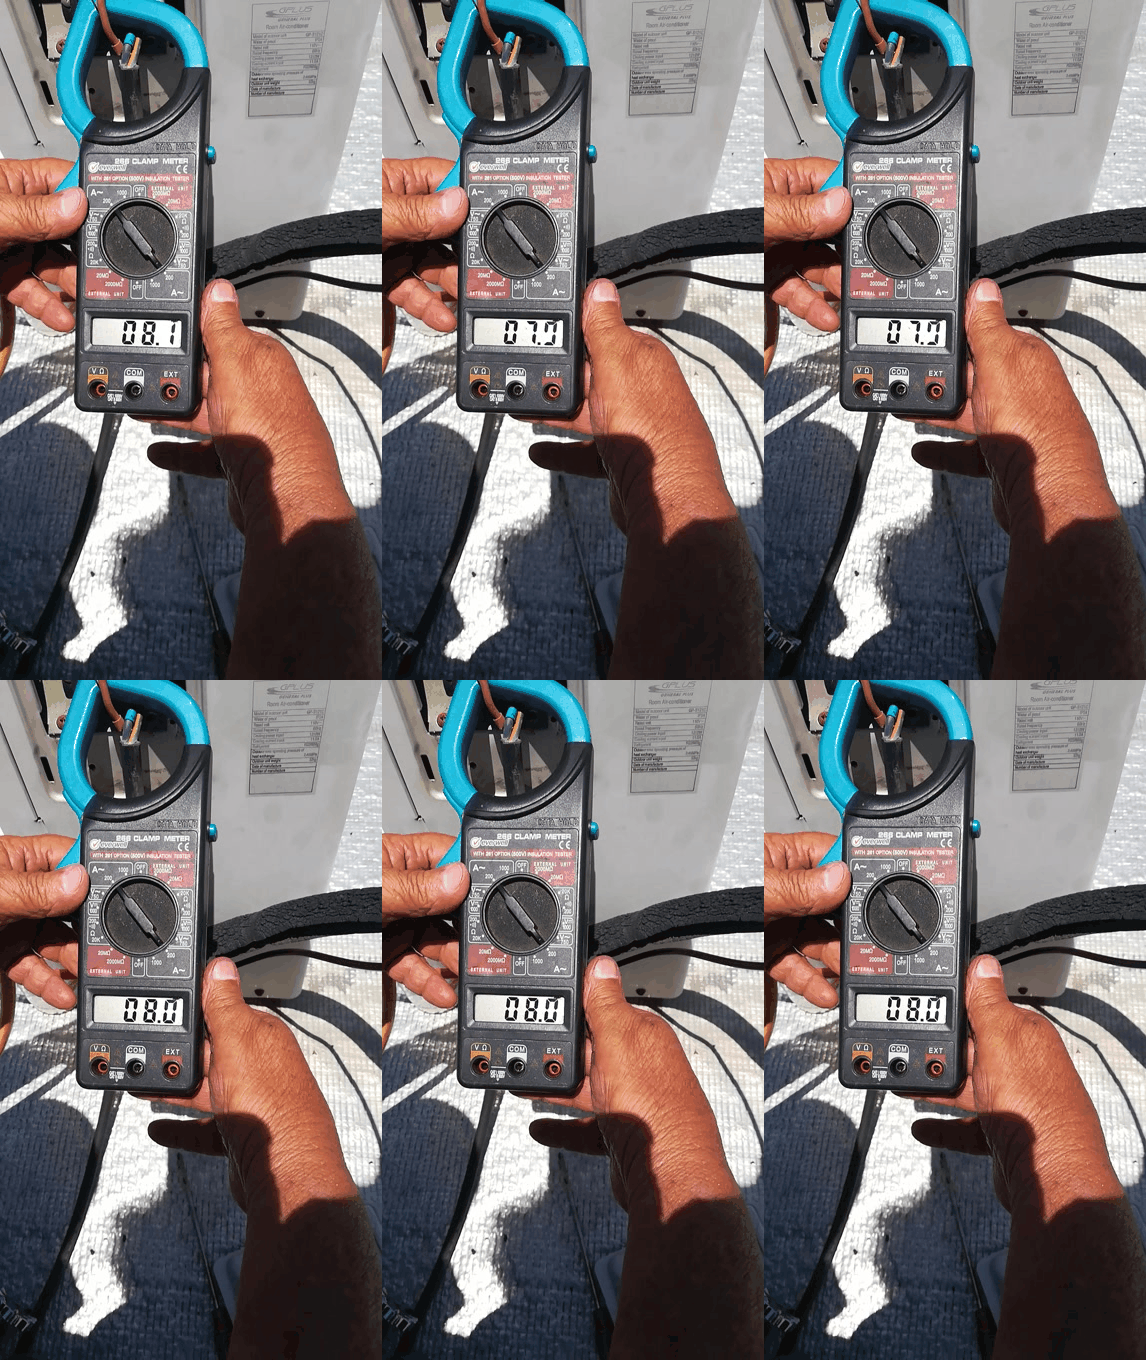
I left it run for 3 hours minimum and the E4 error did not set up again, at least it did not show upon the display. However, the fact that the error had not appeared did not mean that the Root Cause of the problem had been solved. I state this since the display seemed somehow “static” as if it was not being updated according to what could be going on with the functioning of the air conditioner.
Under these conditions the operation of the air conditioner was not trustable. So, a check to the display plug that connected to the electronic card needed to be carried out. Wiggling test on the cable revealed that there was a false contact with the six-cable plug at this location.
Lo dejé funcionando durante 3 horas como mínimo y el error E4 no volvió a aparecer, al menos no se mostró en la pantalla. Sin embargo, el hecho de que el error no hubiera aparecido no significaba que se hubiera solucionado la causa del problema. Digo esto porque la pantalla parecía de alguna manera "estática" como si no se actualizara de acuerdo a lo que pudiera estar pasando con el funcionamiento del aire acondicionado.
En estas condiciones el funcionamiento del aire acondicionado no era confiable. Por lo tanto, era necesario realizar una comprobación del enchufe de la pantalla que se conectaba a la tarjeta electrónica. La prueba de movimiento en el cable reveló que había un falso contacto con el enchufe de seis cables en este lugar.
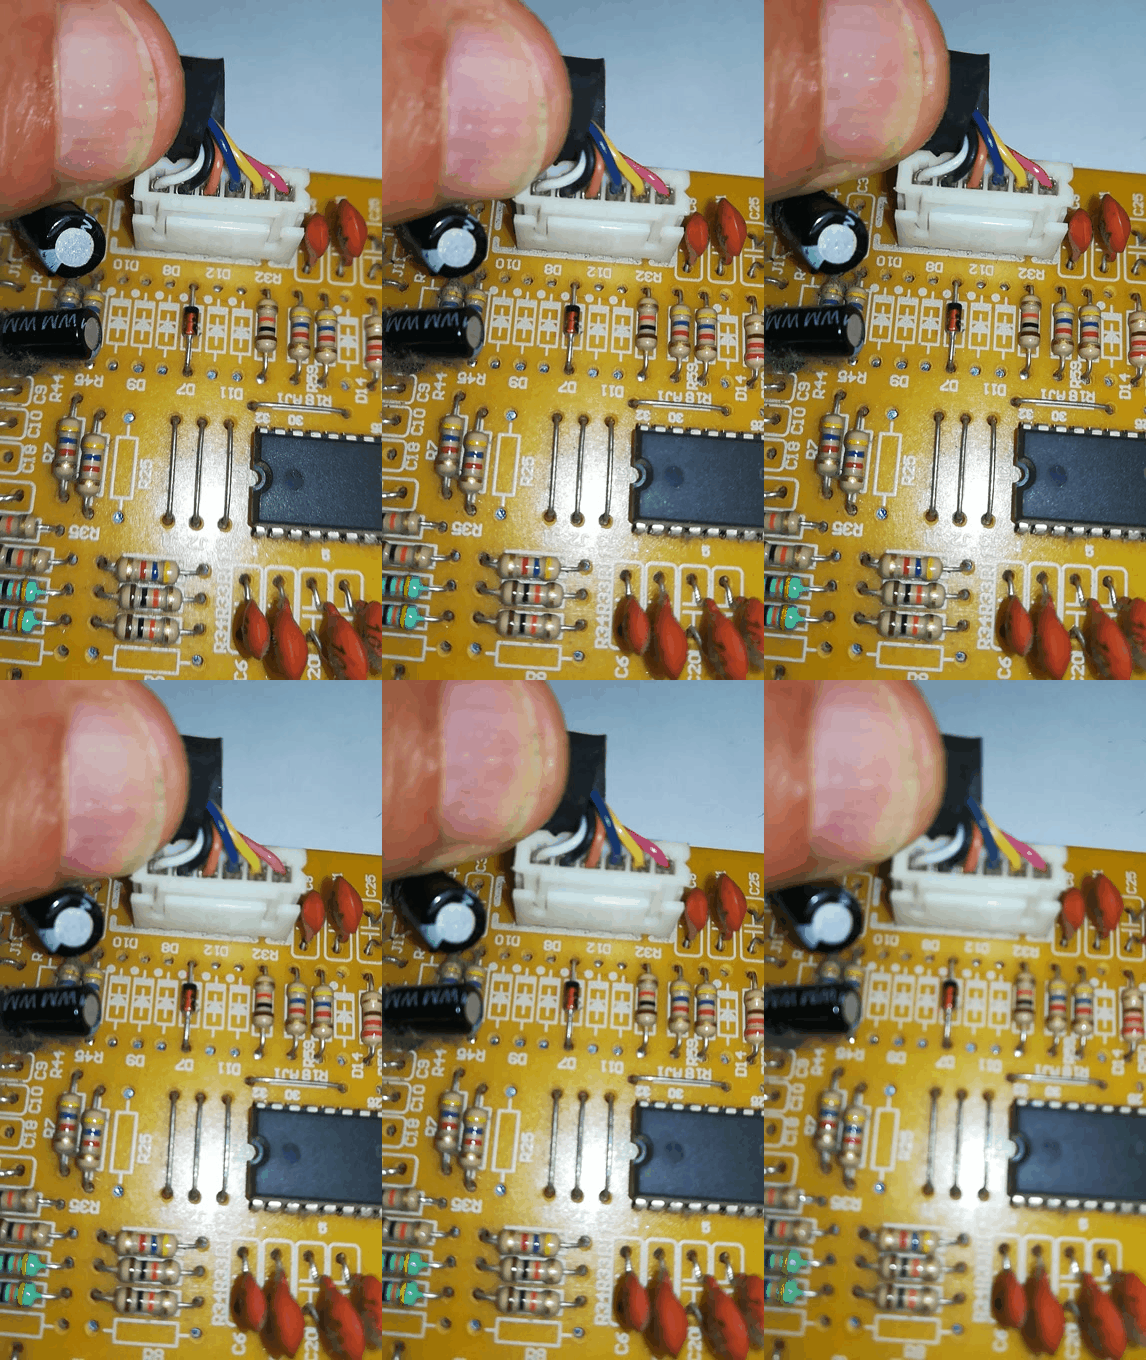
Not knowing which of these six cables or wires was to make the display operate normally, I went on to press the inner contact of that female plug so as to make sure they would make a tied contact to the pins on the card male plug, so that it would respond to a command from the remote controller. I kept doing so until I finally got a stable response, leaving the AC to function as it was expected to do. As a short summary, for that particular moment, what was needed from the display was that it actually showed a trustable signaling. For this display, it shows a sequence of lights going on and off similar to a Christmas tree decoration lighting.
Sin saber cuál de estos seis cables o hilos era el que debía hacer funcionar la pantalla con normalidad, pasé a presionar el contacto interior del plug hembra para asegurarme de que hicieran un contacto ajustado a los pines del plug macho de la tarjeta, para que respondiera a una orden del control remoto. Seguí haciéndolo hasta que finalmente obtuve una respuesta estable, dejando que el AC funcionara como se esperaba que lo hiciera. Como resumen, para ese momento en particular, lo que se necesitaba de la pantalla era que realmente mostrara una señalización confiable. En este caso, la pantalla muestra una secuencia de luces que se encienden y se apagan, similar a la iluminación de un árbol de Navidad.
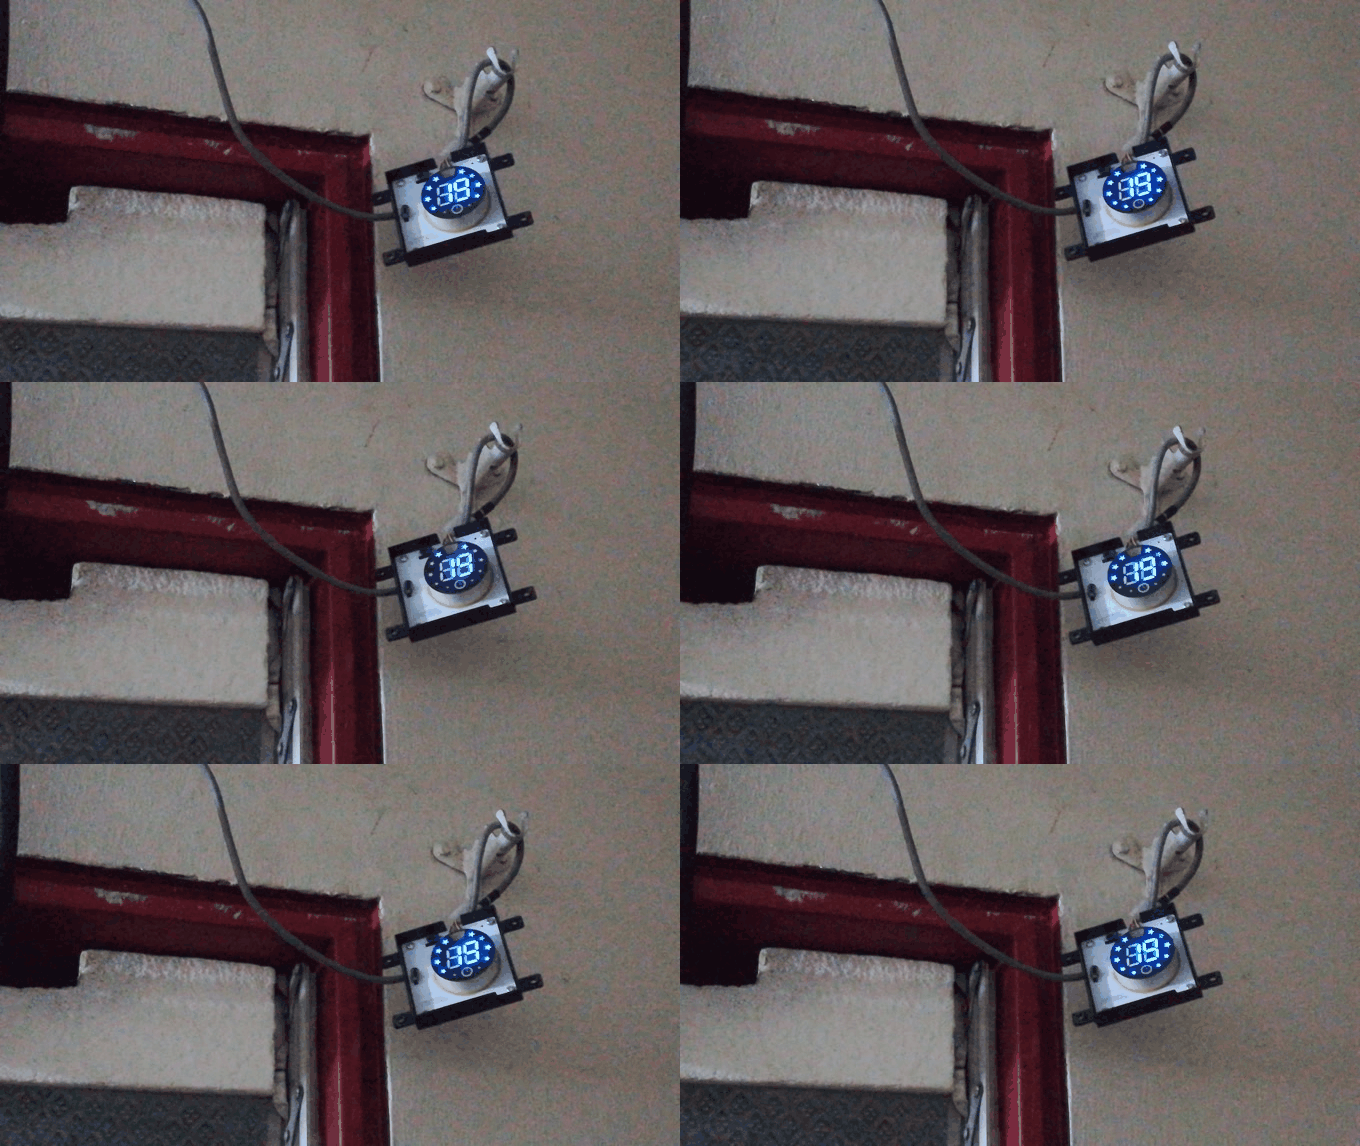
Although I finally got my air conditioner back in operating conditions again, I know that there are some other things to be done, as to change the bearings of the air propeller drum. Investigating this as a probable cause, I found out the following:
.- When the card receives the signal to turn on the air conditioner, it does so setting a value for the air drum to turn at.
.- The air drum feeds back its speed to the card by means of a washer type magnet, the magnetic field of which is picked up by a speed sensor based on the Hall effect principle.
.- The setup and the fedback values are compared. If they match to an error of, say 2%, it is fine. If not, the electronic card keeps the air conditioner running for certain time, monitoring the difference. If it keeps that way, the control card shuts off the compressor as a protection. In fact, to the card what it actually means is that something is not working properly, causing the compressor to overwork, getting too cold since the air drum is not pushing enough air through the evaporator, not taking the “cold away”. That is way, as a protection, E4 error is set.
Aunque finalmente conseguí que mi aire acondicionado volviera a estar en condiciones de funcionamiento, sé que hay otras cosas que hacer, como cambiar los rodamientos del tambor de la turbina de aire. Investigando esto como causa probable, encontré lo siguiente:
.- Cuando la tarjeta recibe la señal para encender el aire acondicionado, lo hace fijando un valor para que la turbina de aire gire..-
.- La turbina de aire retroalimenta su velocidad a la tarjeta mediante un imán tipo arandela, cuyo campo magnético es captado por un sensor de velocidad basado en el principio de efecto Hall.
.- Se comparan los valores de configuración y de realimentación. Si coinciden con un error de, por ejemplo, del 2%, está bien. Si no es así, la tarjeta electrónica mantiene el aire acondicionado en funcionamiento durante cierto tiempo, controlando la diferencia. Si se mantiene así, la tarjeta de control apaga el compresor como protección. En realidad, para la tarjeta lo que significa es que algo no está funcionando bien, haciendo que el compresor trabaje en exceso, enfriando demasiado ya que la turbina de aire no está empujando suficiente aire a través del evaporador, no llevándose el "frío". Así es como, por protección, se establece el error E4.
This is a way to show, using a probable a long example, anyway, how to use the Seven Step Diagnostic Procedure..
Esta es una manera de mostrar, utilizando un ejemplo probablemente largo, de todos modos, cómo utilizar el Procedimiento de Diagnóstico de Siete Pasos..
All pictures are of my own

Su post ha sido valorado por @ramonycajal
Congratulations @ogutierrez! You have completed the following achievement on the Hive blockchain and have been rewarded with new badge(s):
Your next target is to reach 4250 upvotes.
You can view your badges on your board and compare yourself to others in the Ranking
If you no longer want to receive notifications, reply to this comment with the word
STOPSupport the HiveBuzz project. Vote for our proposal!
Fascinante la fuente del error E4 y de tu sistema de pasos, ya lo había dicho previamente, pero me encanta tu metódico proceso para reparar, siempre estable e inclemente, es adecuado y lo mejor posible para reparaciones, ya que toma personal la misma y además aplica el método científico correctamente, un abrazo y espero pronto puedas cambiar los rodamientos de la turbina que mencionas :)
Ciertamente este método es estable y puedes repetirlo y de seguro ubicaras la causa del malfuncionamiento de aquello que estes revisando por muy trivial o dificil que parezca.
Ciertamente ya ubique los rodamientos y prontamente los cambiare.
Lo agradable de todo esto es que te brinda experiencia y te hace sentir, tal vez no con el conocimiento para debatirte con un tecnico en A/A, pero si podrias darte cuenta si te estarian metiendo "cuentos", verdad?
Saludos, un abrazo...Mis saludos @jesustiano, siempre agradecido por tus comentarios motivadores luego de tomarte el tiempo de leer mis publicaciones.