ENGLISH 🇺🇸 |
|---|
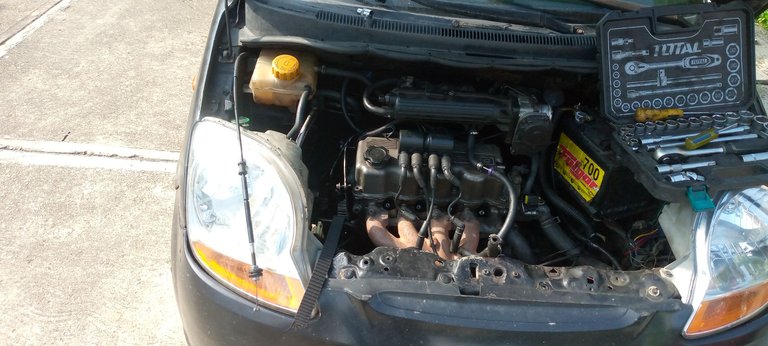
Como siempre, les contaré la historia de cómo llegué a este punto con el vehículo. Hace algunos días, recibí una llamada de un cliente que estaba conduciendo el vehículo y, bruscamente, al caer en un hueco, el vehículo se apagó. Es importante destacar este detalle para el final de la historia. El cliente me comentó que creía que la base del motor se rompió y que al intentar encender el vehículo, no funcionaba. Le dije que no intentara más y que iba en camino.
Sin embargo, debido a una mala jugada del destino, no pude llegar al sitio porque creció un río cerca de donde vivo y no pude salir de la zona. Después de unos días, trajeron el vehículo a mi taller y de inmediato verifiqué si la correa de tiempo o de distribución estaba rota y, efectivamente, lo estaba. Procedí a explicarle al cliente que el vehículo dobla válvulas y todo el trabajo que debía realizar, así como los repuestos que debía traer para comenzar con el trabajo al día siguiente. (Mi error fue no verificar todo en ese momento, antes de que comprara los repuestos).
Desarmé, reparé y armé todo el vehículo en poco tiempo, pero el destino tenía otro obstáculo para este trabajo, ya que debido al golpe que recibió al romperse la base del motor, se dobló y rompió la polea del árbol de levas. Los clientes ya estaban esperando el vehículo para que se les entregara, así que tuve que llevarlos a casa para que al día siguiente me trajeran la pieza y así poder entregarles el vehículo.
A continuación, les muestro un pequeño resumen del trabajo realizado en este vehículo.
Hello Hivers, good morning, afternoon or evening, depending on what time you are reading me. I hope you are well and I thank you in advance for giving me your attention. In this opportunity, I bring you a little work I did on a Spark 2007 after several months of absence from this community. I hope I can contribute a little knowledge with this work.
As always, I will tell you the story of how I got to this point with the vehicle. A few days ago, I received a call from a customer who was driving the vehicle and, abruptly, falling into a hole, the vehicle shut down. It is important to highlight this detail for the end of the story. The customer commented to me that he believed the base of the engine was broken and when he tried to start the vehicle, it would not run. I told him not to try any more and that I was on my way.
However, due to a bad twist of fate, I could not get to the site because a river rose near where I live and I could not get out of the area. After a few days, the vehicle was brought to my shop and I immediately checked to see if the timing belt was broken and indeed it was. I proceeded to explain to the customer that the vehicle bends valves and all the work that needed to be done, as well as the parts that needed to be brought in to start the work the next day. (My mistake was not verifying everything at that time, before I bought the parts).
I disassembled, repaired and assembled the whole vehicle in a short time, but destiny had another obstacle for this job, since due to the blow it received when the base of the engine broke, the camshaft pulley was bent and broke. The customers were already waiting for the vehicle to be delivered to them, so I had to take them home so that the next day they could bring me the part and I could deliver the vehicle to them.
Here is a brief summary of the work done on this vehicle.
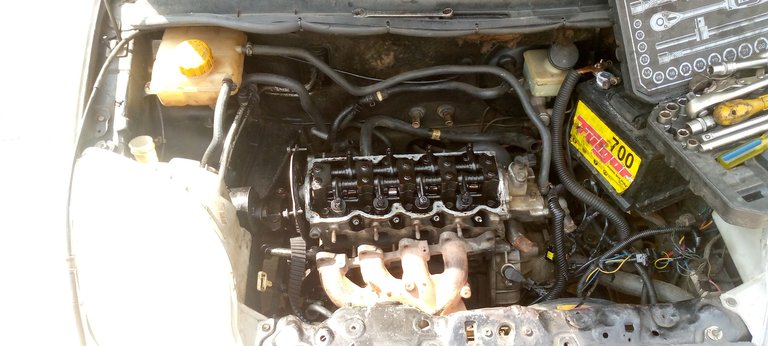
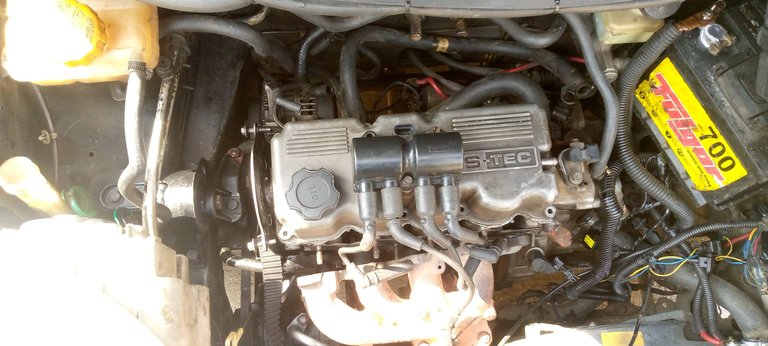
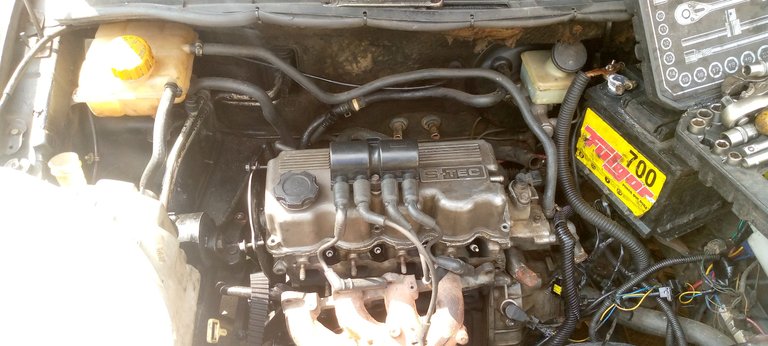
Foto tomada desde mi Android

Para realizar el cambio de válvulas, tenemos que tener en cuenta que este trabajo no es rápido, requiere mucha paciencia. No se trata solo de colocar las válvulas nuevas, sino de asegurarnos de que encajen perfectamente. Requiere dedicarle mucho tiempo para evitar cualquier tipo de fuga en las válvulas.
Las herramientas que se utilizan son llaves inglesas de 17 mm, 15 mm, 13 mm, 12 mm y 10 mm, alicate de presión, dados, palanca de fuerza y destornilladores. Sin embargo, la herramienta más importante es el torquímetro, que se utiliza para asegurar que los tornillos de la cámara queden apretados con una precisión uniforme, garantizando así una buena unión entre la cámara de combustión y el bloque de cilindros.
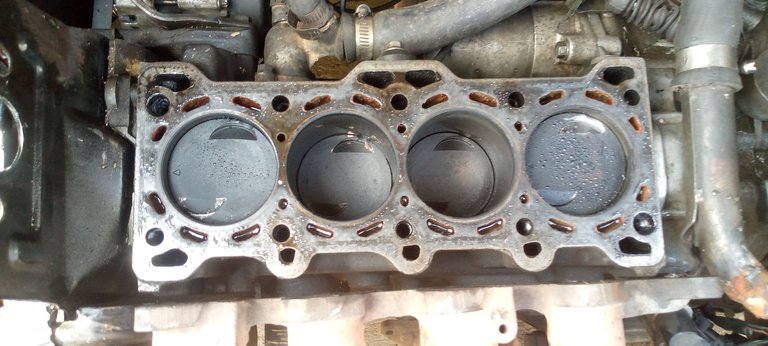
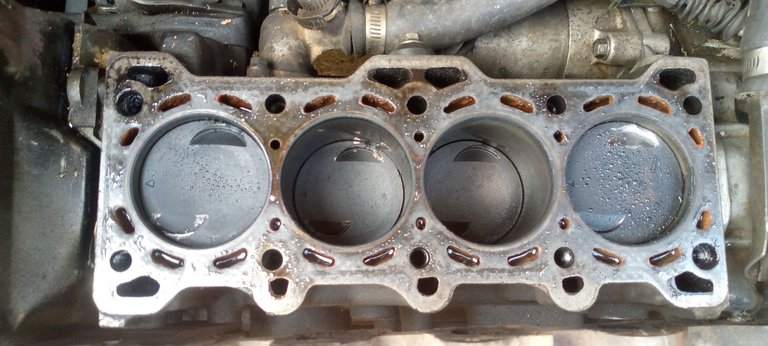
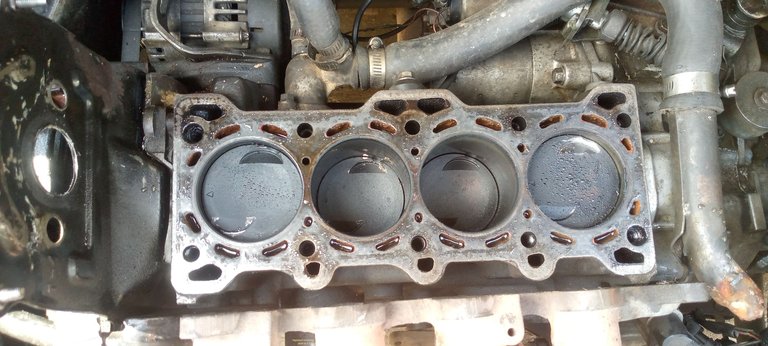
Comencé desconectando la batería y vaciando el líquido refrigerante. Luego, retiré todas las mangueras del sistema de refrigeración del motor que estaban conectadas a la cámara, para tener un mejor acceso al múltiple de admisión y de escape. Después de retirarlos, quité la tapa de las válvulas y, finalmente, aflojé los tornillos de la cámara. Una técnica que me enseñó mi abuelo para aflojar estos tornillos es apretar un poco más con el torquímetro y luego aflojarlos gradual y uniformemente hasta poder retirarlos con la mano. Esto evita que la cámara sufra daños a largo plazo.
Una vez fuera, procedí a aflojar los martillos de las válvulas o taquetes para luego retirar las guías de estos taquetes. Así pude finalmente retirar las válvulas. Pude notar al verlas que la gran mayoría tenían pequeños golpes, lo que indicaba que incluso si eran solo un poco, estaban dobladas. Por eso se decidió reemplazar todas las válvulas.
De igual manera, retiré las poleas y el tensor de tiempo del frente del motor para dejar esa parte lista para comenzar a colocar las piezas de repuesto y armar todo nuevamente.
To perform the valve replacement, we have to keep in mind that this work is not fast, it requires a lot of patience. It is not only a matter of fitting the new valves, but also of making sure that they fit perfectly. It requires a lot of time to avoid any kind of leakage in the valves.
The tools used are 17 mm, 15 mm, 13 mm, 12 mm and 10 mm wrenches, pressure pliers, socket wrenches, power wrenches and screwdrivers. However, the most important tool is the torque wrench, which is used to ensure that the cam bolts are tightened with uniform precision, thus guaranteeing a good bond between the combustion chamber and the cylinder block.
I started by disconnecting the battery and draining the coolant. Then, I removed all the hoses from the engine cooling system that were connected to the chamber, in order to have better access to the intake and exhaust manifold. After removing them, I removed the valve cover and finally loosened the cam bolts. A technique my grandfather taught me for loosening these bolts is to tighten them a little more with a torque wrench and then loosen them gradually and evenly until they can be removed by hand. This prevents long-term damage to the camera.
Once out, I proceeded to loosen the valve hammers or sockets and then remove the guides from these sockets. I was then able to finally remove the valves. I could tell by looking at them that the vast majority had small dings, indicating that even if they were just a little, they were bent. It was therefore decided to replace all the valves.
Likewise, I removed the pulleys and timing tensioner from the front of the engine to get that part ready to start putting the spare parts on and putting everything back together.
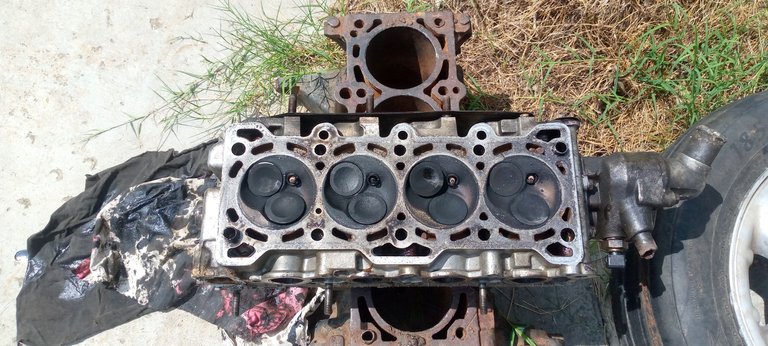
Foto tomada desde mi Android

El trabajo real de este vehículo es el esmerilado de las válvulas o el asentado de las mismas. Este es un proceso delicado que requiere mucha paciencia y dedicación, ya que la mínima fuga de las válvulas puede generar fallas que solo pueden corregirse desarmándolo y realizando el trabajo nuevamente. Imagino que les gustaría saber cuáles son mis recomendaciones para llevar a cabo este trabajo.
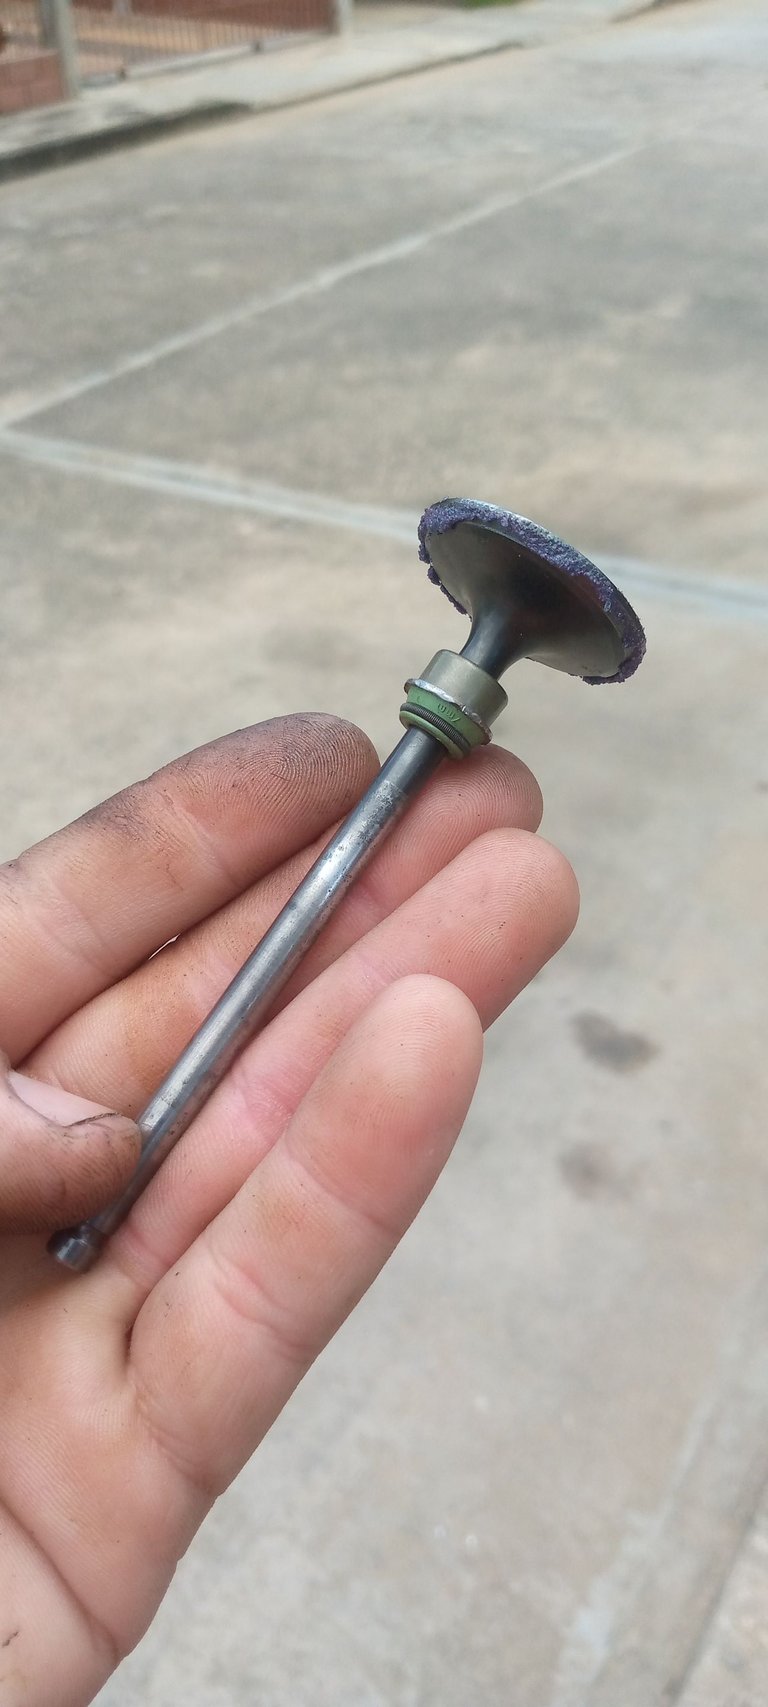
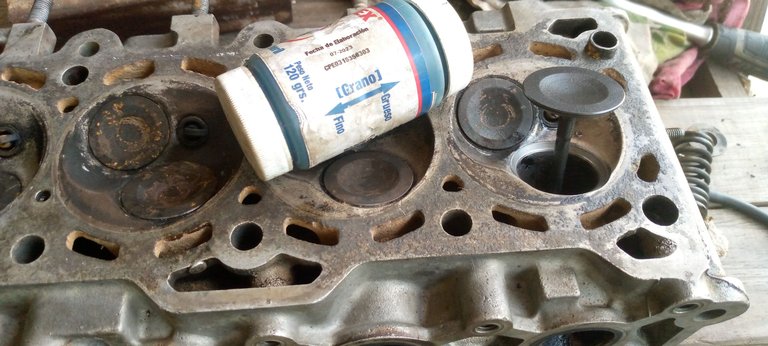
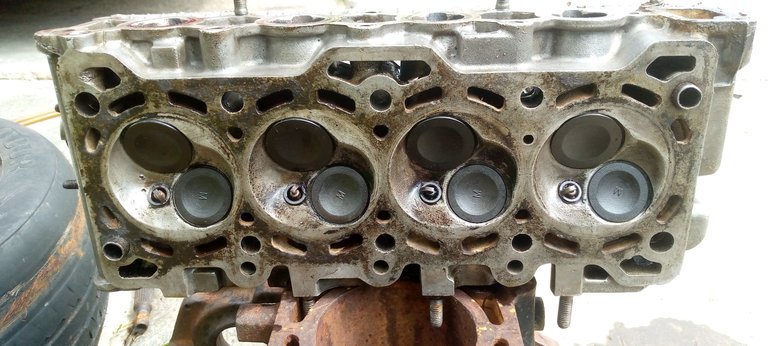
Lo primero y más importante es sacar la cámara del vehículo y limpiarla detalladamente, ya que esto garantizará que no haya virutas de suciedad que nos compliquen el trabajo. Entre los trucos que suelo utilizar y quiero compartir con ustedes, está el uso de un gorro o sello de válvula viejo cuando hacemos el esmerilado de la válvula. Esto evita que la grasa con partículas de lija que utilizamos pueda caer dentro de la guía y dañarla, como se muestra en la foto. Además, es importante asegurarse de que el resto de la válvula esté bien lubricada para que deslice fácilmente.
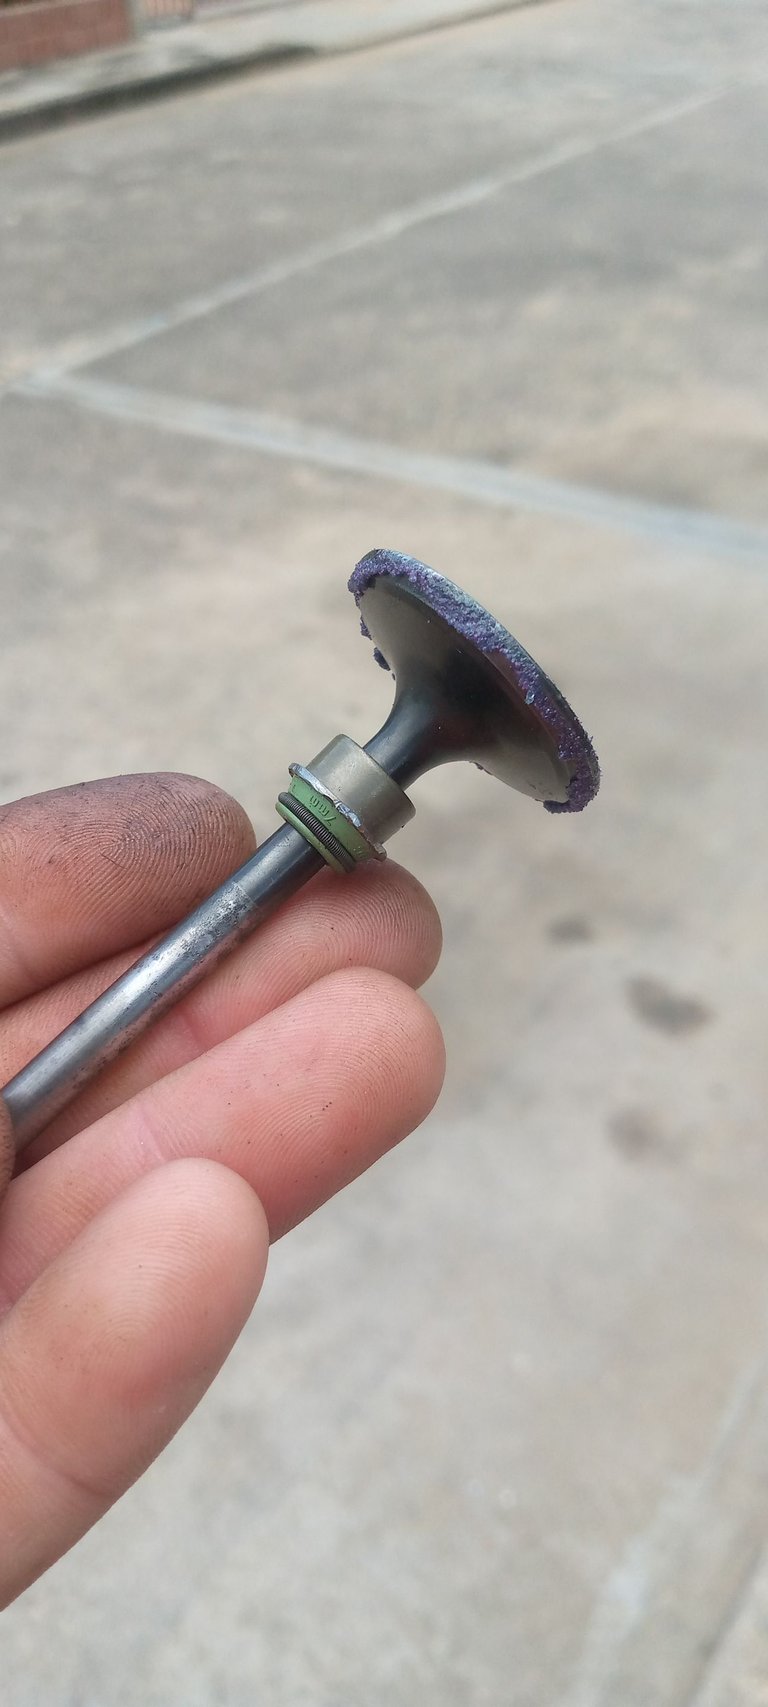
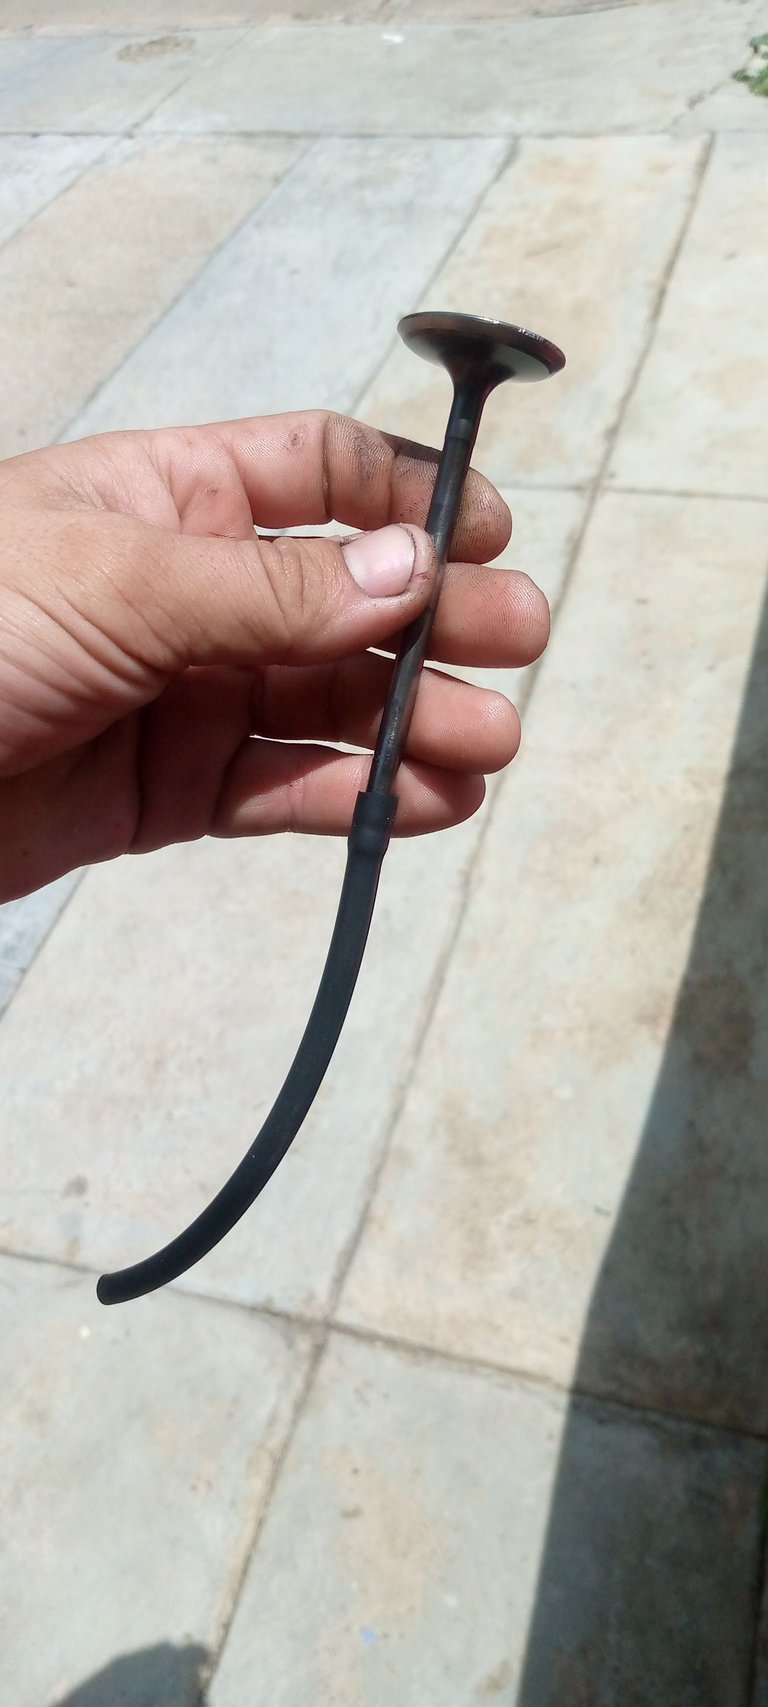
Existen muchas técnicas para el lijado, pero la que nunca recomiendo es la que se realiza con taladro, ya que no se tiene un control total del lijado. Personalmente, me siento más cómodo realizando el trabajo con una manguera pequeña en la punta de la válvula, aunque también he probado hacerlo con un chupón. La diferencia radica en la comodidad de quien realiza el trabajo. No tengo una foto de esta parte, pero puedo darles una idea.
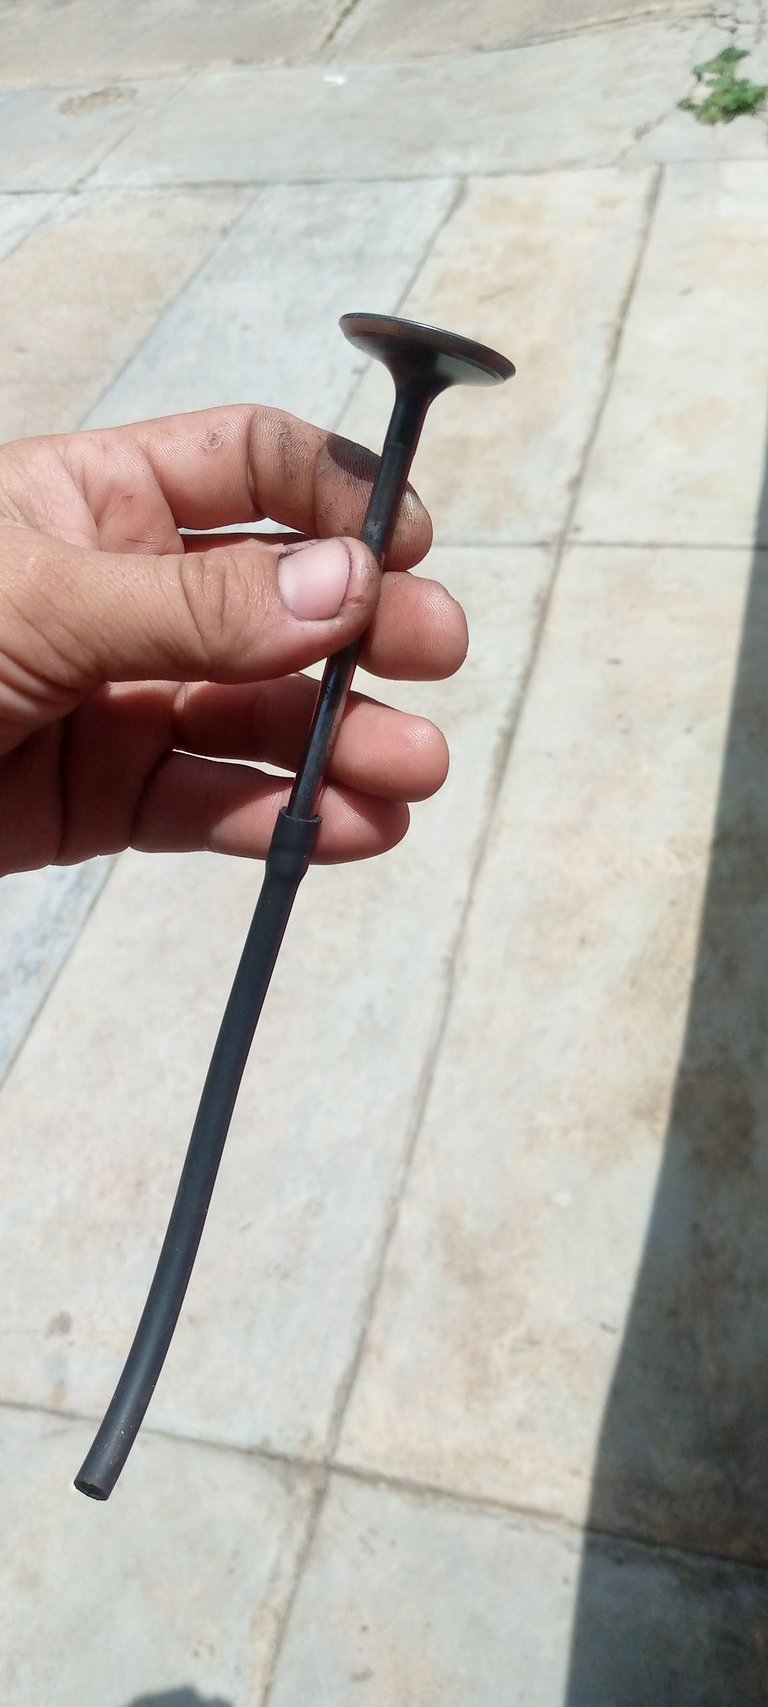
Para comprobar que no haya fugas, armo el motor sin colocar los sellos o gorros y dejo líquido refrigerante durante una hora. Luego, verifico que no haya fugas y, al comprobarlo, armo todo correctamente. Realmente, este trabajo requiere más paciencia y conocimiento que otros.
Una vez finalizado el asentado de las válvulas y el armado de toda la cámara, debemos continuar con el resto del motor
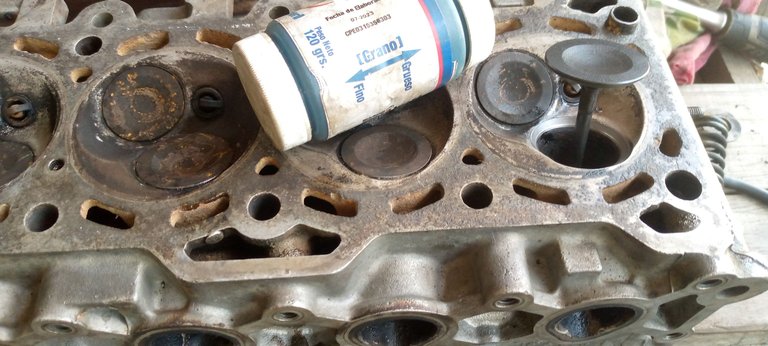
The actual work on this vehicle is valve grinding or valve seating. This is a delicate process that requires a lot of patience and dedication, since the slightest valve leakage can generate failures that can only be corrected by disassembling it and doing the job again. I imagine you would like to know what my recommendations are for carrying out this work.
The first and most important thing is to remove the chamber from the vehicle and clean it thoroughly, as this will ensure that there are no dirt shavings that will complicate the work. Among the tricks I usually use and want to share with you, is the use of an old valve cap or seal when grinding the valve. This prevents the grease with sanding particles that we use from falling into the guide and damaging it, as shown in the photo. Also, it is important to make sure that the rest of the valve is well lubricated so that it slides easily.
There are many techniques for sanding, but the one I never recommend is the one done with a drill, since you don't have total control of the sanding. Personally, I feel more comfortable doing the job with a small hose at the tip of the valve, although I have also tried doing it with a sucker. The difference is in the comfort of the person doing the work. I don't have a photo of this part, but I can give you an idea.
To check for leaks, I assemble the engine without putting on the seals or caps and leave coolant for an hour. Then, I check for leaks and, upon checking, put everything back together correctly. Actually, this job requires more patience and knowledge than others.
Once we have finished seating the valves and assembling the whole chamber, we must continue with the rest of the engine.
 |  |  |
|---|
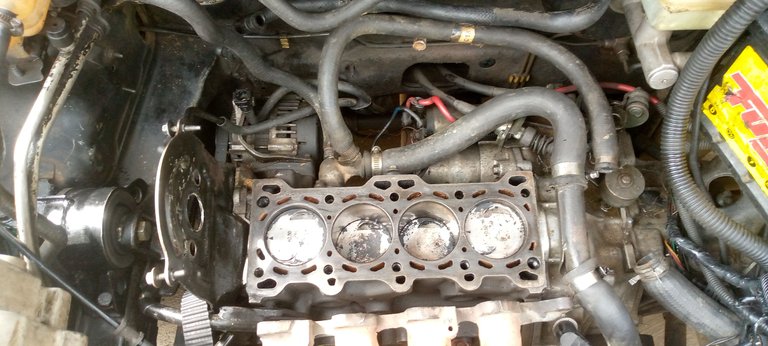
Foto tomada desde mi Android

Para concluir el trabajo, coloqué todos los accesorios a la cámara para así colocarla de una manera mucho más fácil y eficiente. Aprendí de los errores al desarmar y no colocar los componentes de la manera más complicada. Realmente me resultó muy fácil y rápido el armado. Les prometo que en otra publicación les mostraré técnicas de cómo graduar las martilleras y todo lo que no les mostré esta vez, ya que la publicación podría ser muy larga.
"Para evitar este tipo de problemas, es recomendable seguir el programa de mantenimiento recomendado por el fabricante, que incluye el reemplazo periódico de la correa de distribución. El intervalo de reemplazo puede variar según el modelo y el año del vehículo, por lo que es importante consultar el manual del propietario o hablar con un mecánico especializado."
Les dejo algunas fotos del resultado final para que las disfruten, y no me despido sin dar mi recomendación de revisar antes de volver a dar marcha al vehículo si se apaga sin generar una falla, para evitar trabajos que a la larga puedan causar dolores de cabeza. ¡Ya extrañaba escribir en esta fabulosa comunidad y espero volver a publicar pronto! Se les aprecia mucho, un gran abrazo, amigos.
To conclude the work, I attached all the accessories to the camera in order to place it in a much easier and more efficient way. I learned from the mistakes when disassembling and not placing the components in the most complicated way. It was really easy and fast to assemble. I promise that in another post I will show you techniques on how to adjust the hammers and everything that I didn't show you this time, as the post could be very long.
"To avoid these types of problems, it is advisable to follow the manufacturer's recommended maintenance schedule, which includes periodic timing belt replacement. The replacement interval may vary depending on the model and year of the vehicle, so it is important to consult the owner's manual or talk to a specialized mechanic."
I leave you some pictures of the final result for you to enjoy, and I do not say goodbye without giving my recommendation to check before starting the vehicle again if it shuts down without generating a fault, to avoid work that in the long run can cause headaches. I missed writing in this fabulous community and I hope to post again soon! You are much appreciated, big hugs, friends.
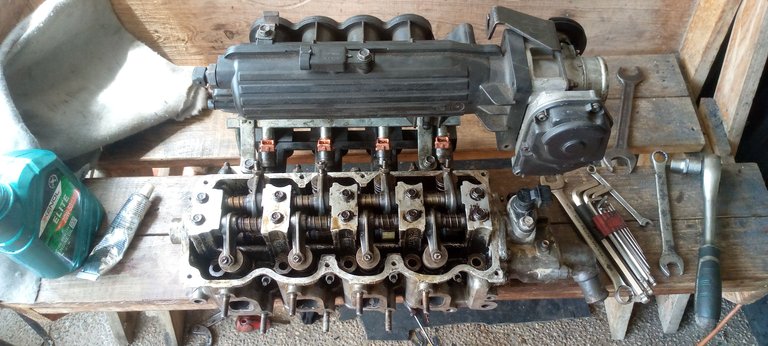
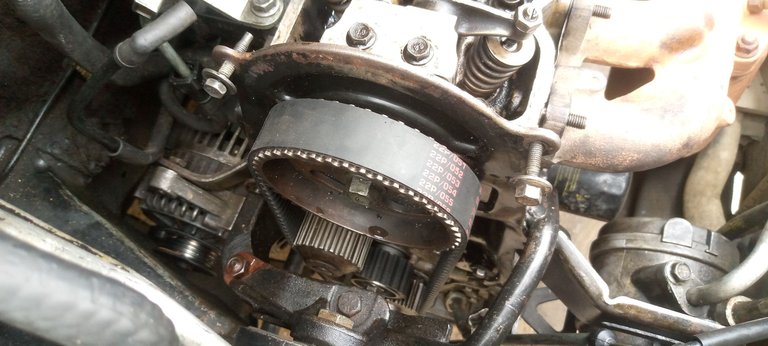
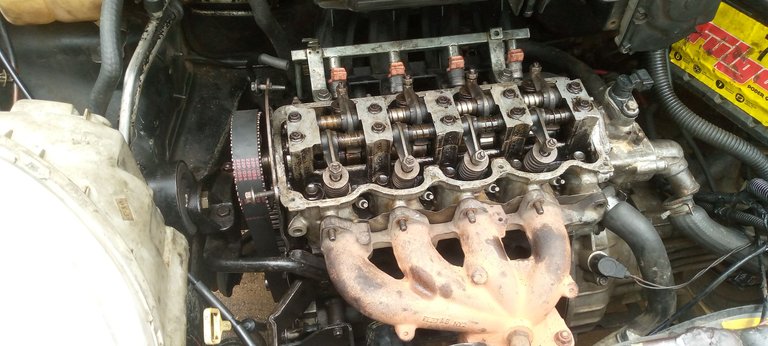
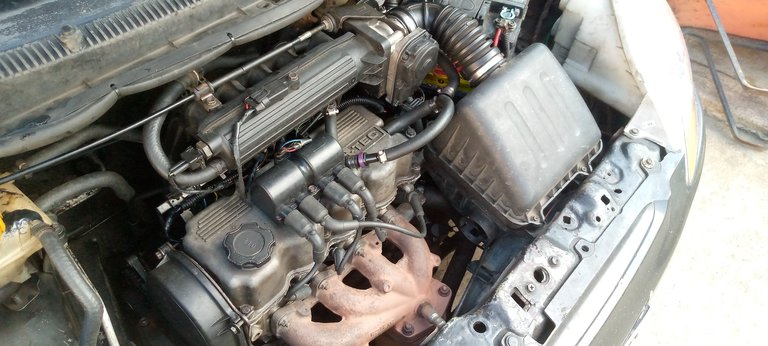
Foto tomada desde mi Android

(versión gratuita)
(free version)


Wilfredo García
@wilfredojgf

Hola amigo, excelente trabajo, se ve que trabajaste con el amor y la paciencia que se requiere. Saludos desde Cuba
La mecánica se volvió más que un trabajo para mí. Es mi segunda pasión
Congratulations @wilfredojgf! You have completed the following achievement on the Hive blockchain And have been rewarded with New badge(s)
Your next target is to reach 4000 upvotes.
You can view your badges on your board and compare yourself to others in the Ranking
If you no longer want to receive notifications, reply to this comment with the word
STOPCheck out our last posts: