Hola chicos, buenas noches para todos.
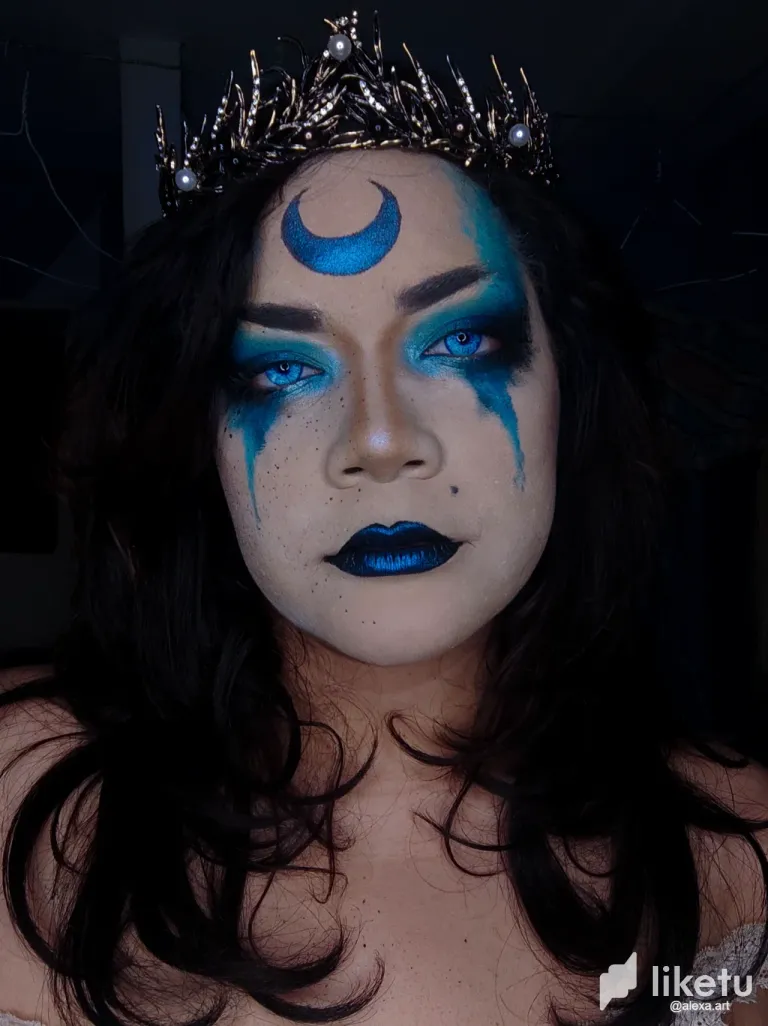
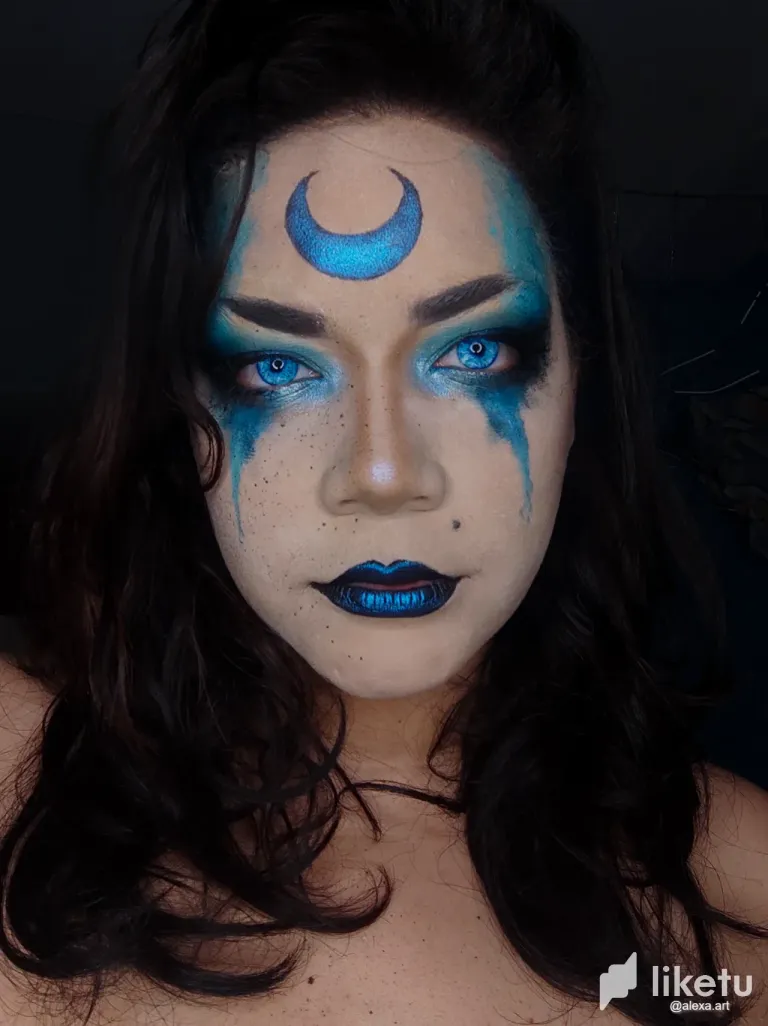
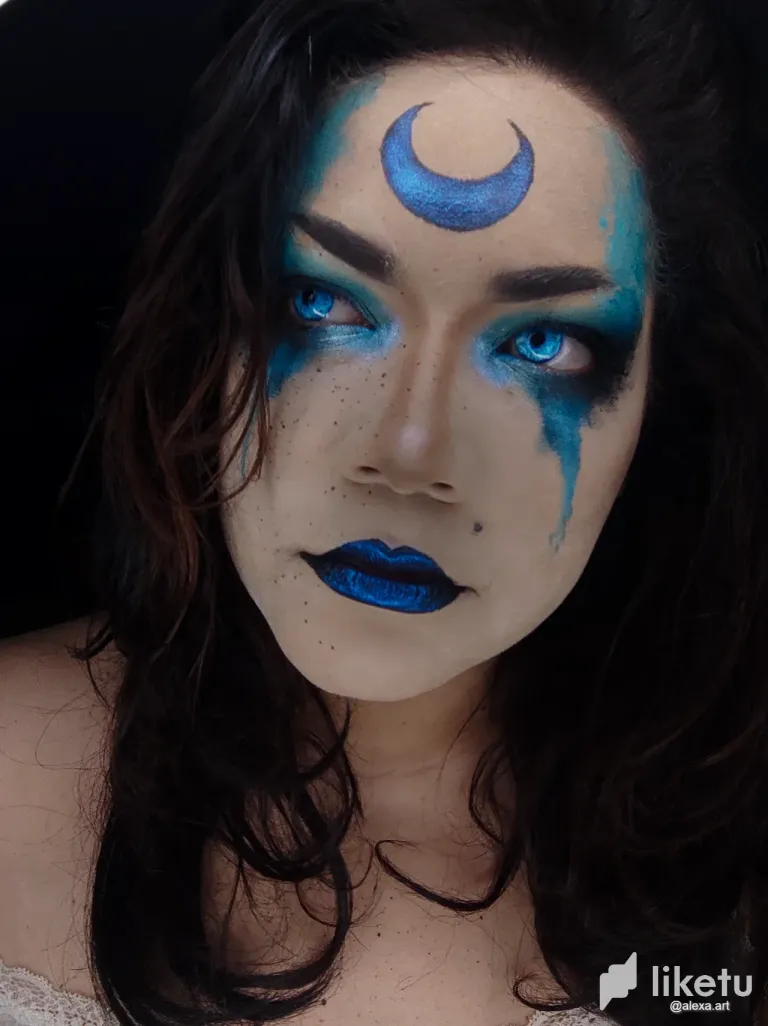
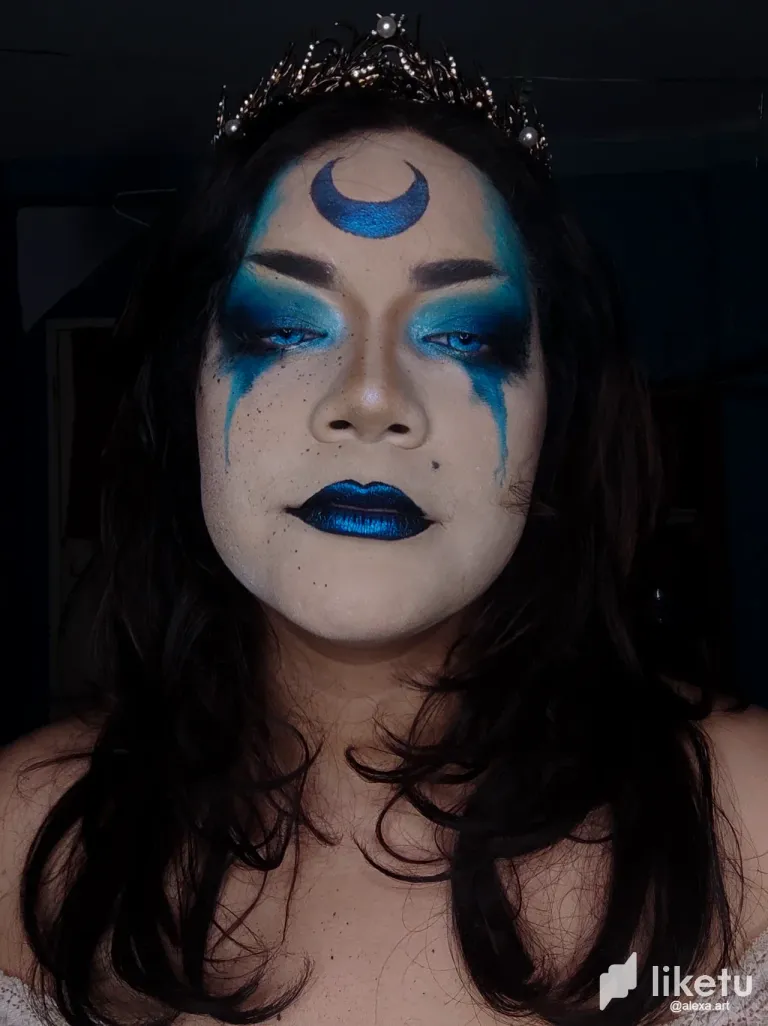
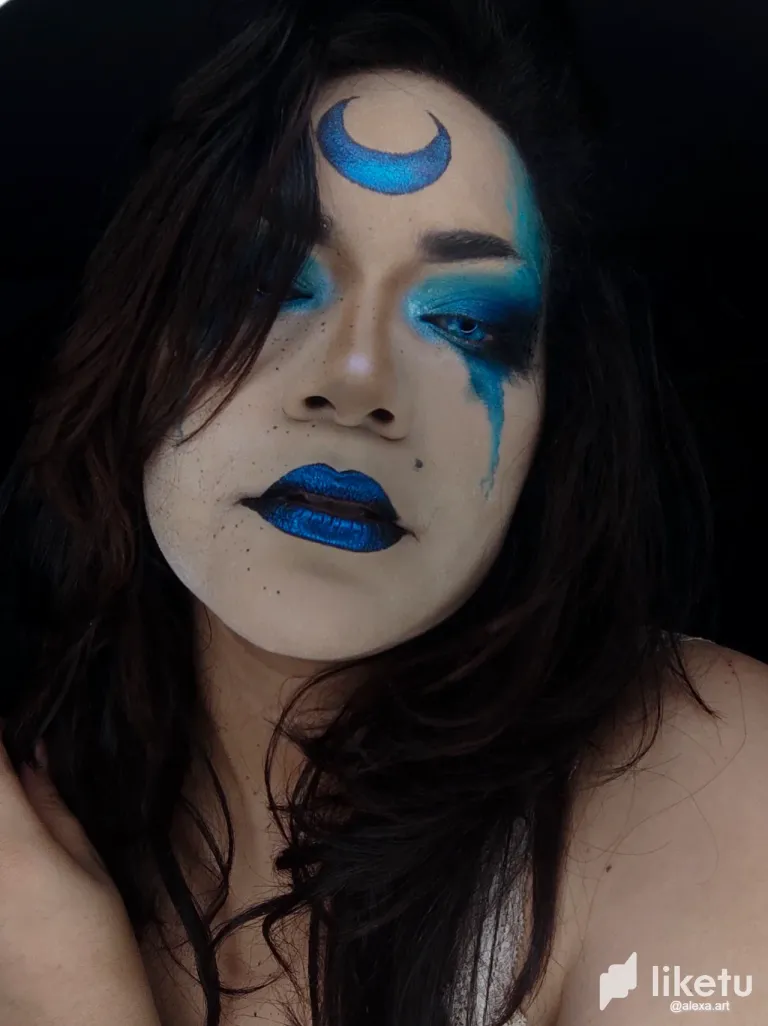
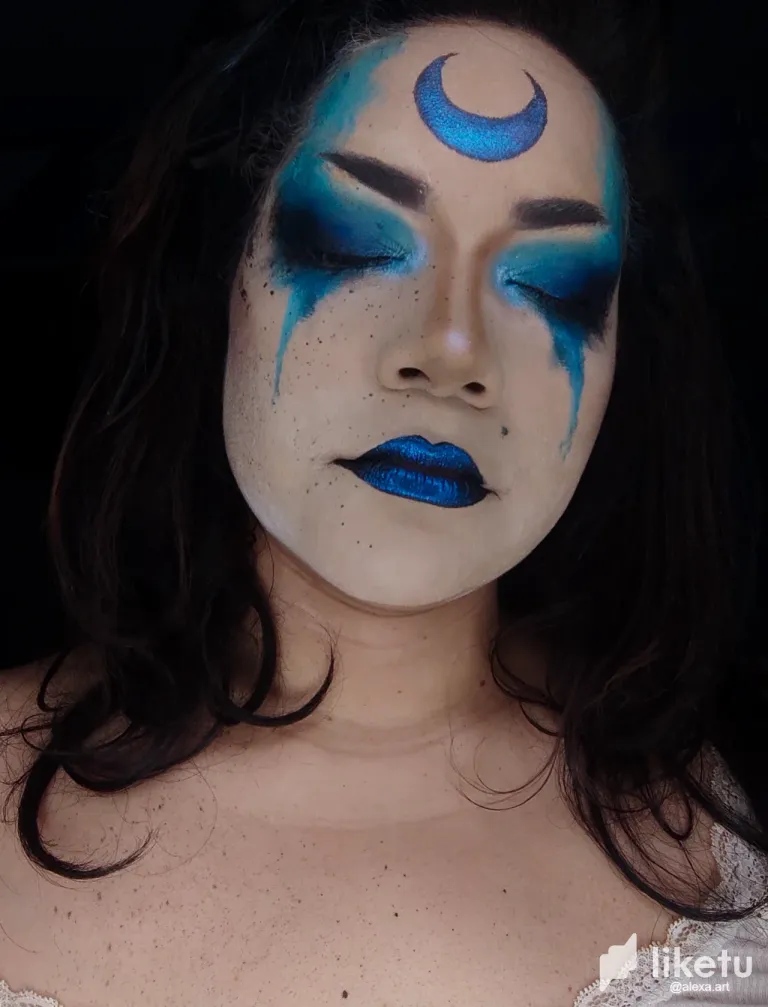
Hoy me quise maquillar con mi color favorito el azul, vi un maquillaje estilo vikingo en Pinterest parecido a este pero con tonos naranjas, realmente no me sentía de humor para ese color asi que decidí usarlo como referencia para hacer mi propia versión usando azul y negro y realizando algunos cambios, para que sea un maquillaje algo diferente al que ví, el azul es un color que me encanta además siento que da un aspecto de algo frio por eso me encanto esta idea, tome algunas fotos usando una corona y otras sin ella, no sabia si me quedaba mejor con la corona puesta o al contrario, además acompañe este look con los lentes de contacto azul que mas me gustan ya que tienen detalles en blanco que hacen ver los ojos bastante impactantes, este maquillaje me encanta por que no hay que ser cuidadoso, al contrario, si haces un desastre queda mucho mejor, incluso llegue a utilizar mis dedos para pintar algunas partes y eso lo hace mucho mas divertido.
Espero que les guste.
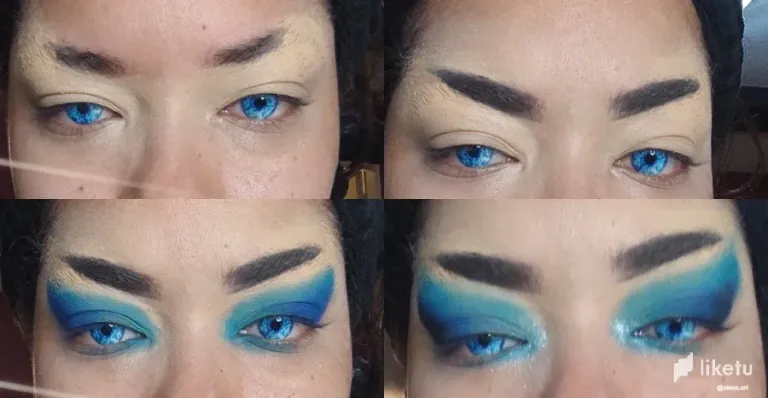
- Primero limpie y prepare mi piel, para luego comenzar a aplicar pegamento en barra en la mitad de mis cejas, dejándolas bien selladas para poder cubrirlas, luego selle con polco traslucido y termine de cubrir usando un corrector, selle nuevamente con polvo traslucido y comencé a dibujar mis cejas, quise realizarles una forma que va hacia arriba, después comencé a pintar mis ojos usando primero azul claro y difuminándolo con azul oscuro, haciendo una forma bastante exagerada y llamativa, luego aplique negro en la parte del azul oscuro y difuminé para darle más profundidad, en el área del lagrimal aplique un azul brillante, para iluminar esa zona.
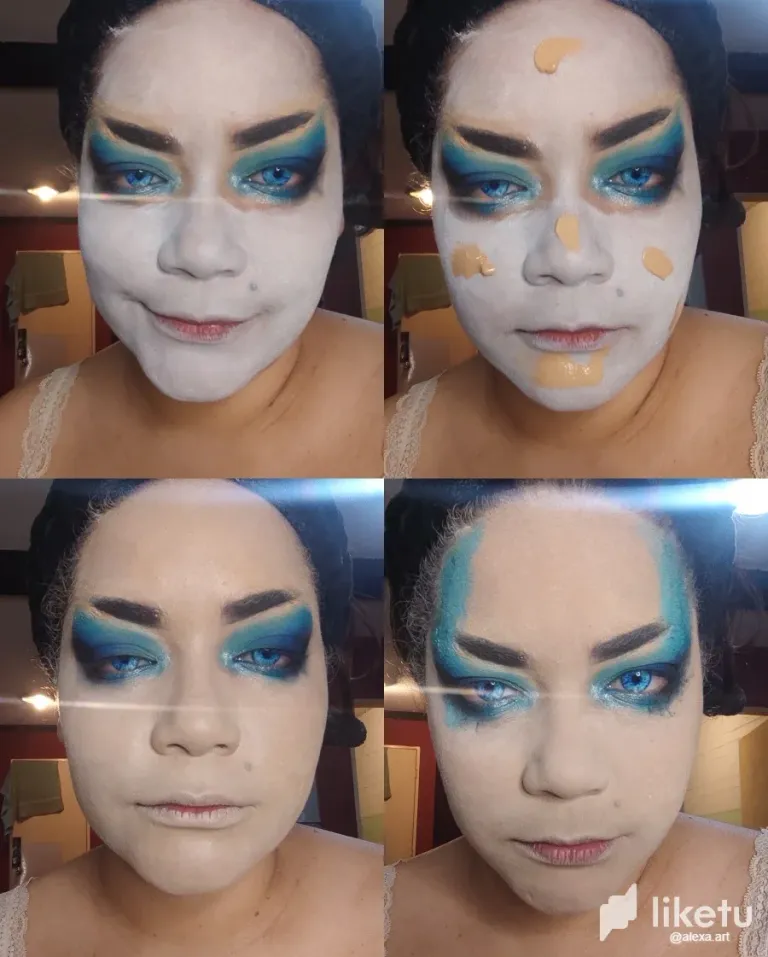
- Después de tener listo los ojos, quería continuar agregando mas sombras pero necesitaba aplicar base primero, entonces primero pinte mi rostro de con pintura corporal blanca, esto para hacer que la base quedara mas clara y tener un rostro mas pálido, luego aplique la base encima y la esparcí con ayuda de un beauty blender, sellé con polvo traslucido y luego empecé a dar mas detalles en el ojo, pintando con mas sombra de ojos negra y azul, en la parte superior utilice pintura corporal azul para pintar una franja sobre mis cejas con ayuda de mis dedos.
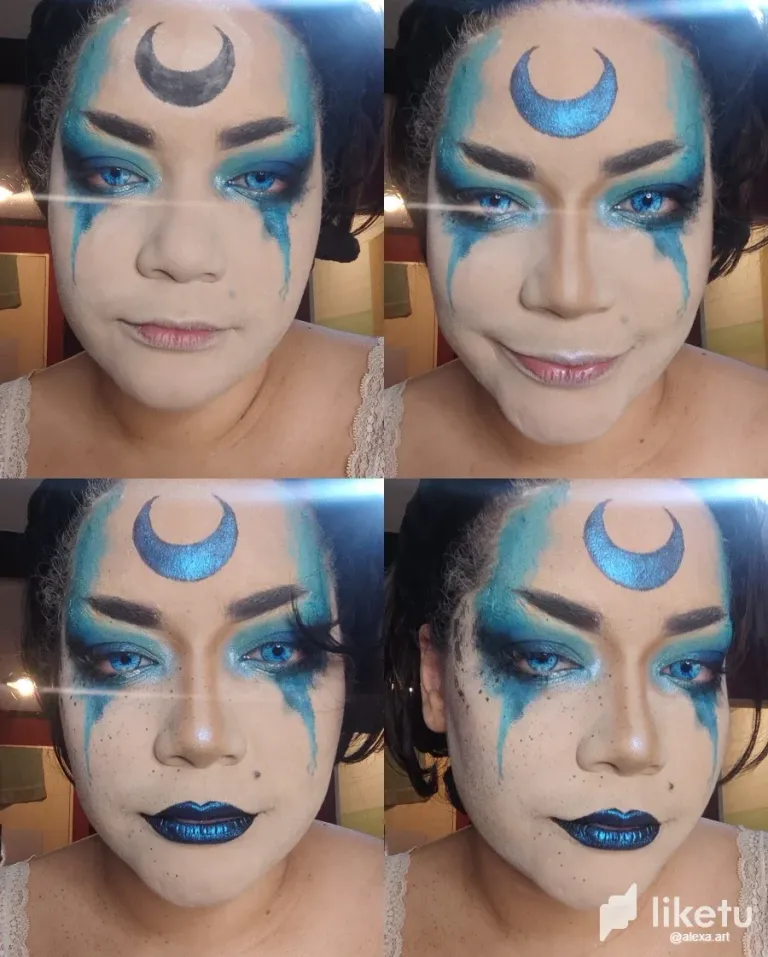
- Agregue pintura azul oscuro y claro en la parte inferior creando líneas que caen desde mis ojos en forma de triangulo, luego tome pintura negra y dibuje una media luna en el centro de mi frente, la cual rellene luego con un iluminador azul y quedo muy brillante, aplique un contorno exagerado en la nariz y luego pinte mis labios de negro, e igualmente aplique el iluminador azul sobre ellos, después tome pintura corporal negra a base de agua y la mezcle con mucha agua, la tome con un cepillo y la esparcí en lado derecho del rostro, creando asi un efecto de salpicadura.

Hi guys, good evening to everyone.
Today I wanted to make up with my favorite color blue, I saw a Viking style makeup on Pinterest similar to this but with orange tones, I really did not feel in the mood for that color so I decided to use it as a reference to make my own version using blue and black and making some changes, to make it a somewhat different makeup than the one I saw, blue is a color that I love plus I feel that gives an aspect of something cold so I love this idea, I took some pictures using a crown and others without it, I didn't know if it looked better with the crown on or not, I also accompanied this look with the blue contact lenses that I like the most because they have white details that make the eyes look quite shocking, I love this makeup because you don't have to be careful, on the contrary, if you make a mess it looks much better, I even used my fingers to paint some parts and that makes it much more fun.
I hope you like it.
- First I cleaned and prepared my skin, then I started to apply glue stick in the middle of my eyebrows, leaving them well sealed to be able to cover them, then I sealed with translucent powder and finished covering using a concealer, sealed again with translucent powder and started to draw my eyebrows, I wanted to make them a shape that goes upwards, then I started to paint my eyes using first light blue and blending it with dark blue, making a quite exaggerated and striking shape, then I applied black on the dark blue part and blended it to give it more depth, on the tear area I applied a bright blue, to illuminate that area.
- After having the eyes ready, I wanted to continue adding more shadows but I needed to apply foundation first, so first I painted my face with white body paint, this to make the foundation lighter and have a paler face, then I applied the foundation on top and spread it with the help of a beauty blender, I sealed with translucent powder and then I started to give more details on the eye, painting with more black and blue eye shadow, on the top I used blue body paint to paint a stripe over my eyebrows with the help of my fingers.
- I added dark and light blue paint on the bottom creating lines that fall from my eyes in a triangle shape, then I took black paint and drew a crescent moon in the center of my forehead, which I filled in with blue highlighter and it was very shiny, I applied an exaggerated contour on my nose and then painted my lips black, and also applied the blue highlighter on them, then I took black water based body paint and mixed it with a lot of water, took it with a brush and spread it on the right side of my face, creating a splatter effect.
For the best experience view this post on Liketu
Hola, bonito maquillaje, me gusta la luna en la frente, nice post.👍👍👍
Gracias!
Saludos amiga, me encantó tu maquillaje, está increíble!!💜
Muchas gracias 🤗
Wow que precioso 🥰, está bellísimo el maquillaje, y los detalles están muy bien hechos, buen trabajo amiga. Me encantó.😍
Mil gracias @zvaleska 😁
!LOL
lolztoken.com
To prove he wasn’t a chicken.
Credit: marshmellowman
$LOLZ on behalf of hivephoto
(8/10)
PLAY & EARN $DOOM
@alexa.art, I sent you an