[ESP]✨
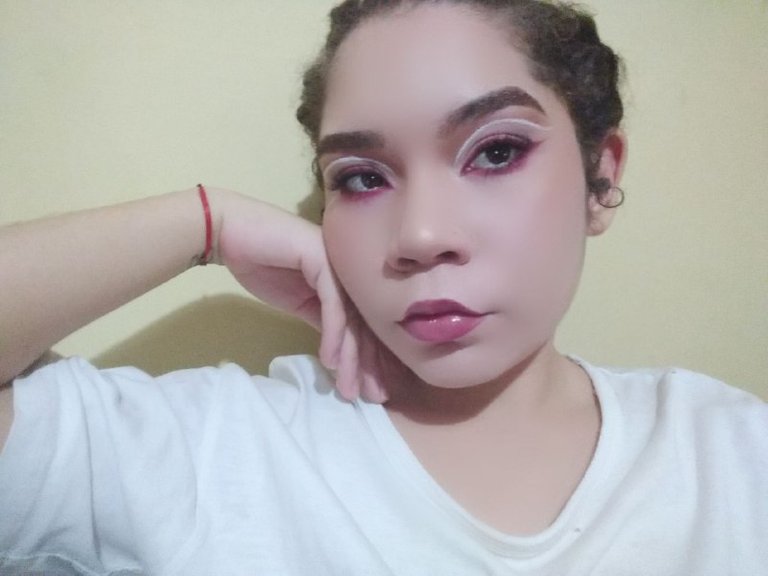
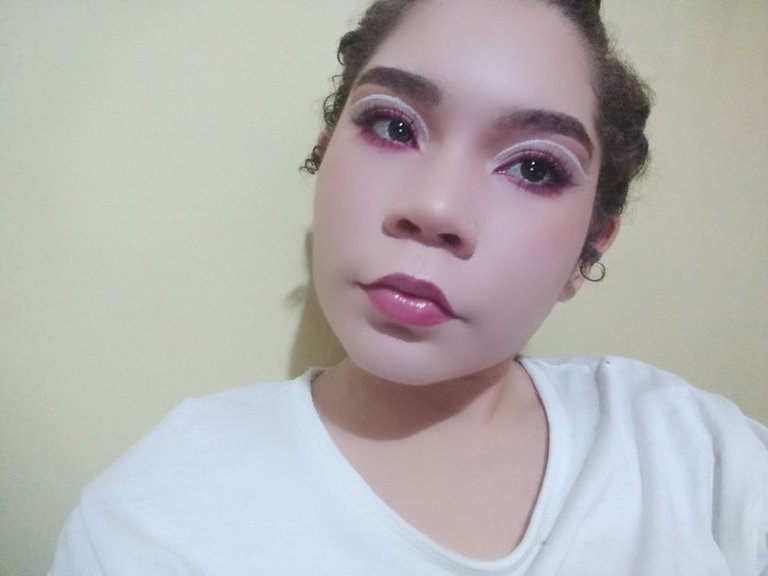
Hola todos los amigos de Hive, mi nombre es Aliagny y está va ser mi primera publicación en la comunidad de Makeup Power. Cómo ya sabrán, ya faltan poco para que sea San Valentín, por lo que mi primera propuesta es un maquillaje para el día de los enamorados.
Quise hacer algo que sea sencillo de elaborar, por lo que opté por un doble delineado en el párpado que hace que tú mi mirada se vea misteriosa y sensual. ¡Espero que le guste!
[ENG]✨
Hello all Hive friends, my name is Aliagny and this is going to be my first post in the Makeup Power community. As you may already know, Valentine's Day is just around the corner, so my first proposal is a makeup for Valentine's Day.
I wanted to do something that is simple to elaborate, so I opted for a double eyeliner on the eyelid that makes you my look mysterious and sensual. I hope you like it!
✨Paso a Paso✨
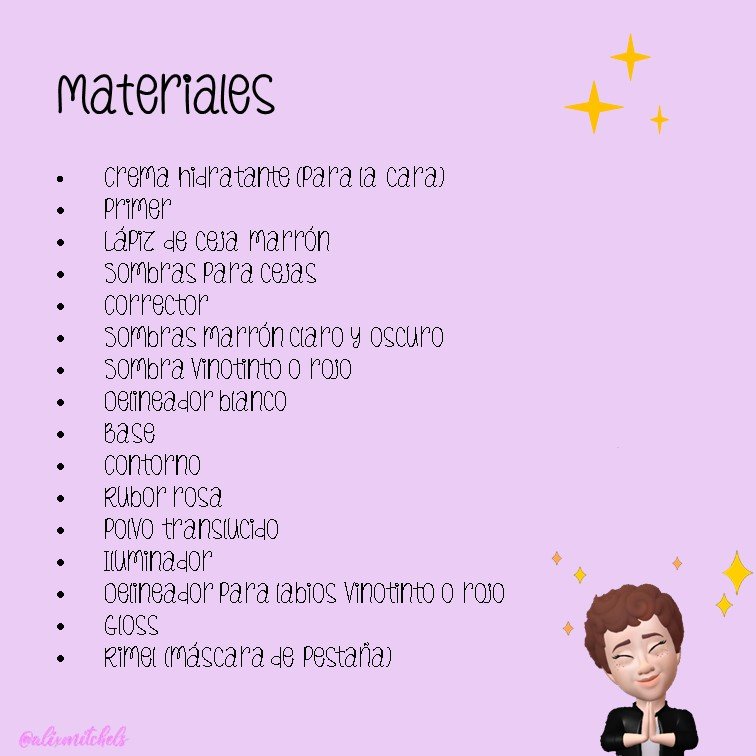
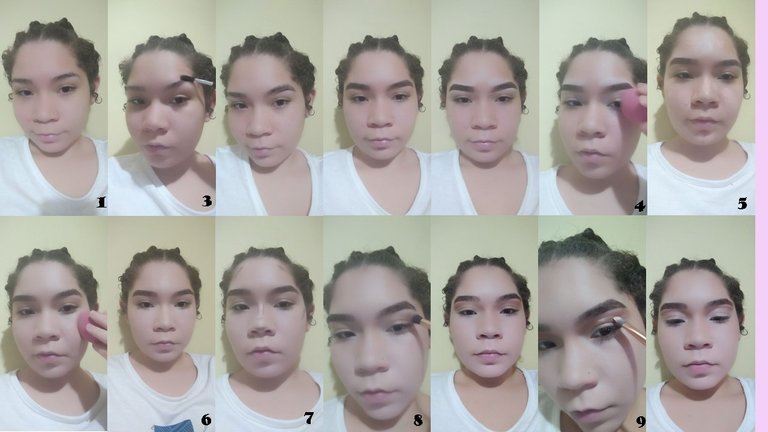
Lo primero que tenemos que hacer a la hora de maquillarnos es lavar nuestra carita para continuar colocándonos una crema hidratante.
Procedemos a ponernos el primer, esto nos ayudará a que los poros de nuestra cara sean un poco difuminados.
A mí en lo particular me encanta comenzar con mis cejas, por lo que iniciaré peinándolas; luego de esto, empiezo a hacerle la forma con un lápiz marrón oscuro y rellenándolas con una sombra marrón para culminar puliéndolas con un corrector tanto en la parte de arriba como en la de abajo.
Difuminamos el corrector por todo el párpado y la frente.
Continuamos distribuyéndonos nuestra base en el rostro y difuminamos con nuestra esponja.
Colocamos el corrector en nuestras ojeras y en la nariz y lo vamos difuminando con la esponja.
Seguiremos con nuestro contorno, colocándolo en la parte media del pómulo para darle un aspecto mas elevado al rostro y luego lo difuminamos.
Continuamos colocándonos una sombra marrón claro en la cuenca del ojo hasta llegar casi al arco de la ceja y lo difuminamos, luego pondremos una sombra marrón oscuro en la cuenca y lo difuminamos para que se mezcle con el otro color.
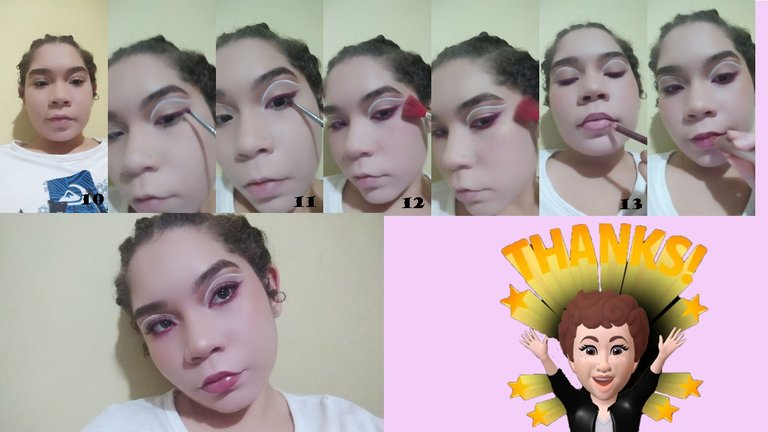
Haremos un corte con el corrector mirando al frente para saber cómo se verá con los ojos abiertos y rellenamos la parte restante del parpado con el corrector y le quitamos el exceso con la esponja.
Pasaremos a delinear nuestro ojo con el delineador blanco siguiendo el corte que hemos echo con el corrector y luego delinearemos el ojo en la parte superior de la línea de las pestañas con una sombra vinotinto.
Colocaremos la misma sombra vinotinto en la parte inferior de la línea de pestañas y difuminamos y después nos podremos el rímel en nuestras pestañas superiores e inferiores.
Con una brocha pondremos el rubor y el iluminador en el pómulo alto de nuestro rostro.
Delineamos nuestros labios con un lápiz vinotinto y rellenamos con el mismo, para culminar colocándonos gloss.
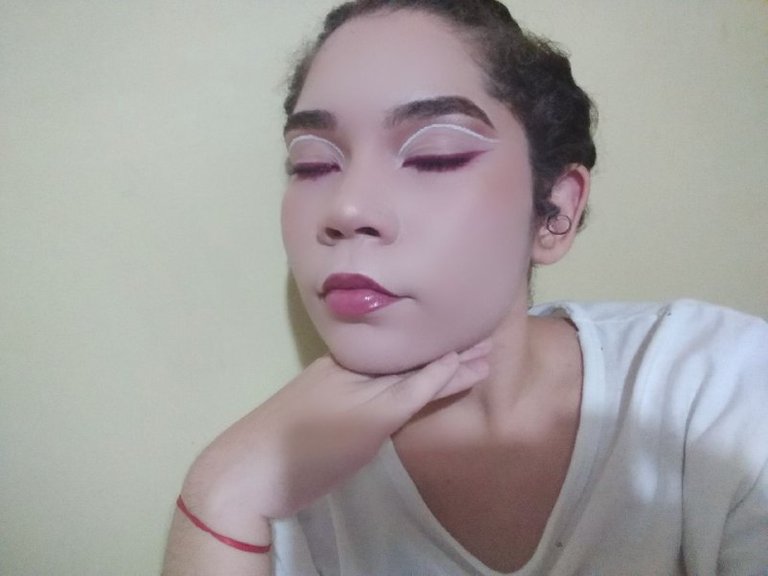
✨Resultado final✨
✨Step by step✨
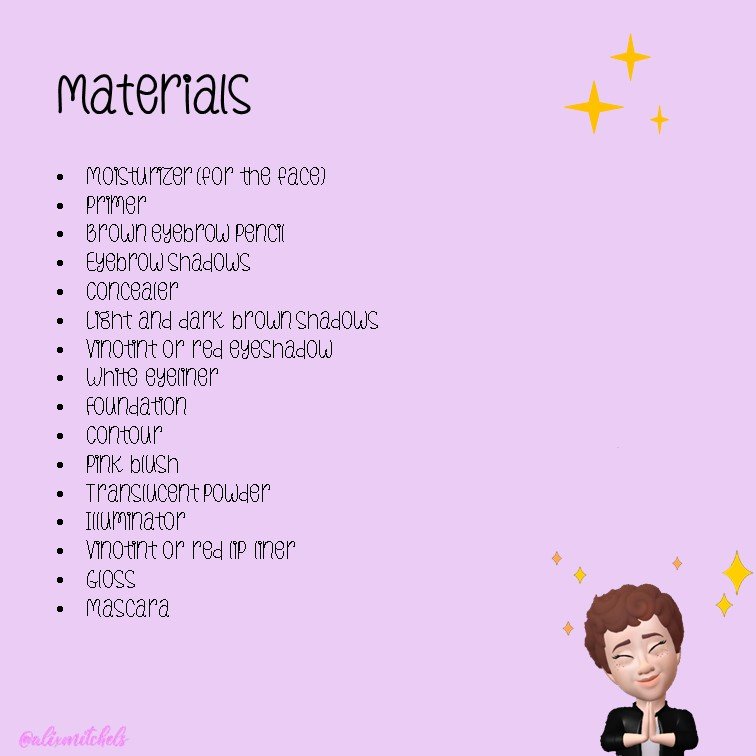
The first thing we have to do when applying makeup is to wash our face and then apply a moisturizer.
We proceed to apply the primer, this will help us to blur the pores of our face a little.
I particularly love to start with my eyebrows, so I'll start by combing them; after that, I start shaping them with a dark brown pencil and filling them in with a light brown shadow and finish by buffing them with a concealer on both the top and bottom.
Blend the concealer all over the eyelid and forehead.
We continue to distribute our foundation on the face and blend with our sponge.
We place the concealer on our dark circles and on the nose and blend it with the sponge.
We will continue with our contour, placing it in the middle part of the cheekbone to give a more elevated look to the face and then we blend it.
We continue by placing a light brown shadow in the eye socket until we get almost to the arch of the eyebrow and blend it, then we will place a dark brown shadow in the eye socket and blend it so that it blends with the other color.
We will make a cut with the concealer looking straight ahead to know how it will look with the eyes open and fill the remaining part of the eyelid with the concealer and remove the excess with the sponge.
We will outline our eye with the white eyeliner following the cut we have made with the concealer and then we will outline the eye at the top of the lash line with a vinotint shadow.
We will place the same vinotint shadow on the lower part of the lash line and smudge and then we will apply mascara on our upper and lower lashes.
With a brush we will put the blush and highlighter on the high cheekbone of our face.
We outline our lips with a vinotint pencil and fill in with the same, to finish with gloss.
✨Final Result✨

All content and photos are mine and are edited by power point and Photoshop.
The avatars were taken from my Facebook page.
Follow me for more content and thanks for visiting my blog!
Instagram-Twitter icon
Que lindo maquillaje, gracias por explicarnos el pasao a paso y por subir tu contenido, espero seguir viendo tus publicaciones, un saludo 💕
Congratulations @alixmitchels! You have completed the following achievement on the Hive blockchain and have been rewarded with new badge(s):
Your next target is to reach 50 upvotes.
You can view your badges on your board and compare yourself to others in the Ranking
If you no longer want to receive notifications, reply to this comment with the word
STOPCheck out the last post from @hivebuzz:
Support the HiveBuzz project. Vote for our proposal!