🦋Hola amigos de HIVE🦋
Hi HIVE friends
Estaba un poco perdida, por problemas de salud, pero acá estoy nuevamente. Espero se encuentren muy bien y que estén cumpliendo sus metas y sueños.
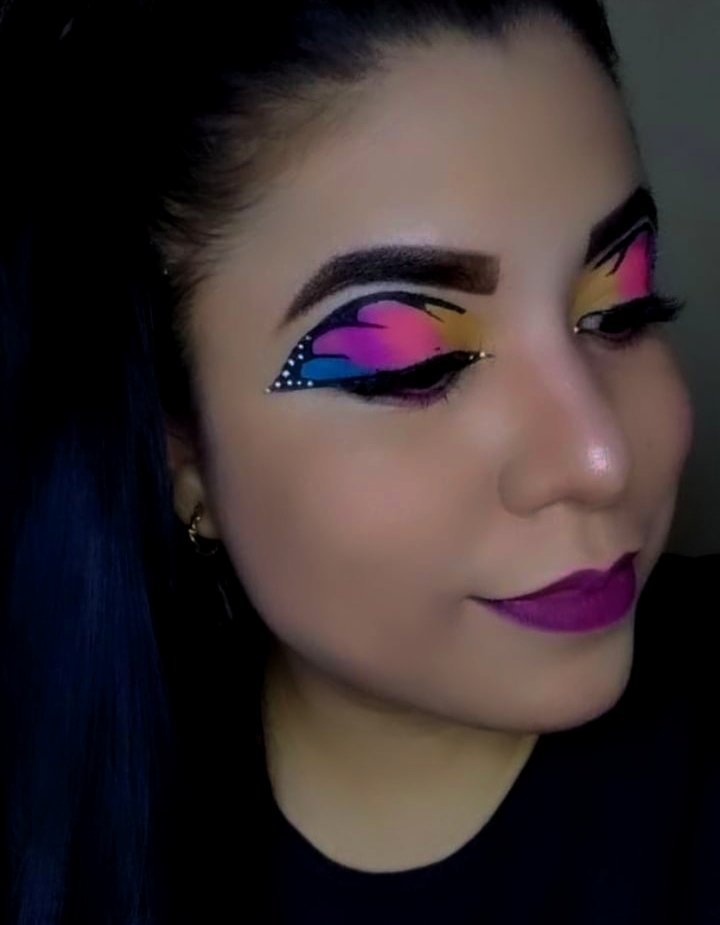
En este nuevo post quise realizarme un maquillaje muy lindo, colorido y muy a la moda. Yo se que a todo el mundo no le gustan las mariposas, a muchas mujeres le dan miedo. Pero a mí me parecen muy lindas muy delicadas.
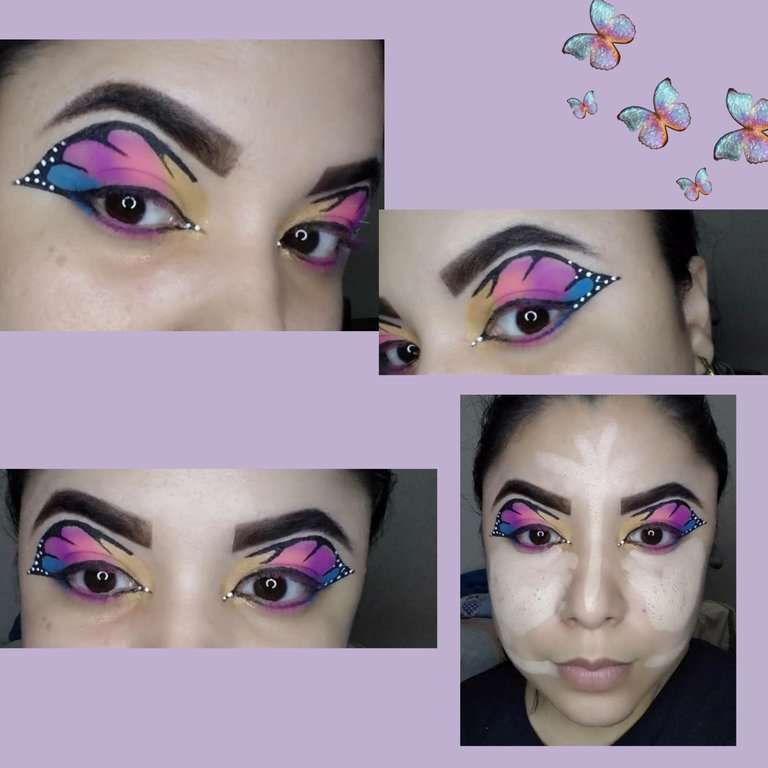
Y esta vez quise realizarme un maquillaje inspirado en una mariposa, espero les guste, acá les estaré mostrando el paso a paso de todo.
I was a bit lost, due to health problems, but here I am again. I hope you are very well and that you are fulfilling your goals and dreams.
In this new post I wanted to do a very cute, colorful and very fashionable makeup. I know that everyone does not like butterflies, many women are afraid of them. But they seem very cute to me, very delicate.
And this time I wanted to do a makeup inspired by a butterfly, I hope you like it, here I will be showing you the step by step of everything.

Empezamos!!!
Let's start !!!
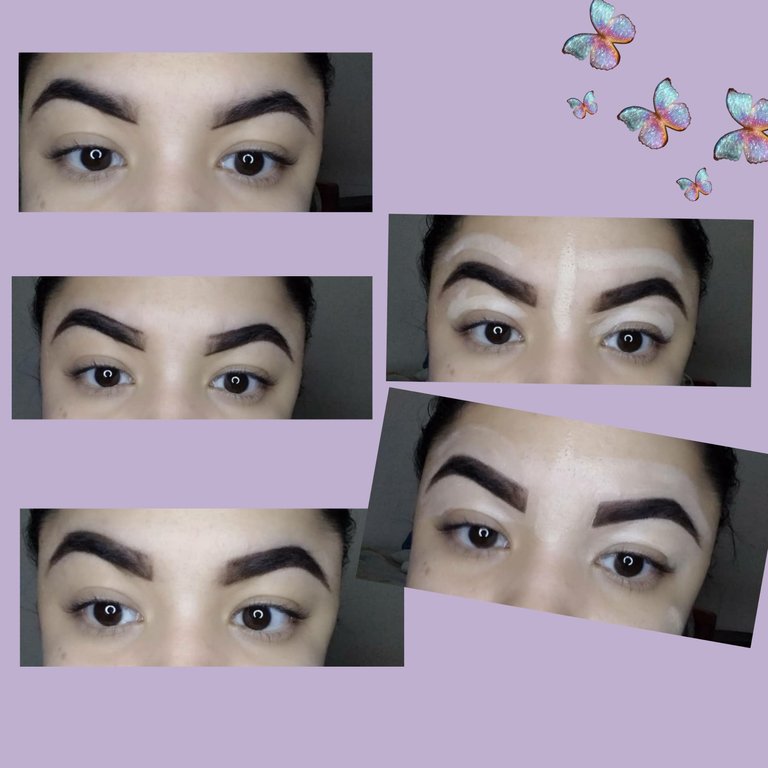
PASO #1 CEJAS
STEP # 1 EYEBROWS
Siempre comenzó con las cejas, me gusta y trato que me queden muy perfectas. La verdad pienso que las cejas son el molde total de nuestra cara, y si no hacemos unas lindas cejas con un lindo maquillaje, creo que queda incompleto. Para este paso lo que hago es una línea fina del punto de inicio de mi ceja hasta el punto final en la parte superior. Luego en la parte inferior realizo el mismo procedimiento una línea muy fina desde el punto de inicio hasta el punto final.
Luego de eso lo que hago es rellenar toda la parte de adentro y tratar de difuminar con unn cepillo para cejas.
Y para terminar, lo que hago es aplicarme un poco de base para ojeras, para poder así lograr un acabado mejor. Y tratar de limpiar y darle forma.
It always started with the eyebrows, I like it and try to make it very perfect. The truth is I think that the eyebrows are the total mold of our face, and if we do not make beautiful eyebrows with a nice makeup, I think it is incomplete. For this step what I do is a fine line from the start point of my eyebrow to the end point at the top. Then at the bottom I do the same procedure a very fine line from the start point to the end point.
After that what I do is fill in all the inside and try to blend with an eyebrow brush.
And to finish, what I do is apply a little base for dark circles, in order to achieve a better finish. And try to clean and shape it.

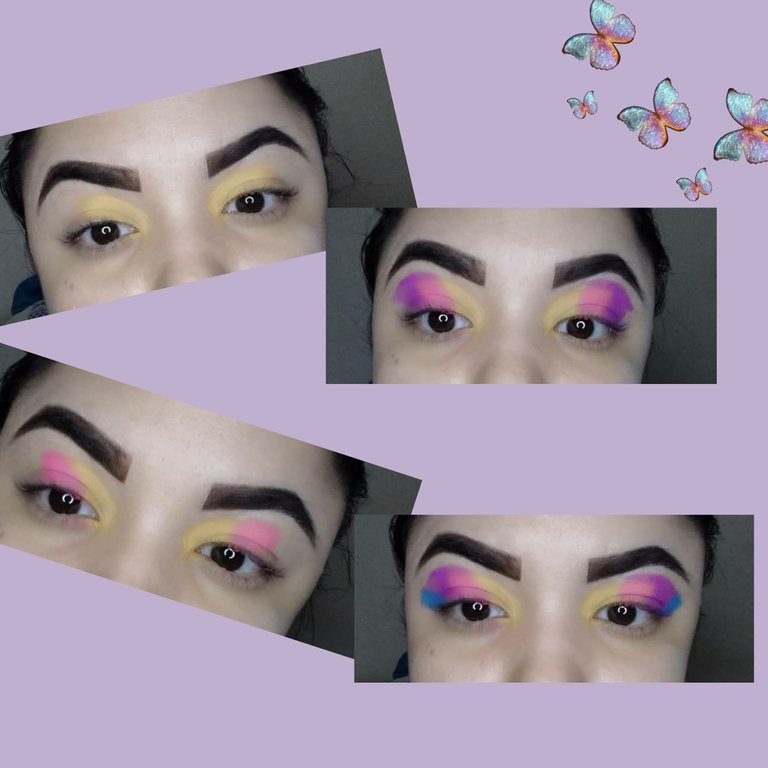
PASO #2 SOMBRAS
STEP # 2 SHADOWS
Para este paso, utilice unos colores hermosos, un amarillo que lo apliqué en la punto donde empieza el párpado, luego un fucsia también en el párpado, luego le aplique un morado y por último un azul oscuro, todas las sombras que utilicé son tipo Neón. Me encanta porqie deja unos colores muy vivos.
For this step, I used some beautiful colors, a yellow that I applied at the point where the eyelid begins, then a fuchsia also on the eyelid, then I applied a purple and finally a dark blue, all the shadows that I used They are Neon type. I love it because it leaves very vivid colors.

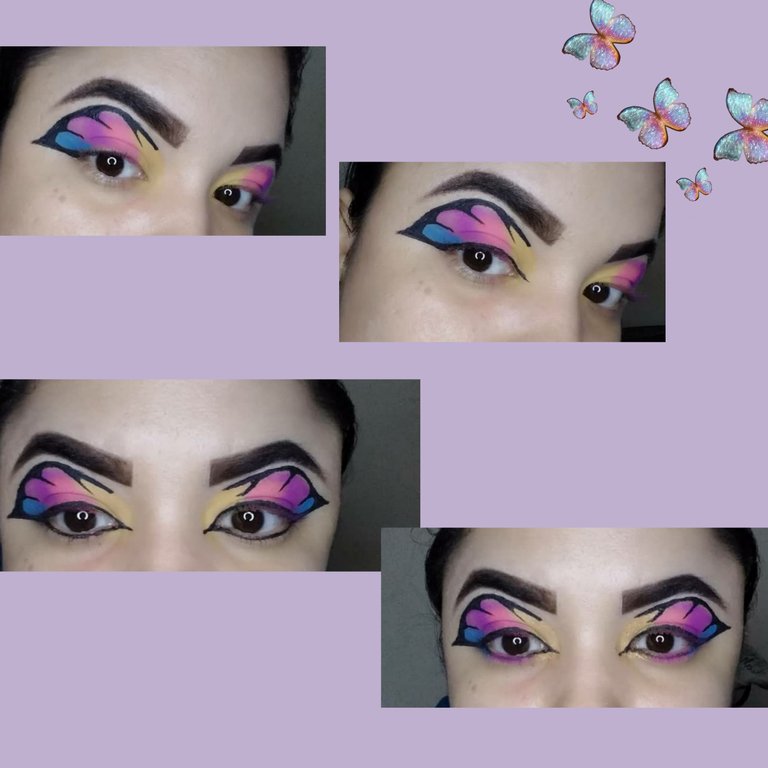
PASO #3 DELINEADO
STEP # 3 OUTLINE
En este paso traté de dibujar con un delineador color negro, alas de mariposas en forma de un hermoso delineado, en cada color iba realizando una línea delgada para así poder dividir cada color con las líneas.
También me realicé un delineado en la parte superior del ojo, que logrará juntarse con los delineados de la parte inferior del ojo. Y finalicé aplicandome sombras color amarillo, fucsia y azul, en la parte superior del ojo.
__________________________________________
In this step I tried to draw with a black eyeliner, butterfly wings in the form of a beautiful outline, in each color I was making a thin line in order to divide each color with the lines.
I also made a liner in the upper part of the eye, which will get together with the liner in the lower part of the eye. And I finished by applying yellow, fuchsia and blue shadows on the upper part of the eye.

PASO #4 PUNTOS Y BASE
STEP # 4 POINTS AND BASE
Para finalizar, con un delineador color blanco. Realice varios puntos en la parte del delineado negro donde termina hasta el medio, eso lo hice en los 2 ojos.
Y también me aplique base conn mucho cuidado para que no llegase a tocar el maquillaje de los ojos, con una espoja difumine toda la base, y me aplique un polvo compacto.
Y finalmente me aplique un labial color púrpura.
Finally, with a white eyeliner. Make several points in the part of the black outline where it ends up to the middle, I did that in the 2 eyes.
And I also applied foundation very carefully so that it did not touch the eye makeup, with a sponge I smudged the entire foundation, and applied a compact powder.
And finally, I applied a purple lipstick.
💜ESTE FUE MI RESULTADO💜
THIS WAS MY RESULT
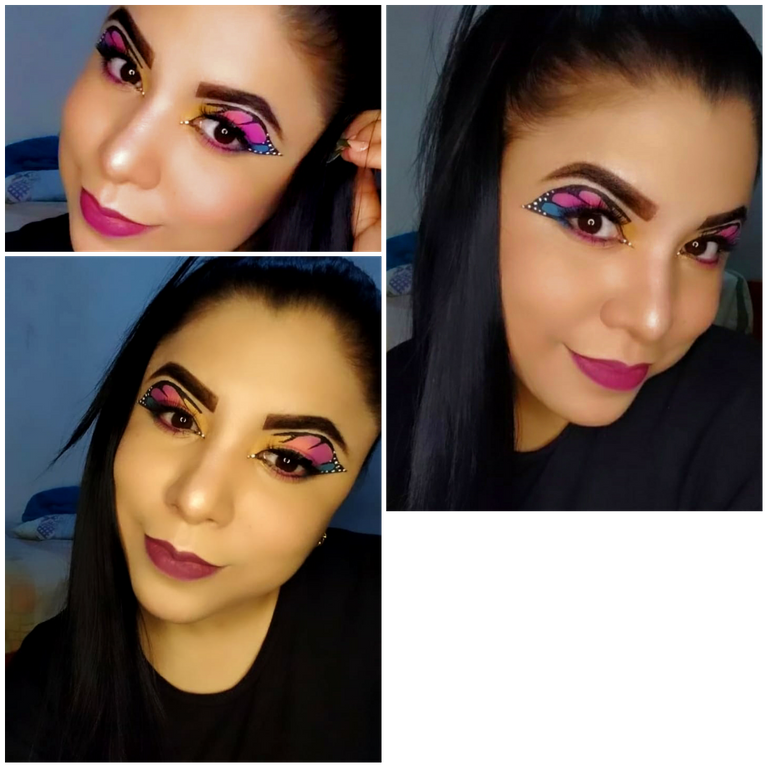

Espero les guste mi pequeño tutorial de maquillaje, lo realice con mucho amor. Es algo muy fácil y sencillo de realizar.
Me encanta hacer las cosas con dedicación, con paciencia y con mucho amor. Para que así me salgan bien y que a ustedes les guste. Sin más nada que decir.
Hasta el próximo post!!!
I hope you like my little makeup tutorial, I did it with a lot of love. It is something very easy and simple to do.
I love doing things with dedication, with patience and with a lot of love. So that they turn out well for me and that you like it. Nothing else to say.
Until the next post !!!

Imagen editada en canva.con
Fotos tomadas desde mi celular Samsungs10
Fotos editadas en Picsart.com
Texto traducido por Google Traductor
Separadores de texto realizados en Picsart.com


Muy bonito el resultado, te quedó muy bien hecho, saludos!
Gracias amiga @gigi8 sii me dediqué mucho haciendomelo jeje🤗