Hola amigos, que bonito saludarlos!
Hello friends, nice to greet yo!
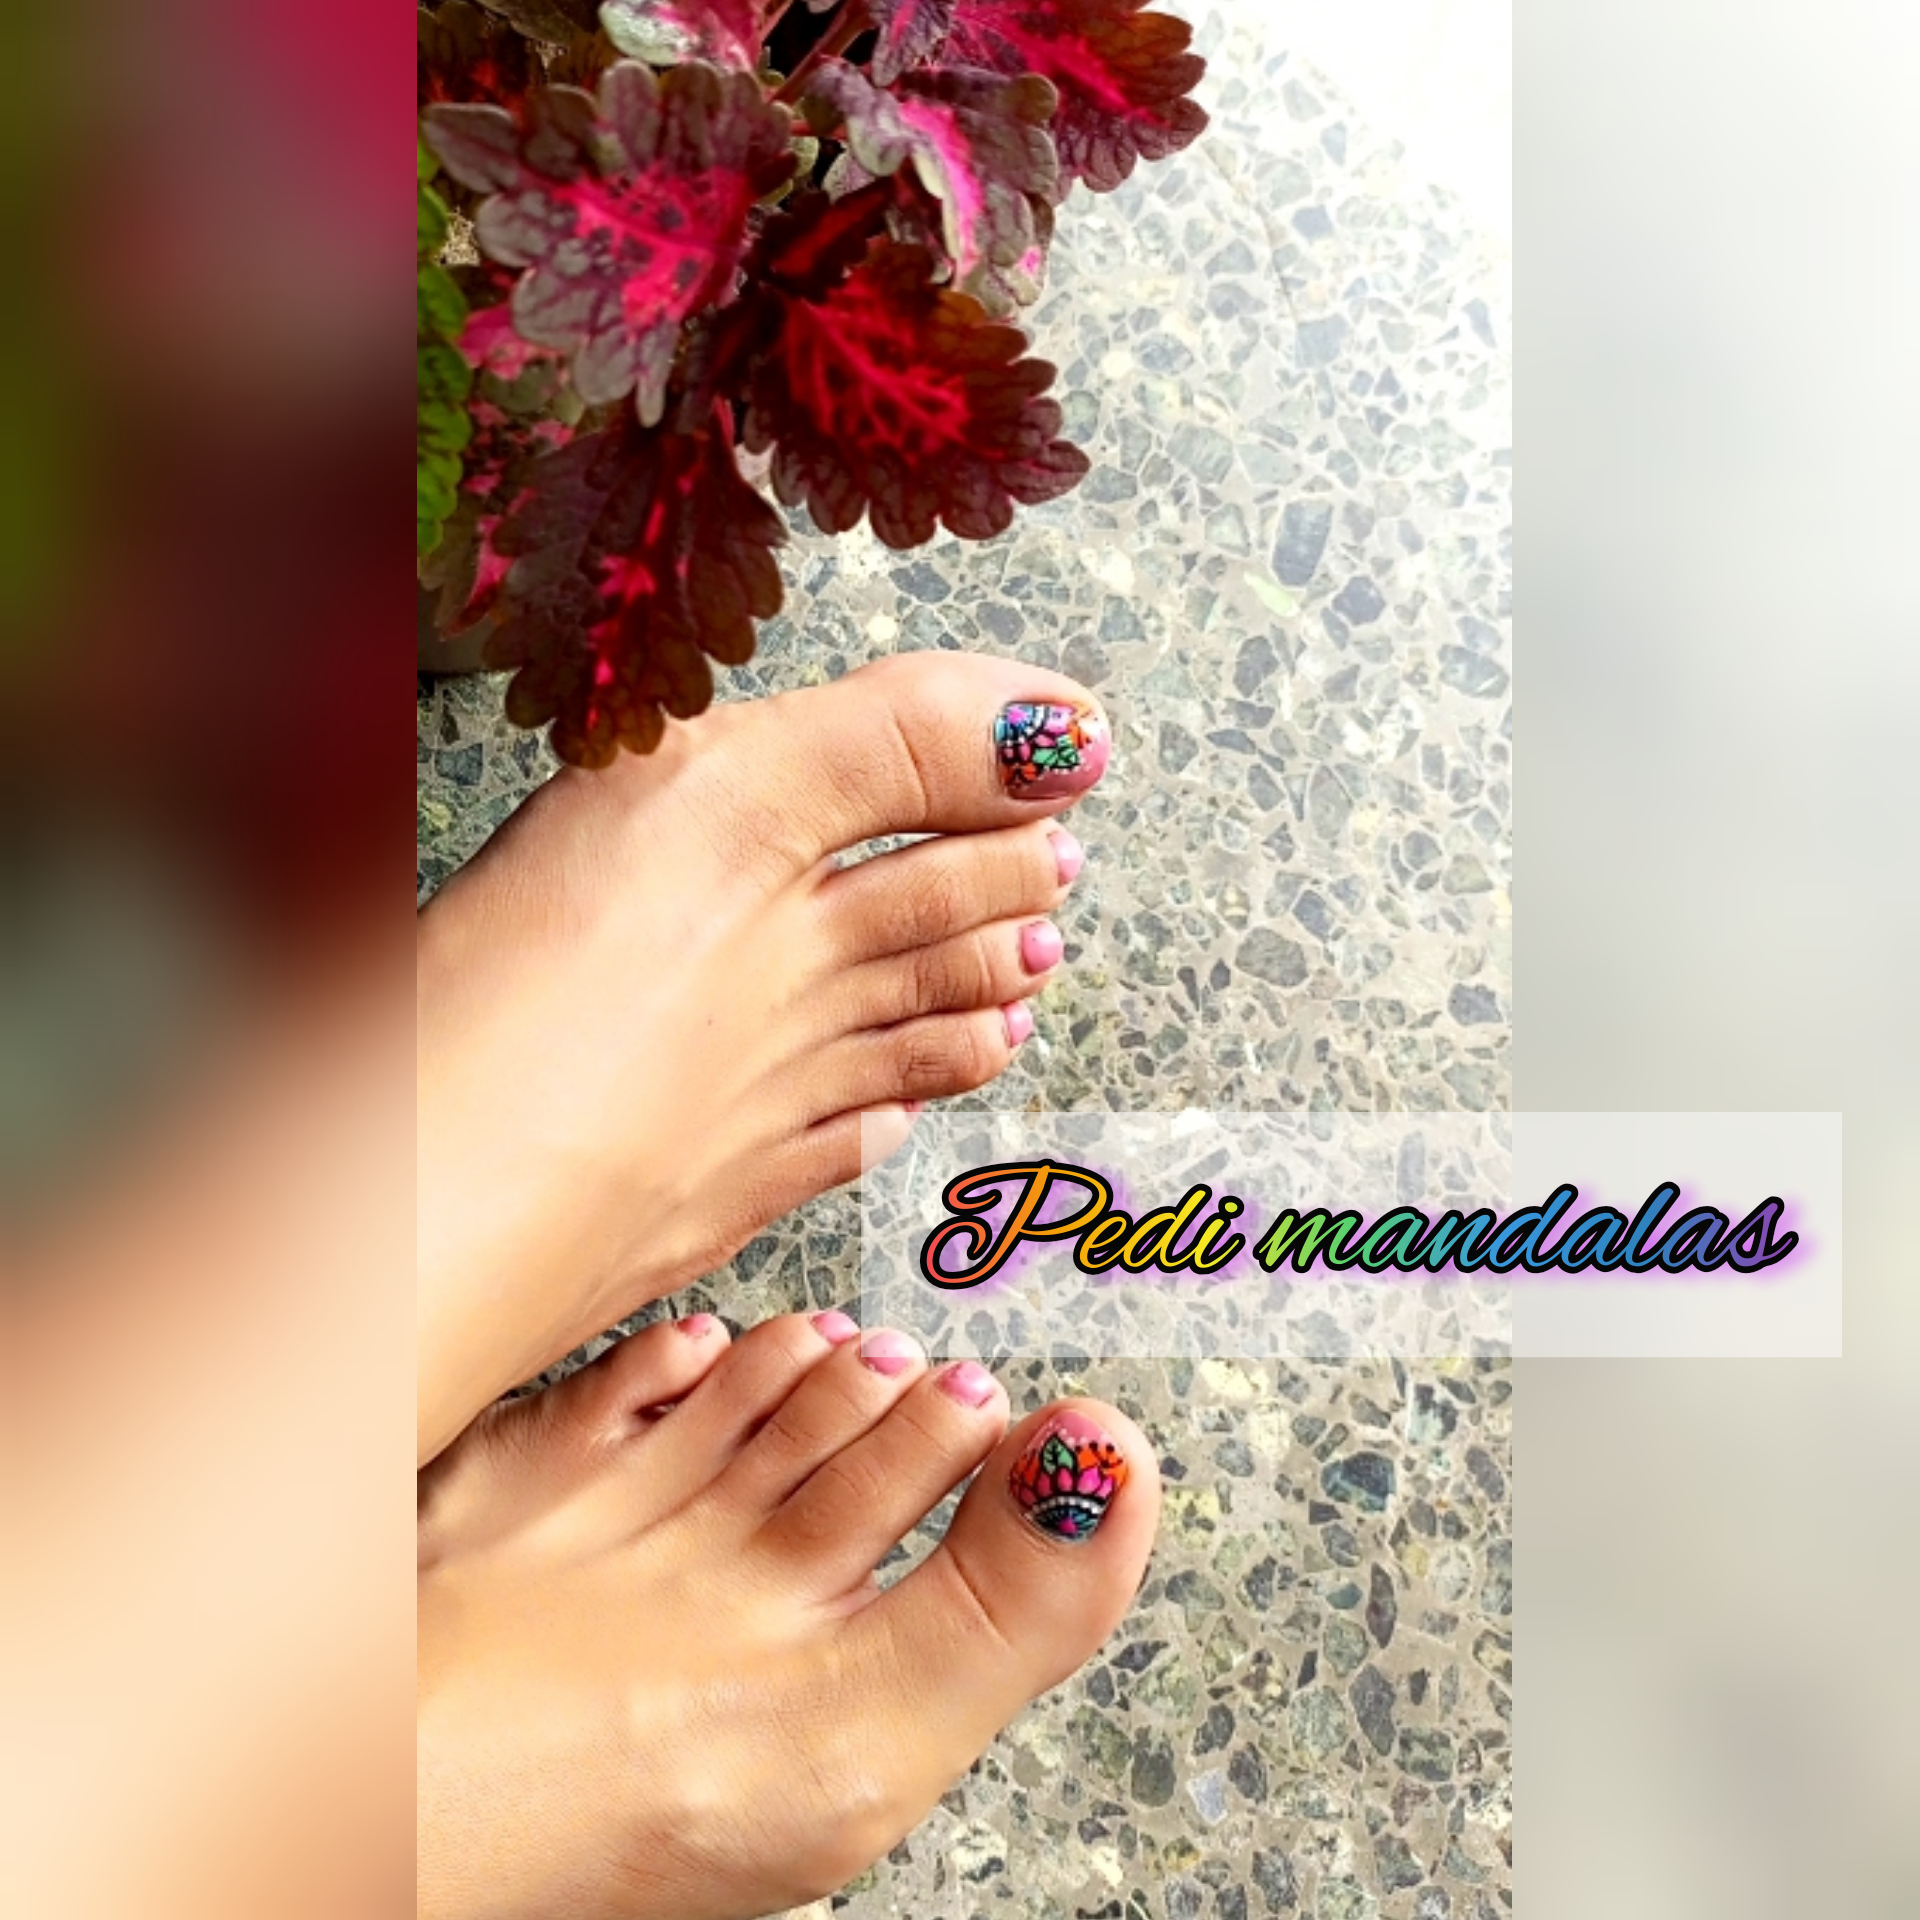
Hoy mi post trata de la técnica de mándala en las uñas de los pies.
Today my post is about the mandala technique on toenails.
Esta es una técnica que aunque me gusta mucho, no la había podido realizar; me fascina este diseño en las uñas por la cantidad de color que se puede usar y por los detalles que en conjunto forman una imagen cargada de vida y textura.
This is a technique that although I like it very much, I had not been able to do it; I am fascinated by this nail design because of the amount of color that can be used and the details that together form an image full of life and texture.
Gracias a la disposición de mi amiga @alina97 como modelo, pude realizar por primera vez esta técnica. Aquí les explico los tres pasos básicos que use para realizarlas.
Thanks to the willingness of my friend @alina97 as a model, I was able to perform this technique for the first time. Here I explain the three basic steps I used to make them.
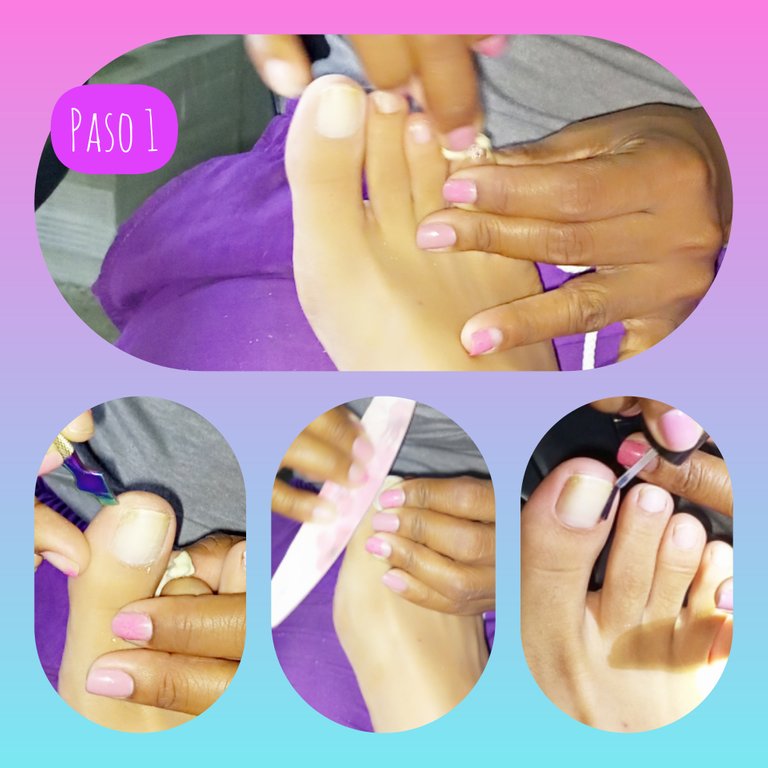
La primera imagen muestra lo que abarca el paso uno:
The first image shows what step one covers:
Remover todo el esmalte anterior, limpiar la uña quitando el exceso de cutícula, así como limar la uña y sus bordes. Logrando una apariencia fresca y delineada entre el dedo y la uña.
Remove all previous polish, clean the nail by removing excess cuticle, as well as filing the nail and its edges. Achieving a fresh appearance and delineated between the finger and the nail.
Aplique secante para una mejor fijación del esmalte.
Apply blotter for a better fixation of the enamel
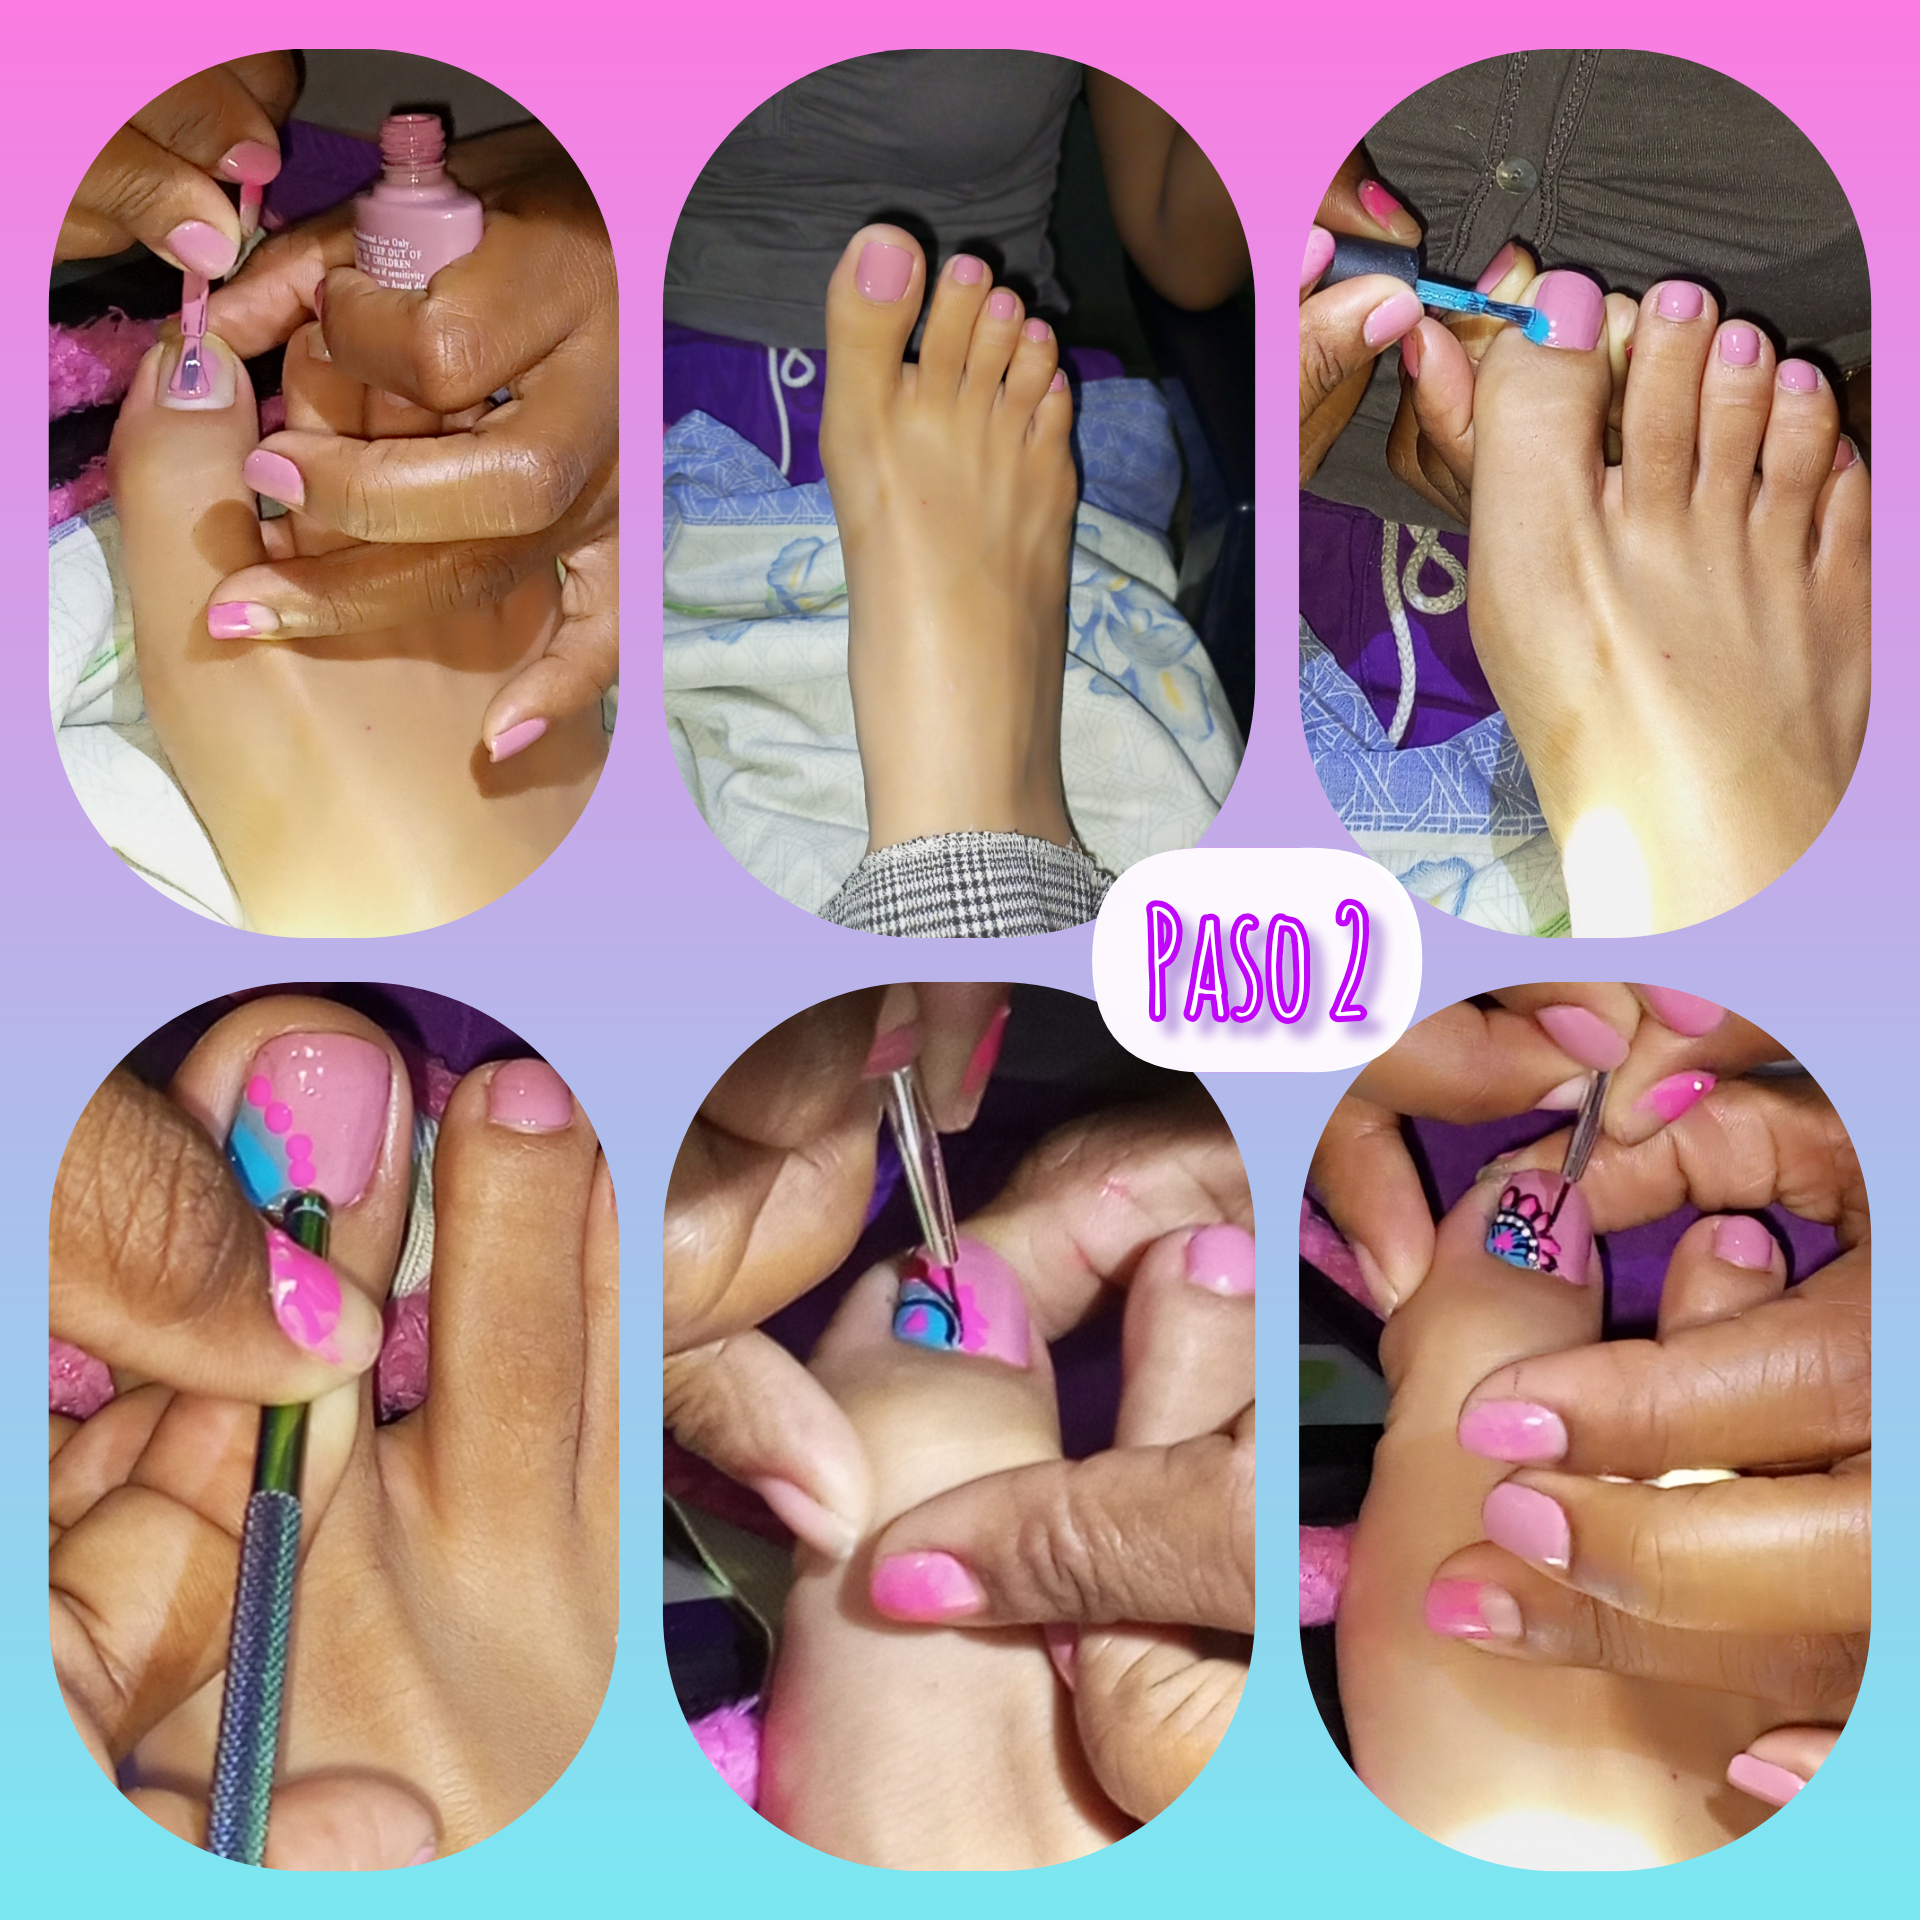
La segunda imagen contiene lo que fue el paso dos que, incluye la técnica de puntos y líneas en contorno a las formas, dando más volumen y profundidad.
The second image contains what was step two, which includes the technique of dots and lines in contour to the shapes, giving more volume and depth.
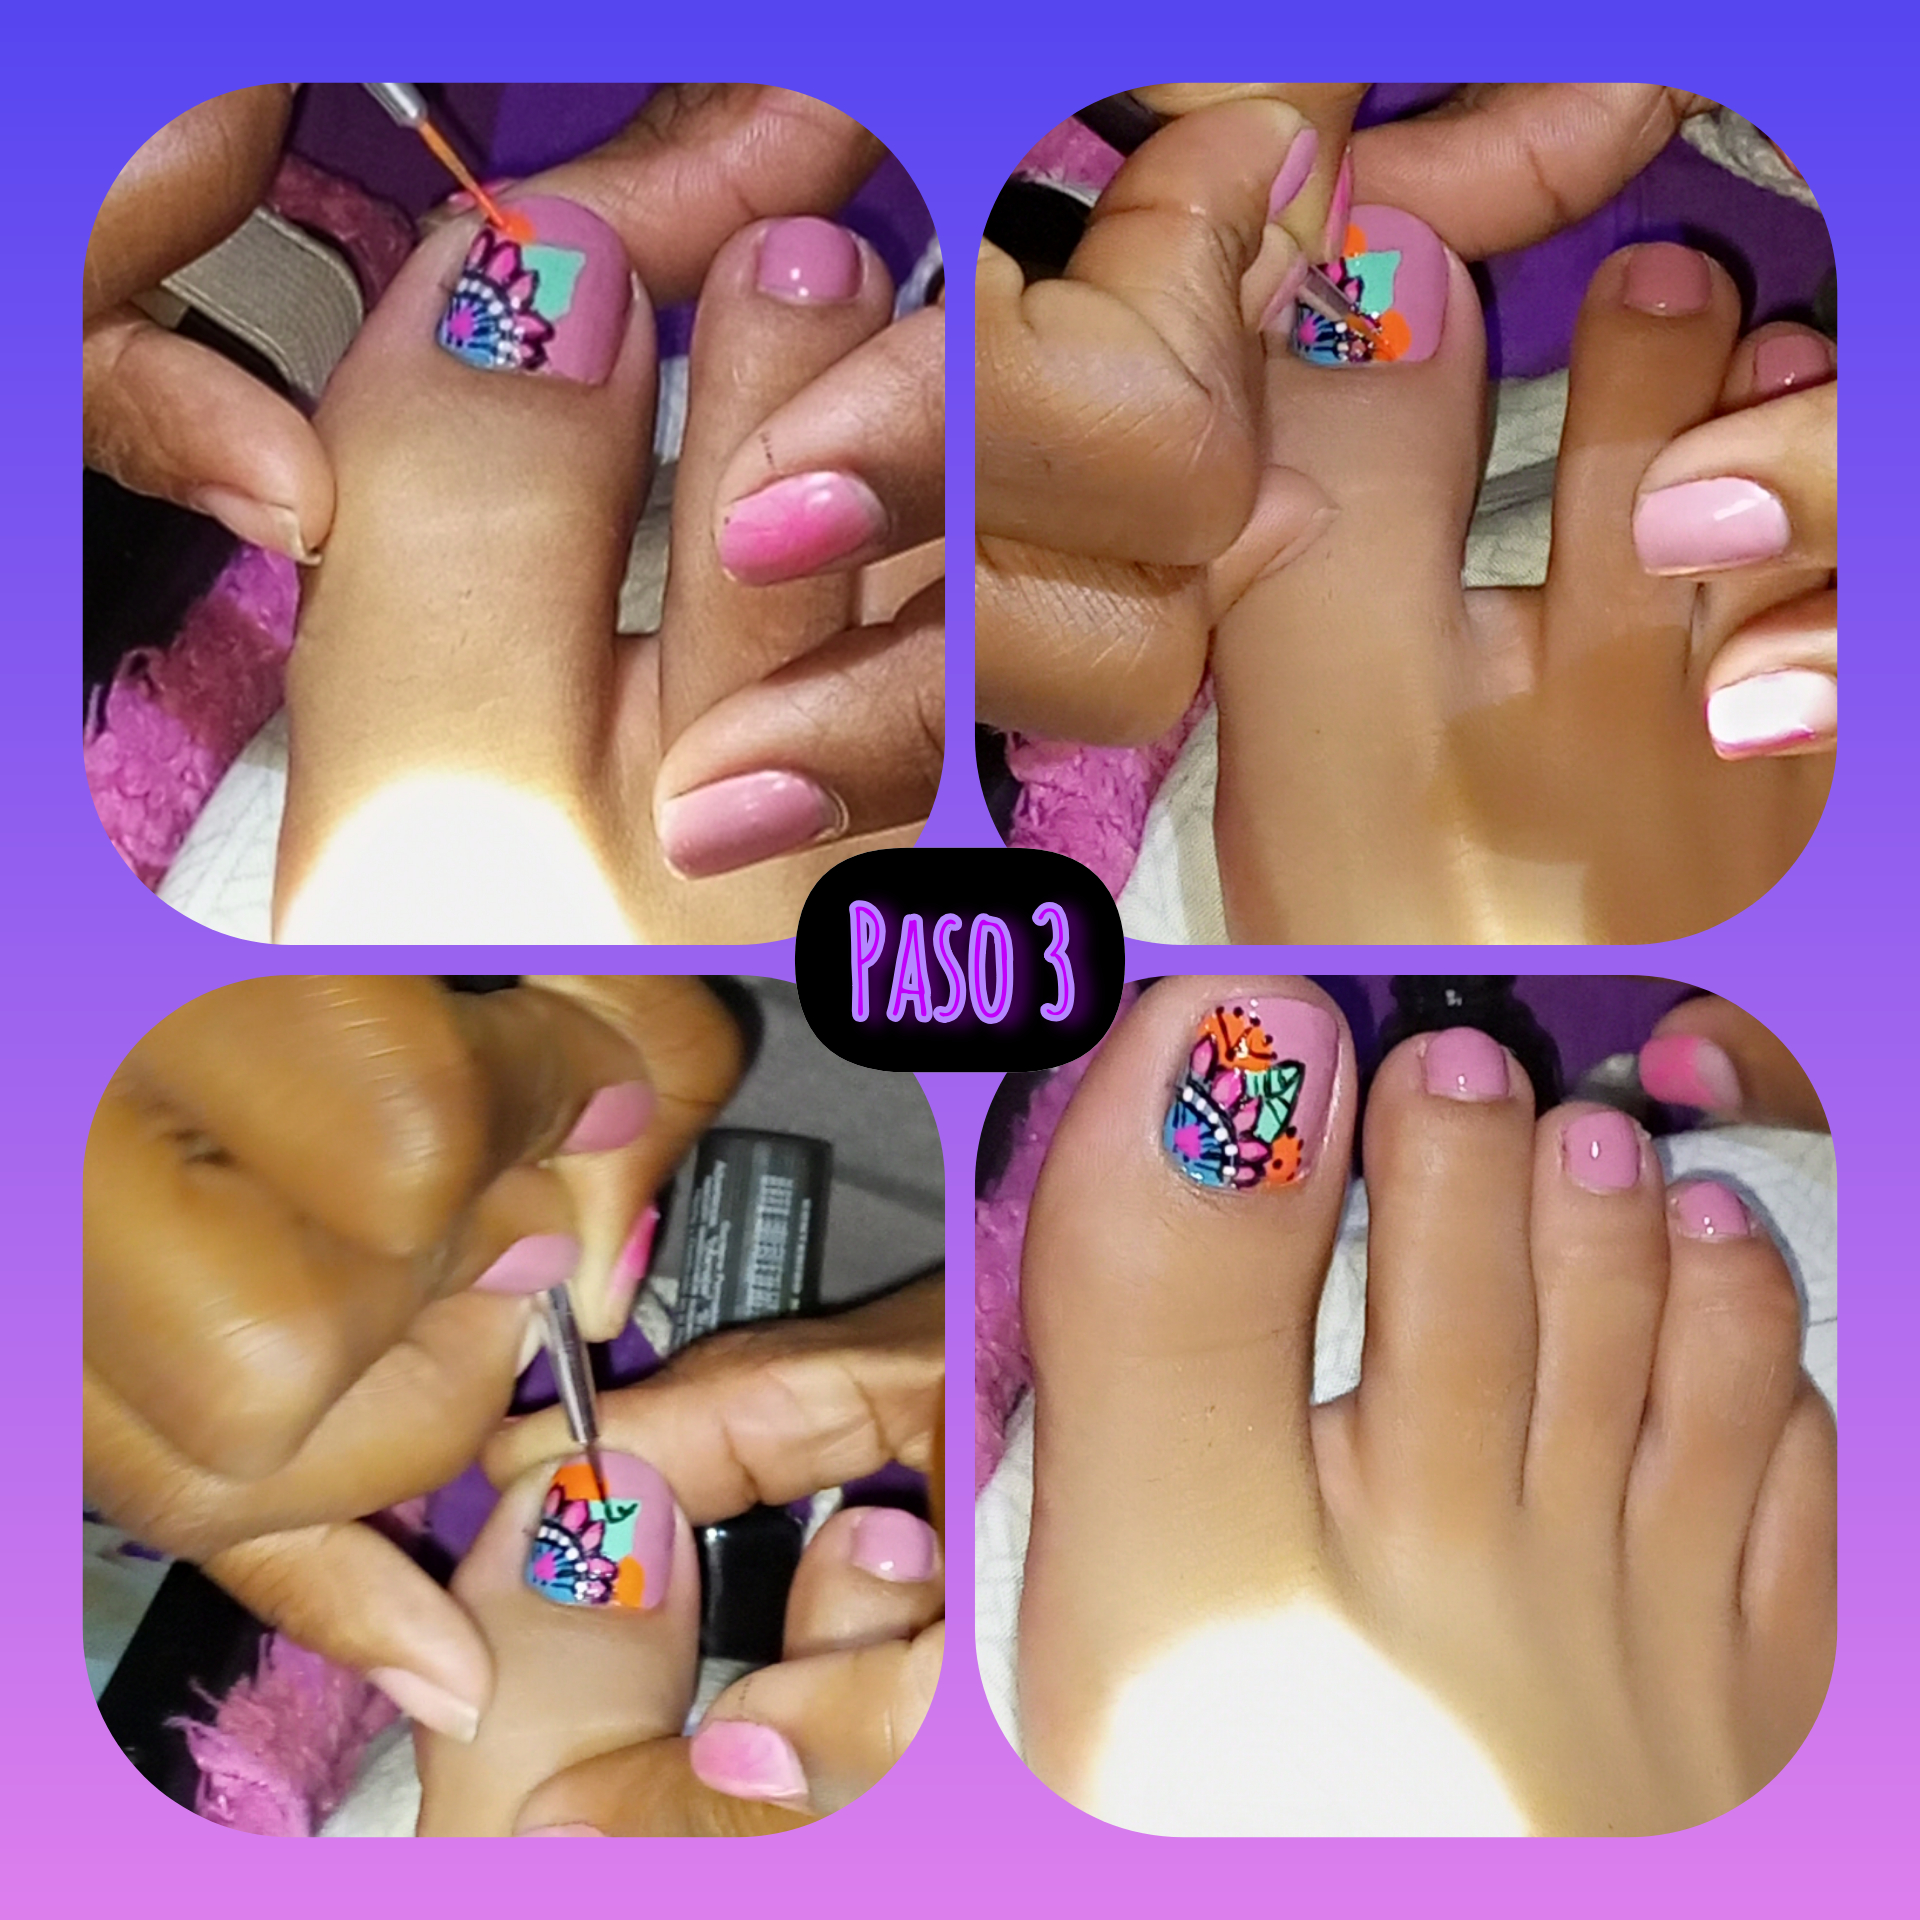
La tercera imagen termina con el paso 3 en el cuál para finalizar , hice los últimos detalles de una hoja con dos capullos igualmente traslapados, estos conforma un efecto 3d , dejando así un hermoso diseño lleno de color y matices.
The third image ends with step 3 in which to finish, I made the last details of a leaf with two equally overlapping buds, these form a 3d effect, leaving a beautiful design full of color and nuances.
Bueno amigos esto es todo, espero les guste 😊
**Well friends this is it, hope you like it 😊.
Todas las imagenes son de mi propiedad/ All the images are my property
Congratulations @caro.noguera! You have completed the following achievement on the Hive blockchain and have been rewarded with new badge(s):
Your next target is to reach 200 upvotes.
You can view your badges on your board and compare yourself to others in the Ranking
If you no longer want to receive notifications, reply to this comment with the word
STOPCheck out the last post from @hivebuzz:
Support the HiveBuzz project. Vote for our proposal!
Waoo que bello. Imagino el tiempo que dedicaste a cada detalle. Esta bellísimo ese diseño. Muchas gracias por tu aporte y felicitaciones
Me gustó mucho tu pedicura, está espectacular!❤️ Saludos!!
Gracias por compartir en Hispapro!
@tipu curate
Upvoted 👌 (Mana: 5/55) Liquid rewards.