¡Hola hermosa comunidad! Espero estén muy bien y hayan tenido un excelente día.
El día de hoy les quiero compartir este paso a paso que se que a muchas les va a ayudar. Hace mucho tiempo iba muy seguido a depilar mis cejas, pero siempre me quedaban diferentes y obviamente me decepcionaba pagar por un servicio que era casi como una ruleta rusa, porque nunca sabia como quedarían mis cejas.
Un buen día me canse de depender de otra persona por el cuidado y limpieza de mis cejas, debido a que tengo una gran cantidad tenía que ir antes de 15 días. Económicamente me arruinaba y mentalmente me mantenía nerviosa no saber si un día llegaría a cas con media ceja nada más. Decidí realizar un curso y nos dieron clase de visagismo y se preguntaran ¿Qué es eso Isabel? ¿Con qué se come?
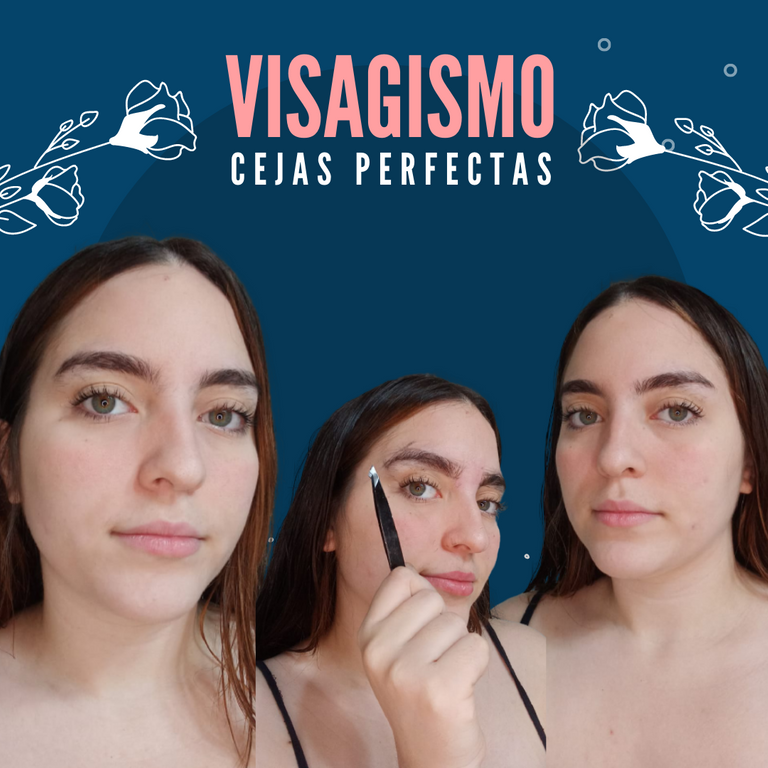
El visagismo es el estudio de la morfología de nuestro rostro y a través de él podemos conocer y definir la forma adecuada de nuestras cejas. Es usado para la depilación, micropigmentación, microblading y microshading, ya que permite tener la mayor exactitud posible.
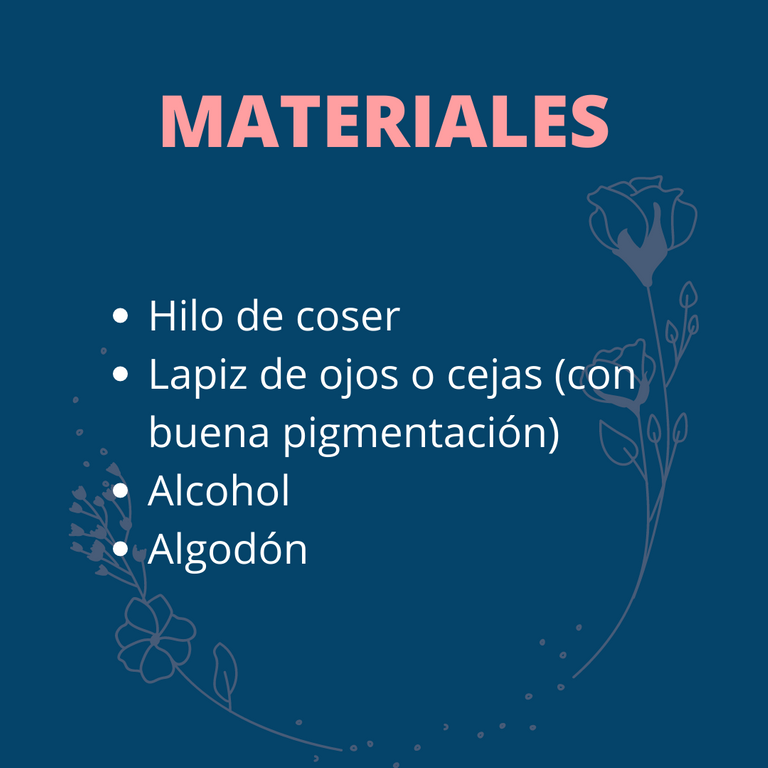
Para realizar un visagismo vamos a necesitar los siguientes materiales:
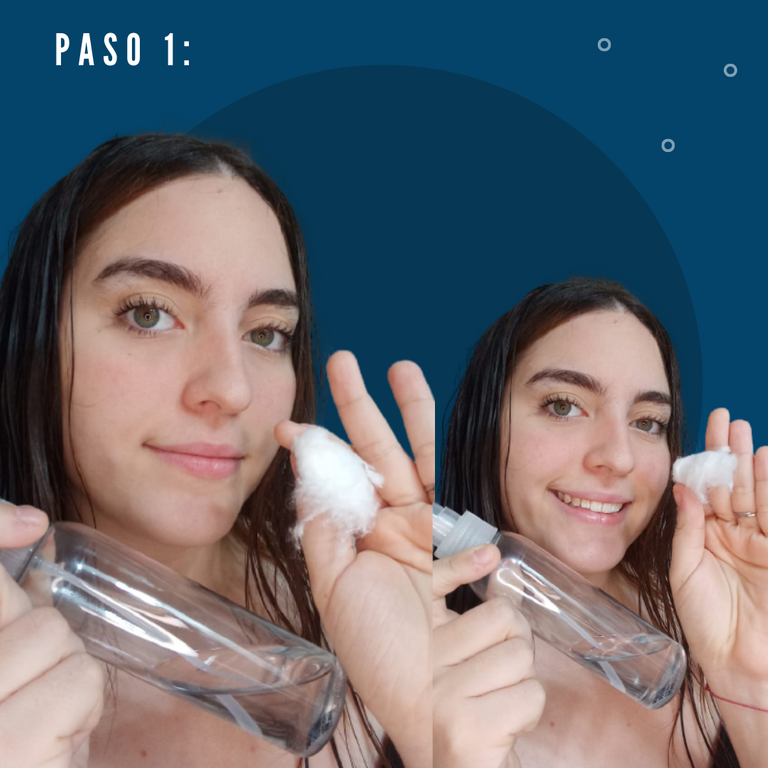
Como primer paso vamos a higienizar la zona a trabajar, que en este caso es todo el alrededor de las cejas.
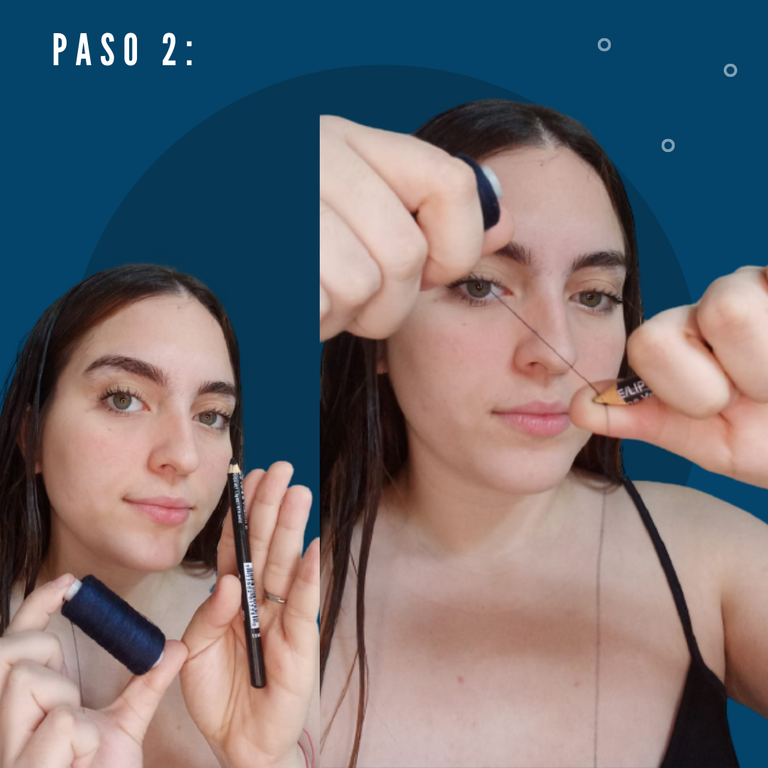
En el paso dos vamos a pintar un trozo de nuestro hilo con el lápiz. Es importante que el lápiz tengo una buena pigmentación ya que esto te permitirá tener mejor visualización.
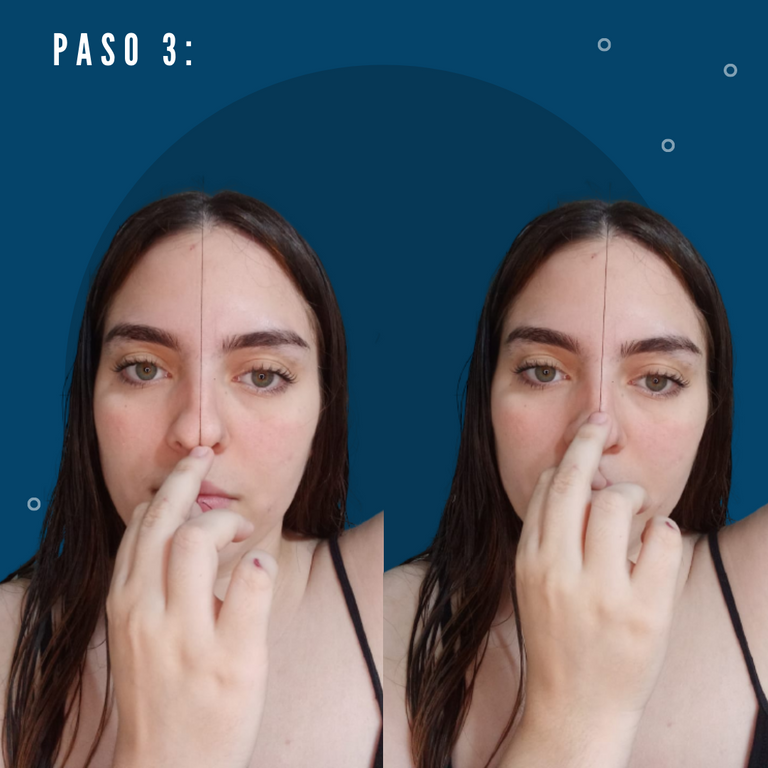
El tercer paso será marcar el medio de nuestras cejas. Vamos a unir la punta e la barbilla, el medio de la nariz y ese pico que se nos hace en el cabello como se ve en la imagen.
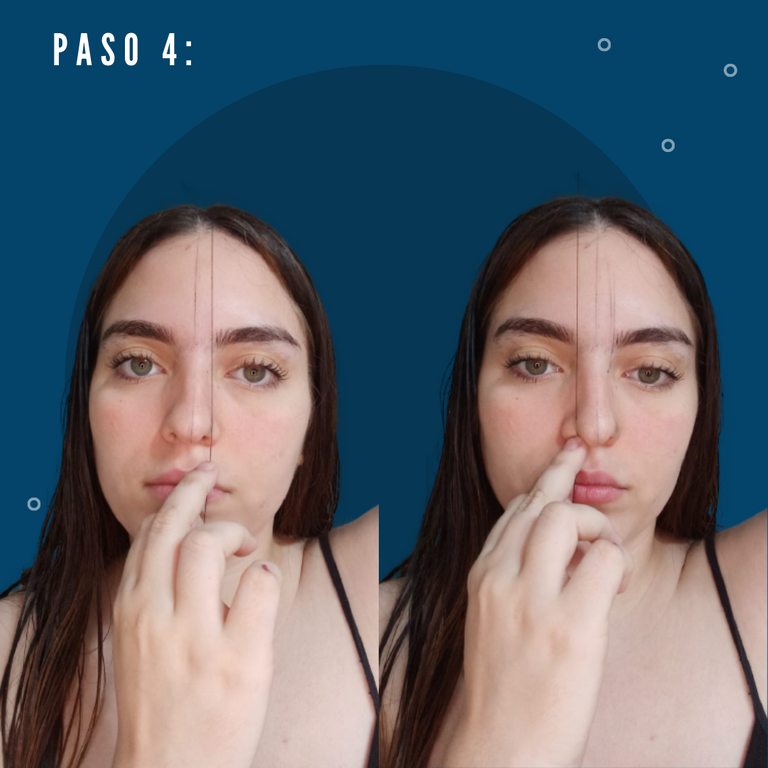
En el paso cuatro vamos a marcar el principio de nuestra ceja midiendo desde el borde de la nariz hasta arriba.
Para realizar el visagismo debemos estar tranquilas para que nuestro pulso colabore a un mejor resultado.
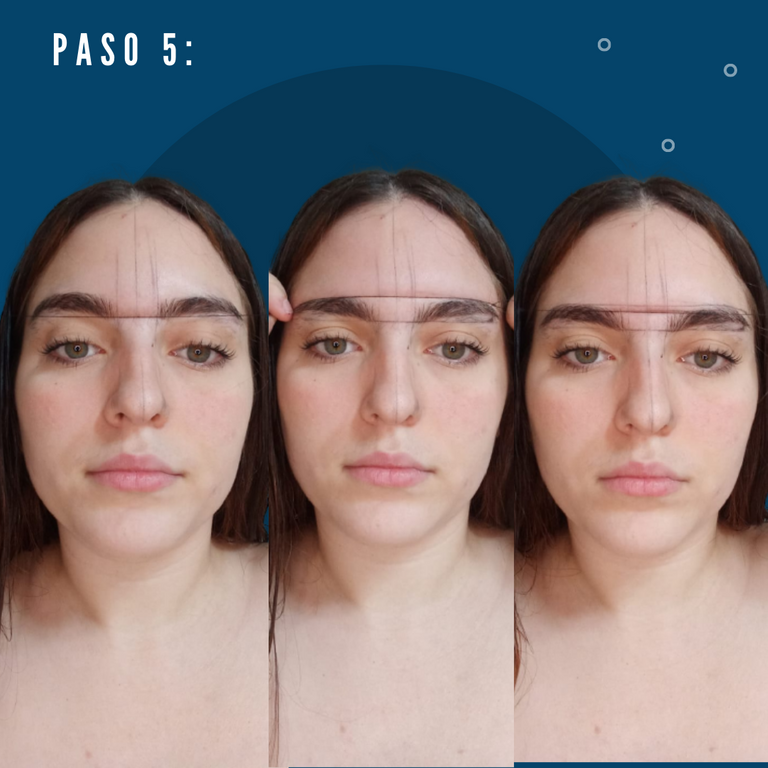
Como paso cinco vamos a medir horizontalmente el grosor. Primero unimos la parte inferior (dejando lo más recto posible ya que esto nos ayudara en los pasos siguientes), luego la parte más alta de lado y lado para tener una mejor precisión a la hora de medir la parte superior siendo el ultimo paso.
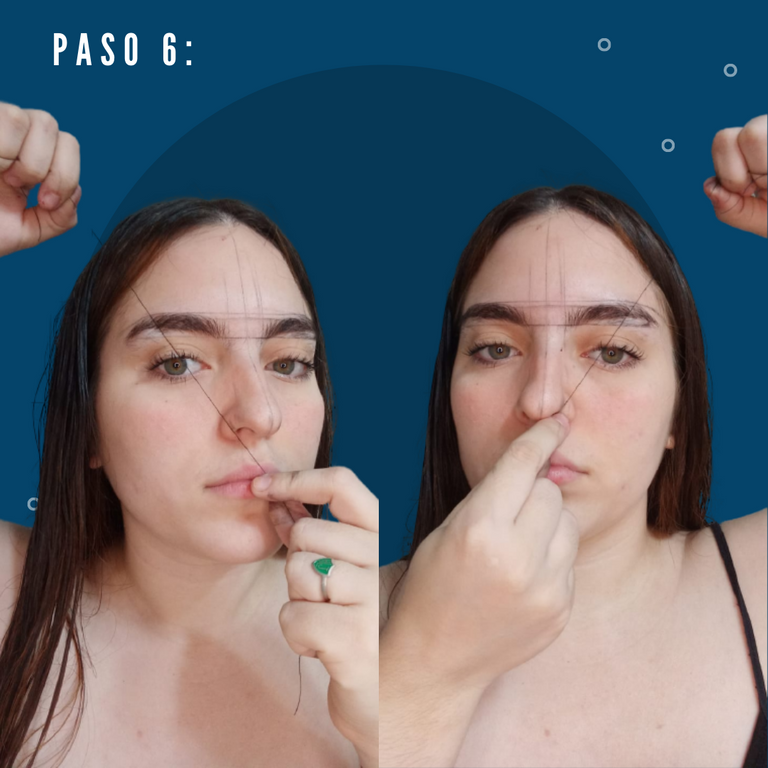
El paso seis será medir nuestra parte más alta e importante de la ceja. Esta es la que da mayor impresión. Uniremos de un lado de la nariz en diagonal pasando justo por encima del iris del ojo. Es importante que estés derecha y mirando al frente.
En el paso siete marcaremos desde el la esquina (de cada lado) y pasaremos por el fin de nuestro ojo. Esto marcara el largo de nuestra ceja.
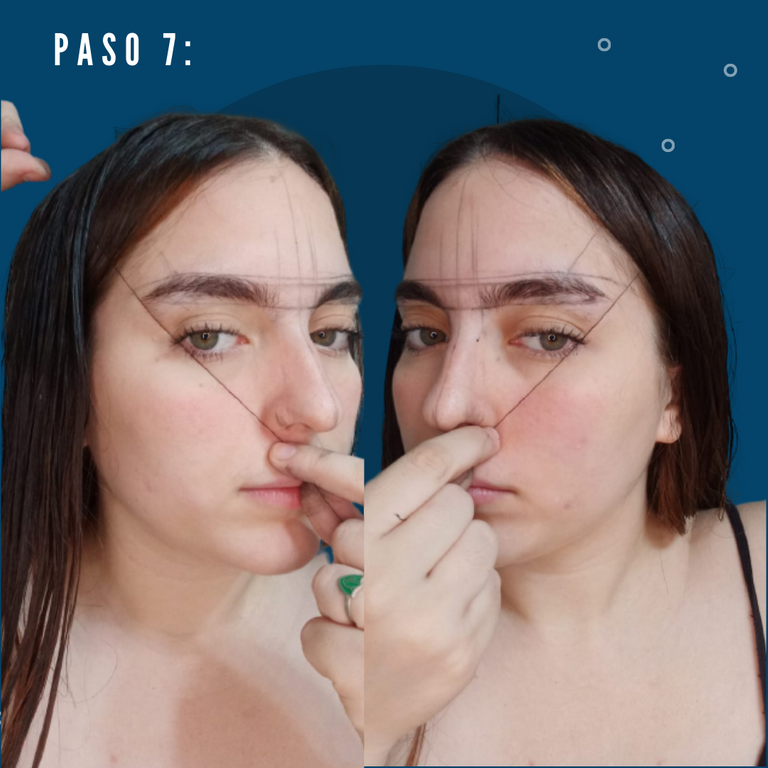
En el paso ocho vamos a unir el paso desde el paso seis al paso siete.
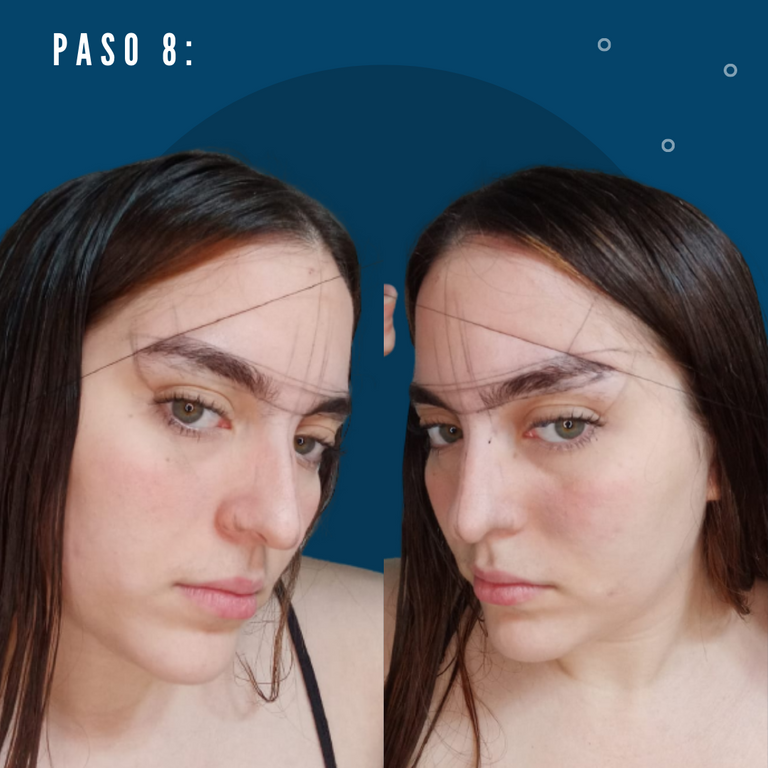
Como paso nueve acabaremos de definir la forma superior de nuestra ceja. Aquí vamos a unir desde la esquina inferior de la otra ceja hasta la parte más alta.
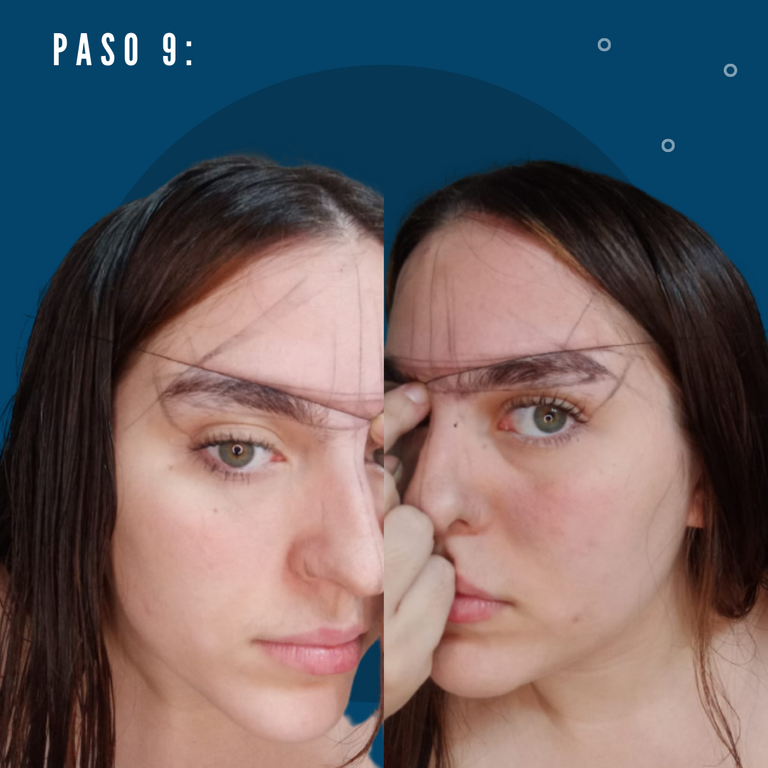
En el paso diez vamos a definir la parte inferior. Vamos a unir desde la esquina inferior de la ceja hasta el punto seis.
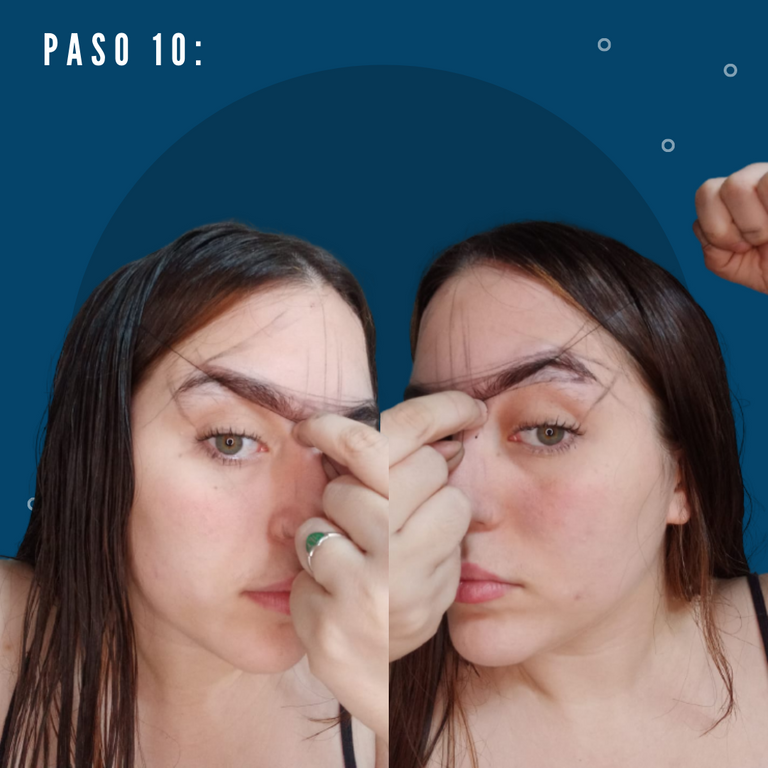
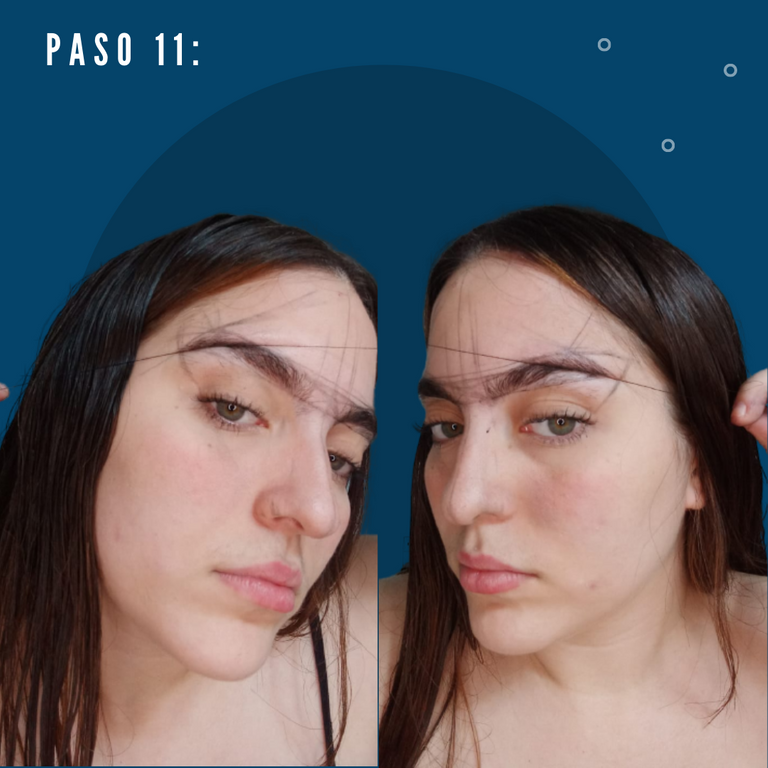
El onceavo y último paso será terminar de dar la forma como se visualiza en la foto.
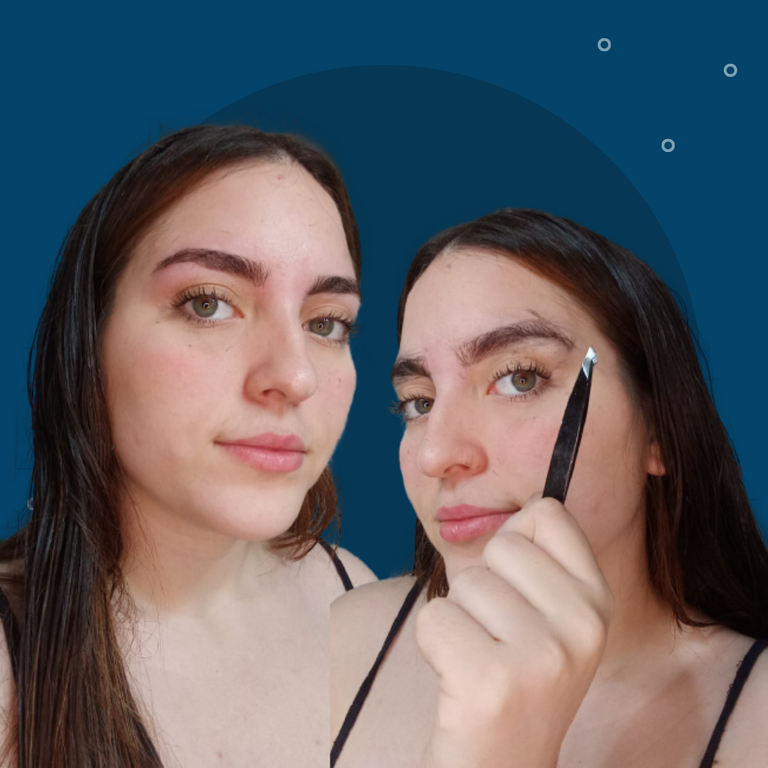
¡Y LISTO! Antes de depilar sus cejas es recomendable practicar hasta tener una buena técnica, recuerden que la practica hace al maestro.
NOTA IMPORTANTE: Tenemos que tener en cuenta que nuestras cejas no son iguales, la técnica ayuda a que queden lo más similares posible, así que tengamos cuidado a la hora de depilar.
Espero que les haya gustado y lo mas importante, que les haya servido mucho este paso a paso.
¡Les mando besos y que tengan una hermosa semana!

English version
Hello beautiful community! I hope you are very well and have had a great day.
Today I want to share with you this step by step that I know will help many of you. A long time ago I used to go very often to pluck my eyebrows, but they were always different and obviously I was disappointed to pay for a service that was almost like a Russian roulette, because I never knew how my eyebrows would look like.
One day I got tired of depending on someone else for the care and cleaning of my eyebrows, because I have a lot of eyebrows I had to go within 15 days. Financially it ruined me and mentally it kept me nervous not knowing if one day I would get home with only half an eyebrow. I decided to take a course and they gave us a visagism class and you may wonder what is that Isabel? What do you eat with?
Visagism is the study of the morphology of our face and through it we can know and define the proper shape of our eyebrows. It is used for hair removal, micropigmentation, microblading and microshading, as it allows us to have the greatest possible accuracy.
To perform a visagism we will need the following materials:
As a first step we are going to sanitize the area to work on, which in this case is all around the eyebrows.
In step two we are going to paint a piece of our thread with the pencil. It is important that the pencil has a good pigmentation as this will allow you to have a better visualization.
The third step will be to mark the middle of our eyebrows. We are going to join the tip of the chin, the middle of the nose and that peak that is made in the hair as shown in the image.
In step four we will mark the beginning of our eyebrow measuring from the edge of the nose to the top.
To perform the visagism we must be calm so that our pulse collaborates to a better result.
As step five we are going to measure horizontally the thickness. First we join the lower part (leaving as straight as possible as this will help us in the following steps), then the highest part of the side and side to have a better precision when measuring the upper part being the last step.
Step six will be to measure our highest and most important part of the eyebrow. This is the one that gives the biggest impression. We will join from one side of the nose diagonally passing just above the iris of the eye. It is important that you are straight and looking straight ahead.
In step seven we will mark from the corner (on each side) and pass through the end of our eye. This will mark the length of our eyebrow.
In step eight we will join the step from step six to step seven.
As step nine we will finish defining the top shape of our eyebrow. Here we will join from the lower corner of the other eyebrow to the highest part.
In step ten we are going to define the lower part. We're going to join from the bottom corner of the brow to point six.
The eleventh and final step will be to finish the shape as shown in the photo.
AND THAT'S IT! Before plucking your eyebrows it is advisable to practice until you have a good technique, remember that practice makes perfect.
I hope you liked it and most importantly, that this step by step has been very useful.
I send you kisses and have a great week!
Congratulations @isadvgarcia! You have completed the following achievement on the Hive blockchain and have been rewarded with new badge(s) :
Your next target is to reach 400 upvotes.
You can view your badges on your board and compare yourself to others in the Ranking
If you no longer want to receive notifications, reply to this comment with the word
STOPCheck out the last post from @hivebuzz:
Support the HiveBuzz project. Vote for our proposal!
OMG! no pensé que pudiera ser tan complicado, al menos en apariencia. Ya aprendí algo nuevo hoy. Gracias por compartir.
Pues todos los días uno aprende algo nuevo... :-)
Se ve engorroso el proceso, pero debe ser superefectivo y preciso, además me imagino que con la práctica ya no hará falta todo el demarcado. ¡Muy interesante!
¡Felicidades! Esta publicación obtuvo upvote y fue compartido por @la-colmena, un proyecto de Curación Manual para la comunidad hispana de Hive que cuenta con el respaldo de @curie.
Si te gusta el trabajo que hacemos, te invitamos a darle tu voto a este comentario y a votar como testigo por Curie.
Si quieres saber más sobre nuestro proyecto, acompáñanos en Discord: La Colmena.