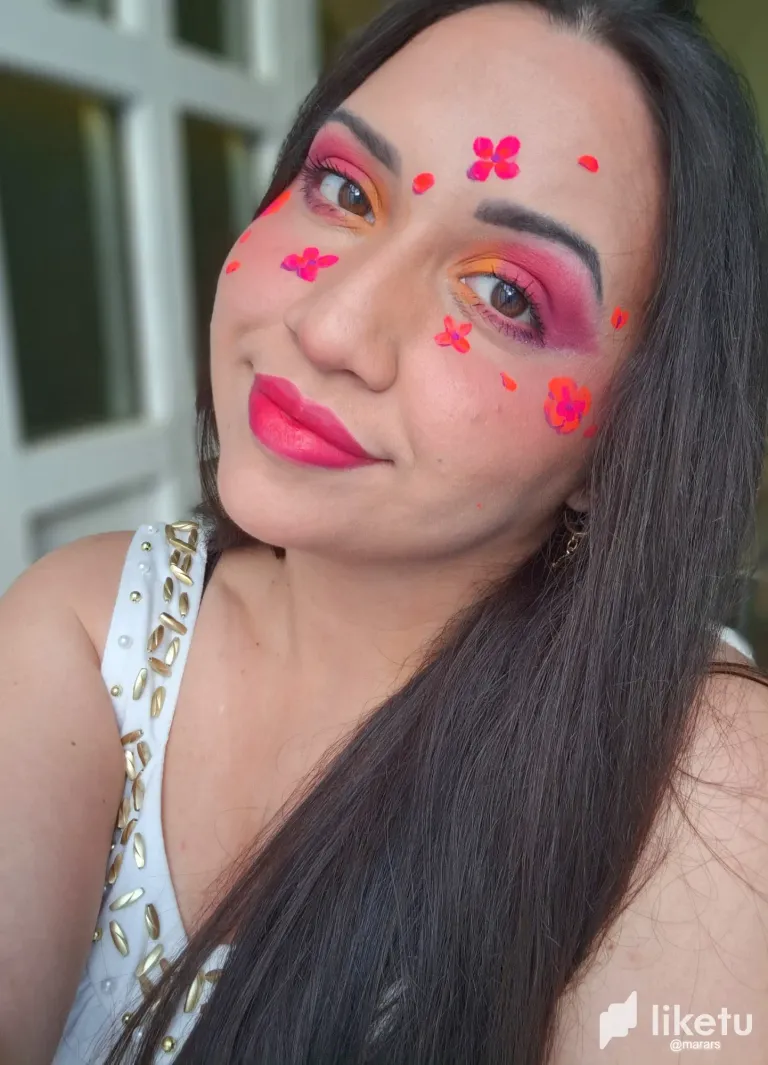


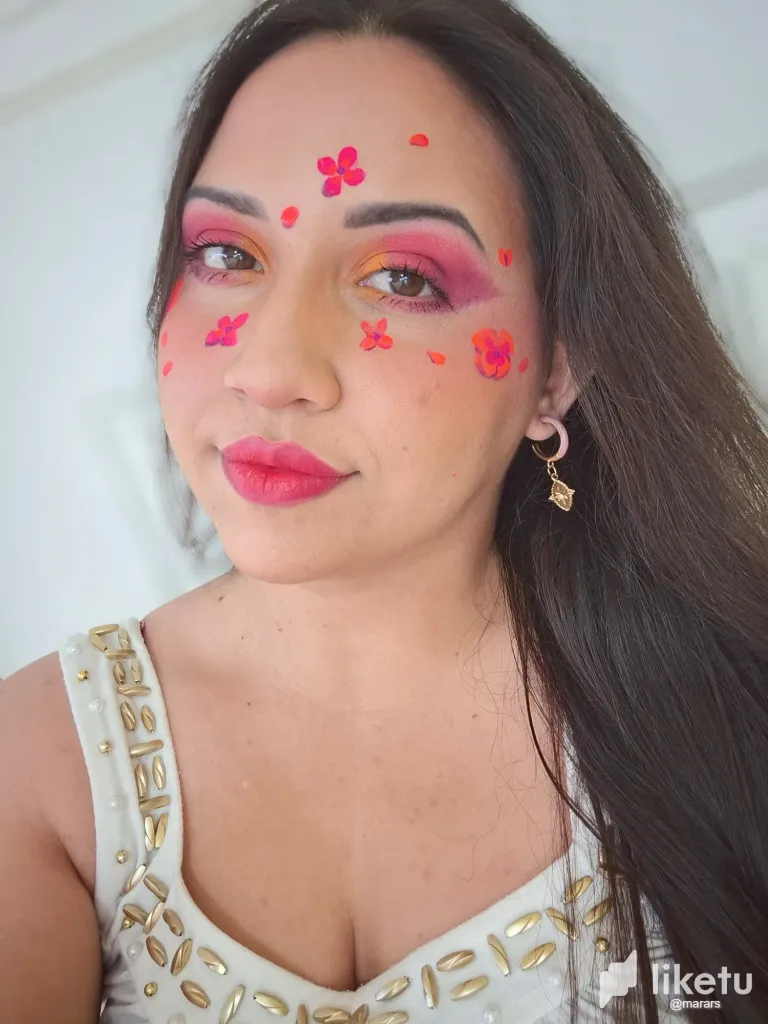
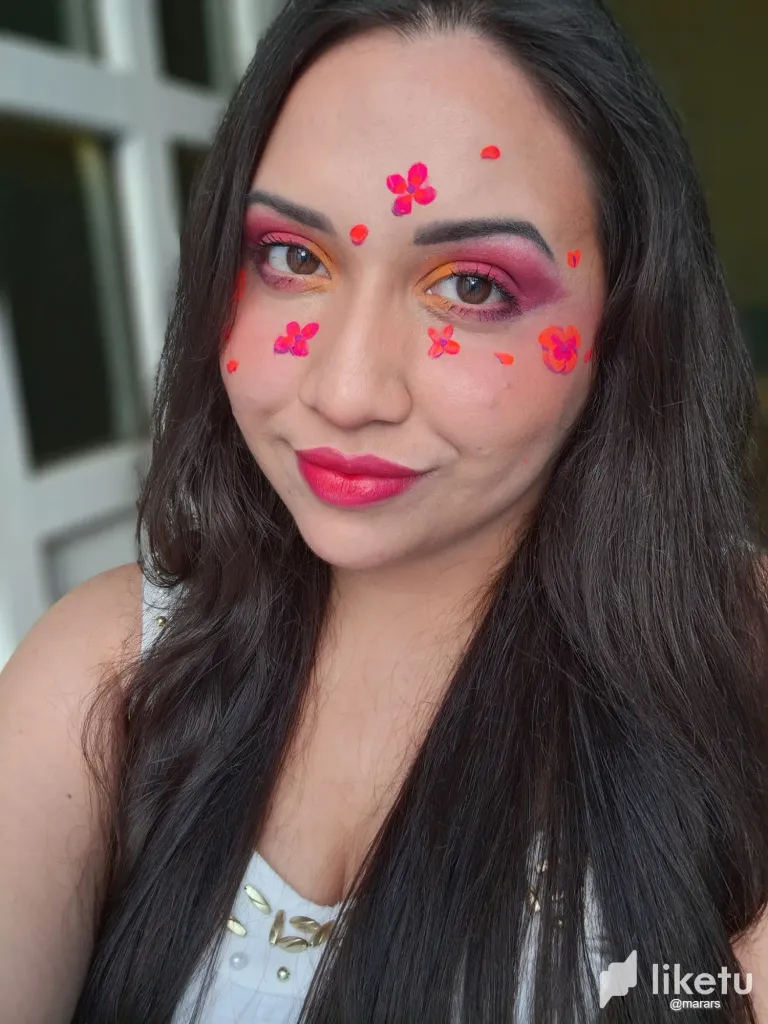
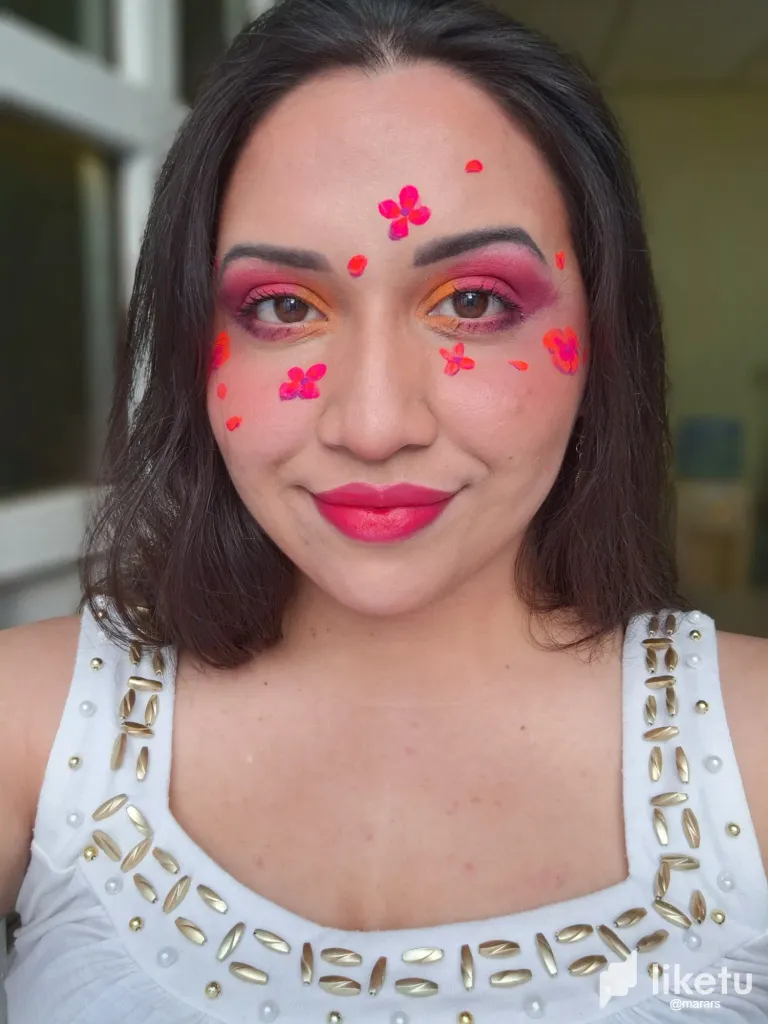
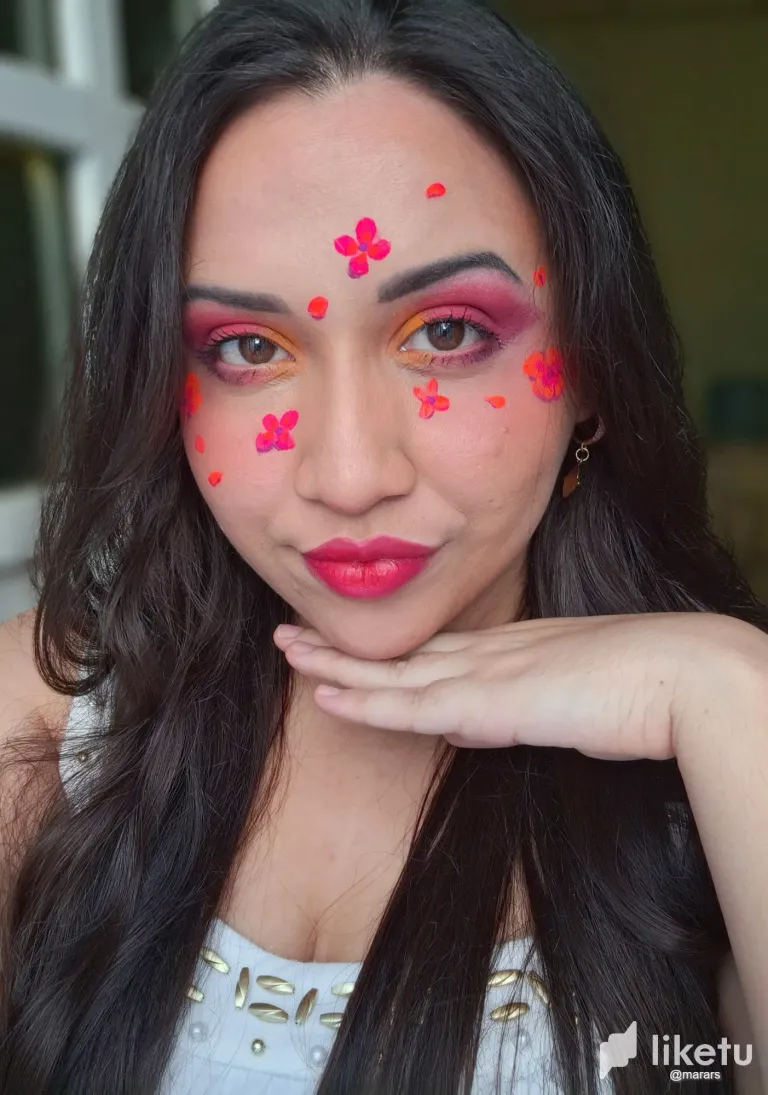
Hi dear friends, I hope you are great, today I am pleased to present you my creative makeup inspired by spring and carnival, since these dates are approaching and painting the face with extravagant colors is the custom, I wanted to wear this fun floral look with bright colors, for those who want to dress up as a flower or a spring queen this makeup is ideal.
Hola queridos amigos, espero estén genial, hoy me place presentarles mi maquillaje creativo inspirado en la primavera y en el carnaval, ya que se acercan estas fechas y pintarse la cara con extravagantes colores es la costumbre, quise lucir este look divertido floral y con colores llamativos, a quienes quieran disfrazarse de flor o de reina primaveral este maquillaje es ideal.
For this makeup I used: foundation, concealer, powder contour, eyebrow pencil, fuchsia, purple, orange and shimmery pink shadows, liquid skin paints of the same color, pink lipsticks, powder, blush and mascara, also brushes of various sizes, here is the process:
Para este maquillaje usé: base, corrector, contorno en polvo, lápiz de ceja, sombras fucsia, morada, naranja y rosa brillosa, pinturas para la piel liquidas del mismo color, labiales rosas, polvo, rubor y máscara de pestañas, también brochas de varios tamaños, a continuación, el proceso:
- I prepared my face by washing it beforehand, then I applied primer and let it dry, I applied concealer in the area of dark circles, in the middle of the forehead, chin and tip of the nose, after blurring I proceeded to apply foundation, which I applied foundation that I blended with a wet sponge.
- Preparé mi rostro lavándolo previamente, después apliqué primer y dejé secar, me puse corrector en la zona de ojeras, en medio de la frente, en barbilla y punta de la nariz, después de difuminar procedí a aplicar base, la cual apliqué base que difuminé con esponja húmeda.
- I combed my eyebrows and proceeded to make a base line with the dark gray eyebrow pencil, starting from the base reaching the arch and ending at the end of them, then I brushed carefully and blurred using black shadow to complement covering the spaces with a softer finish.
- Peiné mis cejas y procedí a hacer una línea base con el lápiz gris oscuro para cejas, partiendo desde la base llegando al arco y terminando al final de las mismas, después cepillé con cuidado y difuminé usando sombra negra para complementar tapando los espacios con un acabado más suave.
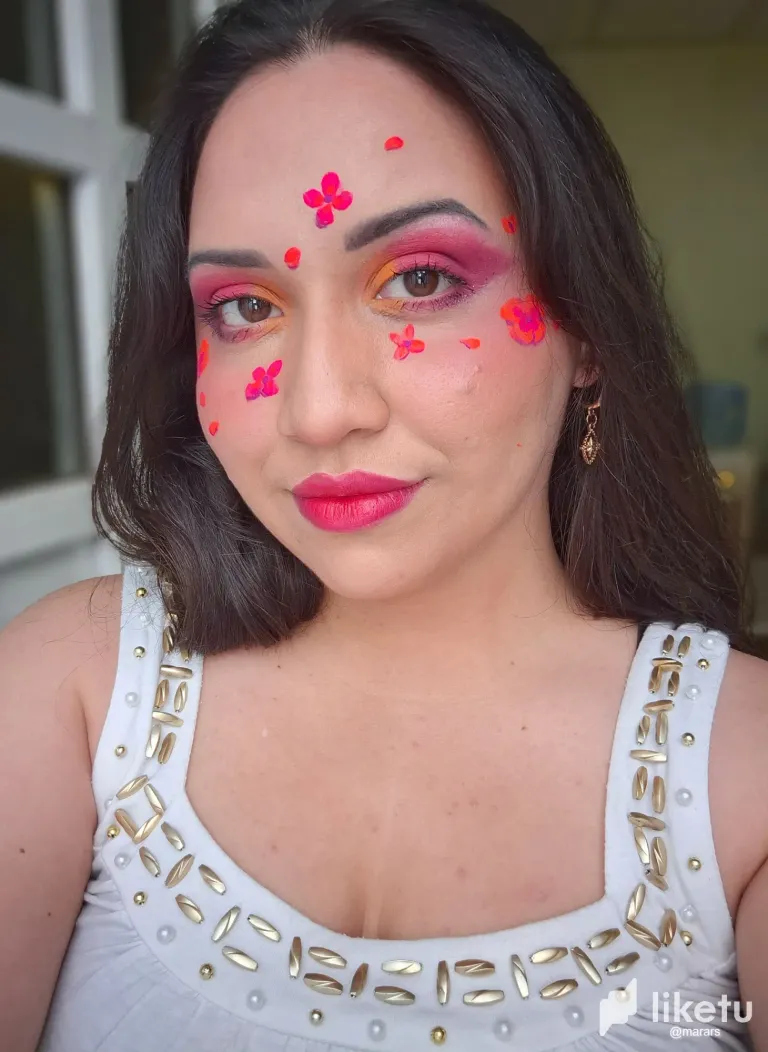
- To paint the eyes the first step I did was to apply orange shadow at the beginning of the eyelid in the area of the lacrimal, stopping in the middle and blending with a small brush, then I applied pink in the middle of the mobile eyelid shading up to the fixed eyelid, I blended with a blending brush this pink, we left the end of the eyelid for the purple color, we also applied it above the socket and blended it together with the pink color, we exaggerate this shadow on the outside of the eye making a pronounced blurring towards the temple and we take it towards the lower eyelid, in the middle of this eyelid we apply fuchsia and in principle orange as in the upper eyelid, finished the part of the shading, we apply a little concealer on the bottom just where the shadow of the lower eyelid ends to correct imperfections of the shading, just below the eyebrow we apply light pink shimmer shadow, we curl the lashes and then we apply mascara. With all this we would have the shaded eyes ready.
- Para pintar los ojos el primer paso que hice fue aplicar sombra naranja en principio del párpado en la zona del lagrimal, parando a mitad y difuminando con una brocha pequeña, después apliqué rosa en medio del párpado móvil sombreando hasta el párpado fijo, difuminé con una brocha de difuminar este rosa, dejamos el final del párpado para el color morado, lo aplicamos también por encima de la cuenca y difuminamos juntándolo con el color rosa, esta sombra la exageramos por fuera del ojo haciendo un difuminado pronunciado hacia la sien y la llevamos hacia el párpado inferior, en medio de este párpado aplicamos fucsia y en principio naranja tal como en el párpado superior, terminado la parte del sombreado, aplicamos un poco de corrector en la parte de abajo justo donde termina la sombra del párpado inferior para corregir imperfecciones del sombreado, justo por debajo de la ceja aplicamos sombra brillosa rosa clara, rizamos las pestañas y después aplicamos máscara de pestañas. Con todo esto tendríamos los ojos sombreados listos.
- I applied contour on the face on the forehead, chin and just below the cheekbones, then I blushed with pink blush on the cheekbones and cheeks, applying light pink blush on the cheek area and darker on the cheekbones, then I applied the loose powder, left a minute and blended it with a brush.
- Apliqué contorno en el rostro por frente, por la barbilla y justo por debajo de los pómulos, después ruboricé con rubor rosa los pómulos y mejillas, aplicando rubor rosa claro en la zona de mejillas y mas oscuro en los pómulos, después apliqué el polvo suelto dejé un minuto y lo difuminé con brocha.
- First I moisturized my lips with a soft pink finish lipstick, I painted with a fuchsia lipstick, then I made a heart shape, applying lipstick on the cupid's bow and lower lip line, I blended trying not to exceed the lip line, finally, I applied an orange lipstick in the middle and blended.
- Primero humecté mis labios con un labial de acabado rosa suave, me pinté con un labial fucsia, después hice una forma de corazón, aplicando labial en el arco de cupido y línea labial inferior, difuminé procurando no excederme de la línea de labios, por último, apliqué un labial naranja en medio y difuminé.
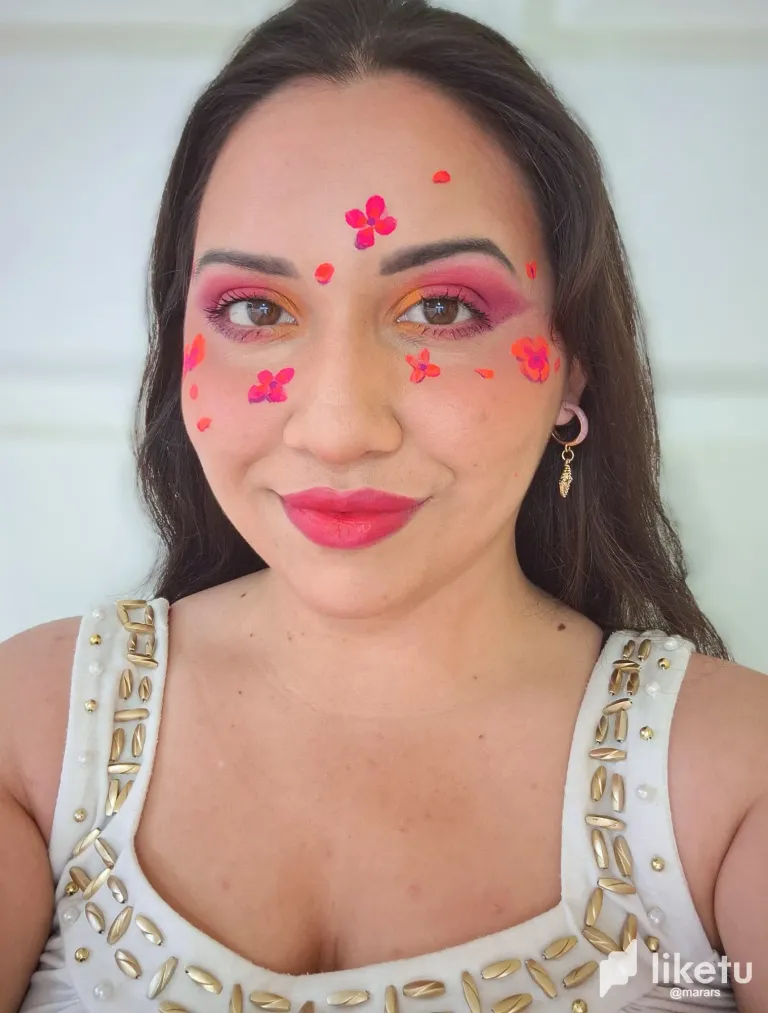
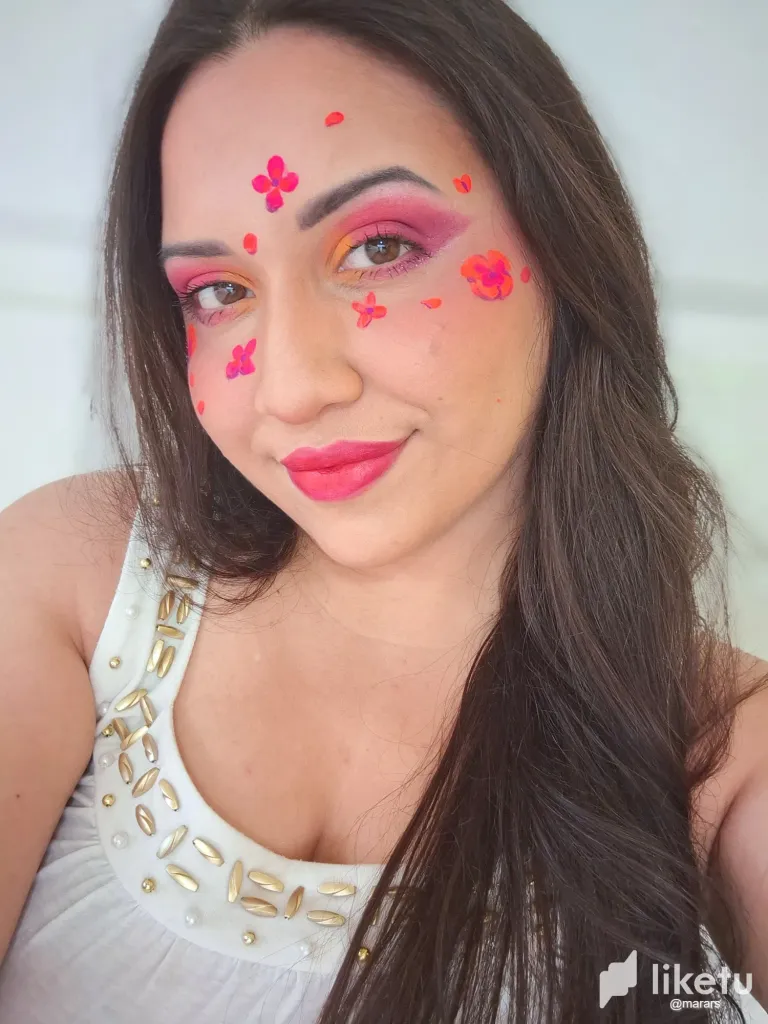
- I came to my favorite part, painting the flowers, for this I used liquid face paint, to make the first flowers bigger I used a flat brush with paint trying not to have excess of it and I flattened the tip on the skin, this way the petal was formed, I repeated it four times in a circular way leaving a small space in the middle, this way the first flower was formed, with a smaller beveled brush I applied a different color in the middle of the flower repeating the technique, in this case I made them orange with fuchsia to combine it with the eyeshadow. On the forehead I made a smaller variable of the flower with a small round brush making the flower fuchsia and orange, I also painted some loose petals, and with purple paint I highlighted the details, I made the dots in the middle of the flower, the shading and as a final detail for this makeup I applied some glitter just below the lash line.
- Llegué a mi parte favorita, pintar las flores, para esto usé pintura líquida para el rostro, para hacer las primeras flores más grandes usé una brocha plana con pintura procurando no tener exceso de la misma y aplasté la punta sobre la piel, así se formaba el pétalo, lo repetí cuatro veces en forma circular dejando un pequeño espacio en medio, así se formó la primera flor, con una brocha más pequeña biselada apliqué un color diferente en medio de la flor repitiendo la técnica, en este caso las hice naranja con fucsia para combinarlo con la sombra de ojos. En la frente hice una variable más pequeña de la flor con una brocha redonda chiquita haciendo la flor fucsia y naranja, también pinté algunos pétalos sueltos, y con pintura morada resalté los detalles, hice los puntos en medio de la flor, el sombreado y como detalle final para este maquillaje apliqué algo de brillo justo por debajo de la línea de pestañas.
That was all friends I hope you liked the makeup and the blog-tutorial until the next makeup <3
Eso fue todo amigos espero les haya gustado el maquillaje y el blog-tutorial hasta el próximo maquillaje <3
.
.
.
• Photos taken of a galaxy A54.
• Traductor/translator: DeepL.
• Collage Editor: Samsung Galaxy editor and Canva.
Thank you for reading
Best wishes to you
❤️
For the best experience view this post on Liketu
Un maquillaje creativo y colorido, te quedó muy biennn! Yo quisiera aprender a maquillar asiii.
Aaaw muchas gracias, espero que le des el intento, es divertido 😊
que bonita sii
gracias 😊