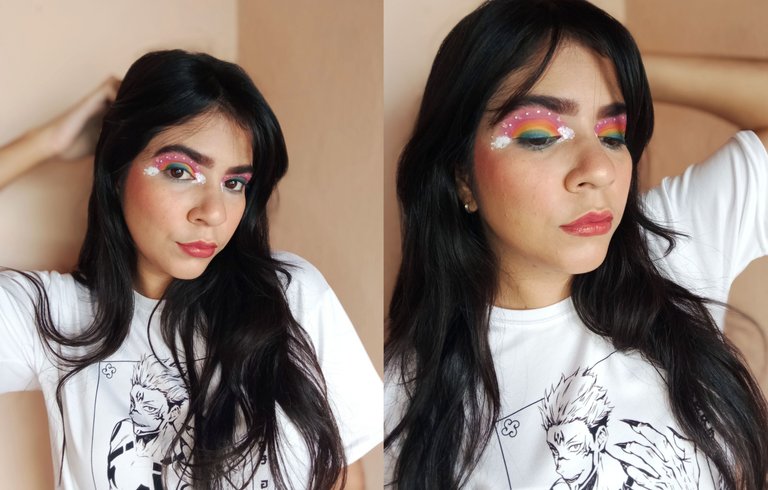
¡Hola amores! Feliz inicio de semana para ustedes, espero que hayan tenido un fin de semana tan genial como el mío, como es de esperarse nueva semana significa nuevos maquillajes, y el de este día es uno que quería hacer desde hace unos días, la verdad me daba algo de miedo porque no pensé que me saldría, pero me dije que podía y que tendría MUCHA paciencia, sin más que decir ¡Comencemos!
Hello loves! Happy start of the week to you, I hope you had a great weekend like mine, as expected new week means new makeovers, and today's is one that I wanted to do for a few days, the truth was a little scary because I didn't think I could do it, but I told myself I could and that I would be VERY patient, without more to say, let's start!
Materiales / Materials:
- Tónico facial / Facial tonic.
- Jabón facial / Facial soap.
- Primer / Primer.
- Crema hidratante / Moisturizing cream.
- Protector solar / Sunscreen.
- Paleta de sombras / Shadow palette.
- Pintura blanca / White paint.
- Pega blanca / White glue.
- Piedras brillantes / Brilliant stones.
- Rubor / Blush.
- Corrector / Concealer.
- Iluminador / highlighter.
- Pomada de cejas / Eyebrow pomade.
- Base / Foundation.
- Beauty blender / Beauty blender.
- Polvo suelto / Loose powder.
- Contorno / Contour
- Pinceles / Brushes
- Brillo labial / Lip Gloss.
- Labial Marron claro / Light brown lipstick.
Procedimiento / Procedure:
Primer paso / First step
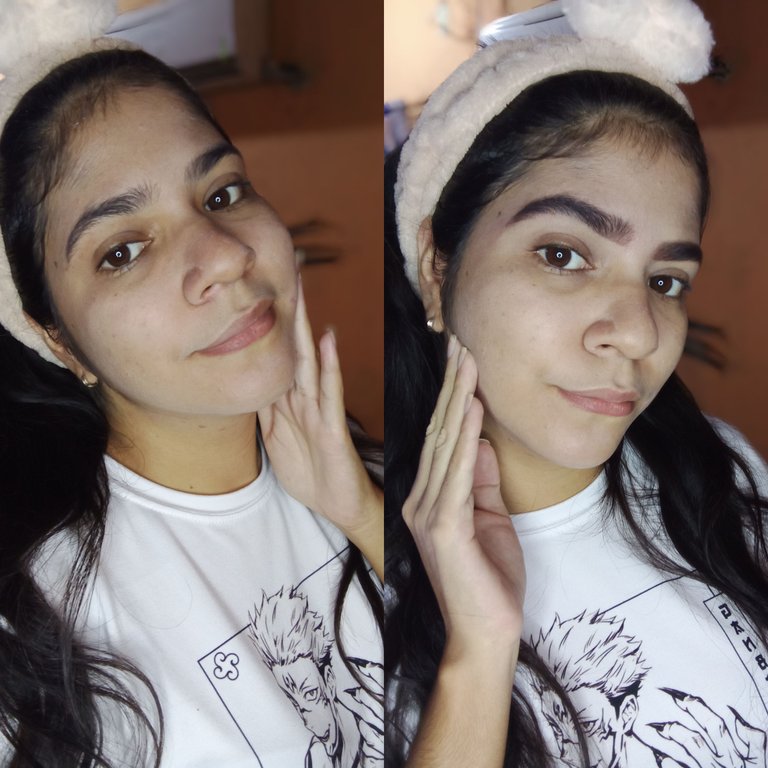
Para preparar mi rostro utilice un tónico facial, coloque unas cuentas gotas en una esponja de algodón y limpie mi rostro para así eliminar cualquier tipo de impureza, luego lave el rostro con un jabón facial, aplique crema hidratante, protector solar y primer.
To prepare my face I used a facial toner, put a few drops on a cotton sponge and cleaned my face to remove any impurities, then washed my face with a facial soap, applied moisturizer, sunscreen and primer.
Segundo paso / Second step:
Peine mis cejas hacia arriba, delinee las cejas en la parte inferior y las fui rellenando hacia arriba, luego las difumine con un cepillo, limpie los bordes con un hisopo y agua micelar, aplique corrector en los bordes y lo difumine para obtener una forma más definida.
Comb my eyebrows upwards, outline the brows at the bottom and fill them in upwards, then blend them with a brush, clean the edges with a cotton swab and micellar water, apply concealer on the edges and blend it to get a more defined shape.
Tercer paso / Third step:
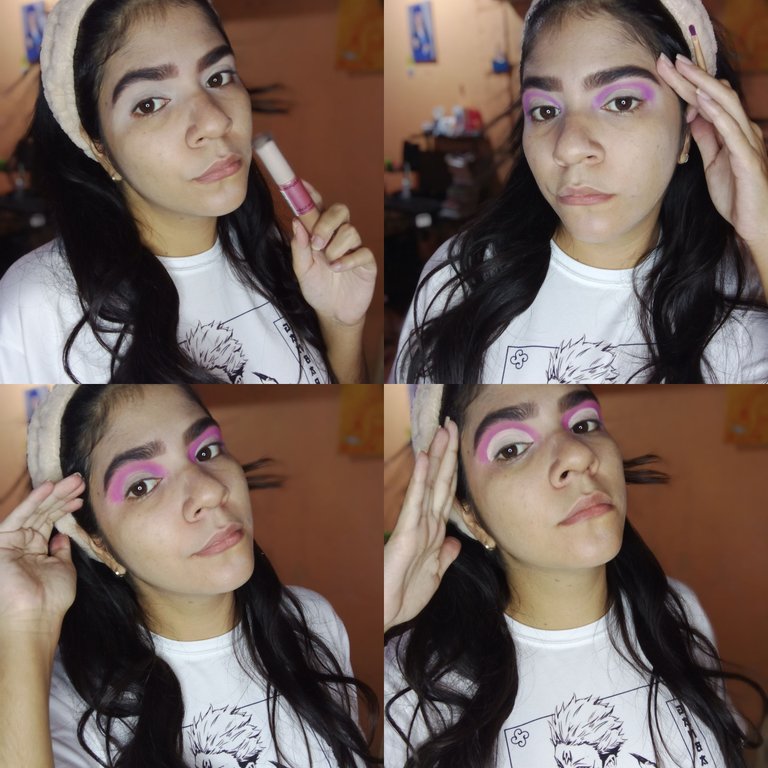
Aplique corrector en mis párpados y lo difumine con un beauty blender, luego tome un pincel delgado y sombra morada e hice un arco comenzando desde el final de mi ojo hasta el inicio, este arco estaba por la parte superior de la cuenca de mi ojo, luego con otra brocha tome más sombra morada y lo difumine alrededor (Hacia afuera) luego tome sombra fucsia y la agregue alrededor de la sombra morada y la difumine también uniendo los colores.
I applied concealer on my eyelids and blended it with a beauty blender, then I took a thin brush and purple shadow and made an arch starting from the end of my eye to the beginning, this arch was along the top of my eye socket, then with another brush I took more purple shadow and blended it around (outwards) then I took fuchsia shadow and added it around the purple shadow and blended it also blending the colors together.
Luego de esto tome un hisopo con agua micelar y limpie adentro del arco, luego tome una brocha plana y con corrector dibuje la forma del arco por dentro y la esparcí y luego la difumine un poco.
After this I took a swab with micellar water and cleaned inside the arch, then I took a flat brush and with concealer I drew the shape of the arch inside and spread it and then blurred it a little bit.
Cuarto paso / Fourth step:
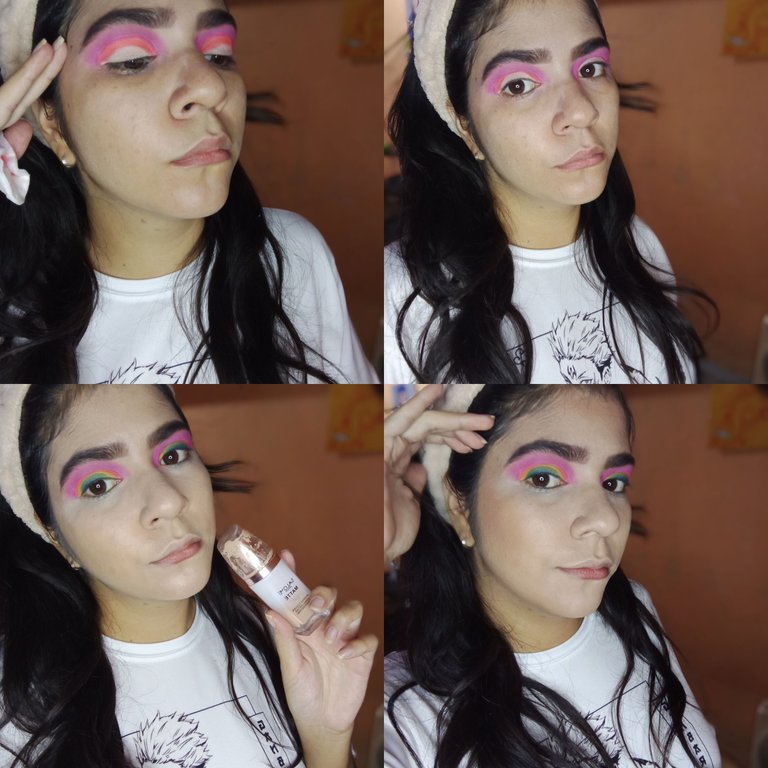
Luego de aplicar el corrector y difuminarlo, tome la brocha plana y comencé a aplicar los colores del arcoiris, para esto hice pequeñas líneas delgadas para así ir armando el arco, el primer color fue el rojo, luego el naranja, seguido por amarillo, verde y finalmente el azul.
After applying the concealer and blending it, I took the flat brush and began to apply the colors of the rainbow, for this I made small thin lines to build the arc, the first color was red, then orange, followed by yellow, green and finally blue.
Luego aplique pequeños puntos de base en mi rostro al igual que contorno y luego esparcí todo con mi Beauty blender, aplique bronzer en mis pomulos y sellé todo con polvo suelto.
I then applied small dots of foundation on my face as well as contouring and then blended everything with my Beauty blender, applied bronzer on my cheeks and sealed everything with loose powder.
Quinto paso / Fifth step:
Para terminar de darle los detalles a mis ojos, tome un pequeño pedazo de algodón y le aplique pintura blanca, luego con el algodón simule las nubes al final de mis ojos y al principio de estos.
To finish giving the details to my eyes, I took a small piece of cotton and applied white paint, then with the cotton I simulated the clouds at the end of my eyes and at the beginning of them.
Para seguir dándole detalles decidí utilizar piedras brillantes, por eso aplique pequeños puntos de pega blanca con un repujador y luego coloque las piedras.
To continue giving details I decided to use shiny stones, so I applied small dots of white glue with an embosser and then placed the stones.
Aplique rubor en crema en mis pomulos y lo difumine, luego coloque lápiz labial Marron y brillo en mis labios, por último coloque iluminador en mis pomulos ¡Y listo! Maquillaje terminado.
I applied cream blush on my cheeks and blended it, then I applied brown lipstick and gloss on my lips, finally I applied highlighter on my cheeks and that was it! Makeup finished.
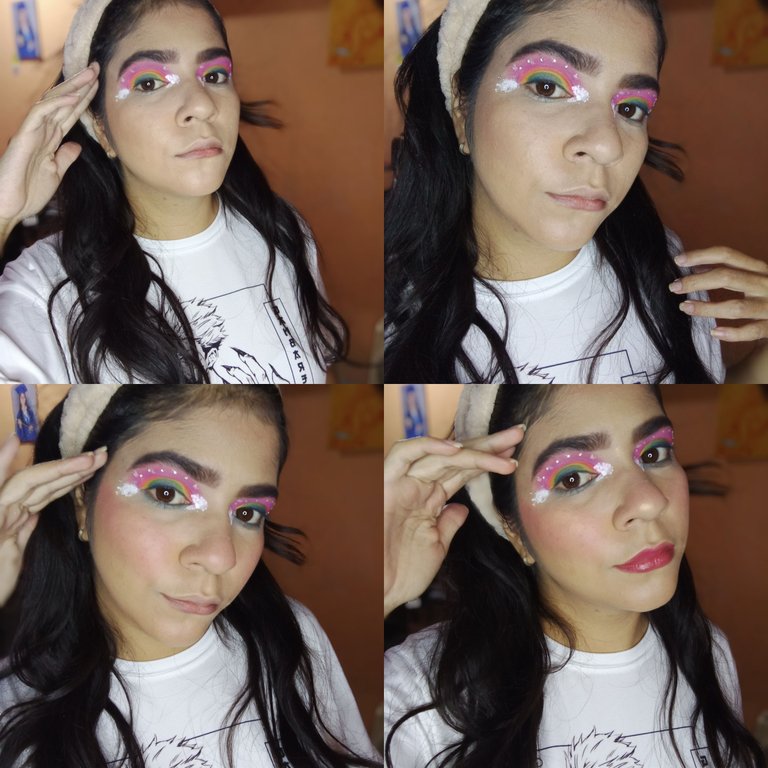
El resultado / The result:
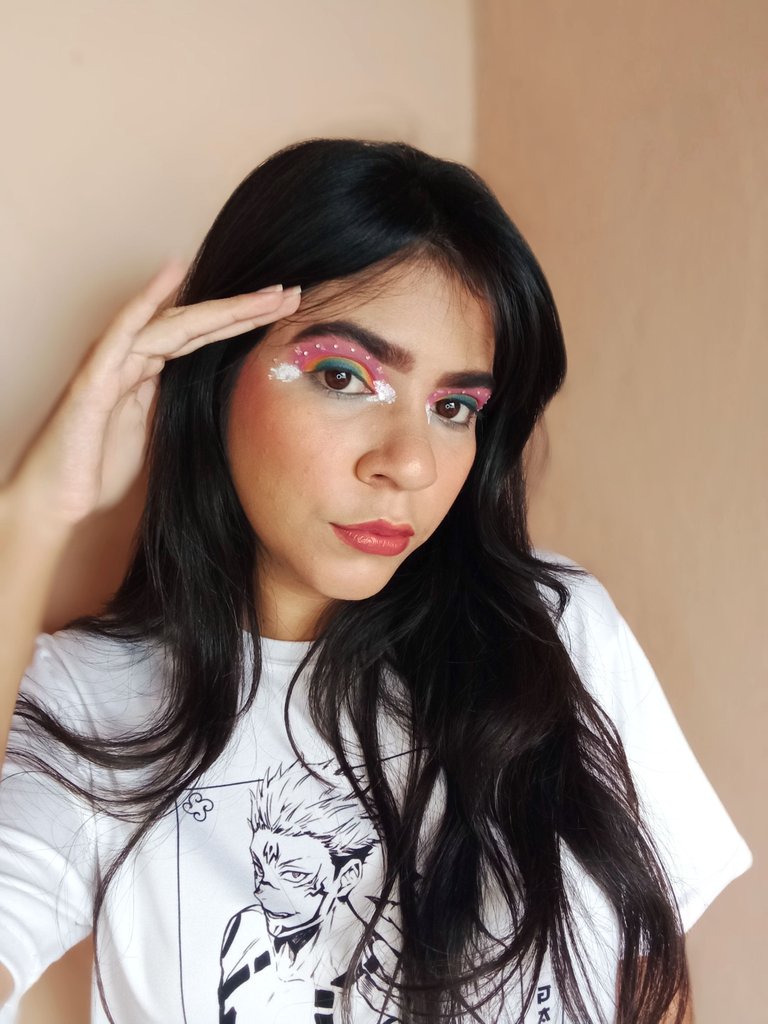
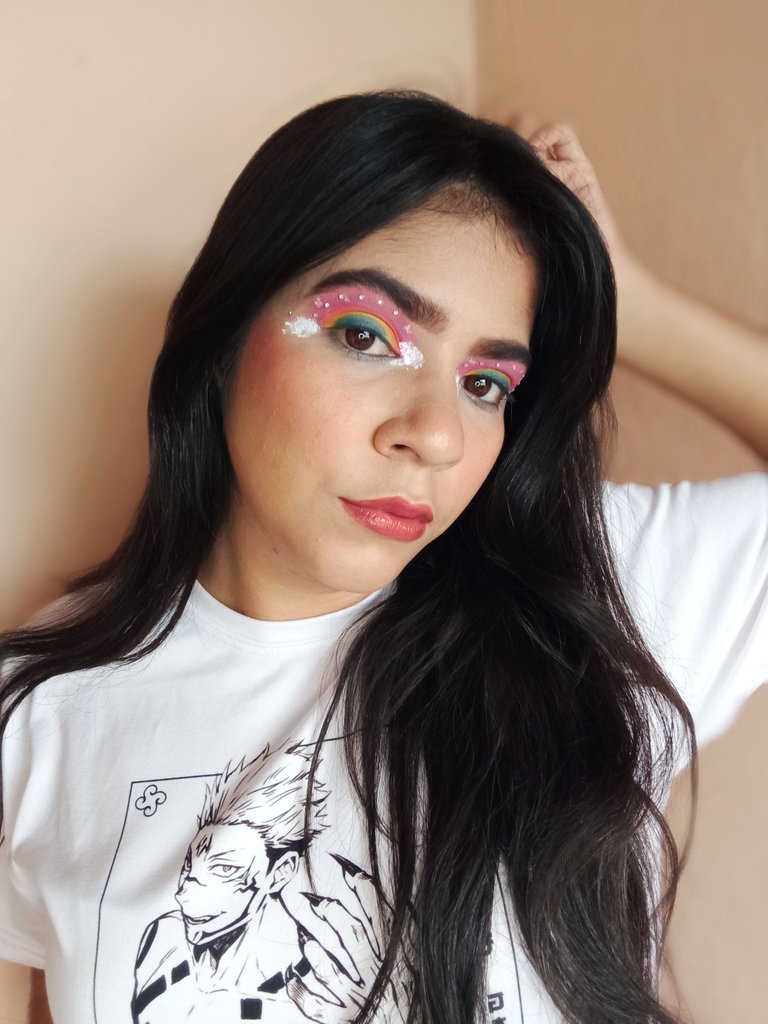
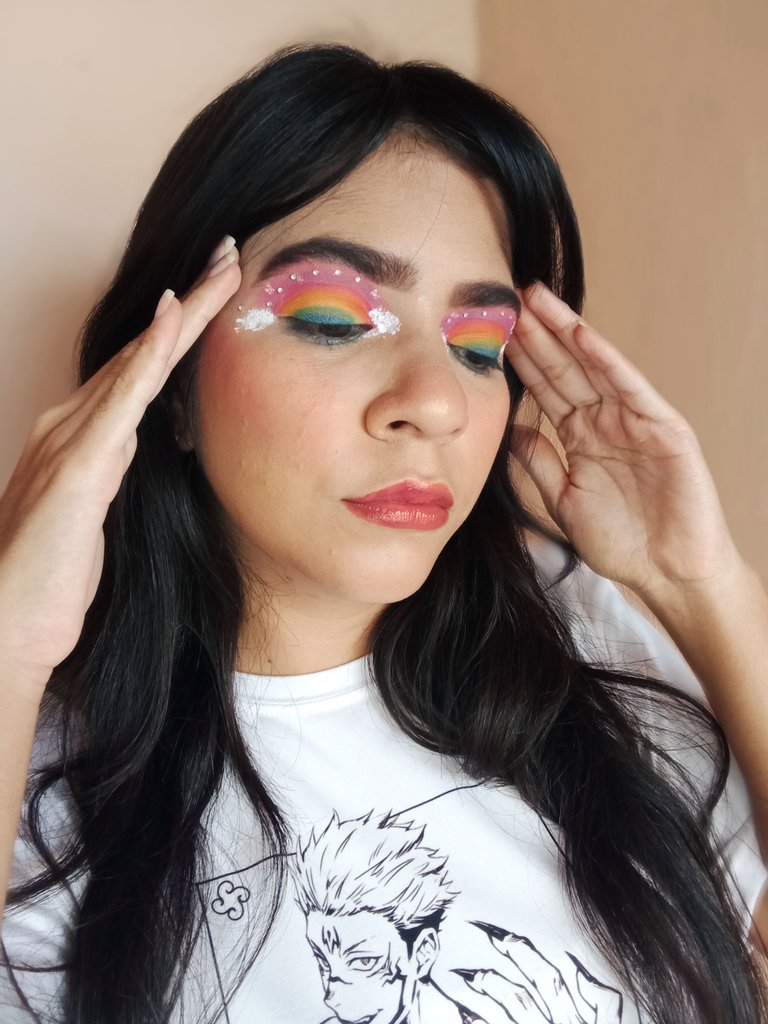
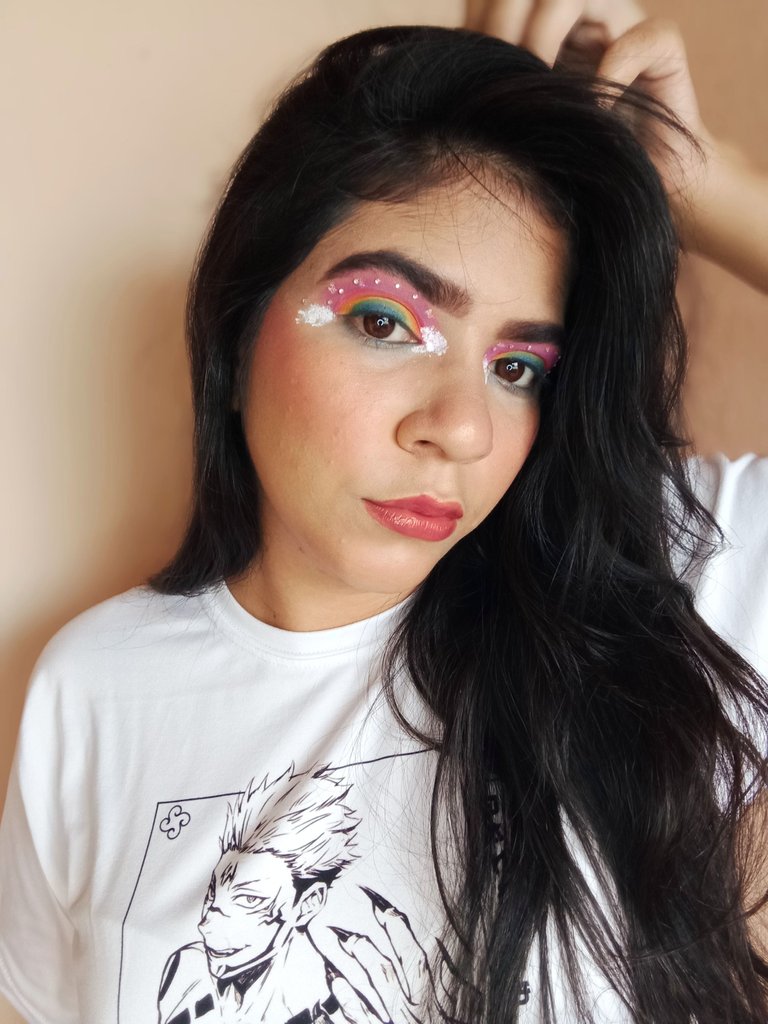
¡Muchas gracias por leer mi post! Me encantó este maquillaje y el proceso, aunque fue muy lindo lo disfruté porque quería que quedara bien, así que espero que a ustedes les haya gustado tanto como a mí (no me gustó, me encantó) ¡Nos leemos pronto! XOXO.
Text translated with: DeepL.
All photos of the procedure and results belong to me.