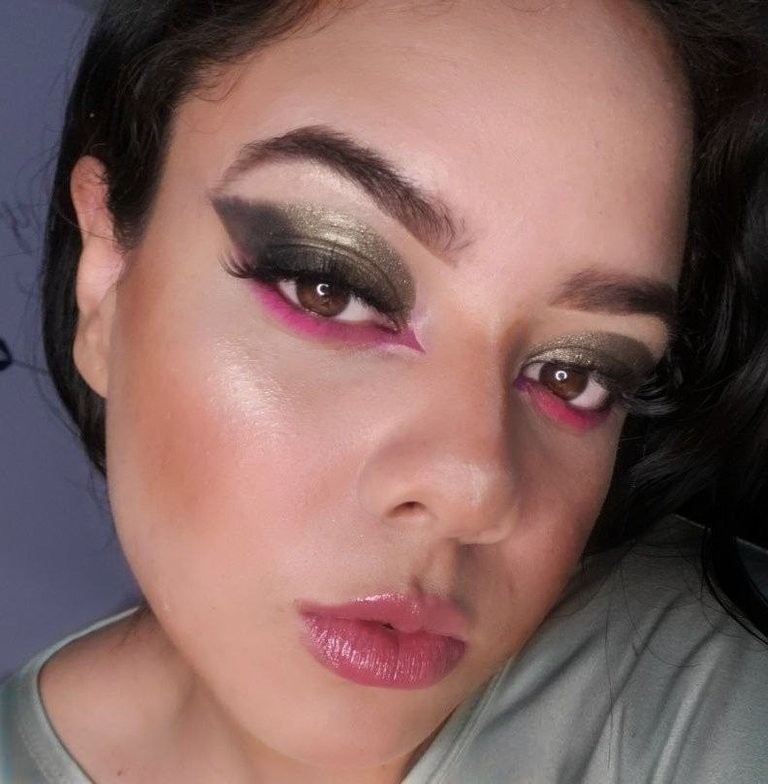
¡Hola, gente linda de Hive! ¿Cómo están el día de hoy? Espero que muy bien ¿Se dieron cuenta de que amo maquillarme con rosa? Me imagino que sí, esta vez quise intentarlo de nuevo pero de otra manera, y la razón es que le queda muy bien a mi tipo de piel. Esta vez quise incorporarlo pero de otra forma, en el párpado inferior y es que es una zona súper genial para agregar un toque de color espectacular al look sin que se vea extremadamente colorida la composición. Por otra parte, también quería enseñarles este hermoso color que me dejó impactada, les cuento que tenia esta sombra en una de mis paletas desde hace mucho tiempo, pero nunca la había probado porque me parecía un gris muy oscuro QUE ERROR! pues cuando lo apliqué me di cuenta de que era un hermoso color. Si quieren saber cómo se hace, sigan bajando!
*Hello, beautiful people of Hive! How are you today? I hope you're doing great. Did you notice that I love pink makeup? I guess so, this time I wanted to try it again but in a different way, and the reason is that it looks great on my skin type. This time I wanted to incorporate it but in a different way, on the lower eyelid and it's a great area to add a spectacular touch of color to the look without looking extremely colorful. On the other hand, I also wanted to show you this beautiful color that left me shocked, I had this shadow in one of my palettes for a long time, but I had never tried it because I thought it was a very dark gray WHAT A MISTAKE! because when I applied it I realized that it was a beautiful color. If you want to know how to do it, keep scrolling down!
Procedimiento / Process:

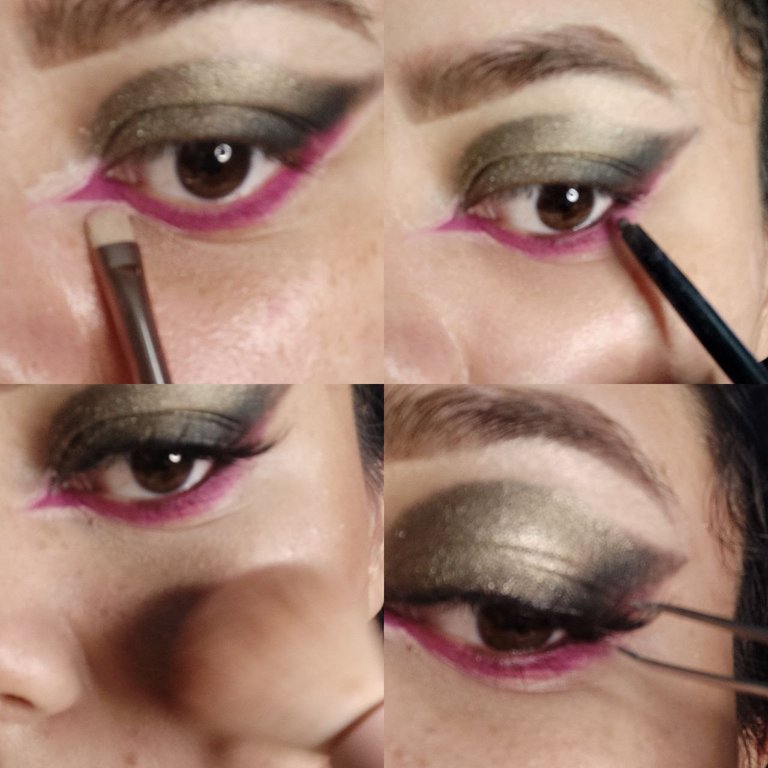
Lo primero que estoy haciendo en la primera foto es peinar mis cejas con una cera fijadora, esto les da un look más "clean". Luego comienzo a rellenarlas un poco con sombra para cejas, ya habrán notado que a veces las hago más fuertes y otras más sencillas, en la mayoría del tiempo las hago más sencillas, sin alterar mucho la forma. Ahora contorneáremos la ceja por la parte de abajo con base, en el post pasado les comentaba que estoy amando esta técnica con base. Luego me dispuse a tomar la famosa sombra, con la luz se ve como un poco dorada pero no lo es, es gris oscura con shimmer dorado. Lo que me gustó de esta sombra es el contraste del gris con el shimmer, ya que si se dan cuenta no es exactamente dorado, es un tono muy interesante. Esta paleta de es la marca Tarte.
The first thing I'm doing in the first picture is combing my eyebrows with a fixing wax, this gives them a cleaner look. Then I start to fill them in a bit with eyebrow shadow, you may have noticed that sometimes I make them stronger and sometimes simpler, most of the time I make them simpler, without altering the shape too much. Now we will outline the eyebrow from the bottom with base, in the last post I told you that I am loving this technique with base. Then I decided to take the famous shadow, with the light it looks a little golden but it is not, it is dark gray with golden shimmer. What I liked about this shadow is the contrast of the gray with the shimmer, because if you notice it's not exactly golden, it's a very interesting tone. This palette is from the brand Tarte.
Ya que tenemos la sombra, vamos a aplicarla en forma de cut-crease pero sin hacer cut-crease, únicamente la esparciremos de forma precisa hasta llegar a antes de la esquina del párpado. Luego en la esquina restante aplicaremos sombra negra y la difumináremos hacia adentro. Tomaremos una sombra rosa de tono fucsia y la aplicaremos en toda la línea inferior de pestañas y además haremos la cola del lagrimal.
Now that we have the shadow, we are going to apply it as a cut-crease but without making a cut-crease, we will only spread it precisely until we reach before the corner of the eyelid. Then in the remaining corner we will apply black shadow and blend it inwards. We will take a pink shadow of fuchsia tone and we will apply it on the lower lash line and we will also make the tail of the tear line.

Vamos a tomar corrector y una brocha de precisión y vamos a limpiar la cola del lagrimal para que quede bastante recta y precisa. Luego tomaremos un delineador negro para la línea de agua y lo aplicaremos. Aplicaremos base por todo el rostro y corrector y difuminamos con la beauty blender. Sellamos con polvos y aprovechamos para hacer el contorno (yo lo hago con bronzer en polvo solamente) y aplicamos blush junto con el iluminador. Por último no se olviden de las pestañas postizas y el gloss! Estamos listas.
We're going to take concealer and a precision brush and we're going to clean up the tail of the tear line so that it's pretty straight and precise. Then we will take a black eyeliner for the waterline and apply it. Apply foundation all over the face and concealer and blend with the beauty blender. We seal with powder and take the opportunity to make the contour (I do it with bronzer powder only) and apply blush along with the illuminator. Lastly, don't forget false eyelashes and gloss! We are ready.
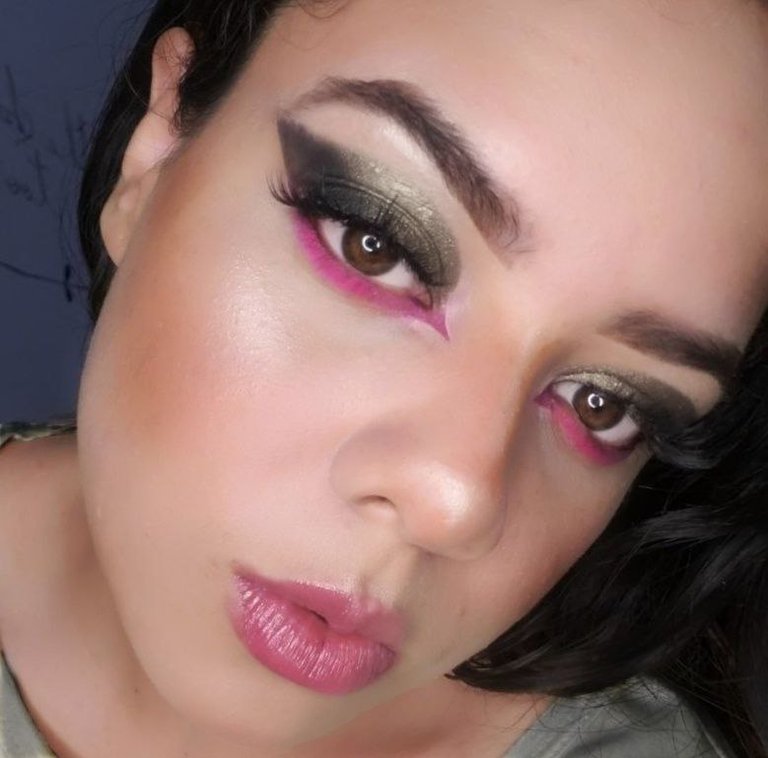
🎉LOOK FINAL 🎊✨
Muchas gracias por leer mi post, como siempre estoy muy agradecida con el apoyo que todos ustedes me dan. Espero que les haya encantado este maquillaje, los quiero y espero leerlos en los comentarios con su recomendaciones y sugerencias ! los espero en el siguiente post! besos 😘
Thank you so much for reading my post, as always I am very grateful with the support you all give me. I hope you loved this makeup, I love you and I hope to read you in the comments with your recommendations and suggestions ! I wait for you in the next post ! kisses 😘.


