Hola queridos amig@s de Hive y comunidad de Makeup Power, me complace traerles un nuevo material de maquillaje y en esta ocasión le quiero mostrar como hacer nuestro parpado un poco mas amplio usando unas sencillas técnicas.
Hello dear friends of Hive and Makeup Power community, I am pleased to bring you a new makeup material and this time I want to show you how to make our eyelid a little wider using some simple techniques.
Paso a paso
Step by step
We start this makeup by combing the eyebrows upwards using gel to fix the eyebrows, or it could also be soap, once the eyebrows are combed we fill in the spaces, in this case I used an eyebrow shadow, only with this step we will see the difference in our eyelids.
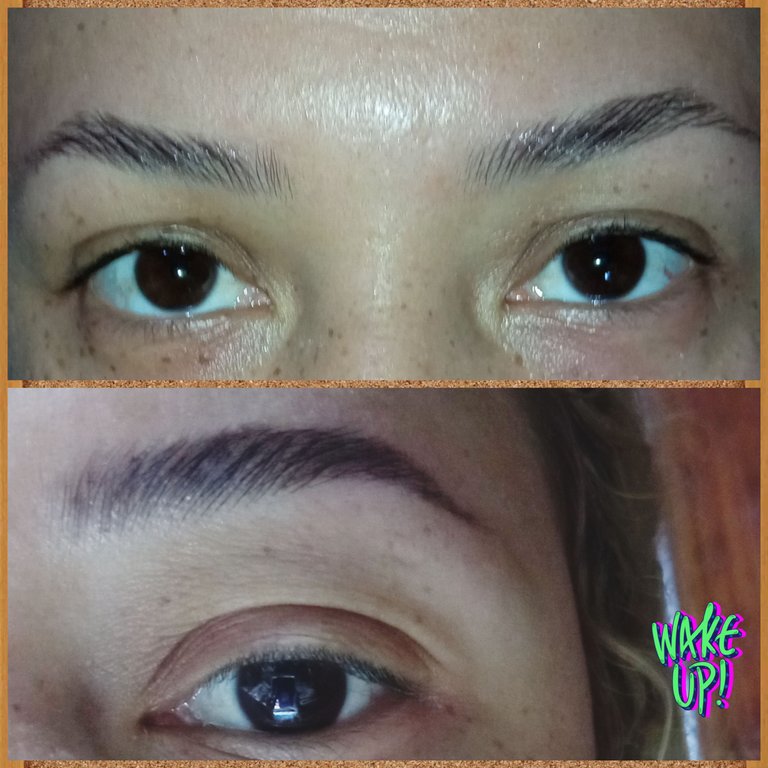
Como podemos ver ya aquí las cejas están peinadas hacia arriba con gel.
As we can see here the eyebrows are already combed upwards with gel.
ºººººººººººººººººººººººººººººººººººººººººººººººººººººººººººººººººººººººººººººººººº
ººººººº
Y aquí ya esta la ceja lista con los espacios rellenados con la sombra
And here is the eyebrow ready with the spaces filled with the shadow.
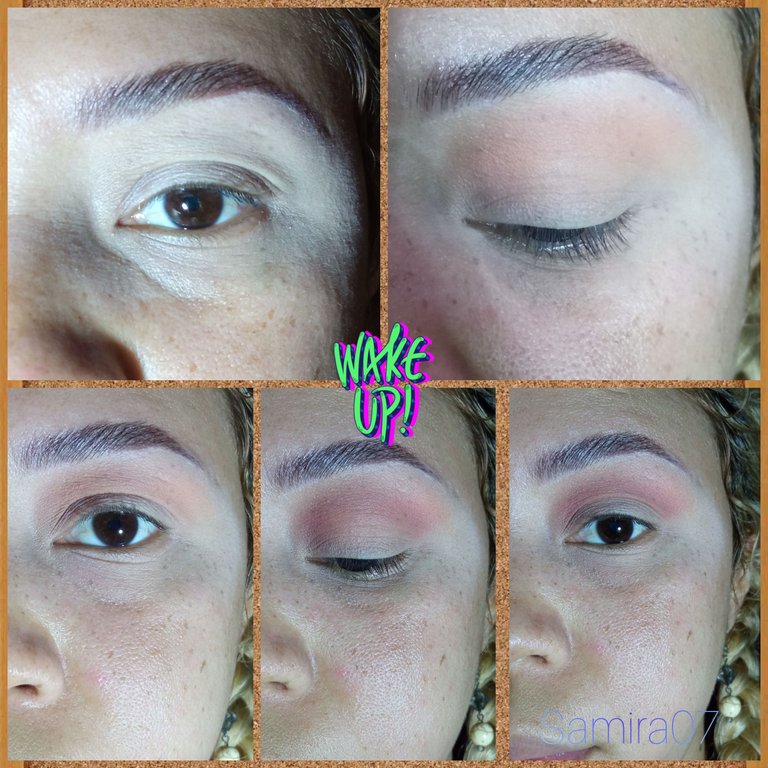
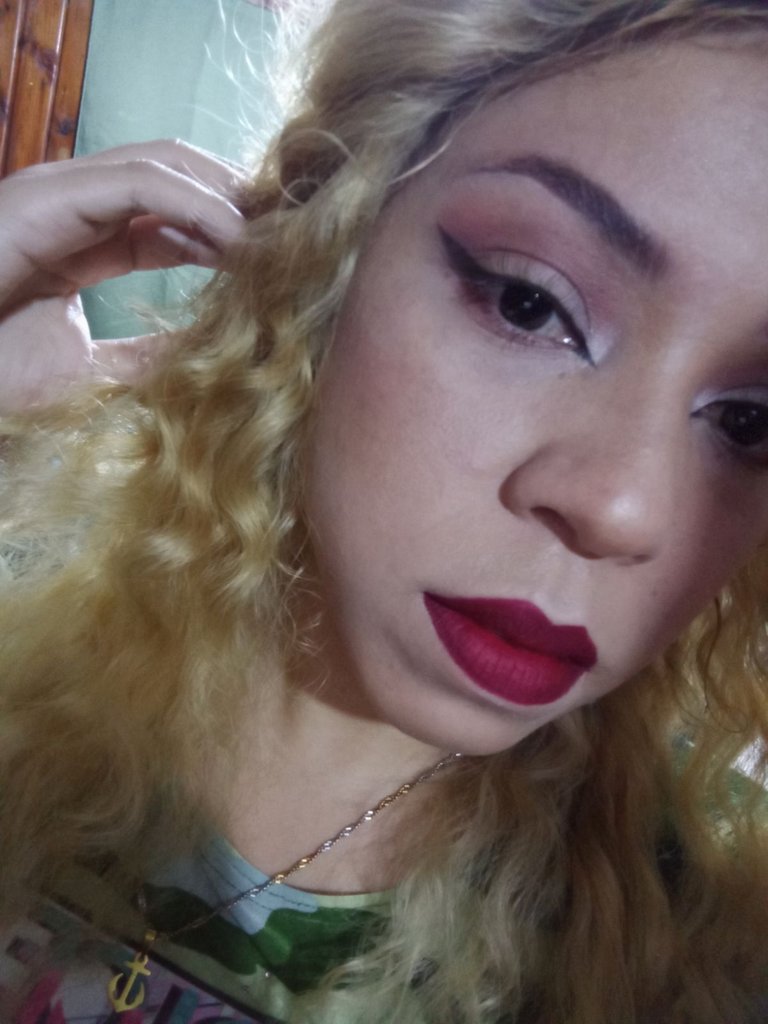
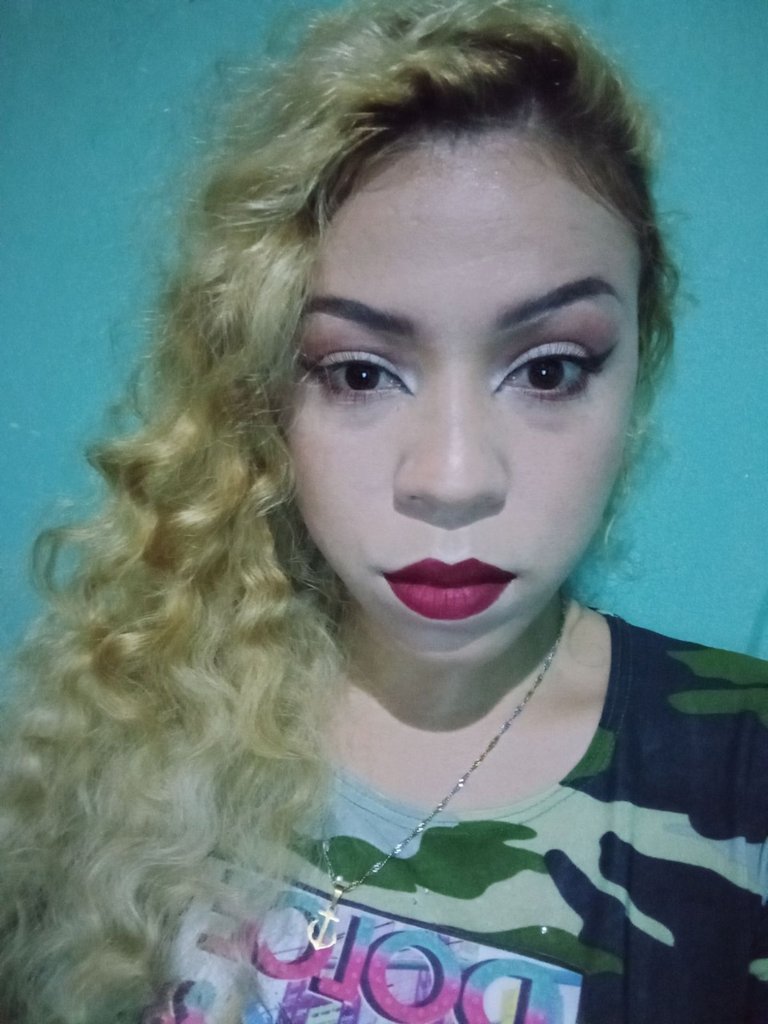
En este siguiente paso preparamos el parpado con corrector para aplicar las sombras, en este caso empece sellando el parpado con una sombra clara color carne, luego aplique un color marrón muy clarito en la cuenca del ojo difuminándolo de lado a lado,seguidamente pase agregar un tono un poco mas oscuro que el marrón anterior, esta vez tratando de llevar el color un poco hacia arriba.
Para darle profundidad a la mirada aplique un tono marrón mas oscuro aplicándolo en la esquina del ojo y llevando en color hasta el otro extremo de ojo casi llegando al lagrimal en trazos largos para asi difuminarlo bien con las sombras anteriores.
In this next step we prepare the eyelid with concealer to apply the shadows, in this case I started sealing the eyelid with a light flesh colored shadow, then I applied a very light brown color in the eye socket blending it from side to side, then I added a tone a little darker than the previous brown, this time trying to take the color a little upwards.
To give depth to the look apply a darker brown tone applying it in the corner of the eye and taking the color to the other end of the eye almost reaching the tear line in long strokes to blend it well with the previous shadows.
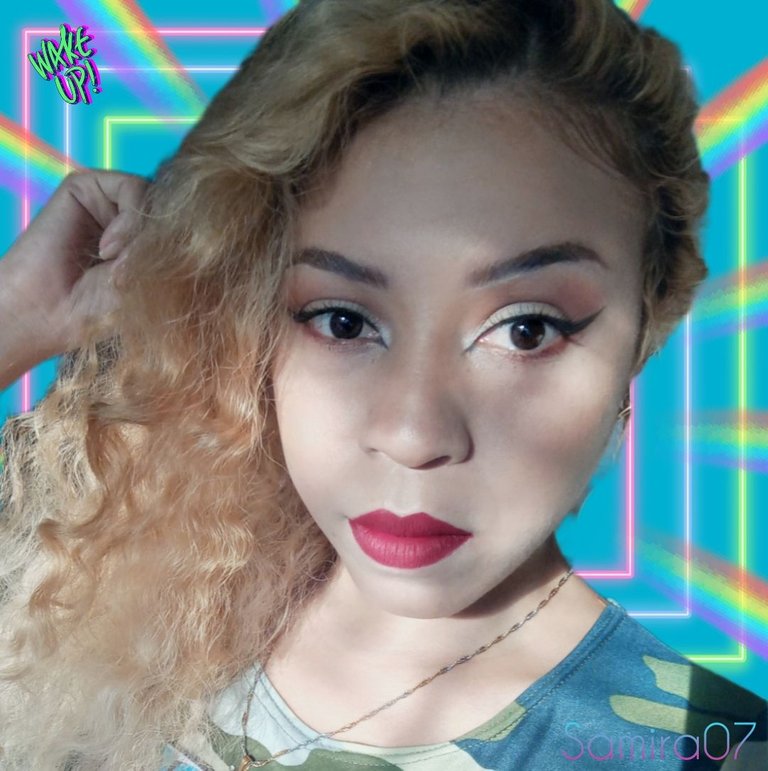
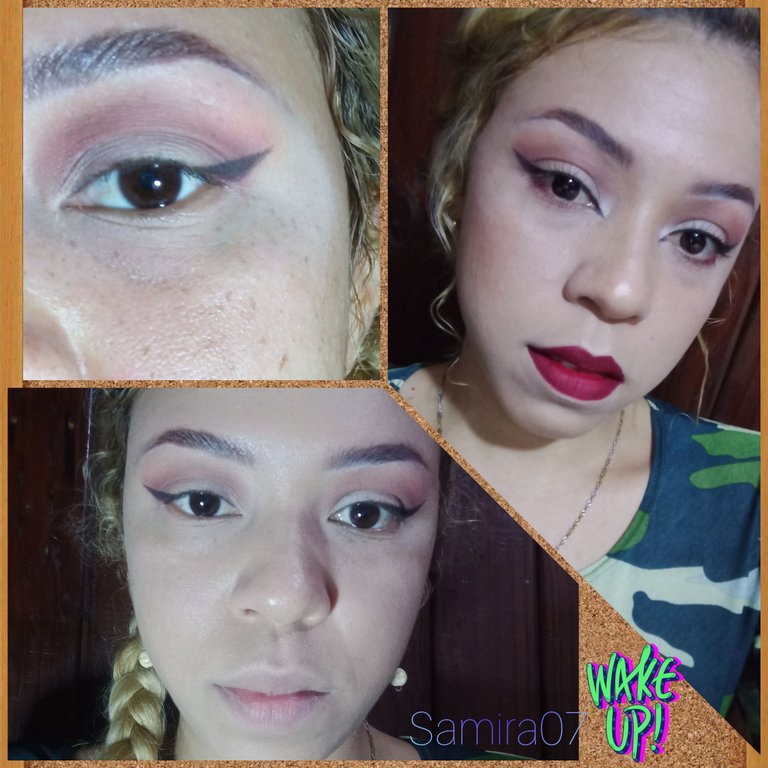
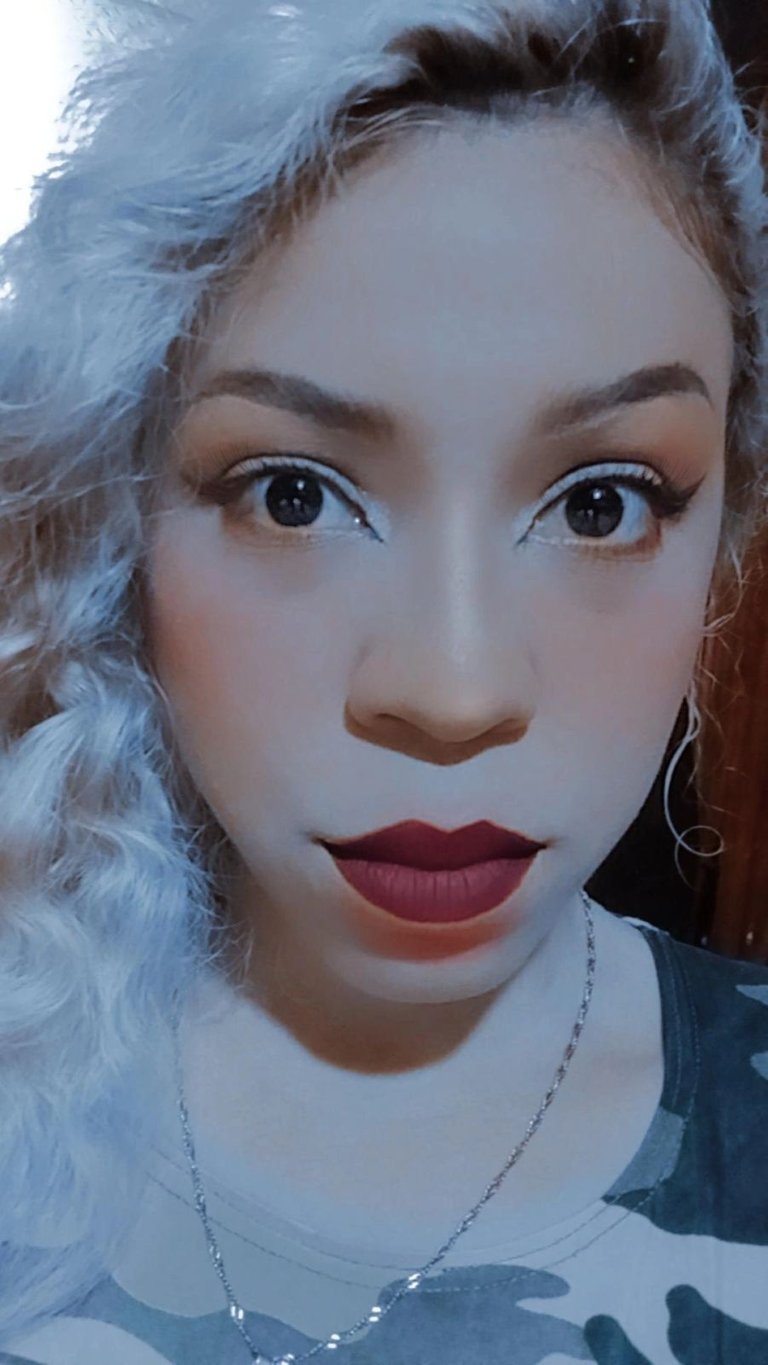
Para este paso realizaremos un delineado lo mas pegado a las pestañas, dibujando la cola del delineados de forma vertical inclinada para hacer parecer el ojo mas alargado, luego aplique base, selle con polvo compacto y pase a contornear la cara, me aplique un poco de rubor e iluminador, en los labios aplique un labial mate vino y ya para terminar los ojos aplique un poco de sombra en la parte de abajo de los ojos y por ultimo mascara para pestañas.
For this step we will make an eyeliner as close to the eyelashes, drawing the eyeliner tail vertically inclined to make the eye look more elongated, then apply foundation, seal with pressed powder and go to contour the face, I applied a little blush and highlighter, on the lips apply a matte lipstick wine and and to finish the eyes apply a little shadow on the bottom of the eyes and finally mascara for eyelashes.
Espero les haya gustado este pequeño pictorial, se que me falta mejorar mucho por aprender, así que estaré mejorando cada día para así poder compartir con todos un poco mas de este hermoso mundo del el maquillaje. Igual agradecería cualquier critica o ayuda de su parte, muchas gracias por llegar hasta aquí.
Todo el contenido es de mi autoría
Las fotos fueron tomadas desde mi teléfono modelo Redmi9 M2004J19G
Cámara Frontal: 8 MP
Cámara Trasera:13 MP f/2.2
8 MP f/2.2 gran angular
5 MP f/2.4 macro
2 MP f/2.4 bokeh
Taducido por : DeepL Traductor
All content is my own
The photos were taken from my phone model Redmi9 M2004J19G
Front Camera: 8 MP
Rear Camera:13 MP f/2.2
8 MP f/2.2 wide angle
5 MP f/2.4 macro
2 MP f/2.4 bokeh
Translated by : DeepL Translator