English
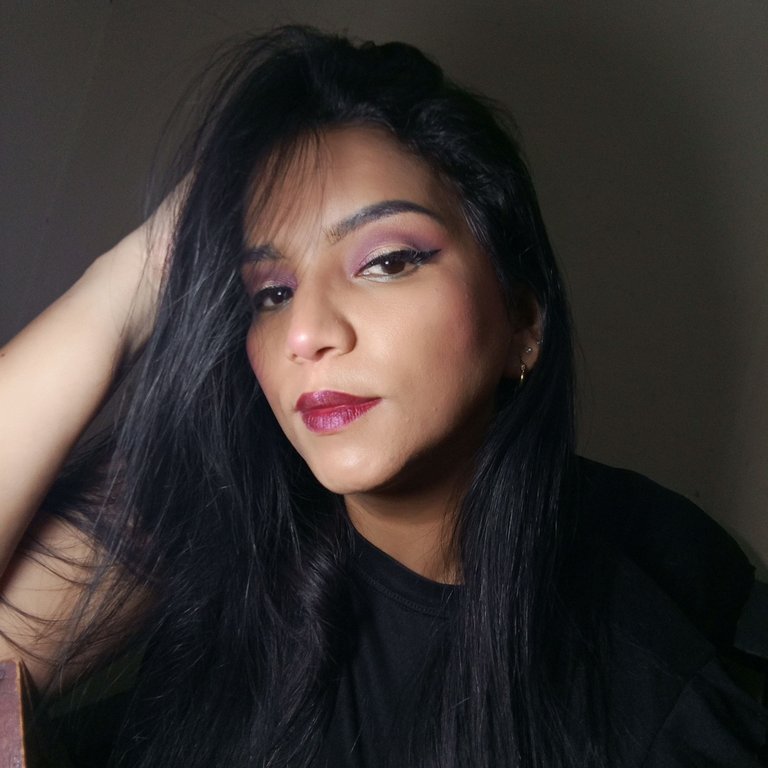
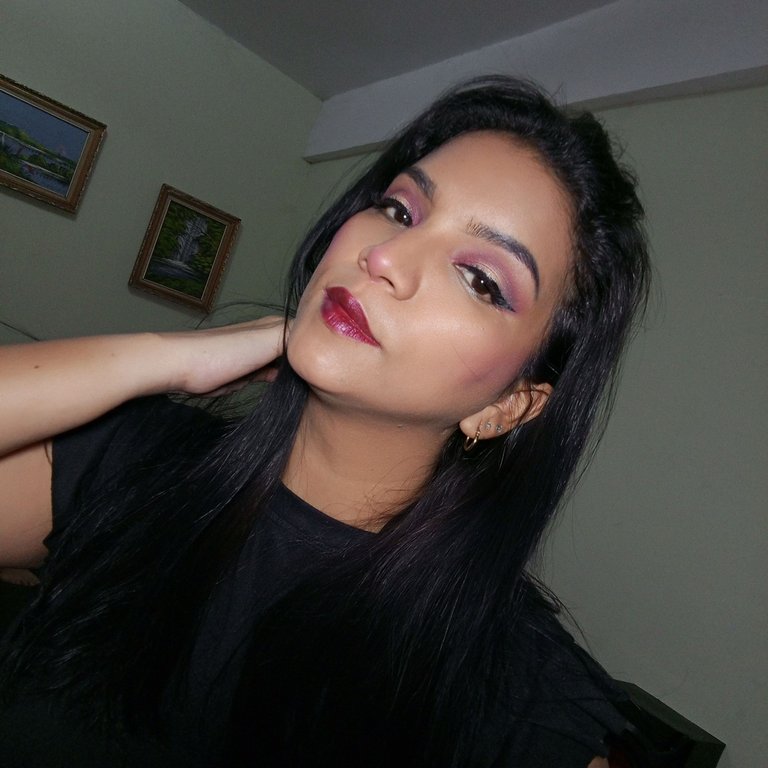
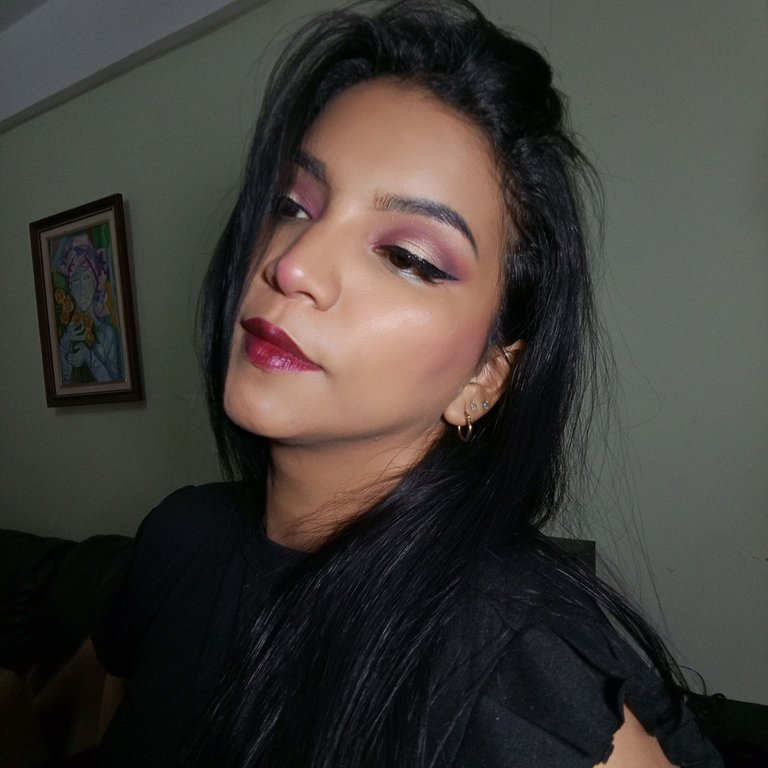
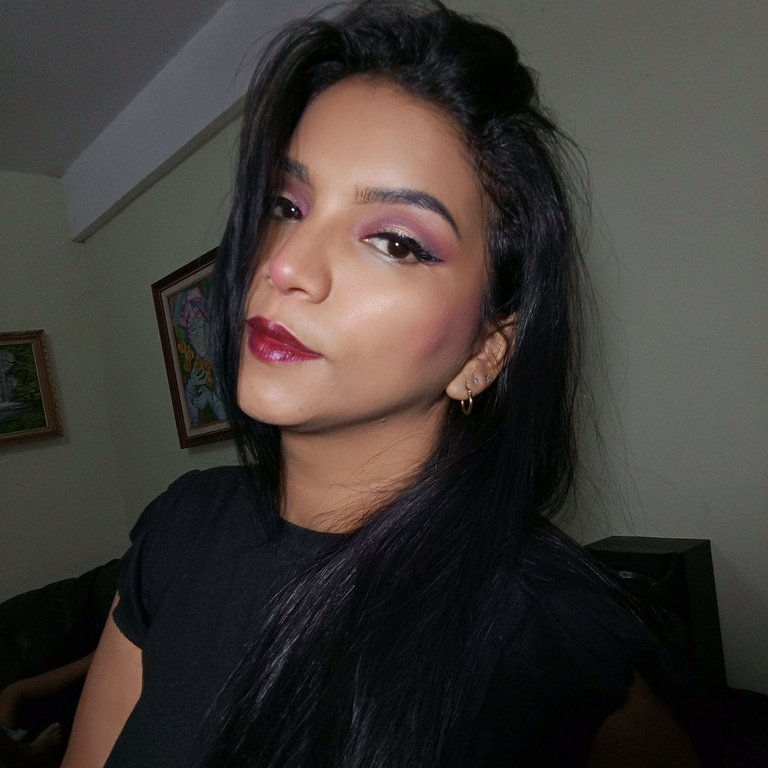
Greetings my dear readers, it is a pleasure to be with you once again. Today I show you a makeup practice in burgundy and gold tones. I think it is a good option to use on a special occasion, an event that we want to attend with our elegant look and at the same time not so overloaded with tones.
I was thinking about what design to make today to show you, but when I sat down, many ideas came to me that I want to practice and little by little I will learn more about this beautiful art of makeup. Below I tell you the materials and the steps used.
- MATERIALS:
Serum, moisturizer, Primer, Makeup base, Face concealer, Pressed powder, Eyebrow shadow, Shadow palette, Eyeliner, Blush, highlighter, Lipstick.
- STEPS:
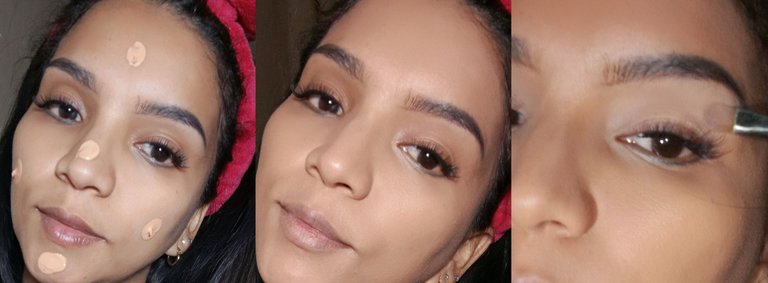
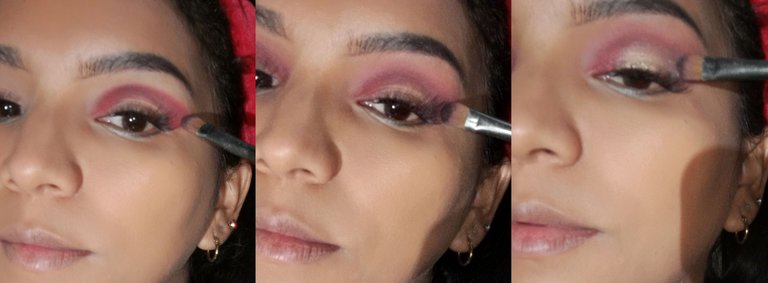
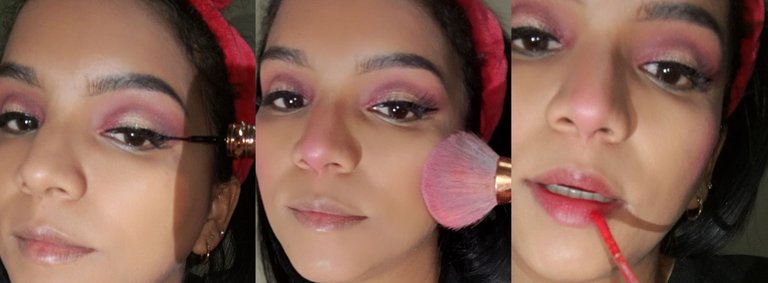
The same process that I always tell you is that first we must do our Skin Care, which we already know is for the care of our skin, and with the products we use it will help us keep our skin healthy, and with a fresh, healthy appearance. Next we proceed to make the eyebrows, I do it with pomade and shadow, and I will perfect them with concealer in the surroundings, I continue applying the makeup base in five key points such as forehead, cheeks, nose and chin and then with the help I will spread a damp sponge covering the entire face very well and sealing it with the compact powder. I proceeded to apply eye makeup on the eyelid, I applied nude transition shadow, then burgundy shadow at the beginning of the fixed eyelid and on the outer V, and I blended it up to the arch of the eyebrows, and in the center. In the central part of the mobile eyelid I applied golden shadow and continued blending the shadows, finally I accompanied it by making a black eyeliner, blush, highlighter and lipstick. As you can see it was quick and easy.
Español
Saludos mis queridos lectores, es un placer estar con ustedes una vez más. El día de hoy os enseño una práctica de maquillaje en tonos burdeos y dorados. Creo que es una buena opción para utilizar en una ocasión especial, algún evento al que queramos acudir con nuestro look elegante y a la vez no tan sobrecargado de tonos.
Estaba pensando en qué diseño hacer hoy para mostrarles, pero al sentarme me vinieron muchas ideas que quiero practicar y poco a poco iré aprendiendo más sobre este hermoso arte del maquillaje. A continuación os cuento los materiales y los pasos utilizados.
Suero, crema hidratante, prebase, base de maquillaje, corrector facial, polvo compacto, sombra de cejas, paleta de sombras, delineador de ojos, rubor, iluminador, lápiz labial.
El mismo proceso que siempre les digo es que primero debemos hacer nuestro Skin Care, que ya sabemos es para el cuidado de nuestra piel, y con los productos que usemos nos ayudará a mantener nuestra piel sana, y con un aspecto fresco, apariencia saludable. A continuación procedemos a hacer las cejas, yo lo hago con pomada y sombra, y las perfeccionaré con corrector en los alrededores, sigo aplicando la base de maquillaje en cinco puntos claves como frente, mejillas, nariz y mentón y luego con el Con la ayuda de extenderé una esponja húmeda cubriendo muy bien todo el rostro y sellándolo con el polvo compacto. Procedo a maquillar los ojos en el párpado, apliqué sombra de transición nude, luego sombra burdeos al inicio del párpado fijo y en la V exterior, y la difuminé hasta el arco de las cejas, y en el centro. En la parte central del párpado móvil apliqué sombra dorada y seguí difuminando las sombras, finalmente lo acompañé haciendo un delineador negro, rubor, iluminador y labial. Como puedes ver fue rápido y fácil.

Thank you for visiting me, I hope you liked it, I send you a big virtual hug.
Gracias por visitarme, espero que les haya gustado, les mando un fuerte abrazo virtual.


@tipu curate 👍🏾
Upvoted 👌 (Mana: 0/49) Liquid rewards.
✨
🤗