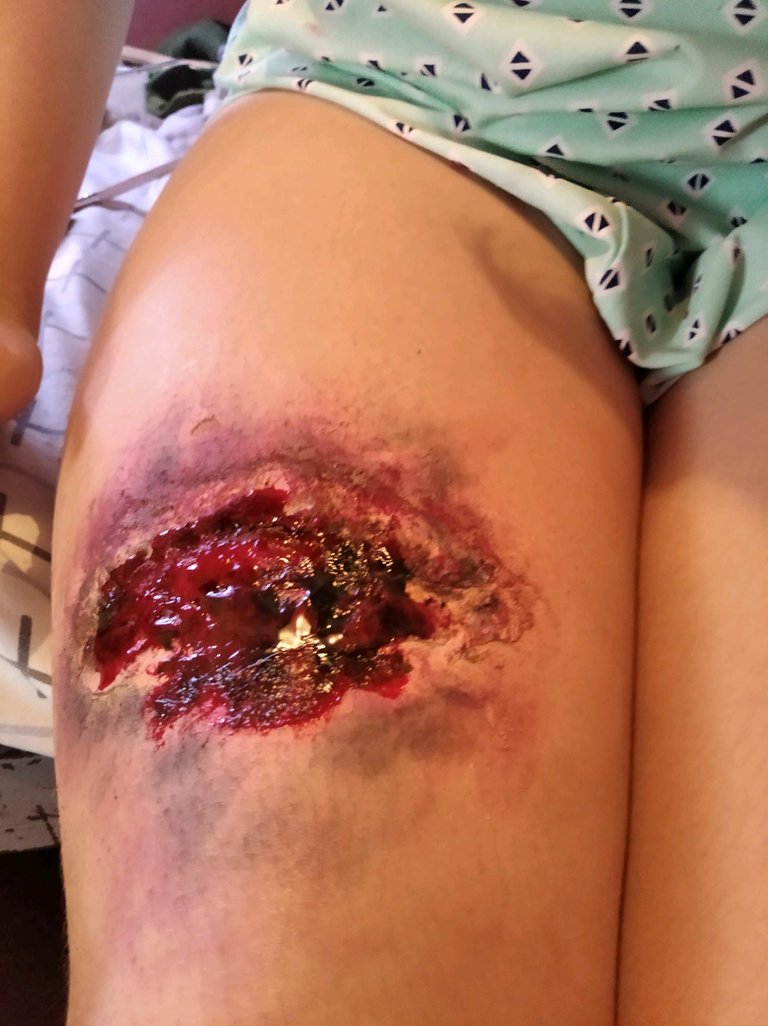
¡Saludos hivers! A decir verdad, mi timidez me caracteriza, de ahí mi habla tan formal, además de respeto y admiración por todos en esta gran plataforma, poco a poco voy conociendo e integrando. Por la misma razón dudé en hacer esta publicación. Tengo que ser sincera, la primera pregunta que me hice fue ¿Quién querría aprender o ver esto? Siempre me fijo en cada una de las películas que veo, no solo la actuación, sino la escenografía y el maquillaje. Quedo impresionada ante el trabajo que hay detrás de todo esto. Quizá esa sea la razón que me motivó esta vez. Las veces anteriores era por la idea de ir a fiestas disfrazada. En fin.
Greetings hivers! To tell the truth, my shyness characterizes me, hence my formal speech, besides respect and admiration for everyone on this great platform, little by little I am getting to know and integrate them. For the same reason I hesitated to make this publication. I have to be honest, the first question I asked myself was who would want to learn or see this? I always look at each of the films I see, not only the acting, but also the set design and make-up. I am impressed by the work behind it all. Maybe that's the reason I was motivated this time. Previous times it was the idea of going to parties in costume. Anyway.
Espero pueda servir de ayuda este post para algo que quieran hacer posteriormente, o que puedan aprender conmigo, eso me daría mucha alegría, puesto que me sentiría útil.
I hope this post can be of help for something you want to do later, or that you can learn with me, that would give me a lot of joy, since I would feel useful.
¡Comencemos!- Let's get started!
Los materiales a utilizar son:
Base en crema
Esponja
Algodón
Acuarela verde y negra
Dos pinceles o brochas de su preferencia
Pega blanca
Polvo traslúcido y uno que se adapte a su tono de piel
Rubor en polvo
Pintura de labios morada y roja (líquida)
Glicerina
Paleta de sombras que incluya azul, rojo, morado, marrón, rosado y negro
The materials to be used are:
Cream base
Sponge
Cotton
Green and black watercolor
Two brushes of your choice
White glue
Translucent powder and one that matches your skin tone
Powder Blush
Purple and red lipstick (liquid)
Glycerin
Shadow palette including blue, red, purple, brown, pink and black
Proceso-Process
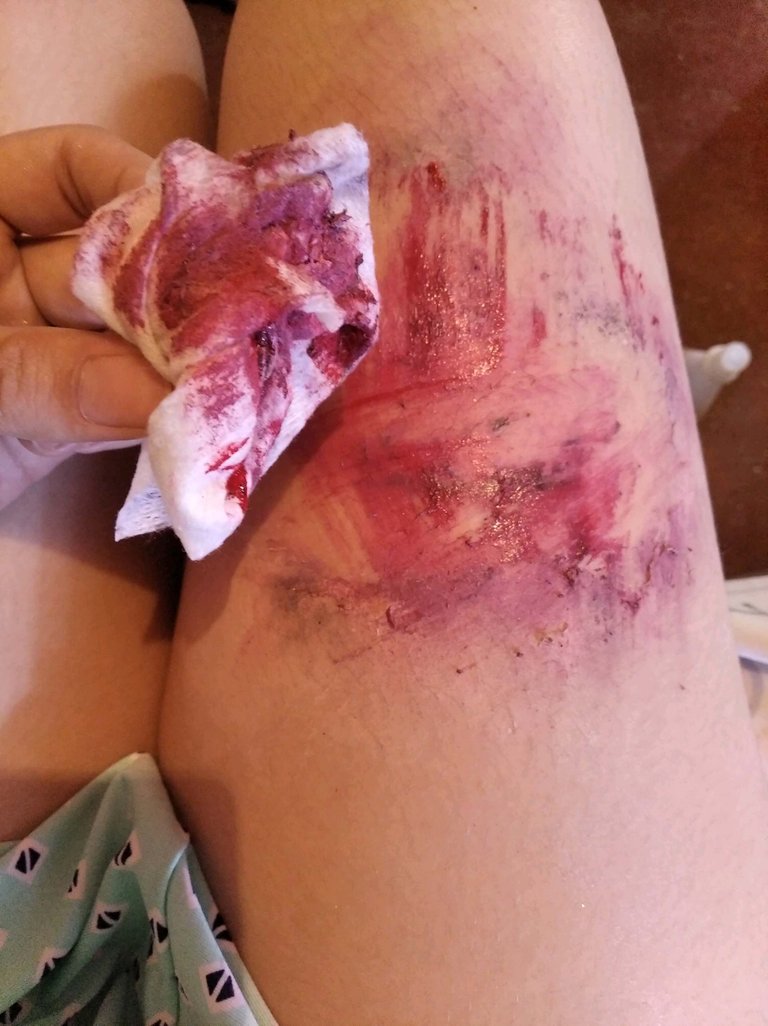
Aplica de manera uniforme la base y extiendela sobre la piel con ayuda de una esponja húmeda.
Apply the base evenly and spread it over the skin with the help of a damp sponge.
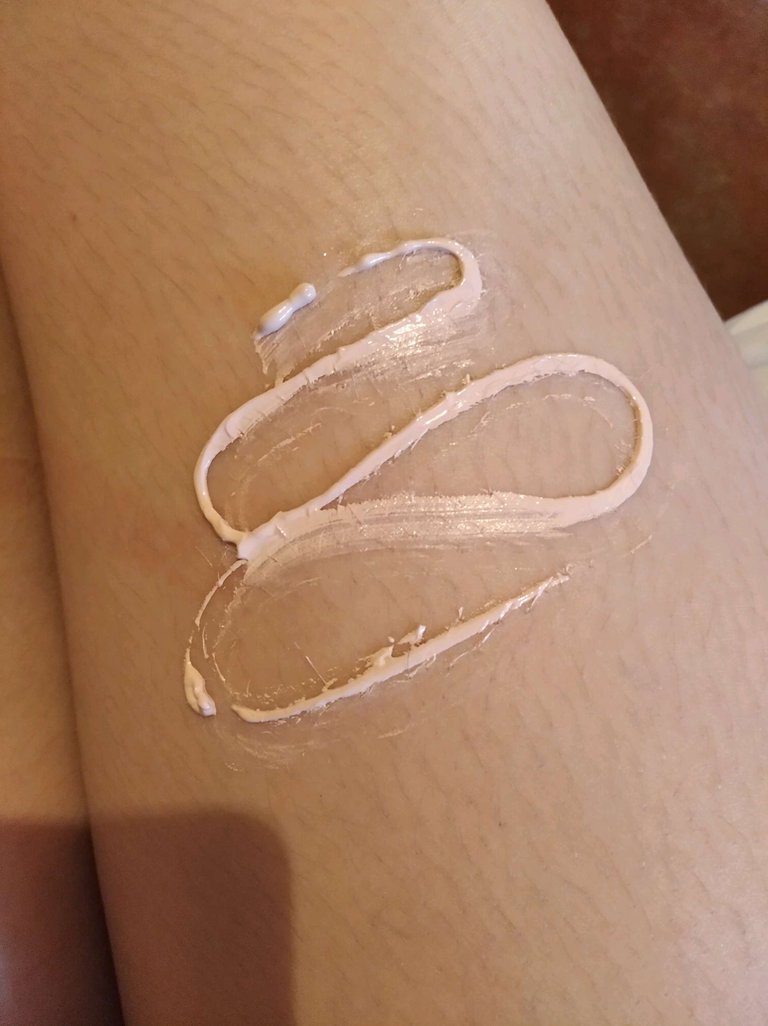
Haz un hilo no demasiado fino de pega blanca.
Make a not too thin thread of white glue
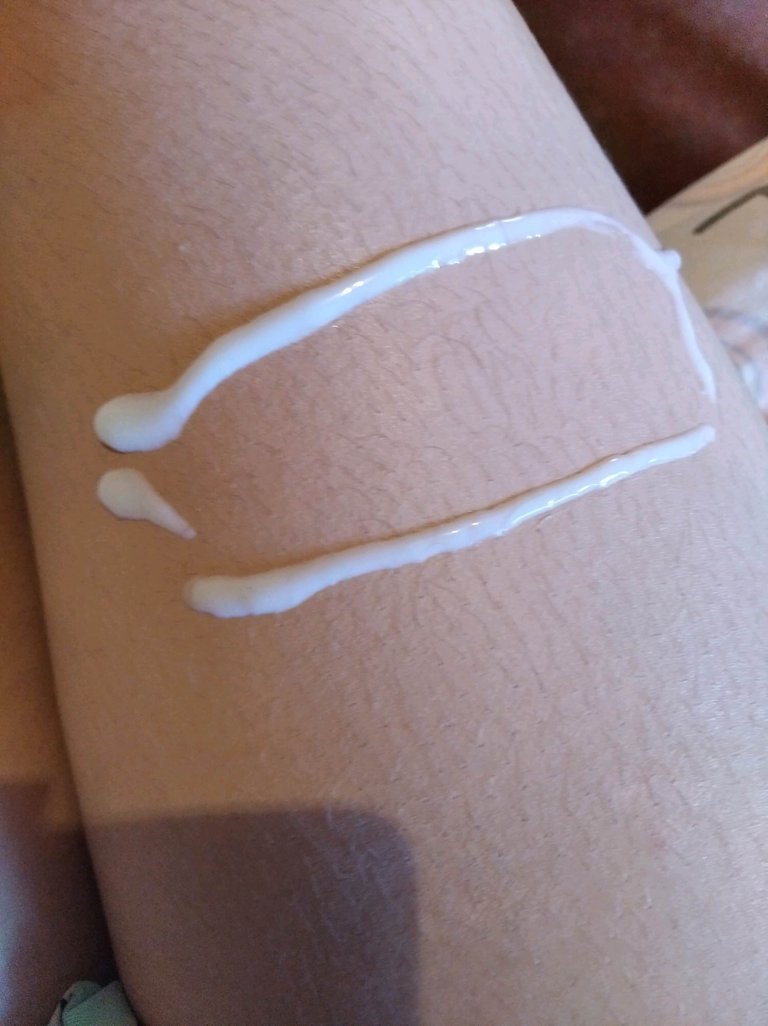
Antes de pegar el algodón, debes estirarlo con tus dedos delicadamente, evitando romperlo. Es necesario que tus manos estén limpias y secas para que el material no se adhiera a tus dedos una vez que lo pegues.
Before gluing the cotton, you must stretch it with your fingers delicately, avoiding breaking it. It is necessary that your hands are clean and dry so that the material does not adhere to your fingers once it is glued.
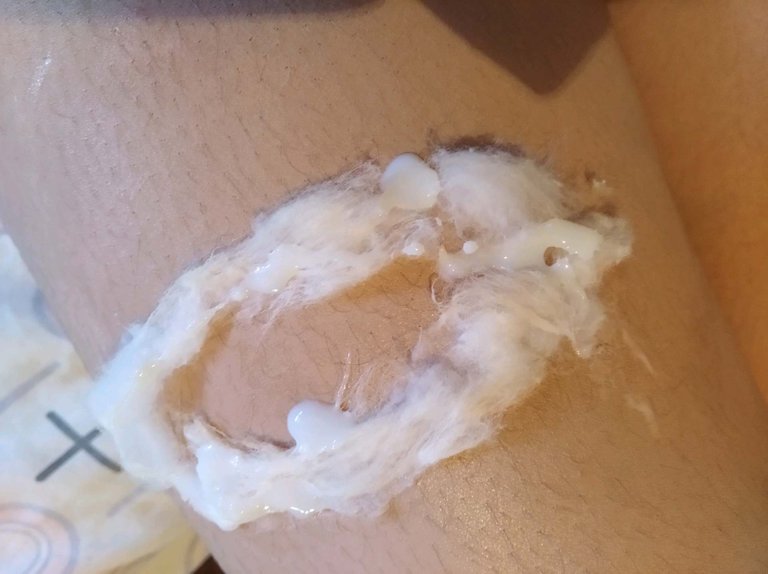
Previamente dejar secar la piel y el algodón, para poder aplicar el polvo traslúcido y a su vez el compacto de tu conveniencia.
Previously let the skin and cotton dry, in order to apply the translucent powder and the compact of your convenience.
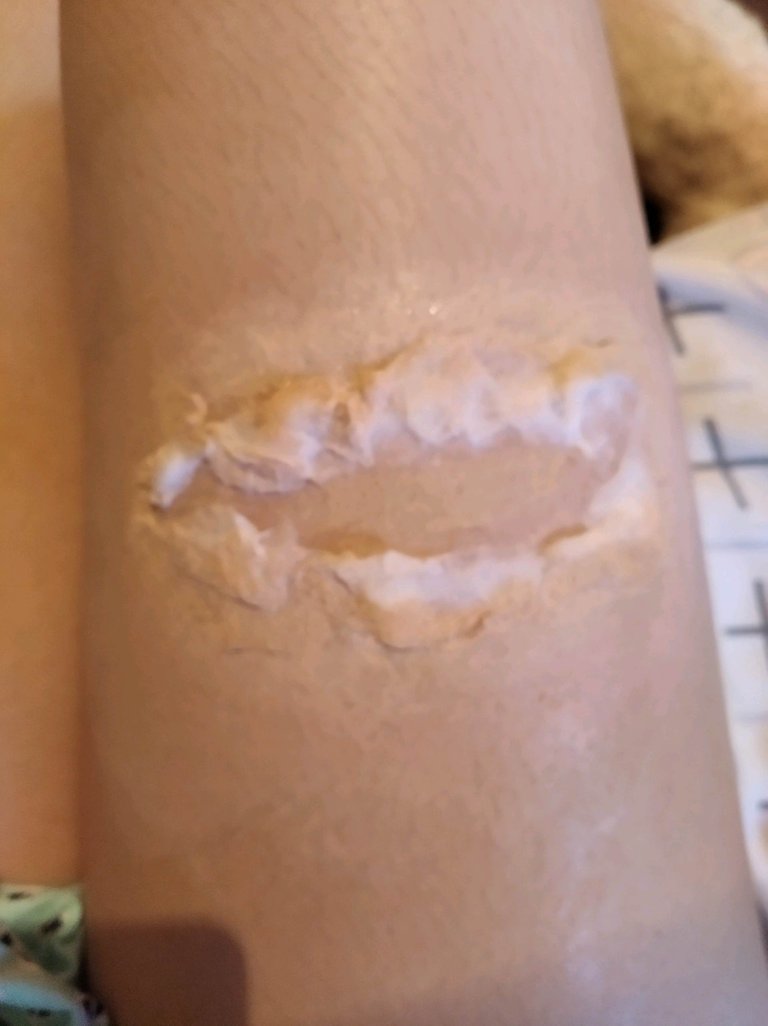
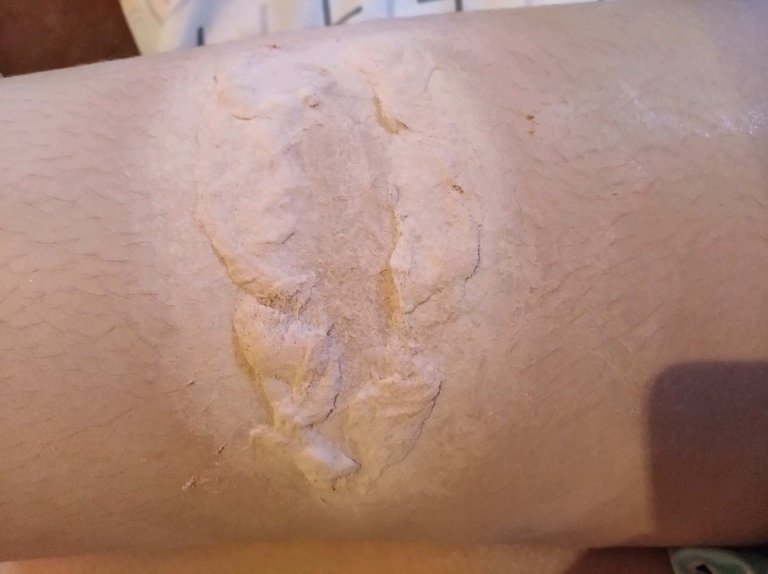
Con sumo cuidado se debe aplicar el rubor, en sí cada proceso, para evitar despegar el material, así que es mejor hacerlo con una esponja que con una brocha.
The blush must be applied very carefully, each process, to avoid detaching the material, so it is better to do it with a sponge than with a brush.
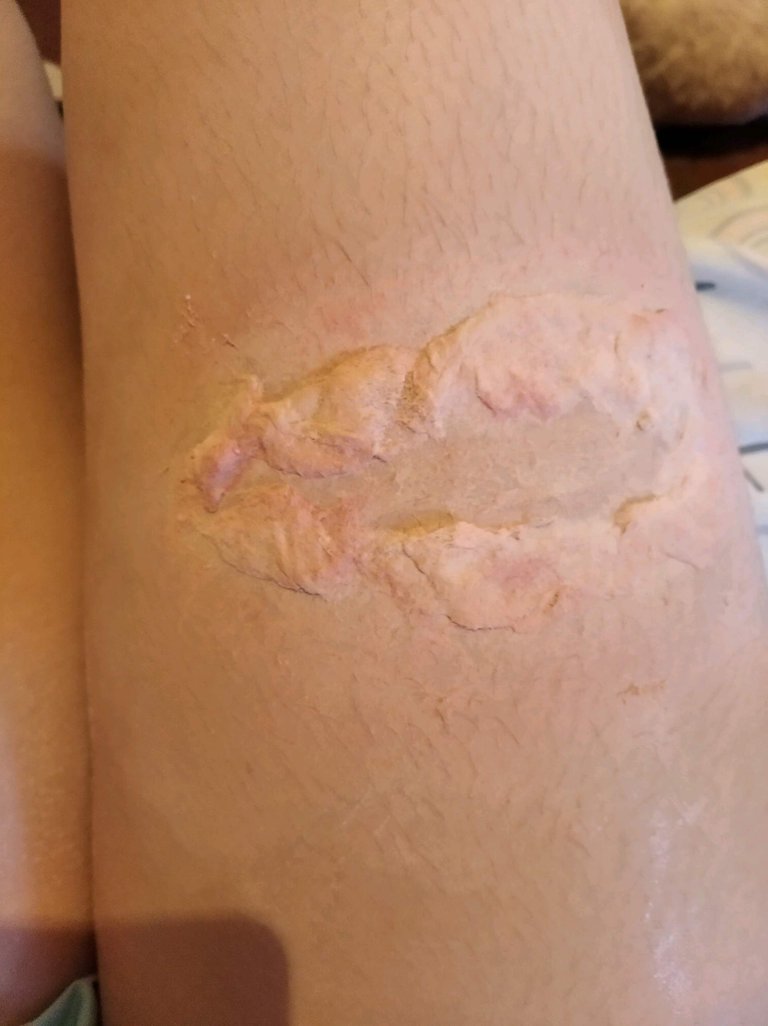
Justamente la pintura de labios morada, se aplica con pequeños roces o toques, afincando levemente el producto. Con ayuda de un pincel puedes difuminar los círculos que aparecen.
The purple lipstick is applied with small touches or rubs, slightly settling the product. With the help of a brush you can blur the circles that appear.
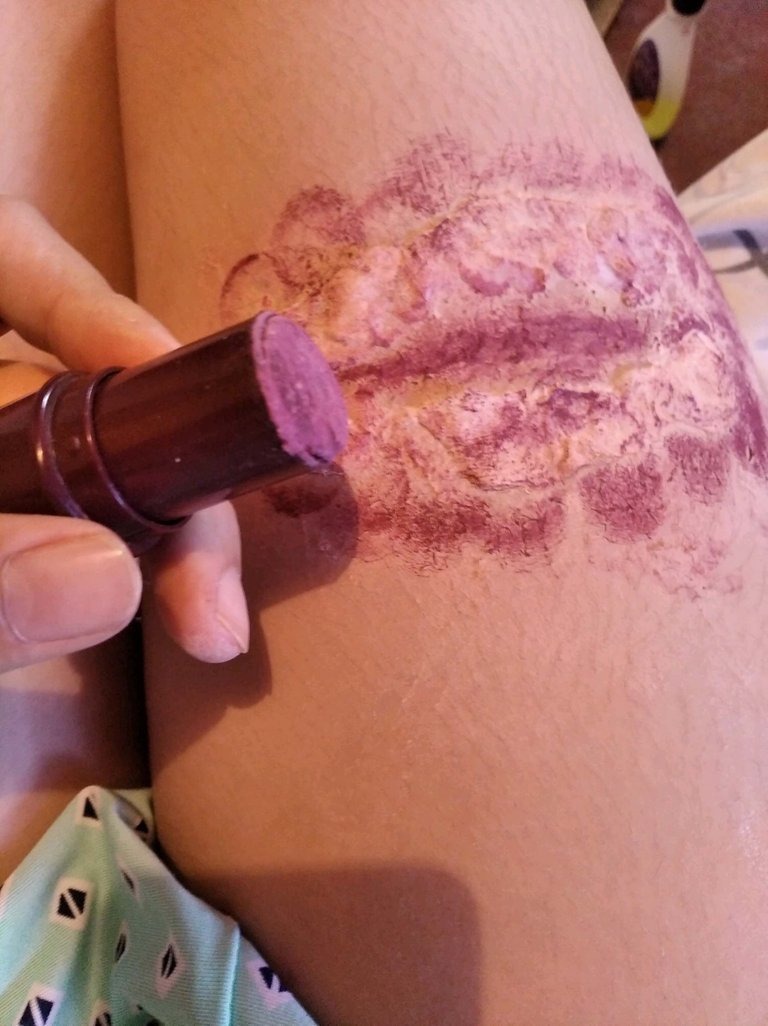
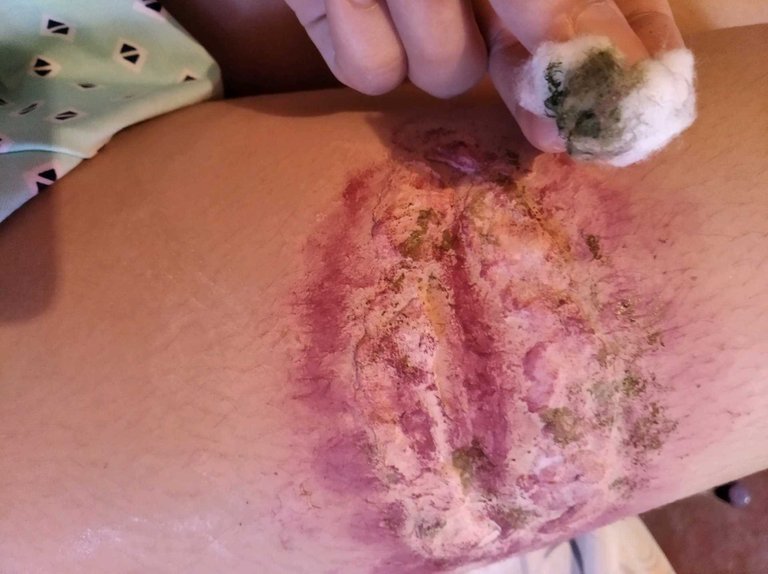
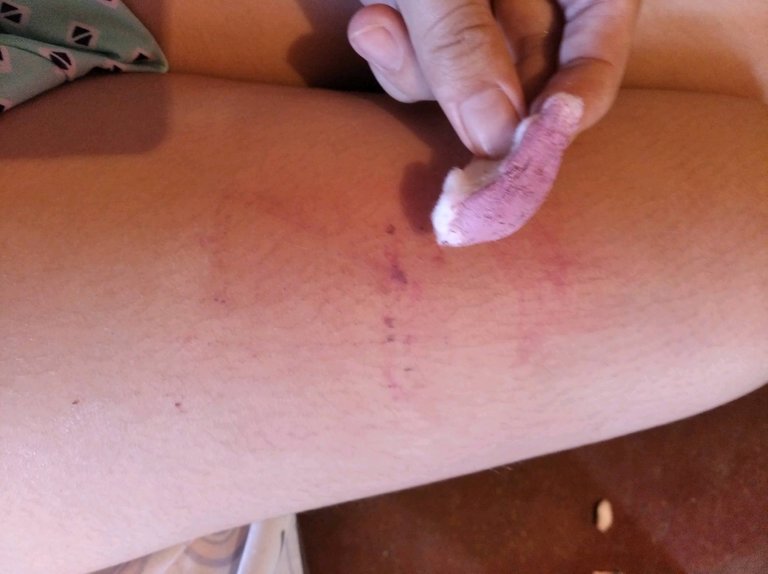
Cómo no queremos nada en exceso, con ayuda de un pedazo de algodón, tomamos la acuarela verde (humedecida previamente) y damos algunos toques disparejos en algunas áreas de la "herida".
As we do not want anything in excess, with the help of a piece of cotton, we take the green watercolor (previously wet) and give some uneven touches in some areas of the "wound".
Ahora en los alrededores del algodón echamos la sombra azul oscura y negra, y en el centro rojo.
Now around the cotton we cast the dark blue and black shadow, and in the center red.
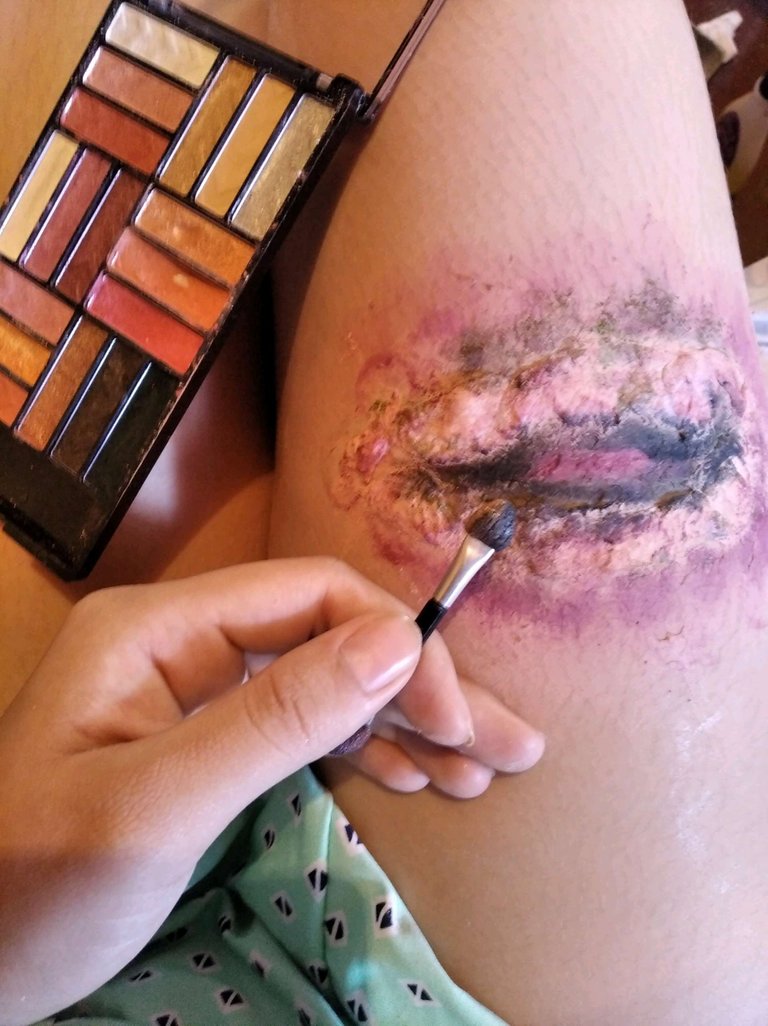
Y por encima colocamos sombra marrón para disimular los bordes exagerados.
And over it we put brown shade to hide the exaggerated edges.
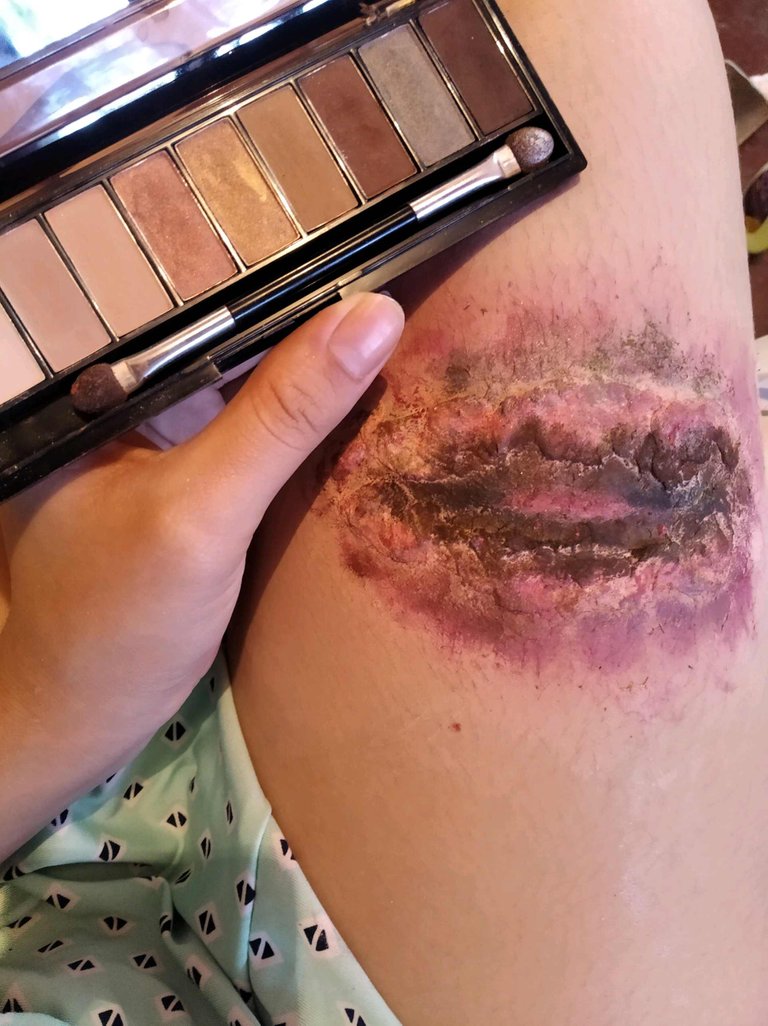
Para contrastar y equilibrar los tonos, usaremos un poco de sombra rosado claro.
To contrast and balance the tones, we will use some light pink shade.

Ahora para finalizar, aplica la pintura roja líquida.
Now to finish, apply the liquid red paint.
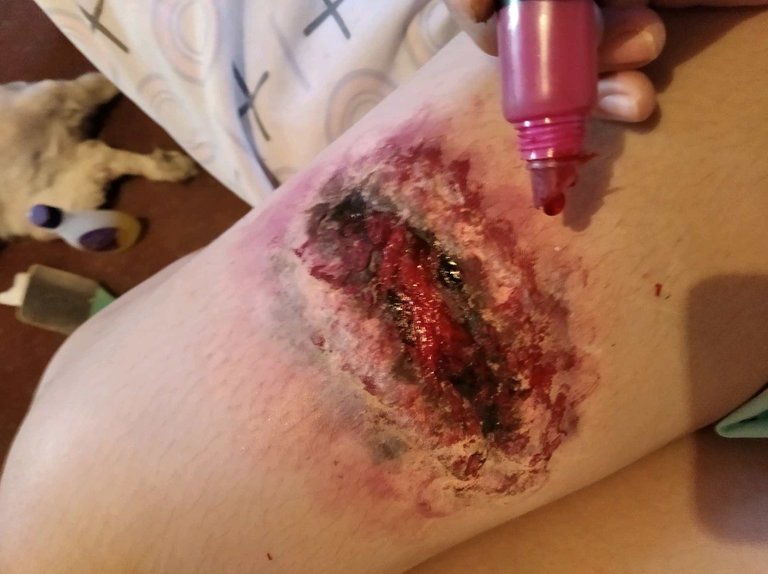
En un frasquito, puedes mezclar la glicerina con la acuarela, sin abusar de la cantidad de agua, puedes usar un colorante también. Otros tonos funcionan, como morado, azul y negro. Es necesario que no se mezcle demasiado ninguno de los tonos para crear un aspecto más realista.
In a little bottle, you can mix the glycerin with the watercolor, without abusing the amount of water, you can use a colorant too. Other shades work, such as purple, blue and black. It is necessary not to mix too much of any of the tones to create a more realistic look.
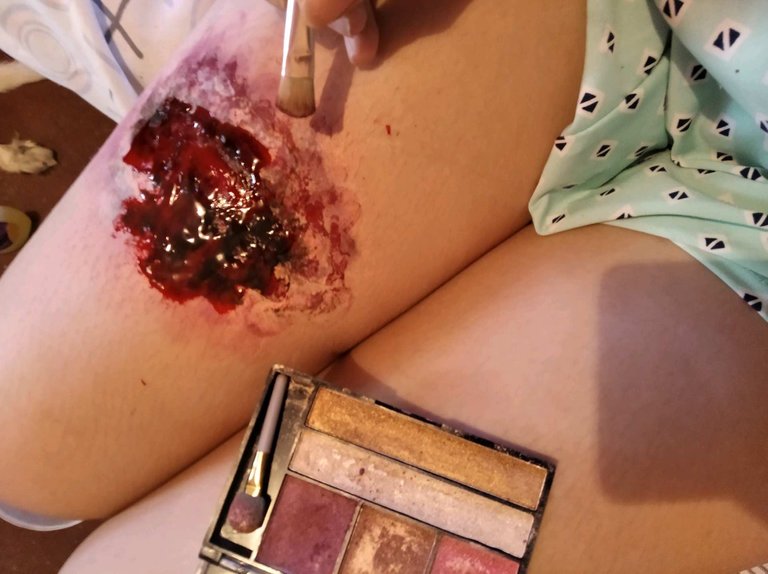
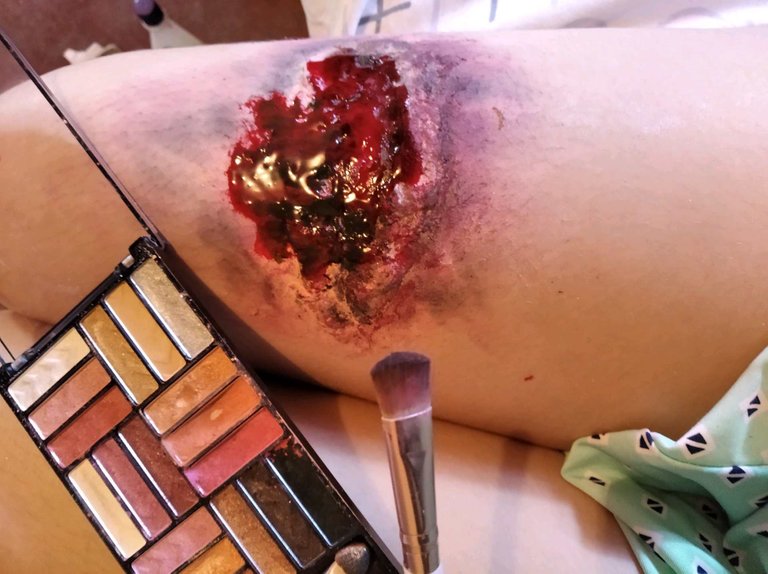
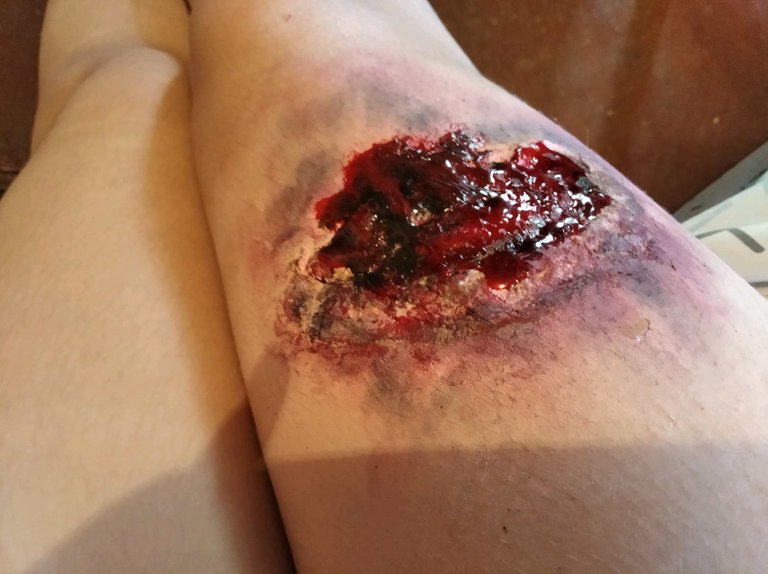
Por fin, solo delinea los bordes exteriores con azul y ¡Listo! Hivers, espero que en vez de asustarlos, haya causado asombro y curiosidad, jajajaja, gracias a todos.
Finally, just line up the outer edges with blue and you're done! Hivers, I hope that instead of scaring you, I have caused astonishment and curiosity, hahaha, thank you all.
Posted using Dapplr
Wow that looks amazing, fantastic work.
¡Me encantó! Muy buena tu manera de explicar.
Ser detallista ayuda mucho, gracias !
Posted using Dapplr
En realidad si me asustó un poco jaja ¡pero es porque es muy real! Excelente trabajo, estoy entre que no puedo dejar de verlo por lo bien que quedó pero a la vez me causa mucha grima jajaja. ¡Saludos!
Si lo comprendo, por eso dudé 🥺
Posted using Dapplr
Me encantó tu trabajo, muy realista. Felicitaciones!
Muchísimas gracias
Posted using Dapplr
Se ve muy real 🙁
Eso idea en el maquillaje profesional ._. raios
Posted using Dapplr
Excelente trabajo. Felicitaciones. Me gustó como quedó y la manera tan didáctica de explicarlo. 👍🤩👏👏
Excelente 💕
Posted using Dapplr
👋 Hi @yoslehz, I was flipping through the blockchain and stumbled on your work! You've been upvoted by Sketchbook / a community for design and creativity. Looking forward to crossing paths again soon.
✅ Join the Sketchbook Community
¡QUE BRUTAAAAAL! YO AMO EL MAQUILLAJE DE HERIDAS, quedó demasiado buenooooooo, obvio lo voy a intentar
Me lo muestras ¡Que emoción!
Posted using Dapplr
Esto está genial👋🏾👋🏾👋🏾👋🏾 te felicito y gracias por el tutorial
Que sirva de mucha ayuda, gracias :)
Posted using Dapplr
quedo 100% genial de verdad, felicidades
Que fabuloso esto🤩 mi bella si creas esto con toda esa timidez imagínate lo que lograrias soltandola un poco... me alegra que a pesar de tu timidez te hayas atrevido a publicarlo, me encanto aprender esta técnica es magnífica, espero continúes así creando cosas maravillosas como estas.🤗
Muchísimas gracias 🥺💕 es que pensé que le daría miedo a otras personas jajajaja, la técnica aplica a cualquier parte del cuerpo y tamaño, así es cuestión de adaptar el maquillaje al área, quise pensar que como compañeros de hive, hicieran sus propios intentos
Posted using Dapplr
Buen trabajo, tal vez me anime a mostrar algo similar...
Congratulations @yoslehz! You have completed the following achievement on the Hive blockchain and have been rewarded with new badge(s) :
You can view your badges on your board and compare yourself to others in the Ranking
If you no longer want to receive notifications, reply to this comment with the word
STOPDo not miss the last post from @hivebuzz:
Anotado para Halloween y para compartir, gracias por compartirlo.
Activas para halloween 💕🤭
Gracias por compartir estas técnicas, tu post me parece perfecto y muy bien explicado, además el resultado final es impresionante. Saludos 🤗🤞🏾
At first glance, the wound seems very realistic ... for first aid he he :-)
Wow, this is scary but so real...